> ## Documentation Index
> Fetch the complete documentation index at: https://docs.upstackdata.com/llms.txt
> Use this file to discover all available pages before exploring further.
# Complete How-To Guide for Onboarding Facebook (Meta) in Upstack Data
> Onboard Facebook (Meta) Ads in Upstack Data — connect your Pixel and Conversions API, disable duplicate tracking, configure NC-ROAS, and verify events flow through to Meta Events Manager.
**New to Upstack?** Follow the [getting started guide](/get-started/install-on-shopify) for a streamlined onboarding walkthrough.
* Configure the **Meta destination** in Upstack Data with your **Pixel ID** and **CAPI token**.
* Disable **Facebook & Instagram data sharing** in Shopify to prevent duplicate events.
* Set up the **NC Purchase** custom conversion and share it with your ad accounts.
* Add **NC-ROAS** and other new-customer columns to Meta Ads Manager.
* Monitor **Event Match Quality** improvements over 7–10 days.
## Prerequisites
Before you start, you need:
* An active Upstack Data account ([sign up](https://app.upstackdata.com))
* Admin access to a **Meta Business Manager** account
* A configured **Meta Pixel** in [Meta Events Manager](https://business.facebook.com/events_manager)
* A **CAPI token** generated from that pixel — see [How to generate your CAPI token](/guides/facebook-ads/how-to-generate-my-facebook-conversion-api-key)
* Shopify owner/staff access (for the duplicate-events cleanup step)
In the Upstack dashboard, navigate to **Event Destinations** and add a **Facebook Advertising** destination using your **Pixel ID** (15–16 digit number, no prefix) and **CAPI token** (starts with `EAA`).
Help guide:
[How to configure the Meta Pixel destination in Upstack Data →](/guides/facebook-ads/how-to-configure-facebook-meta-ads-pixel-destination-in-upstack-data)
You must disable all other Meta pixel integrations to prevent duplicate events. Multiple active pixels inflate conversion metrics and harm campaign optimization.
Help guide:
[How to disable Facebook and Instagram data sharing in Shopify →](/guides/facebook-ads/how-to-disable-facebook-and-instagram-data-sharing-in-shopify)
**Additional pixels to check and disable:**
* Native Shopify Facebook & Instagram sales channel pixel
* Third-party Facebook pixel apps in Shopify
* Manual pixel code in your theme files (`theme.liquid`, header snippets)
* Facebook pixel tags inside Google Tag Manager
**Key metrics you'll configure:**
* **NC-ROAS** (New Customer Return on Ad Spend) — revenue from new customers only
* **NC-CPA** (New Customer Cost Per Acquisition) — cost to acquire each new customer
Help guide:
[How to set up new-customer purchase metrics in Meta Ads Manager →](/guides/facebook-ads/complete-how-to-guide-for-setting-up-new-customer-purchase-metrics-in-facebook-meta-ads-manager)
Confirm each piece of the setup is working:
* In the Upstack dashboard, **Event Destinations** shows your Meta destination as **Healthy** (green).
* In [Meta Events Manager](https://business.facebook.com/events_manager), the pixel shows recent events with the **Server** connection label.
* In Meta Ads Manager, the **NC Purchase** custom conversion is visible and the **NC-ROAS** custom metric appears in your column layout.
If anything is unhealthy, check the corresponding help guide above for troubleshooting steps.
## What to expect after setup
### Event Match Quality timeline
* **Event Match Quality (EMQ)** scores start to improve in 2–3 days and normalize over 7–10 days.
* You can typically expect a 1–2 point increase on lower-funnel events (PageView, ViewContent, AddToCart).
* The **Purchase** EMQ score will remain largely unchanged — at checkout, all match parameters (email, name, address) are already being sent to Meta.
### Normal warnings and notifications
**Red triangle ⚠️ warnings in Meta Events Manager**
You may see new warnings appear next to your events in Meta Events Manager during the first few days. These are **normal** and **require no action**. They appear because:
* Meta detects the change in data source from the Shopify sales channel to Upstack Data
* Meta recognizes a different set of parameter configurations
* Meta's algorithm is adjusting to the new data format
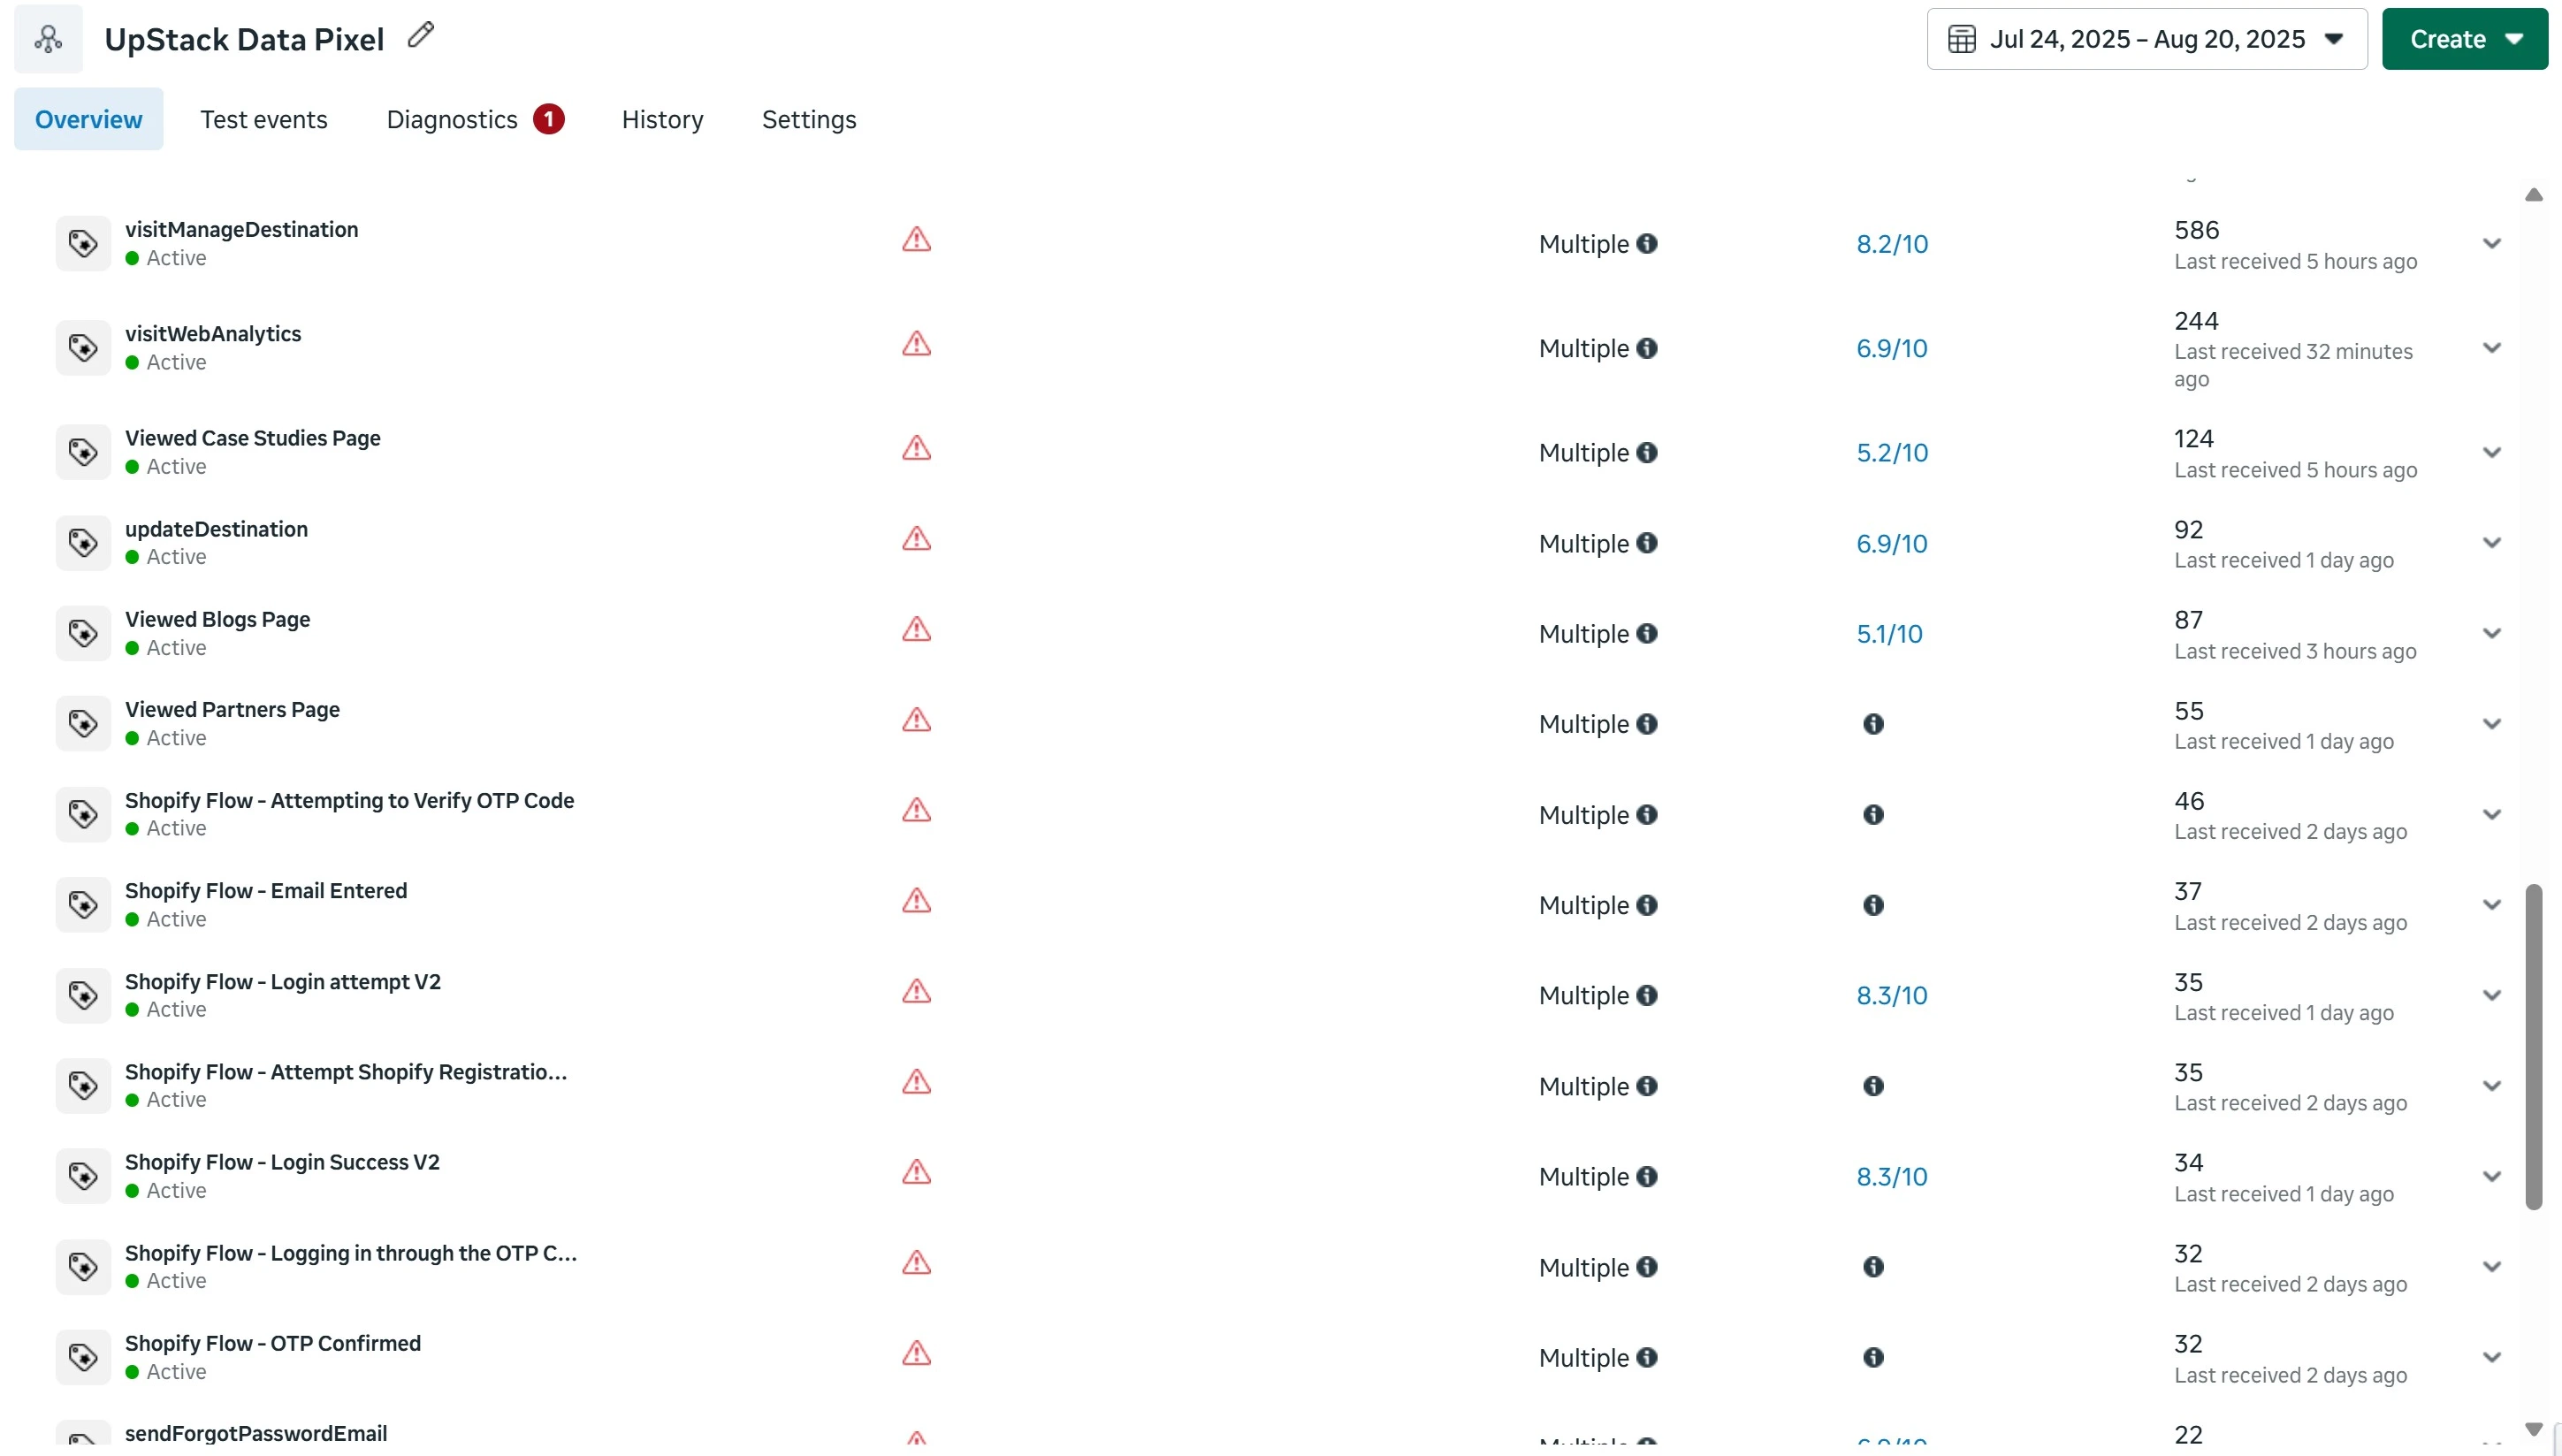 **What to do:** Monitor your events to confirm they're firing correctly, but avoid making changes based solely on these warnings.
**Need help?**
If you encounter any issues during setup or don't see expected improvements after 10 days, contact our support team with your **Meta Pixel ID** and we'll help diagnose the problem.
**What to do:** Monitor your events to confirm they're firing correctly, but avoid making changes based solely on these warnings.
**Need help?**
If you encounter any issues during setup or don't see expected improvements after 10 days, contact our support team with your **Meta Pixel ID** and we'll help diagnose the problem.