> ## Documentation Index
> Fetch the complete documentation index at: https://docs.upstackdata.com/llms.txt
> Use this file to discover all available pages before exploring further.
# How do I find my Facebook Ads Pixel (Dataset) ID?
> Find your Facebook (Meta) Pixel/Dataset ID in Meta Events Manager to configure the Upstack Data Meta Ads destination for server-side tracking.
* Sign in to [Meta Events Manager](https://business.facebook.com/events_manager) and locate your pixel.
* Click the pixel name, then open the **Settings** tab.
* Copy the **Pixel ID** — a 15–16 digit number, no prefix (e.g., `123456789012345`).
* Paste it into your Upstack Meta destination configuration.
**What is a Meta Pixel ID?**
Your **Meta Pixel ID** (sometimes shown as "Dataset ID" inside Meta Events Manager) is a 15–16 digit number Upstack Data uses to send conversion data to your Meta ad account. Meta Pixel IDs have **no prefix** — that's how they differ from Google Ads conversion IDs (which start with `AW-`).
## Prerequisites
Before you start, you need:
* Access to a **Meta Business Manager** account
* A pixel already created in [Meta Events Manager](https://business.facebook.com/events_manager) (or follow the create-pixel steps below)
## Steps to find your Meta Pixel ID
Sign in to Meta Events Manager at [business.facebook.com/events\_manager](https://business.facebook.com/events_manager).
**If you already have a pixel**, you'll see it listed in the left-hand **Data Sources** panel — proceed to the next step.
**If you need to create one:**
* Click the green **Connect Data Sources** button
* Select **Web**
* Click **Next** or **Get Started**
* Follow the instructions to create a new Meta Pixel
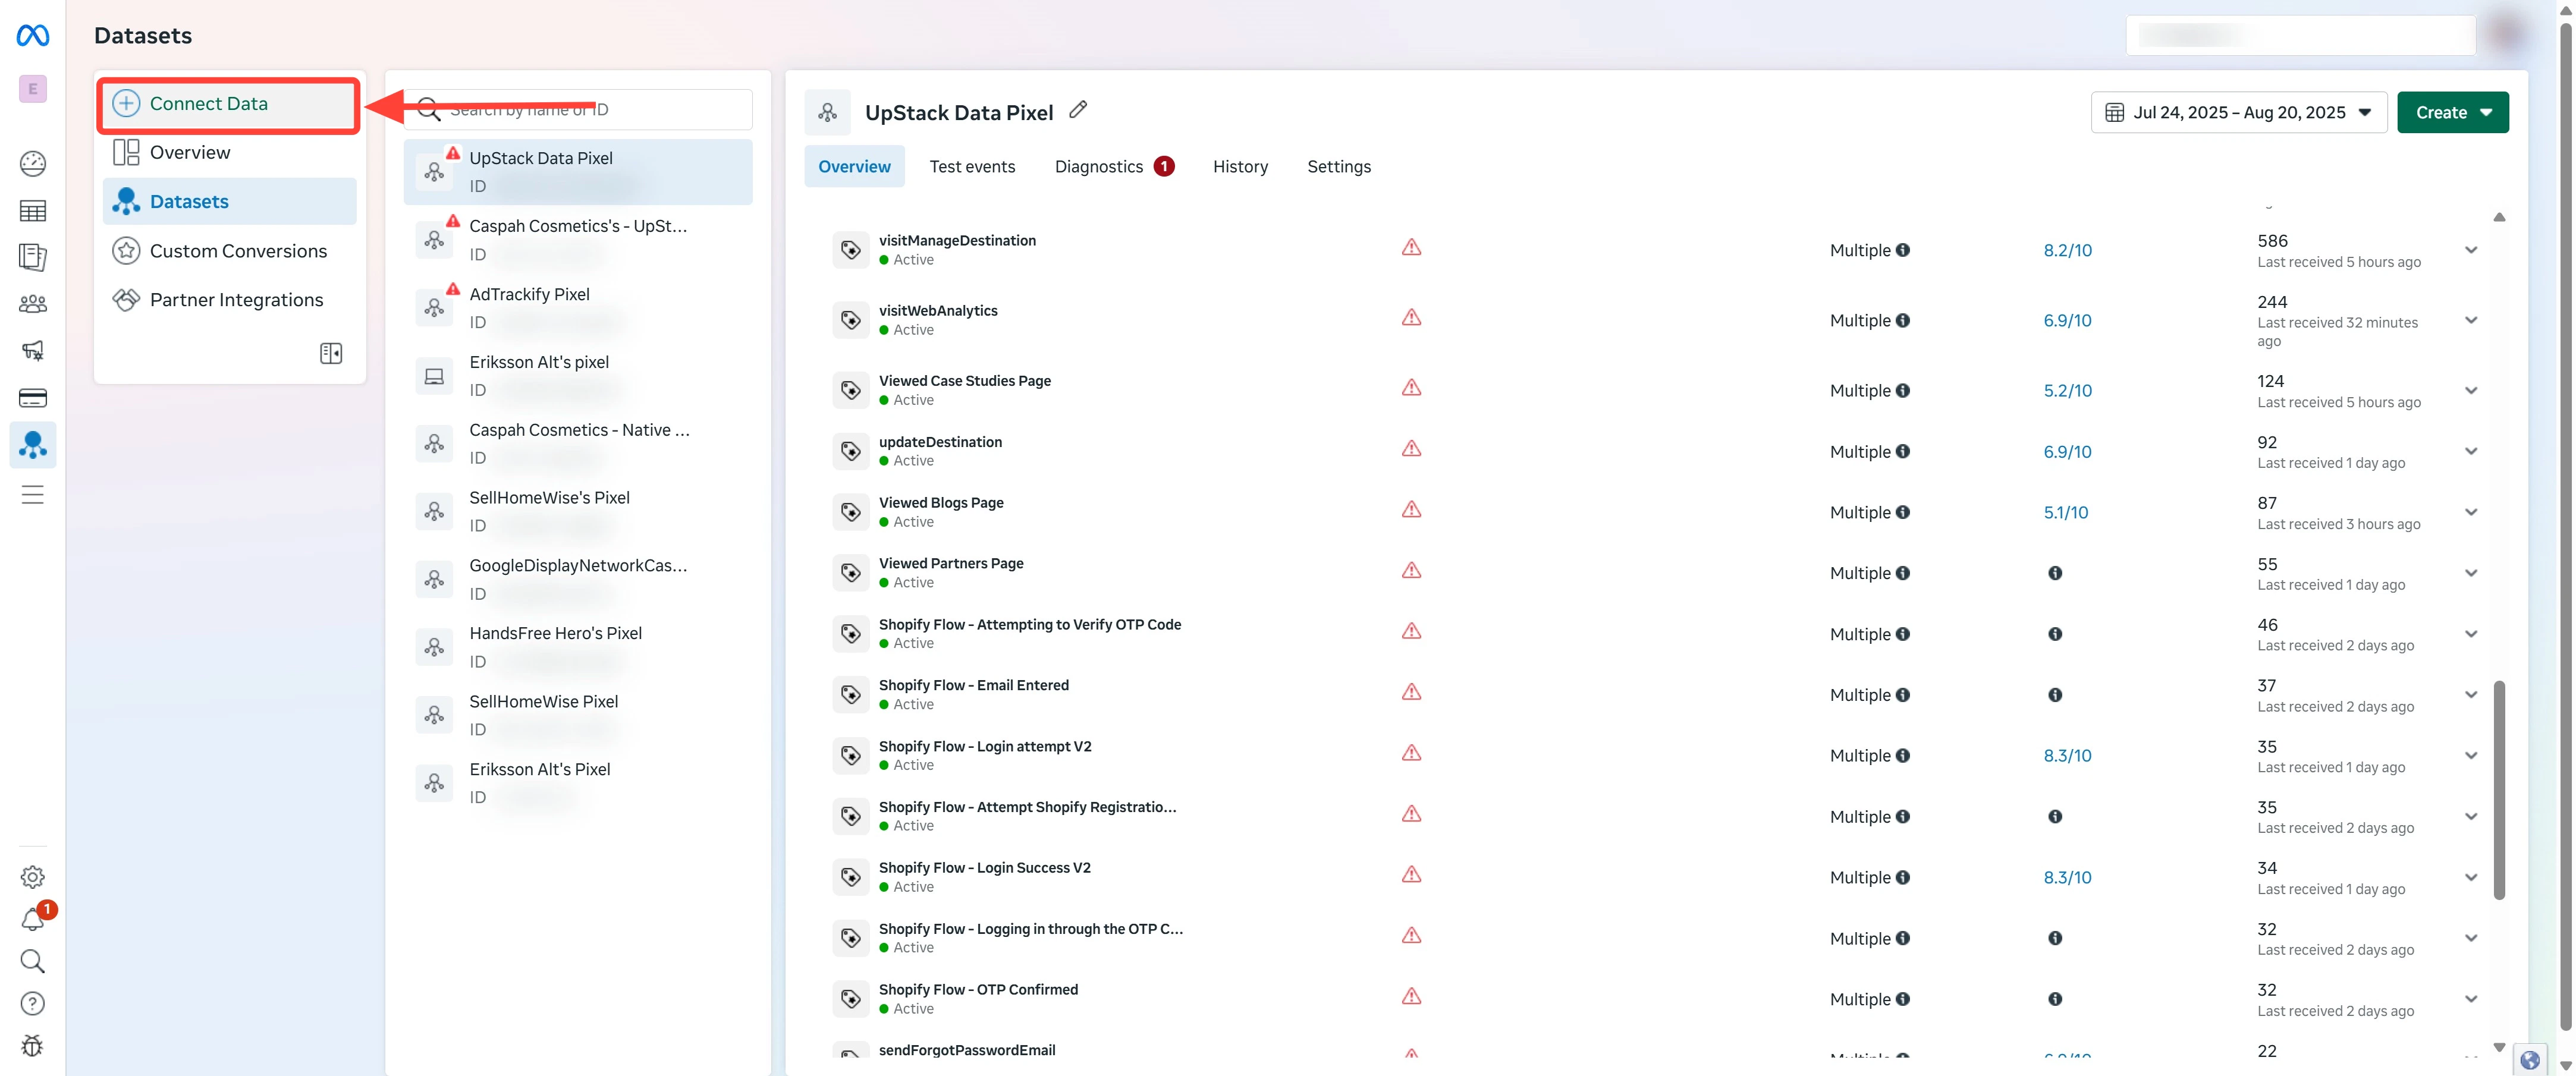
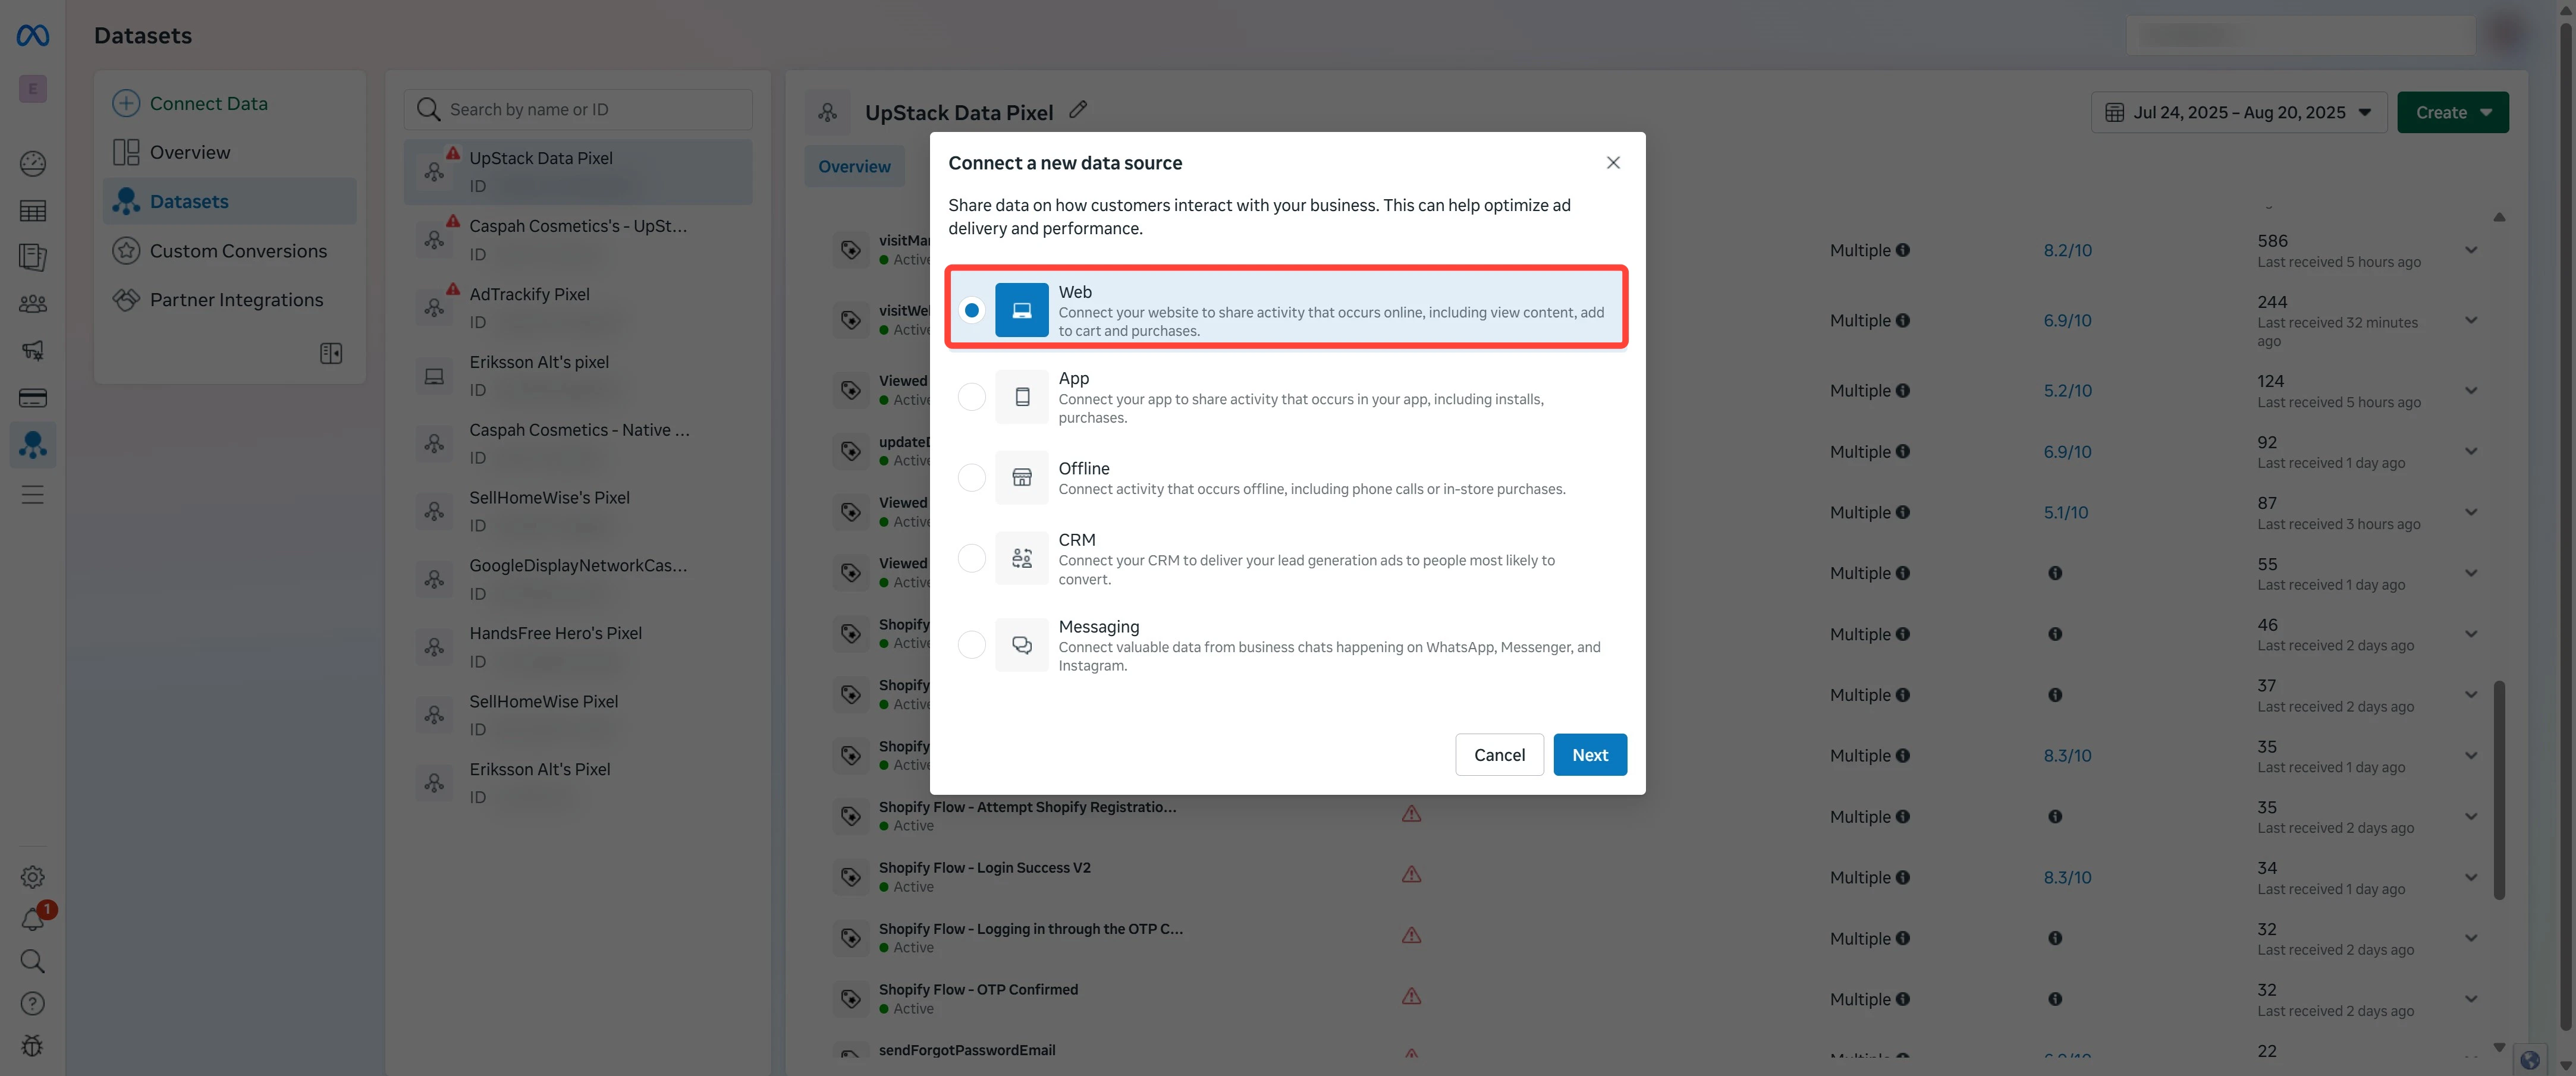 In the **Data Sources** list, click the pixel's name. You'll land on the pixel's **Overview** page.
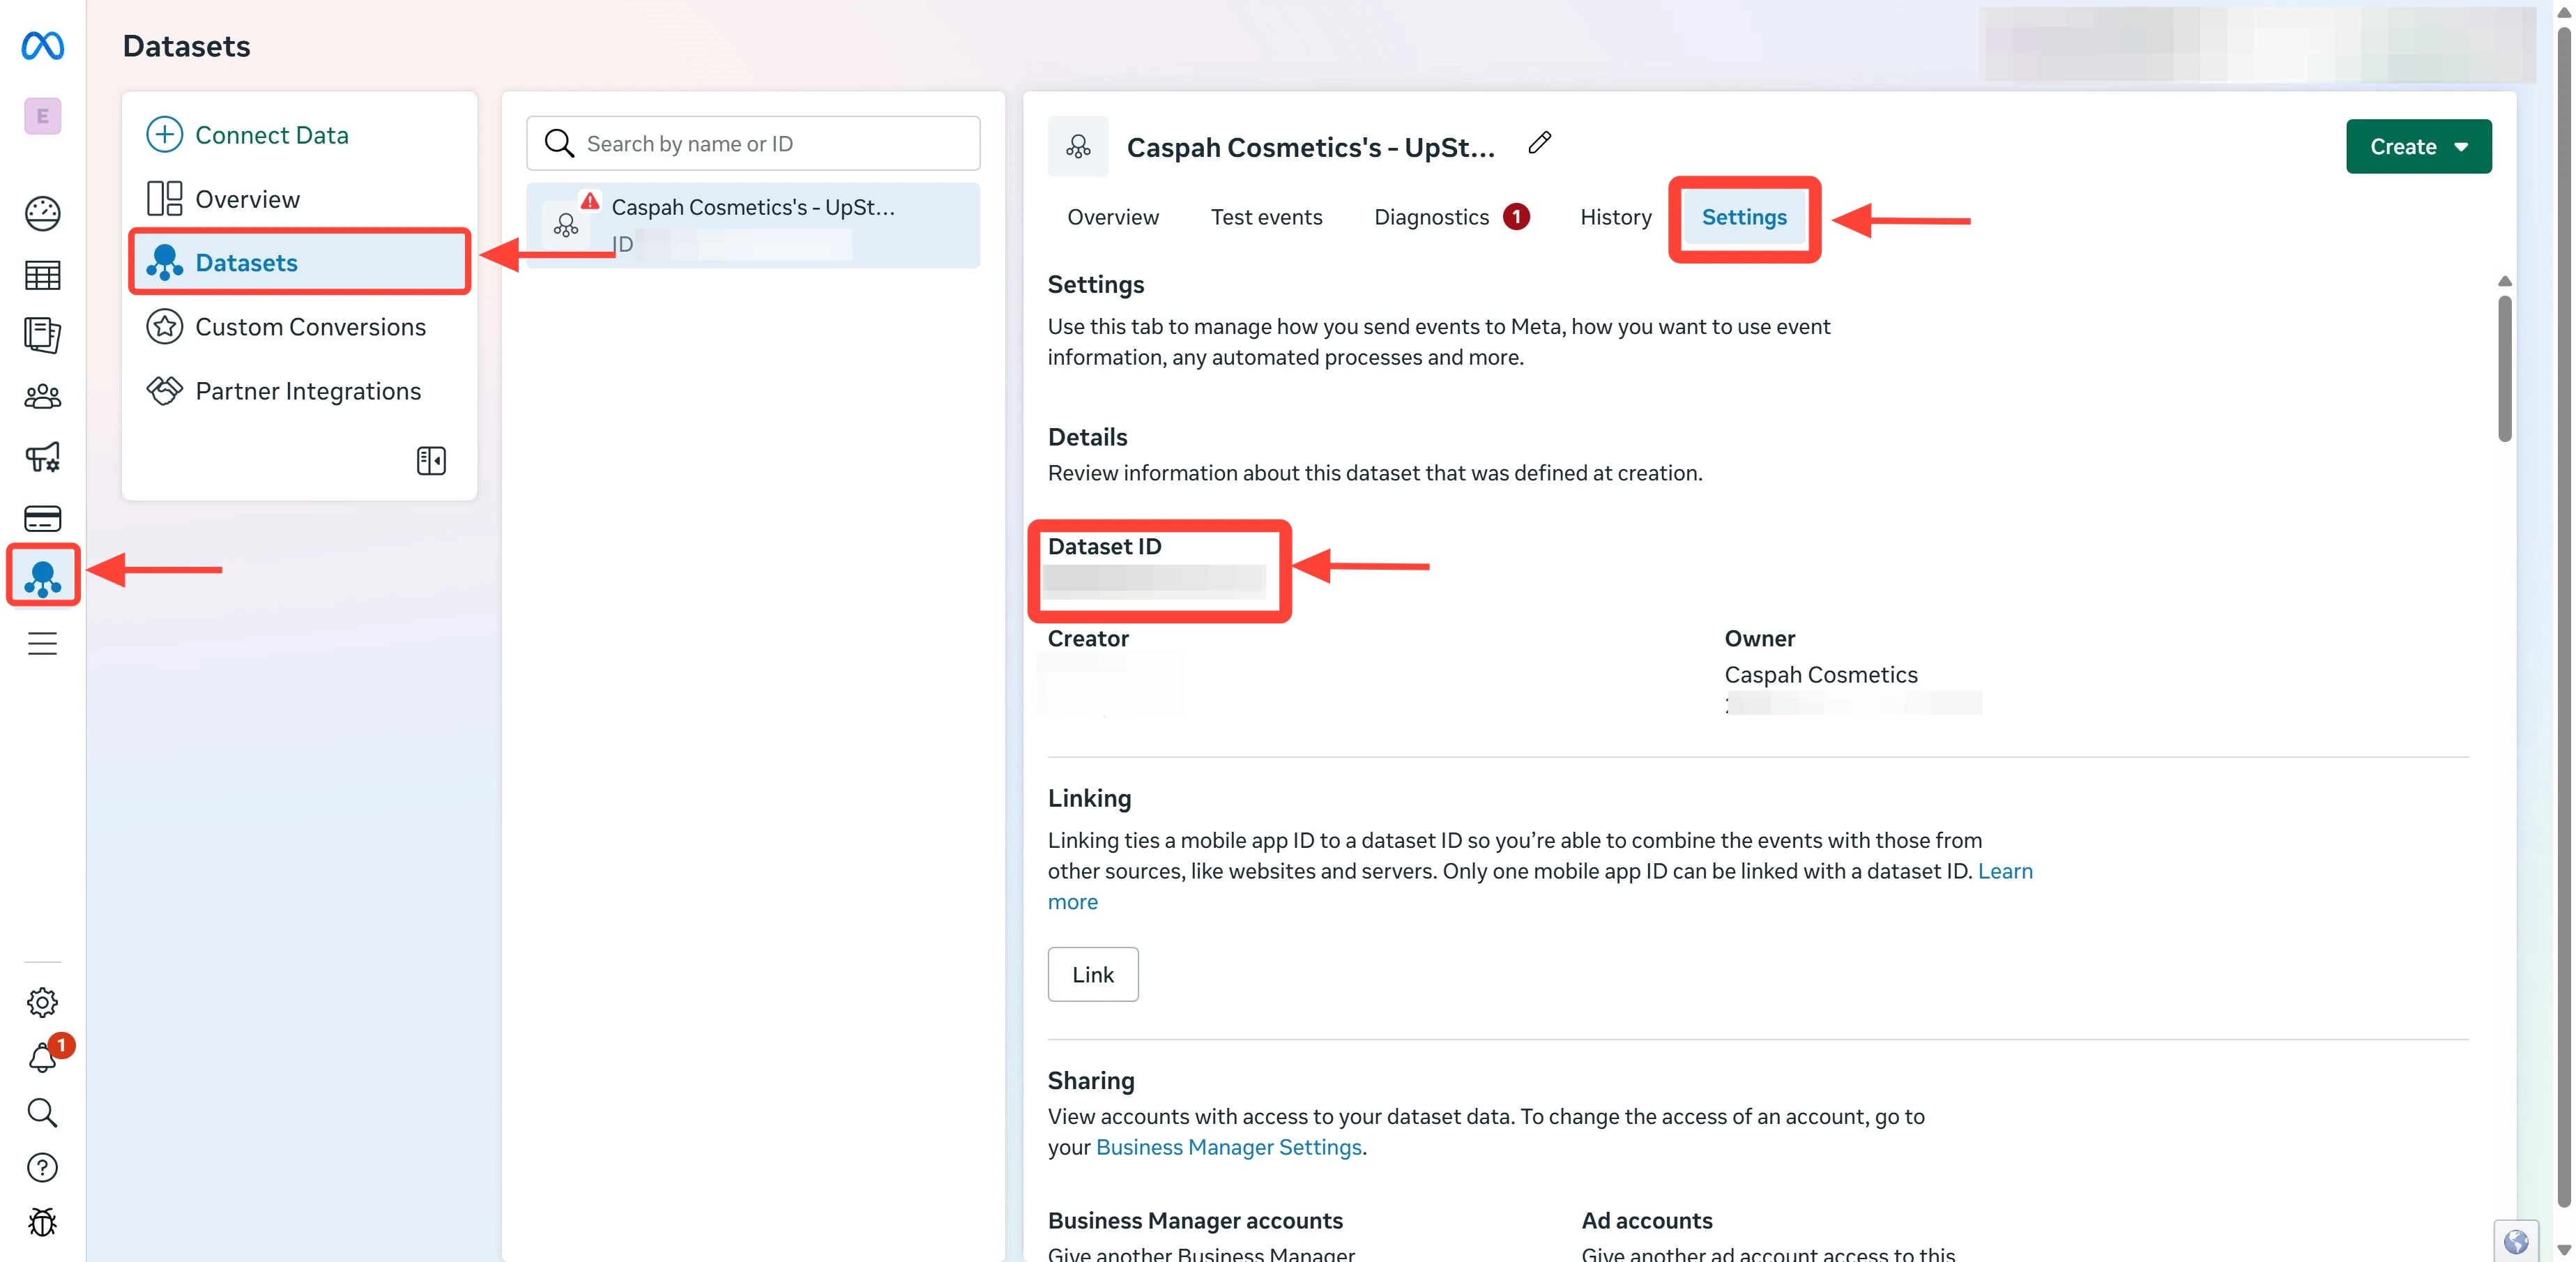
On the pixel **Overview** page, click the **Settings** tab in the left-hand menu.
On the **Settings** tab, locate **Dataset ID** at the top of the page. This is your **Pixel ID** — a 15–16 digit number with no prefix.
In the **Data Sources** list, click the pixel's name. You'll land on the pixel's **Overview** page.
On the pixel **Overview** page, click the **Settings** tab in the left-hand menu.
On the **Settings** tab, locate **Dataset ID** at the top of the page. This is your **Pixel ID** — a 15–16 digit number with no prefix.
 **Example format:** `123456789012345`
Copy your Pixel ID and paste it into the **Pixel ID** field in your Upstack Meta destination setup.
**Example format:** `123456789012345`
Copy your Pixel ID and paste it into the **Pixel ID** field in your Upstack Meta destination setup.
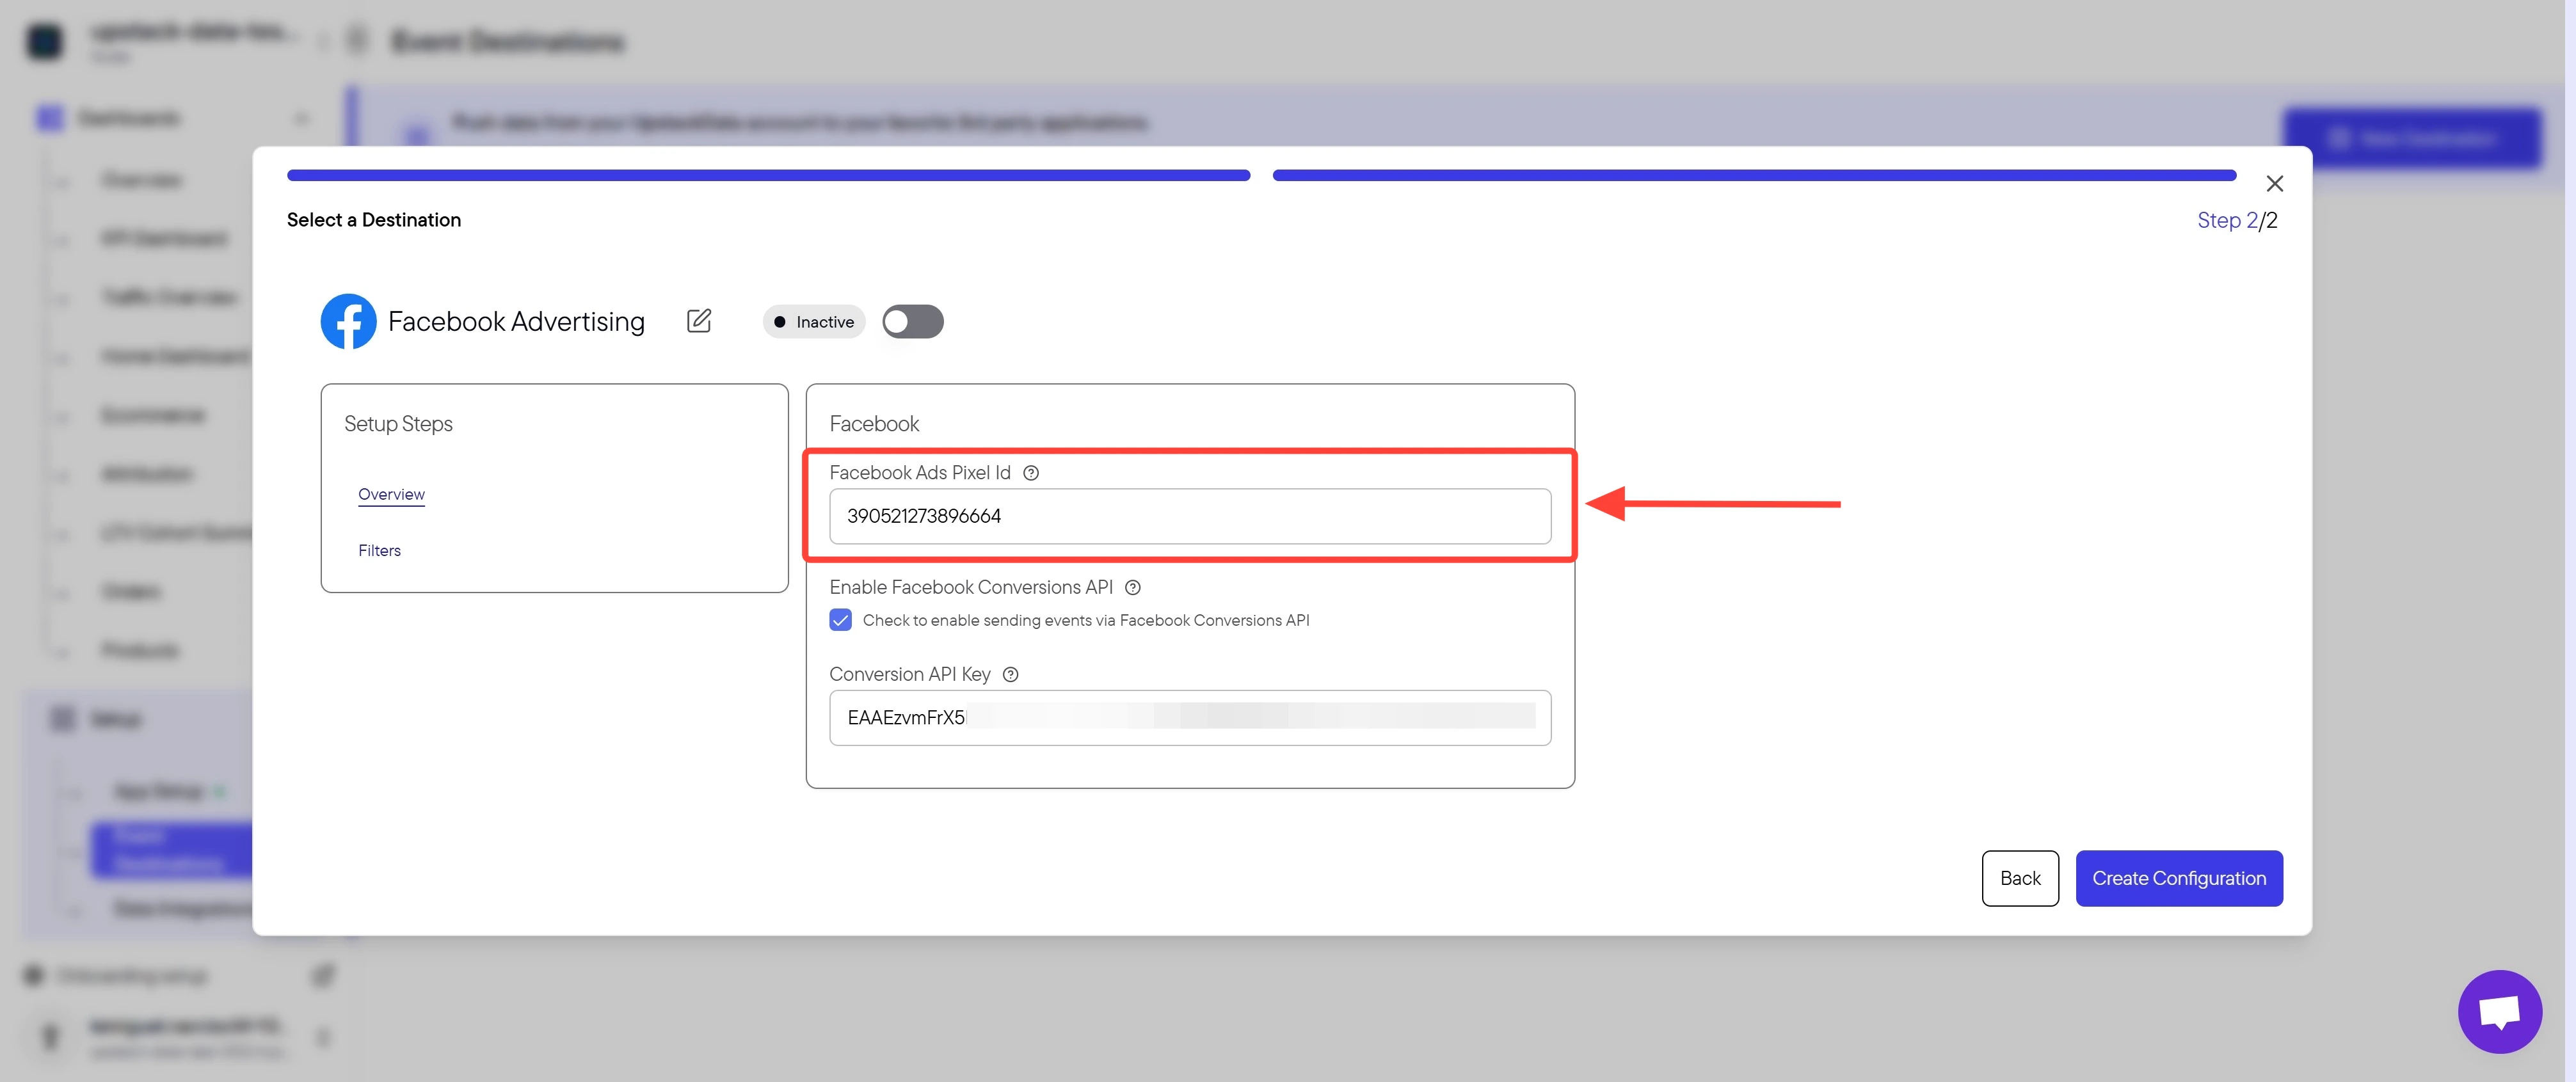 Ensure there are no extra spaces before or after the ID. The value should be exactly 15 or 16 digits with no `AW-` or other prefix.
Click **Create Configuration** to save the destination.
Ensure there are no extra spaces before or after the ID. The value should be exactly 15 or 16 digits with no `AW-` or other prefix.
Click **Create Configuration** to save the destination.
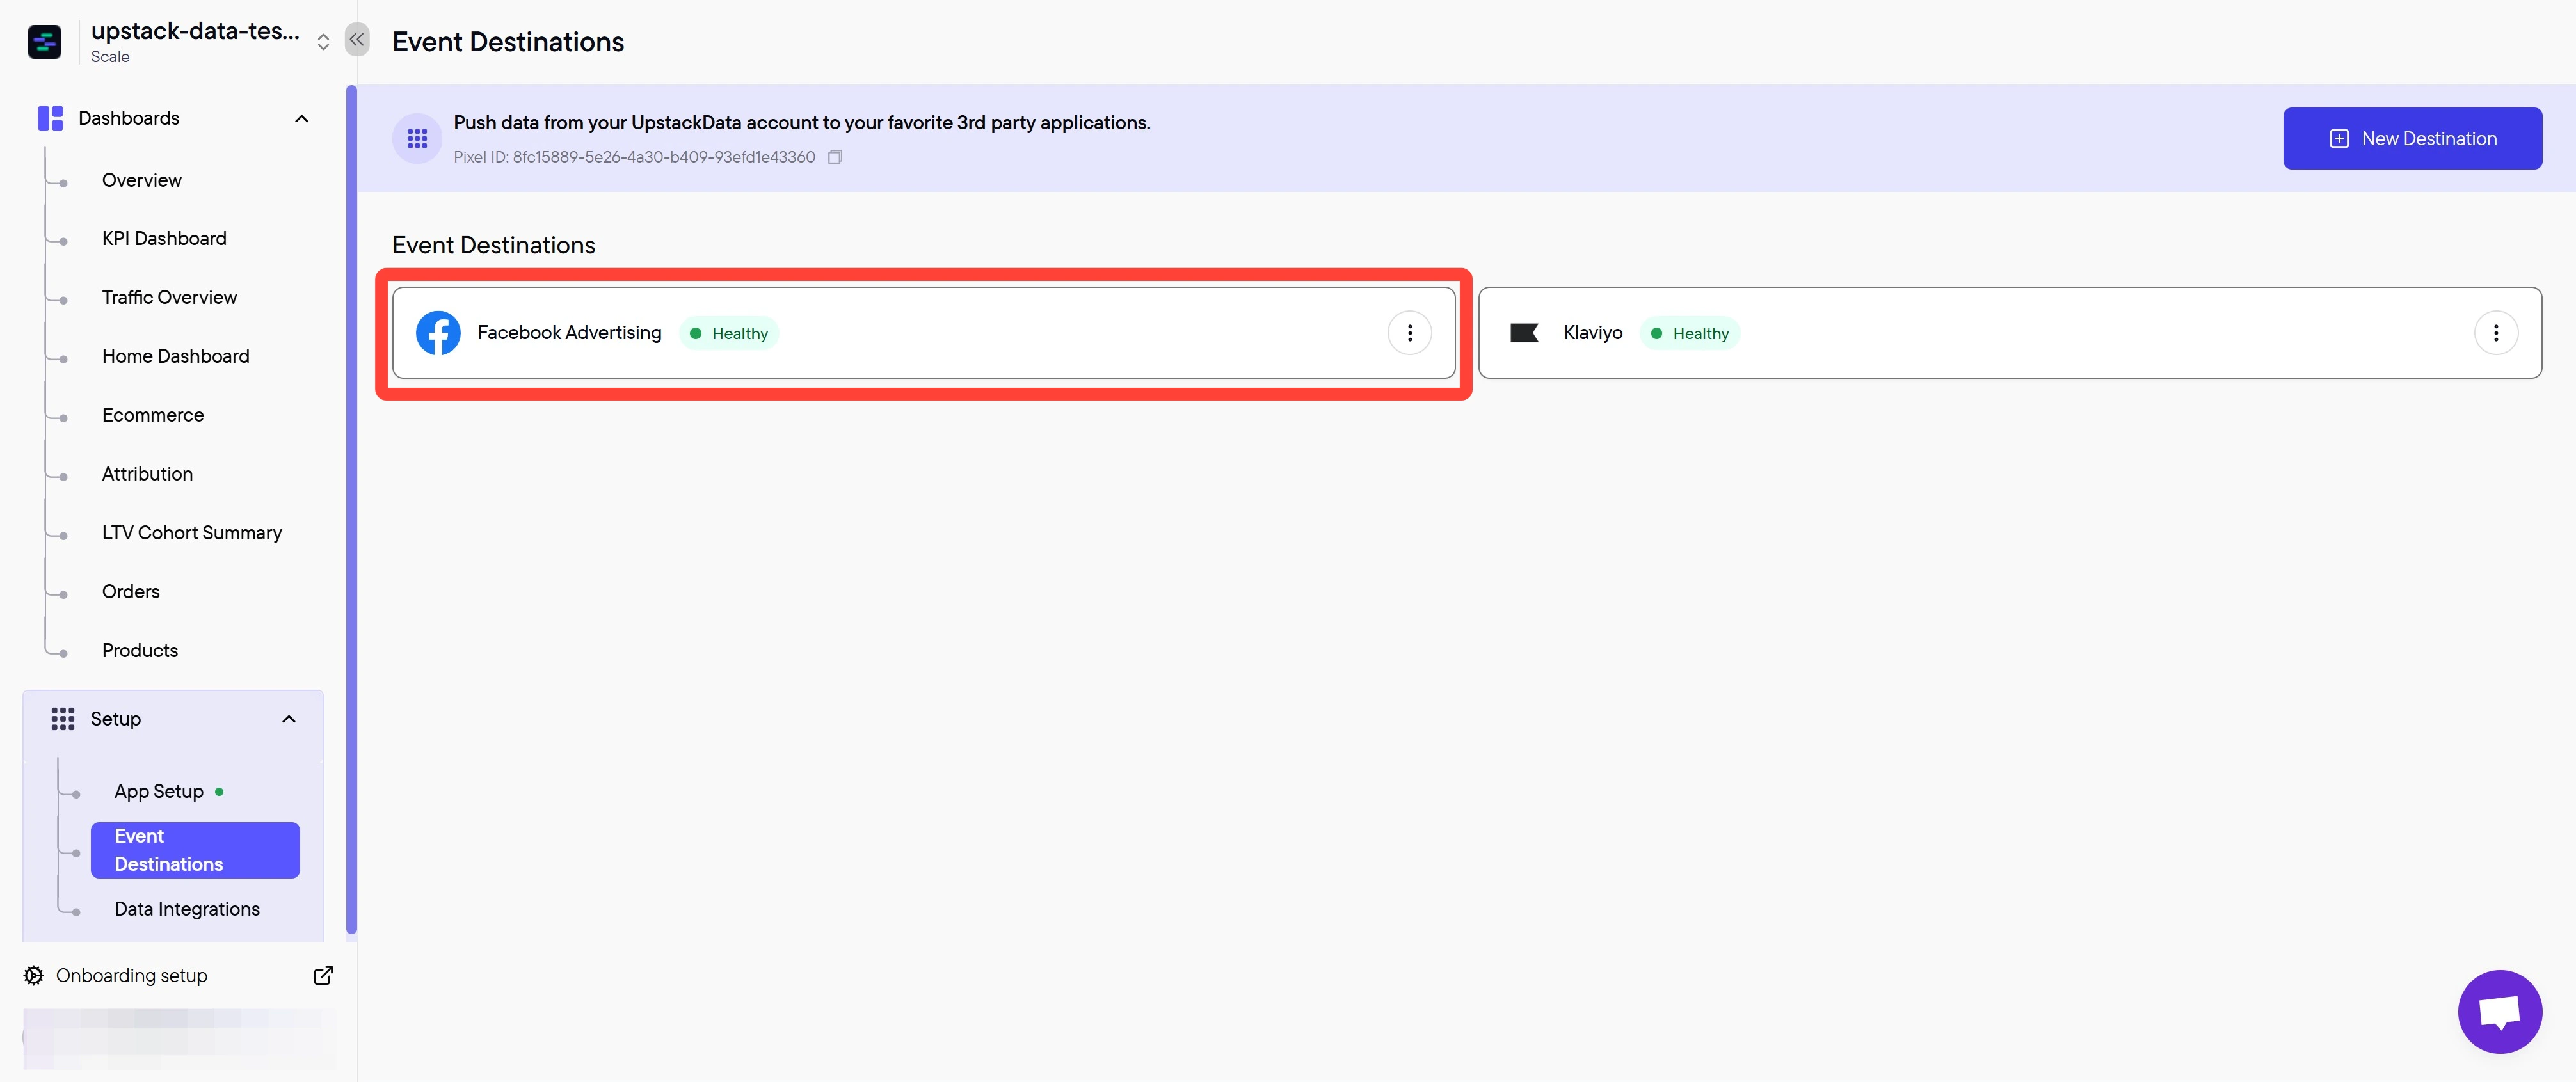 In the Upstack dashboard, navigate to **Event Destinations**. Your Meta destination should display **Healthy** with a green status indicator within 5 minutes.
If the status shows **Unhealthy**, double-check that the Pixel ID matches exactly what you see in Meta Events Manager (no prefix, no whitespace).
**Next step:** [How to generate your CAPI token](/guides/facebook-ads/how-to-generate-my-facebook-conversion-api-key)
In the Upstack dashboard, navigate to **Event Destinations**. Your Meta destination should display **Healthy** with a green status indicator within 5 minutes.
If the status shows **Unhealthy**, double-check that the Pixel ID matches exactly what you see in Meta Events Manager (no prefix, no whitespace).
**Next step:** [How to generate your CAPI token](/guides/facebook-ads/how-to-generate-my-facebook-conversion-api-key)