> ## Documentation Index
> Fetch the complete documentation index at: https://docs.upstackdata.com/llms.txt
> Use this file to discover all available pages before exploring further.
# How to Add NC Purchase Metrics and NC-ROAS to Facebook (Meta) Ads Manager
> Add NC Purchase metrics and create NC-ROAS in Facebook (Meta) Ads Manager to measure new-customer revenue and optimize campaigns for first-time buyers.
* Sign in to [Meta Ads Manager](https://adsmanager.facebook.com) and open any campaigns table.
* Click **Columns → Customize columns**.
* Under **Custom Conversions**, add **NC Purchase** (Total + Cost).
* Click **Create custom metric** and define **NC-ROAS = NC Purchase Conversion Value ÷ Amount spent**.
* Click **Apply** to save the column layout.
## Prerequisites
Before you start, you need:
* The **NC Purchase** custom conversion already created **and** shared with the ad account you're configuring — see [How to create and share the NC Purchase custom conversion](/guides/facebook-ads/how-to-create-and-share-nc-purchase-custom-conversion-in-facebook-meta)
* Admin or campaign-management access to the Meta ad account you want to update columns for
## What you'll achieve
After completing this setup, you'll see new-customer metrics — **NC-ROAS** (New Customer Return on Ad Spend), **Cost per NC Purchase**, and **Total NC Purchases** — directly in Meta Ads Manager.
## Part 1 — Add NC Purchase metrics to columns
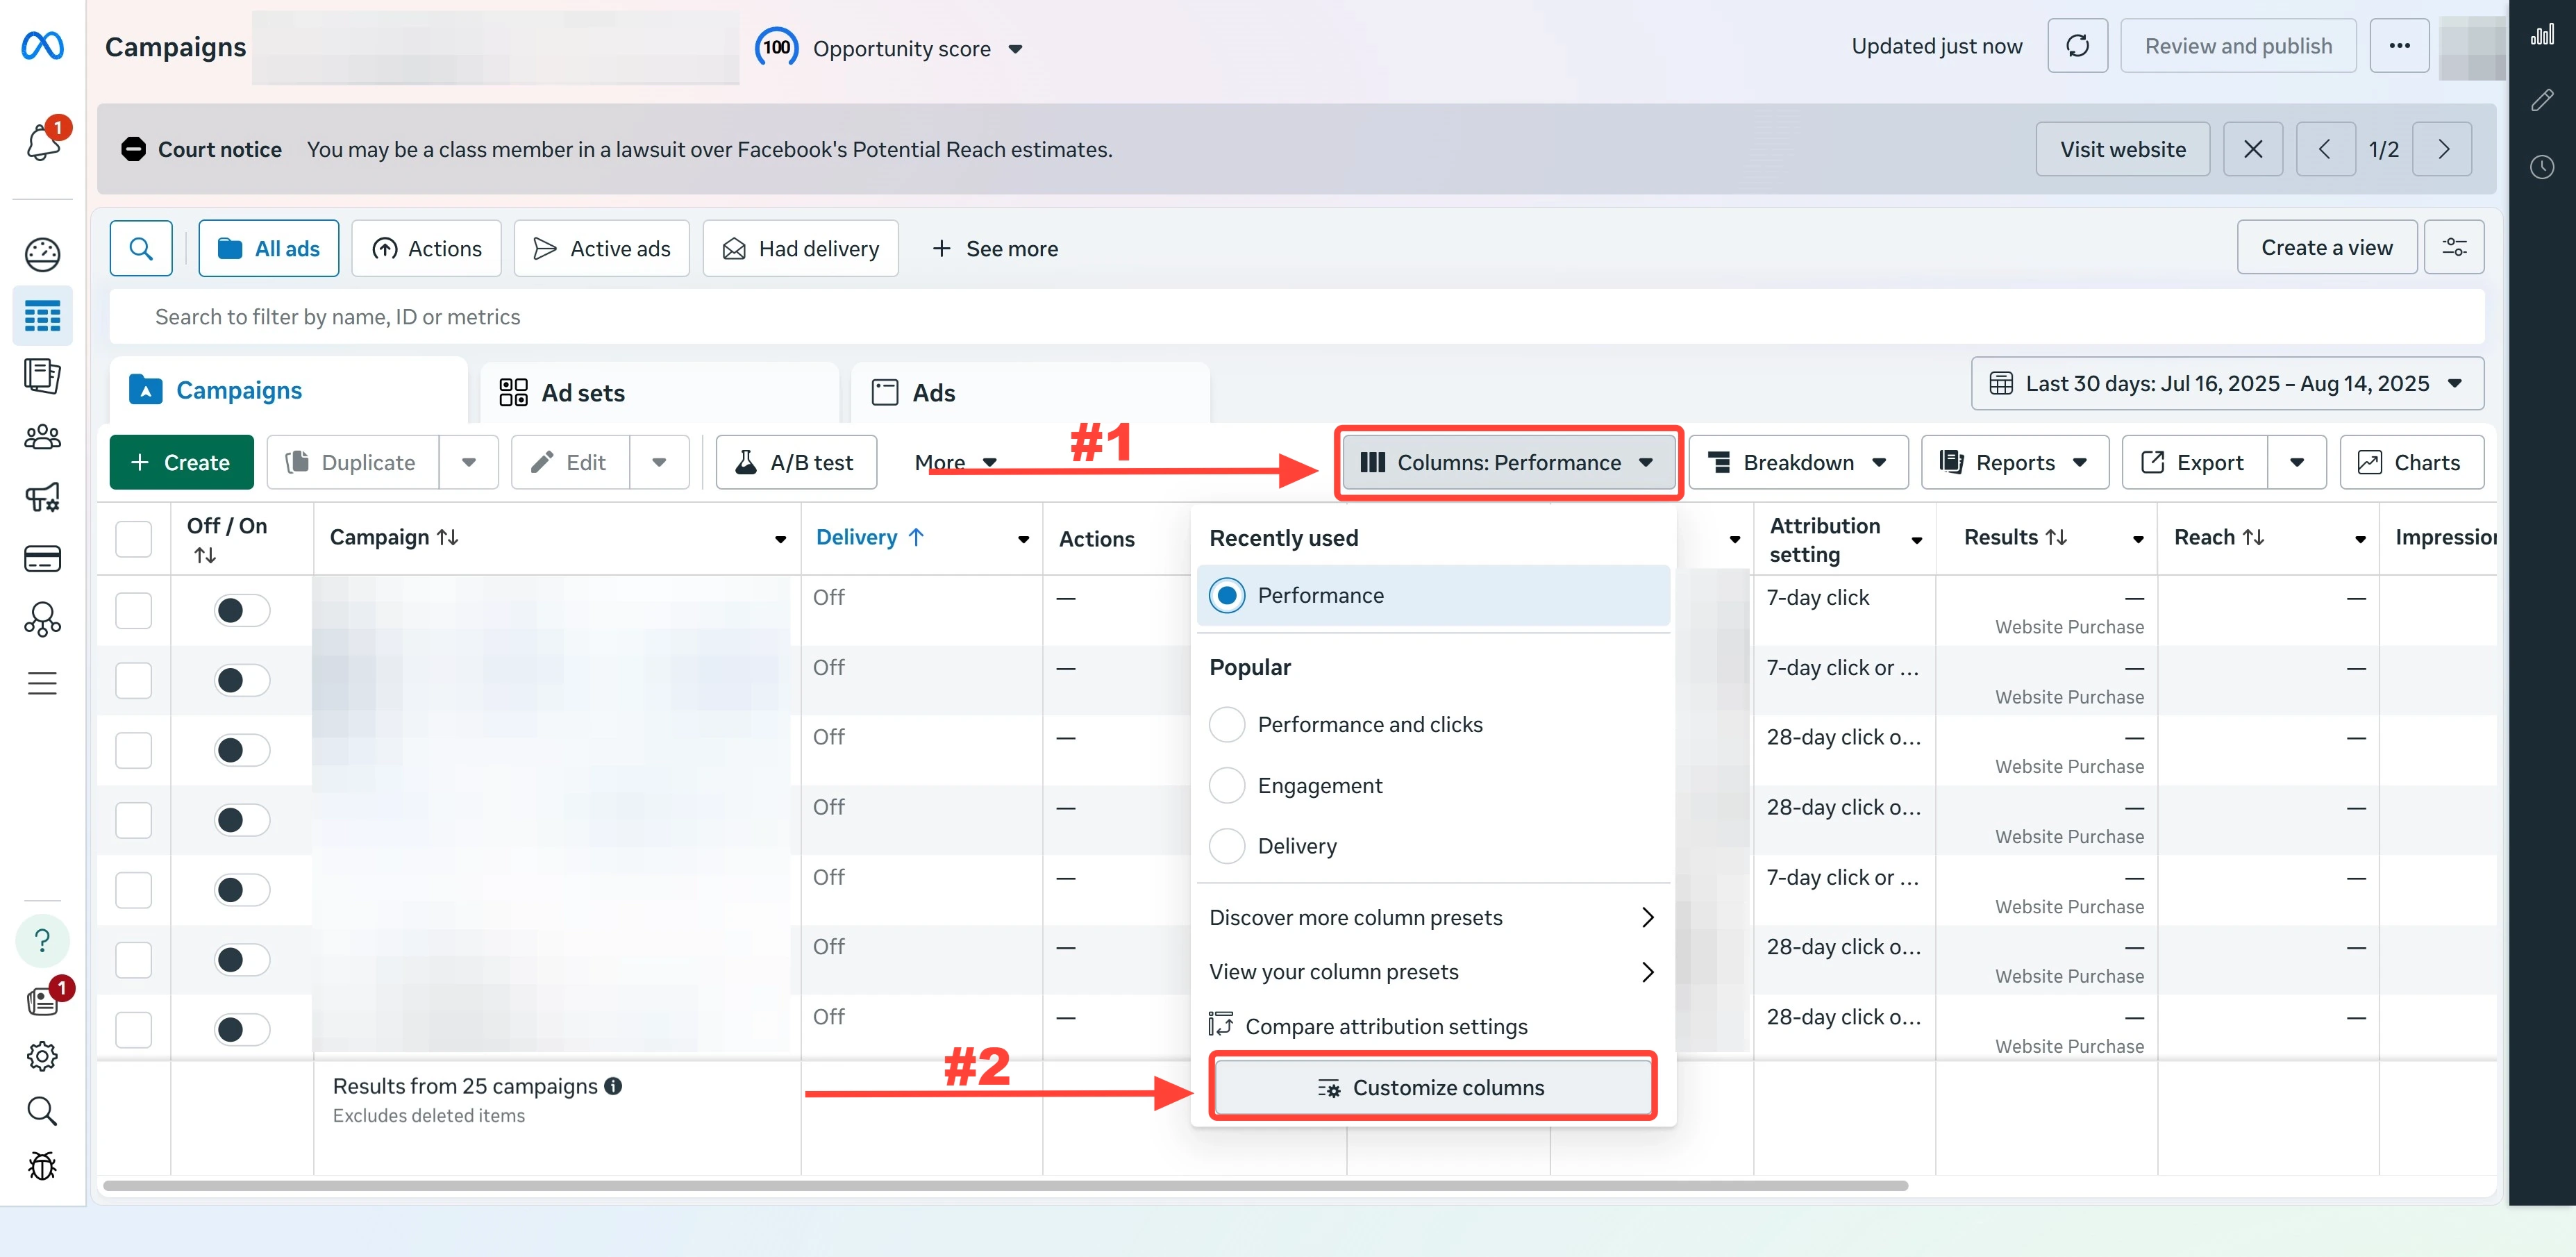
Sign in to Meta Ads Manager at [adsmanager.facebook.com](https://adsmanager.facebook.com), select the ad account you want to configure, then on the campaigns/ad sets/ads table click **Columns** in the toolbar above the table and select **Customize columns**.
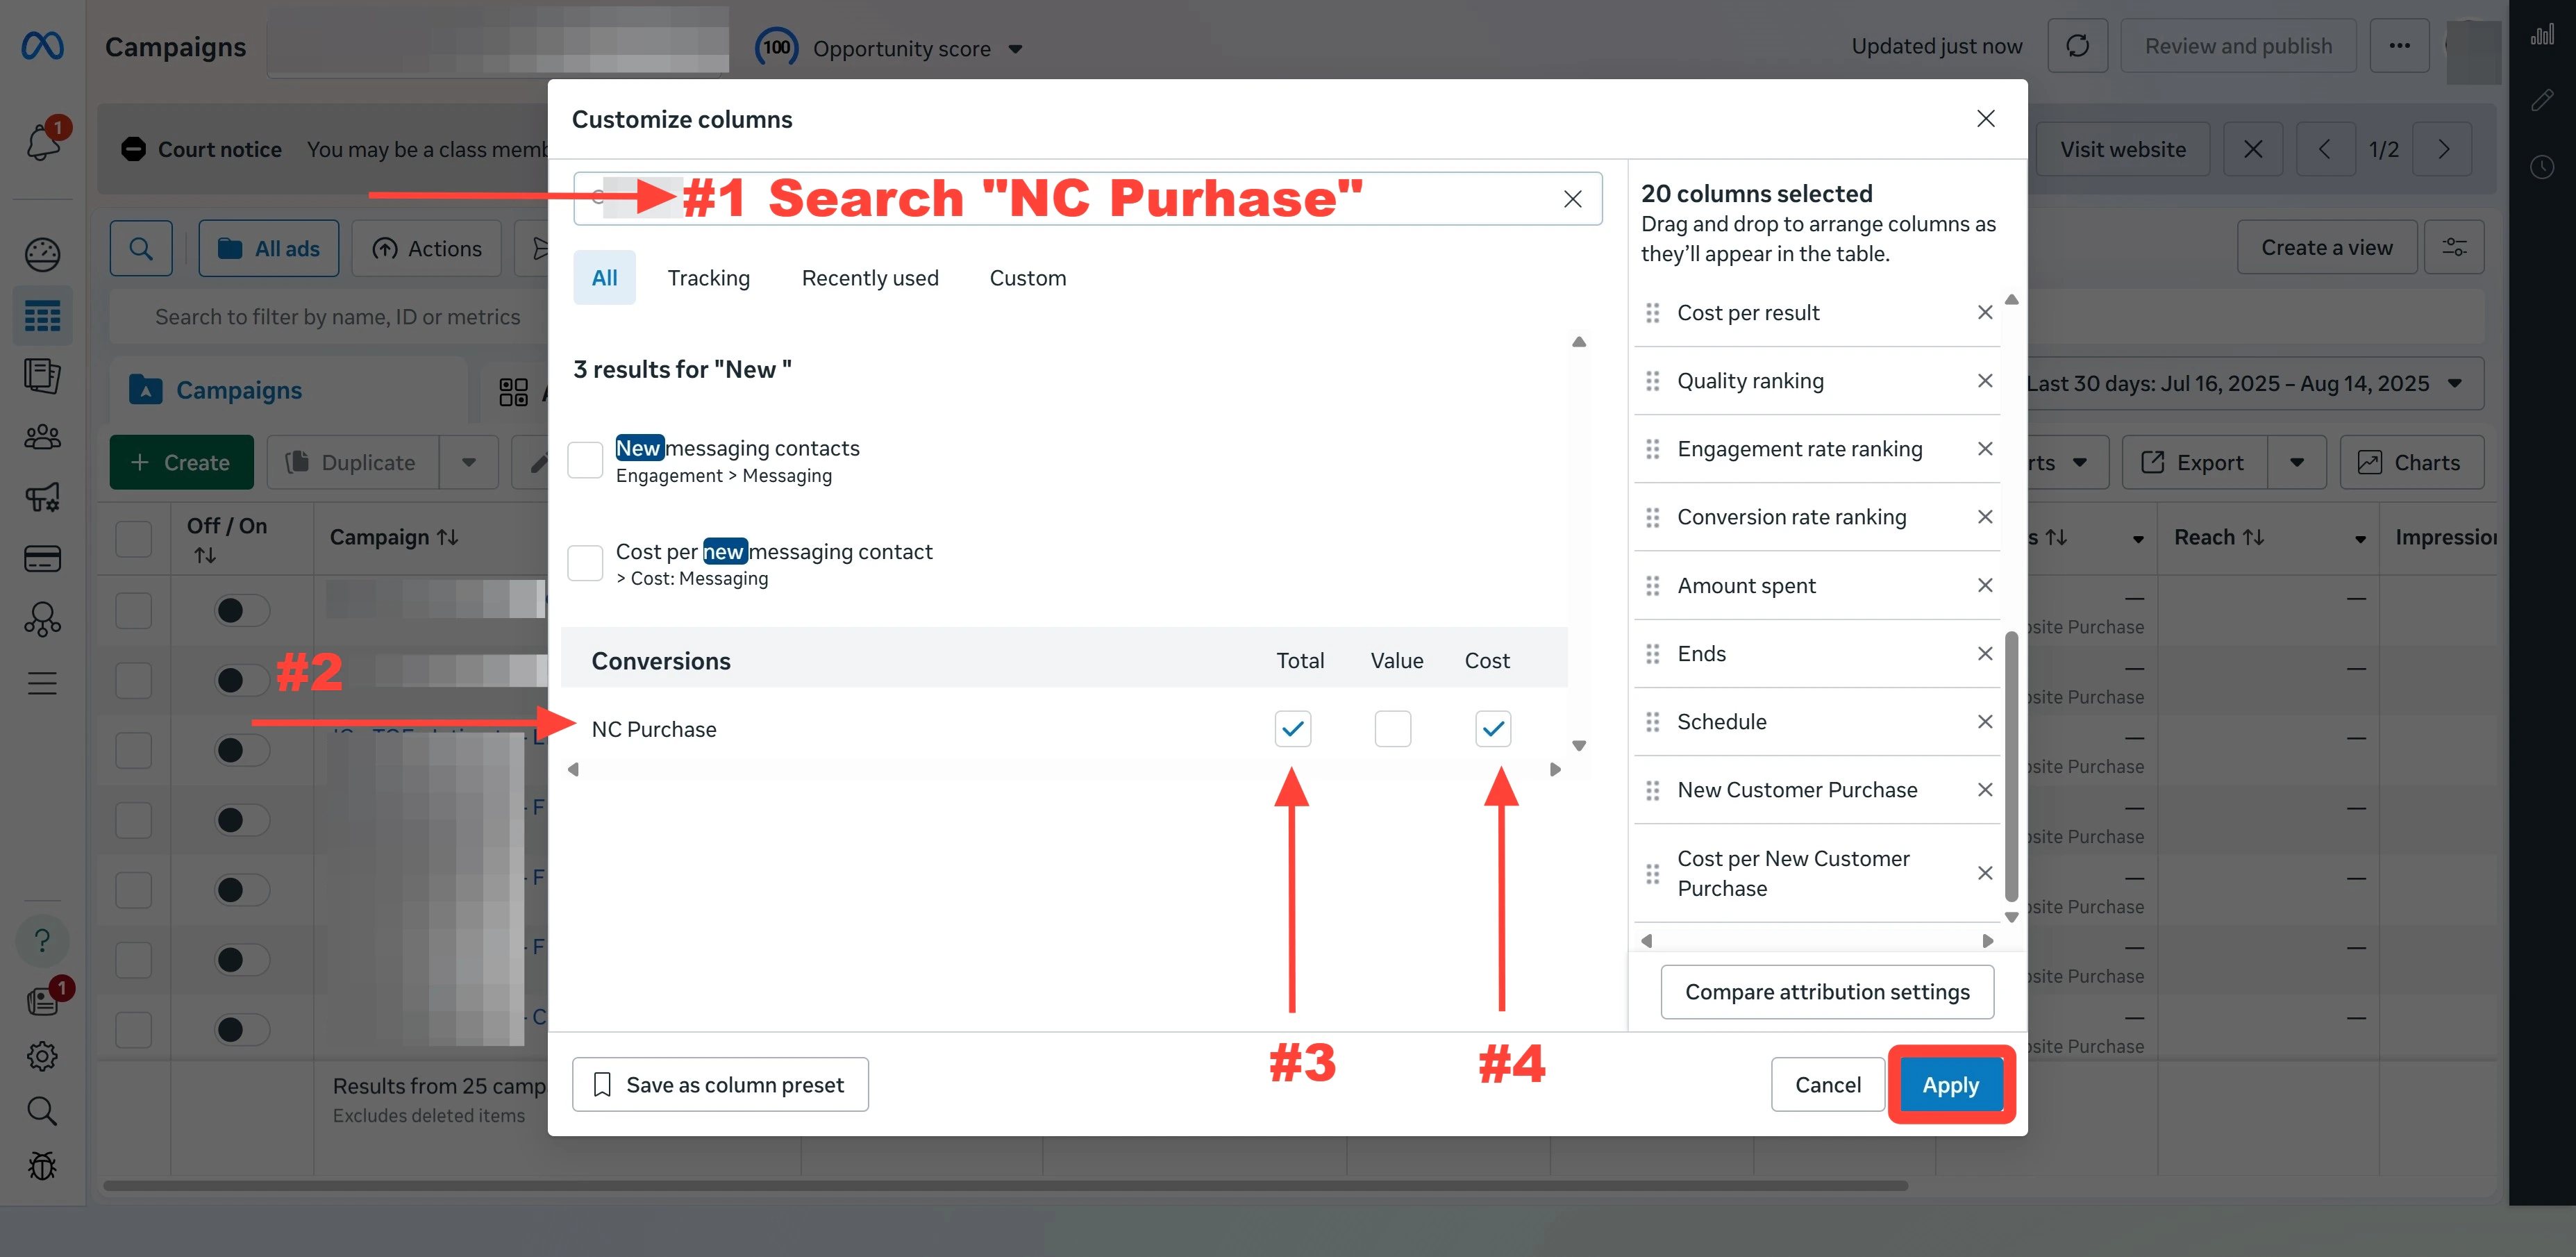
 In the **Customize columns** dialog, scroll the left-hand category list to **Custom Conversions** and select your **NC Purchase** conversion (it may be named **NewCustomerPurchase** depending on how you created it).
Check both checkboxes that appear:
* **Total** — total number of new-customer purchases attributed
* **Cost** — cost per new-customer purchase
In the **Customize columns** dialog, scroll the left-hand category list to **Custom Conversions** and select your **NC Purchase** conversion (it may be named **NewCustomerPurchase** depending on how you created it).
Check both checkboxes that appear:
* **Total** — total number of new-customer purchases attributed
* **Cost** — cost per new-customer purchase
 ## Part 2 — Set up the NC-ROAS custom metric
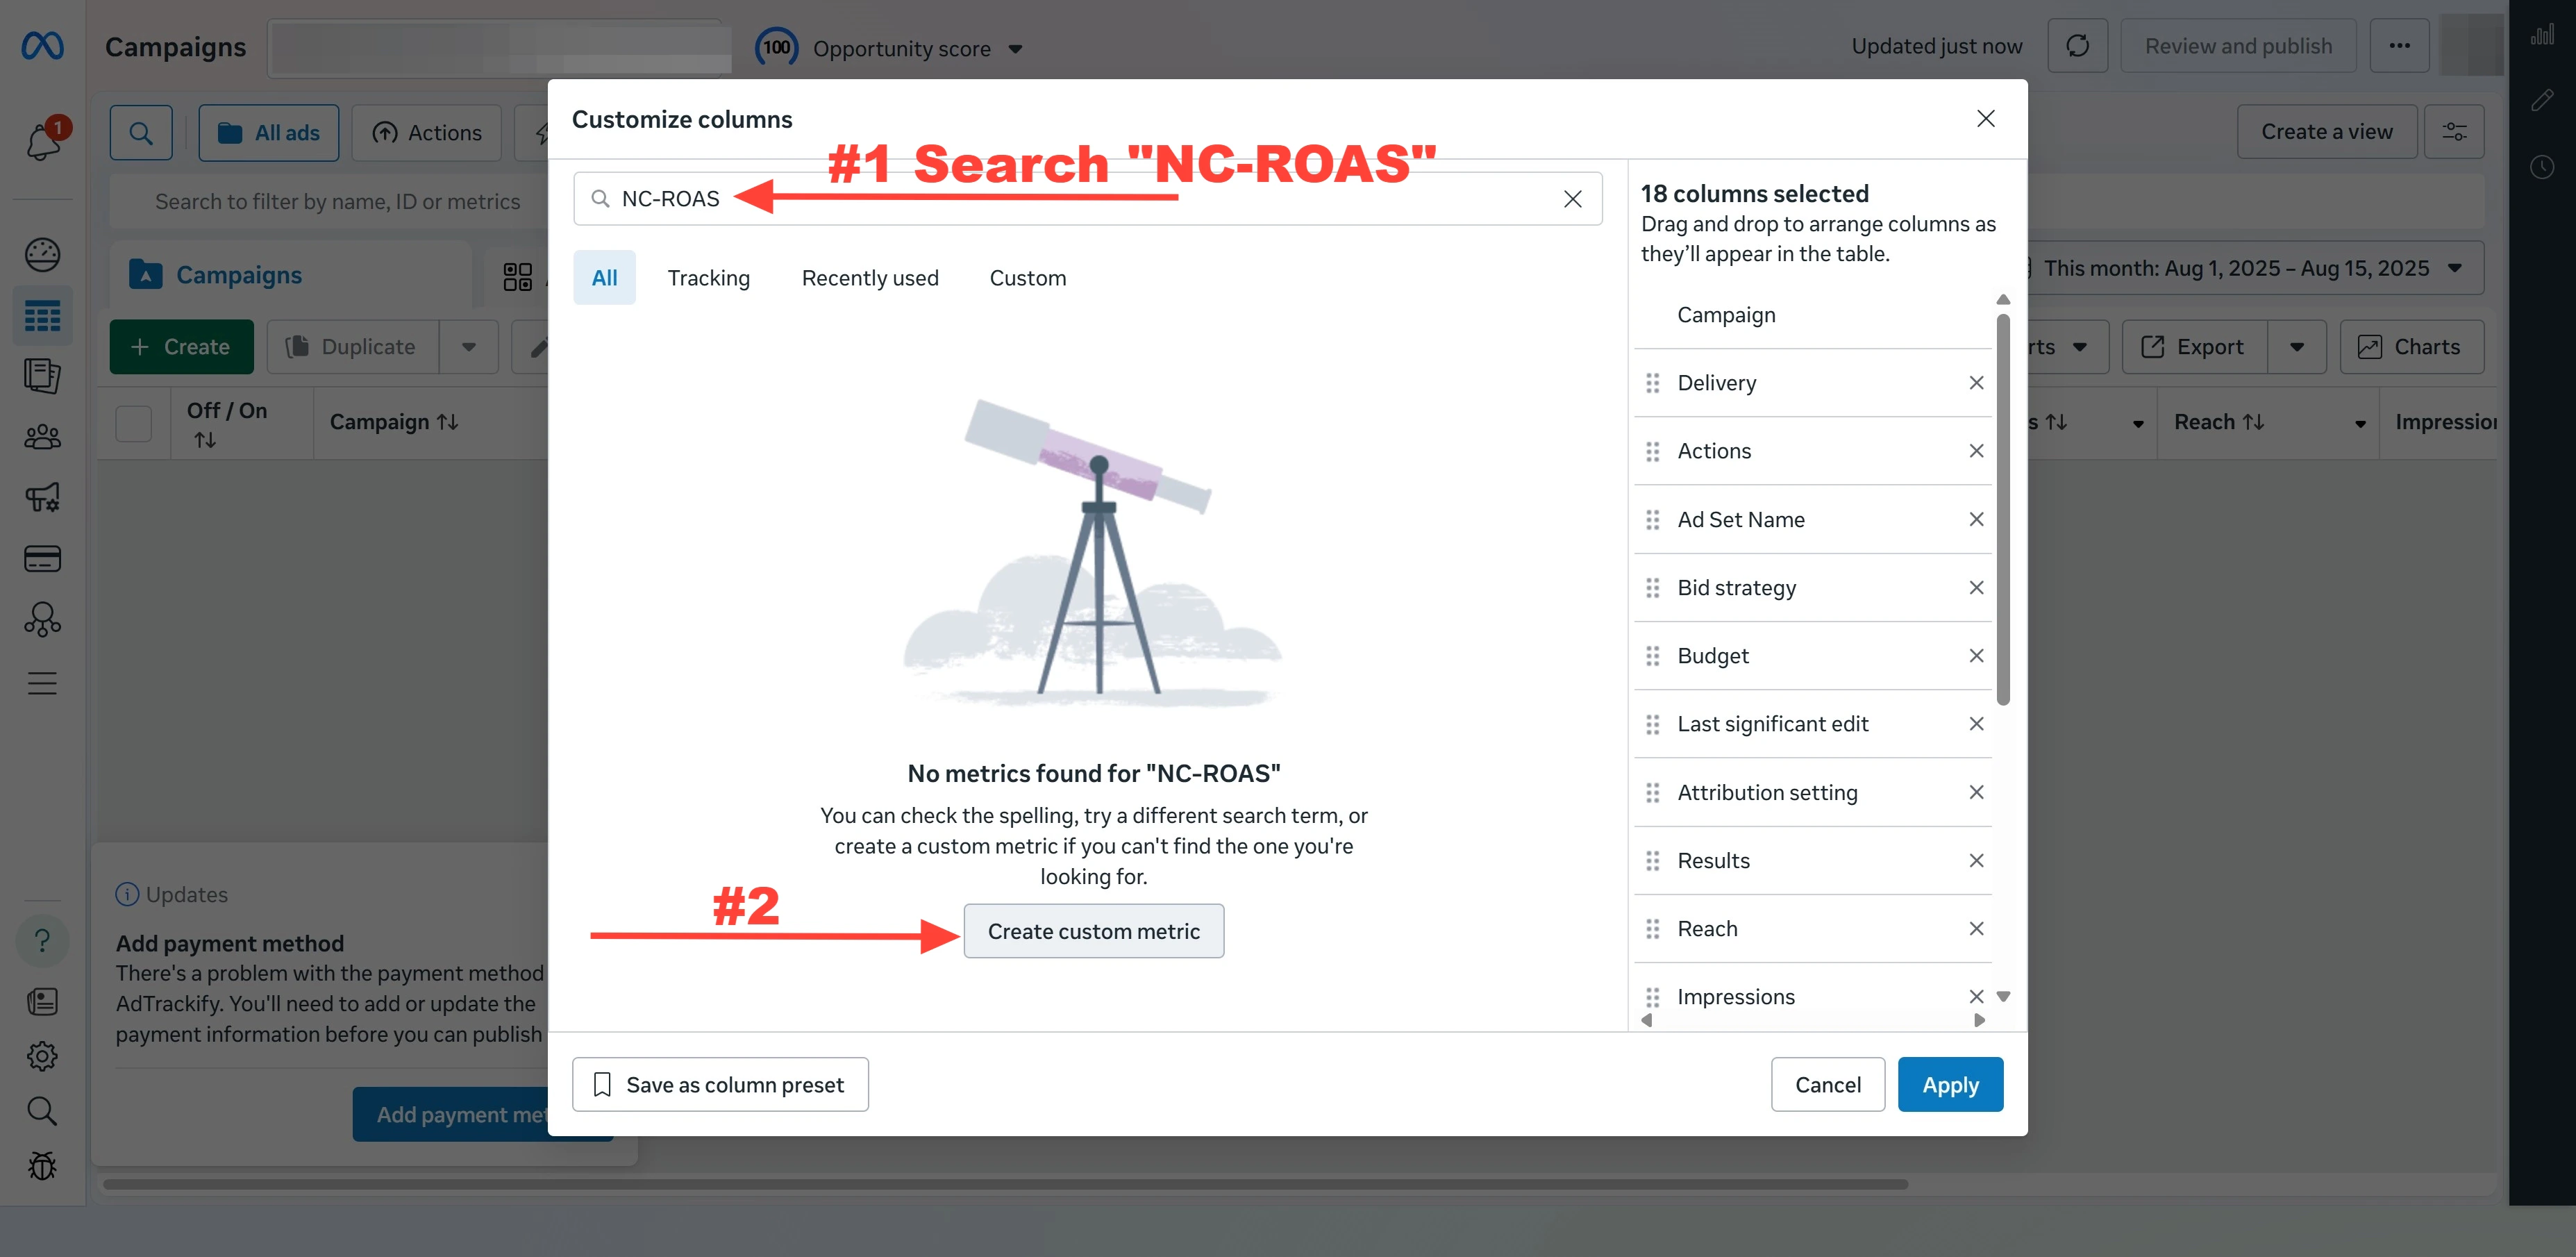
Inside the **Customize columns** dialog, click **Create custom metric** in the bottom-left.
## Part 2 — Set up the NC-ROAS custom metric
Inside the **Customize columns** dialog, click **Create custom metric** in the bottom-left.
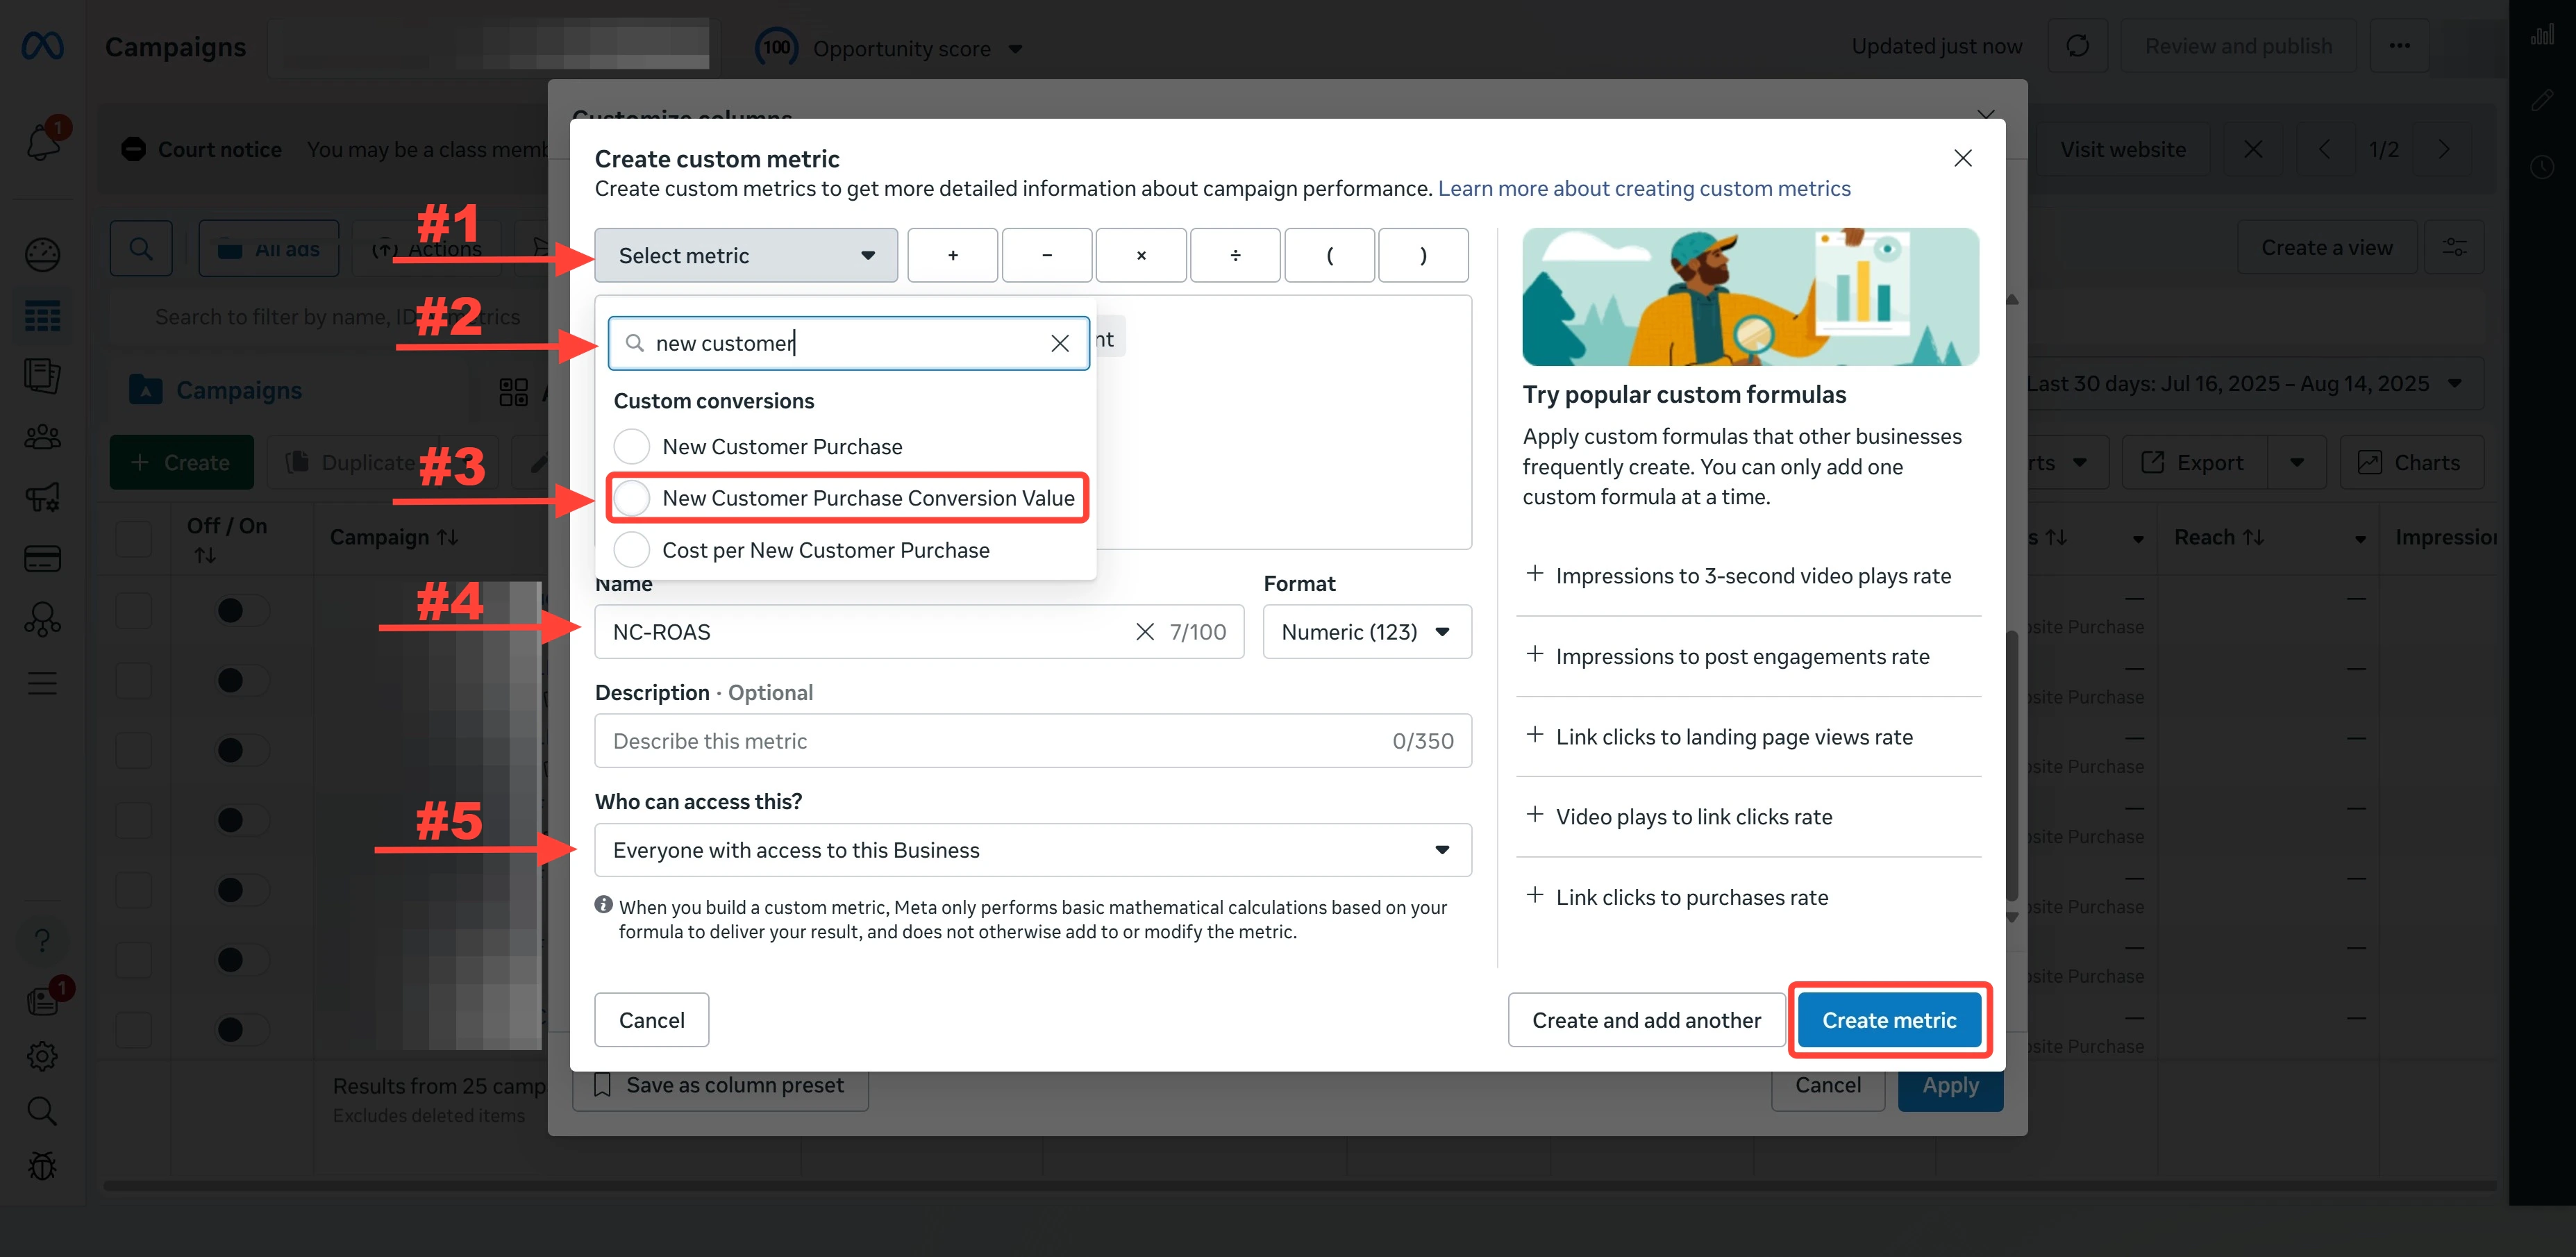
 Fill in the new-metric form:
* **Name:** `NC-ROAS`
* **Formula:** `NC Purchase Conversion Value` ÷ `Amount spent`
* Click **Create metric**
Check **Everyone with access to this Business** if you want the metric to be available to your whole team.
Fill in the new-metric form:
* **Name:** `NC-ROAS`
* **Formula:** `NC Purchase Conversion Value` ÷ `Amount spent`
* Click **Create metric**
Check **Everyone with access to this Business** if you want the metric to be available to your whole team.
 Back in **Customize columns**, find **NC-ROAS** under **Custom metrics** and check it so it appears in your table.
Click **Apply** in the bottom-right of the dialog to save the column layout.
Back in **Customize columns**, find **NC-ROAS** under **Custom metrics** and check it so it appears in your table.
Click **Apply** in the bottom-right of the dialog to save the column layout.
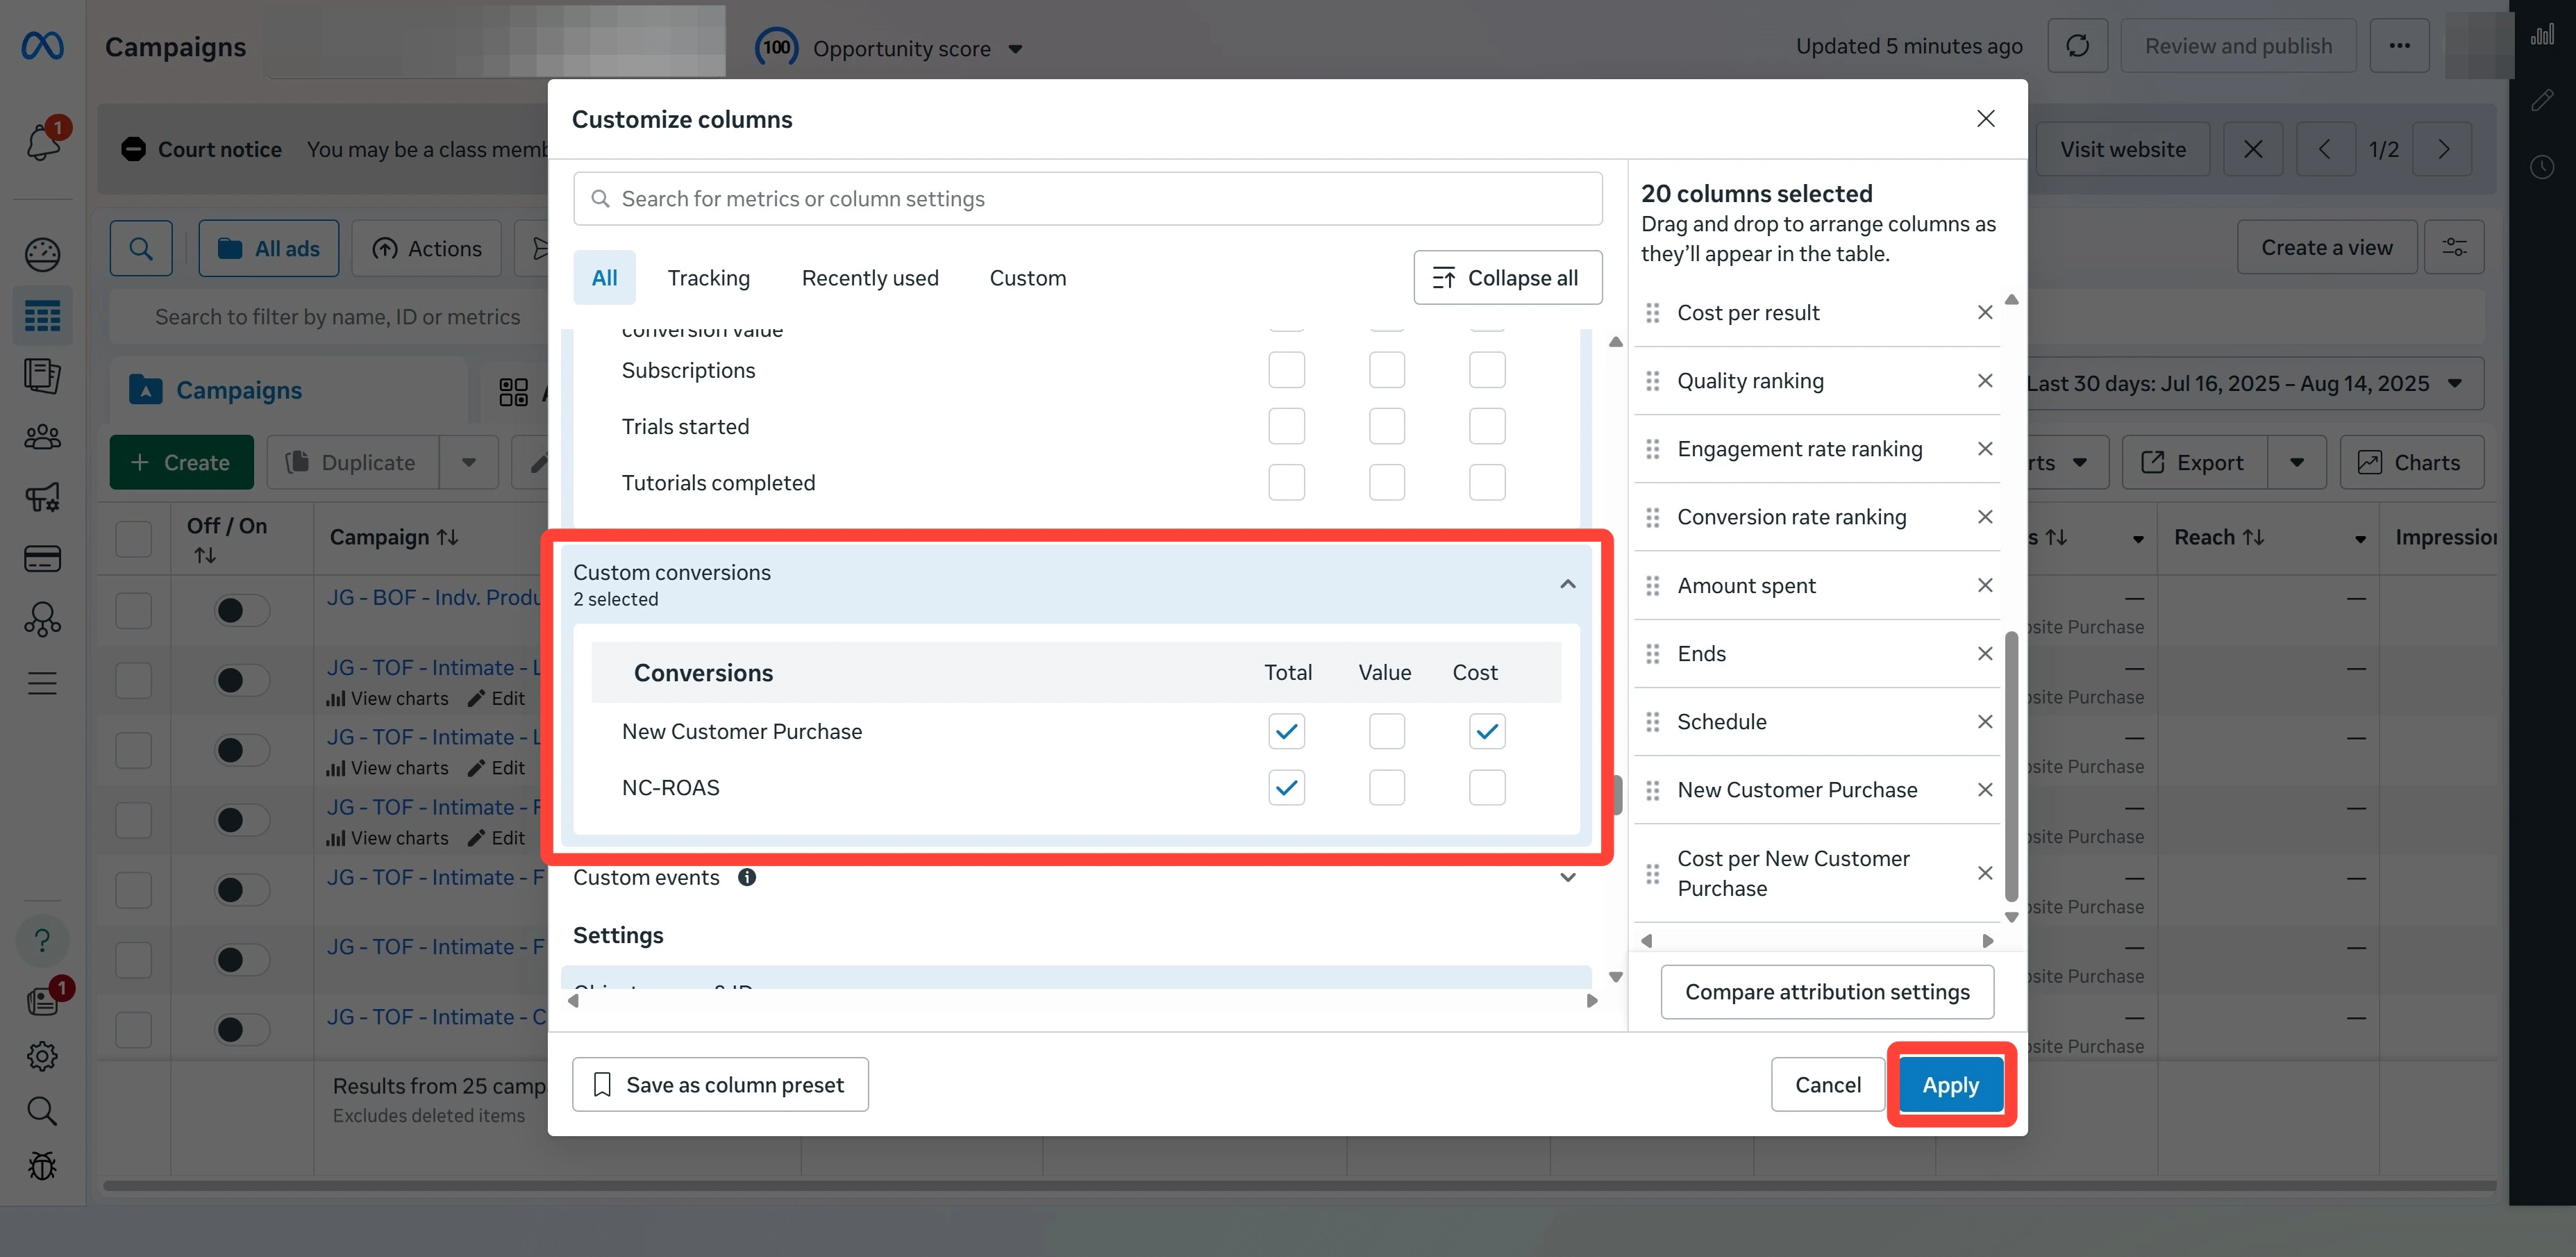 Your Ads Manager table should now show three new columns:
* **NC Purchase (Total)** — number of new customers acquired
* **NC Purchase (Cost)** — cost per new customer
* **NC-ROAS** — return on ad spend from new customers
Initially, the new columns may show **0** or **—** because Meta does **not** retroactively attribute custom conversions from before they were created. Data populates for conversions that occur **after** the conversion was created and shared. Allow 24–48 hours of new traffic before judging the values.
Your Ads Manager table should now show three new columns:
* **NC Purchase (Total)** — number of new customers acquired
* **NC Purchase (Cost)** — cost per new customer
* **NC-ROAS** — return on ad spend from new customers
Initially, the new columns may show **0** or **—** because Meta does **not** retroactively attribute custom conversions from before they were created. Data populates for conversions that occur **after** the conversion was created and shared. Allow 24–48 hours of new traffic before judging the values.