> ## Documentation Index
> Fetch the complete documentation index at: https://docs.upstackdata.com/llms.txt
> Use this file to discover all available pages before exploring further.
# How to Configure Facebook (Meta) Ads Pixel Destination in Upstack Data
> Configure the Facebook (Meta) Ads destination in Upstack Data with your Pixel ID and Conversion API key to enable dual tracking via browser pixel and server-side CAPI.
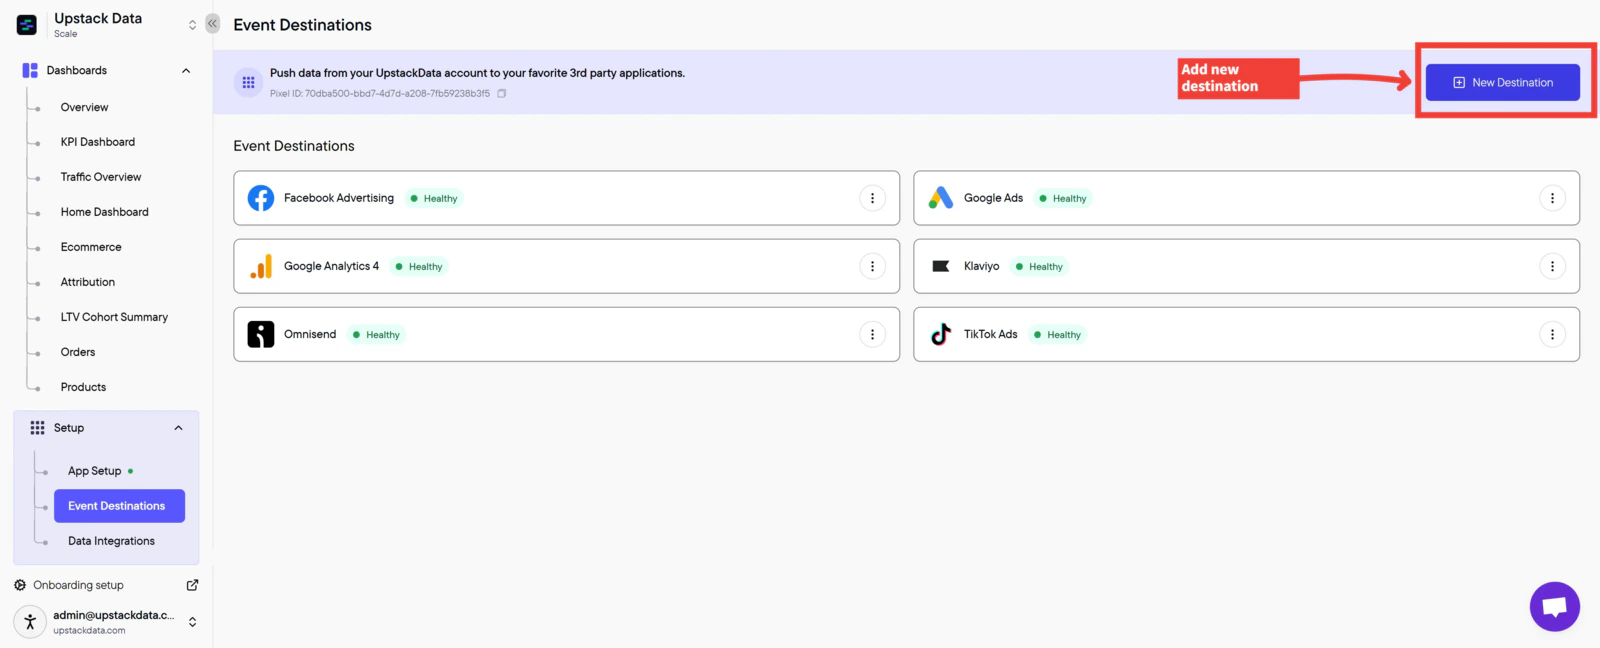
* In the Upstack dashboard, go to **Event Destinations** and click **+ New Destination**.
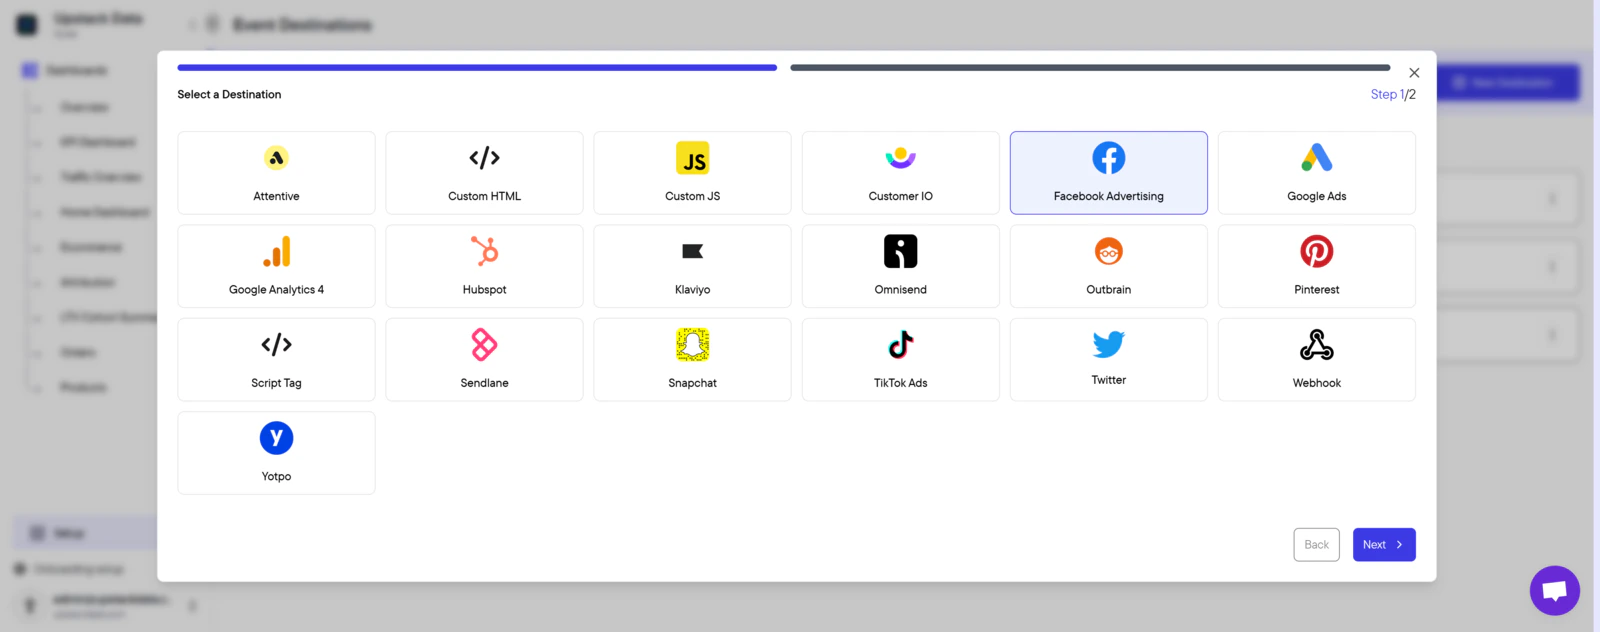
* Select **Facebook Advertising**.
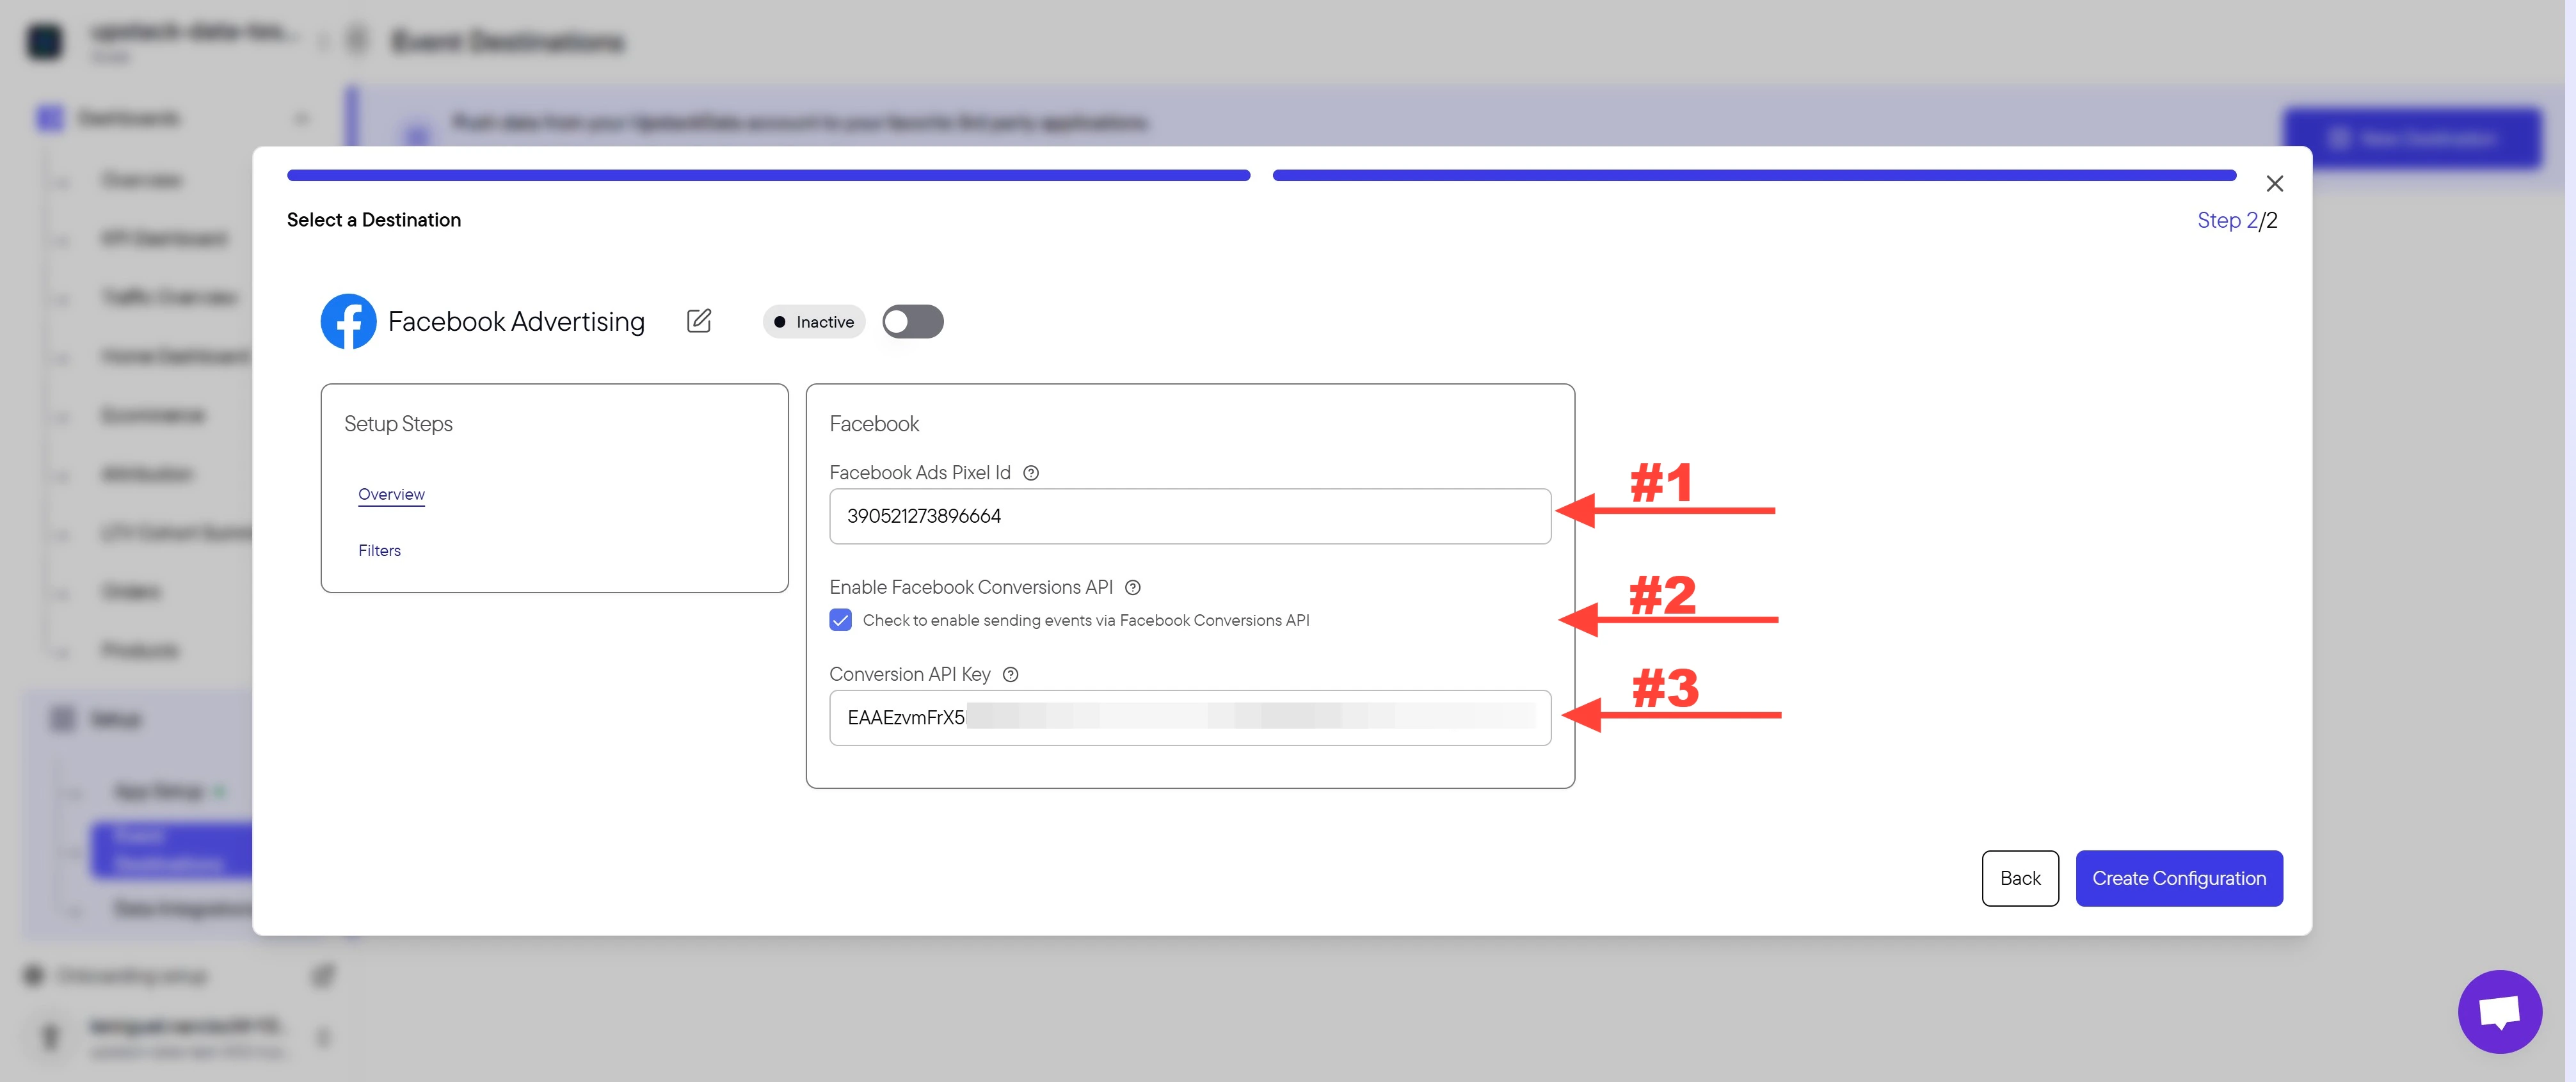
* Enter your **Meta Pixel ID** (15–16 digit number, no prefix).
* Enable the **Conversions API** checkbox and paste your **CAPI token** (starts with `EAA`).
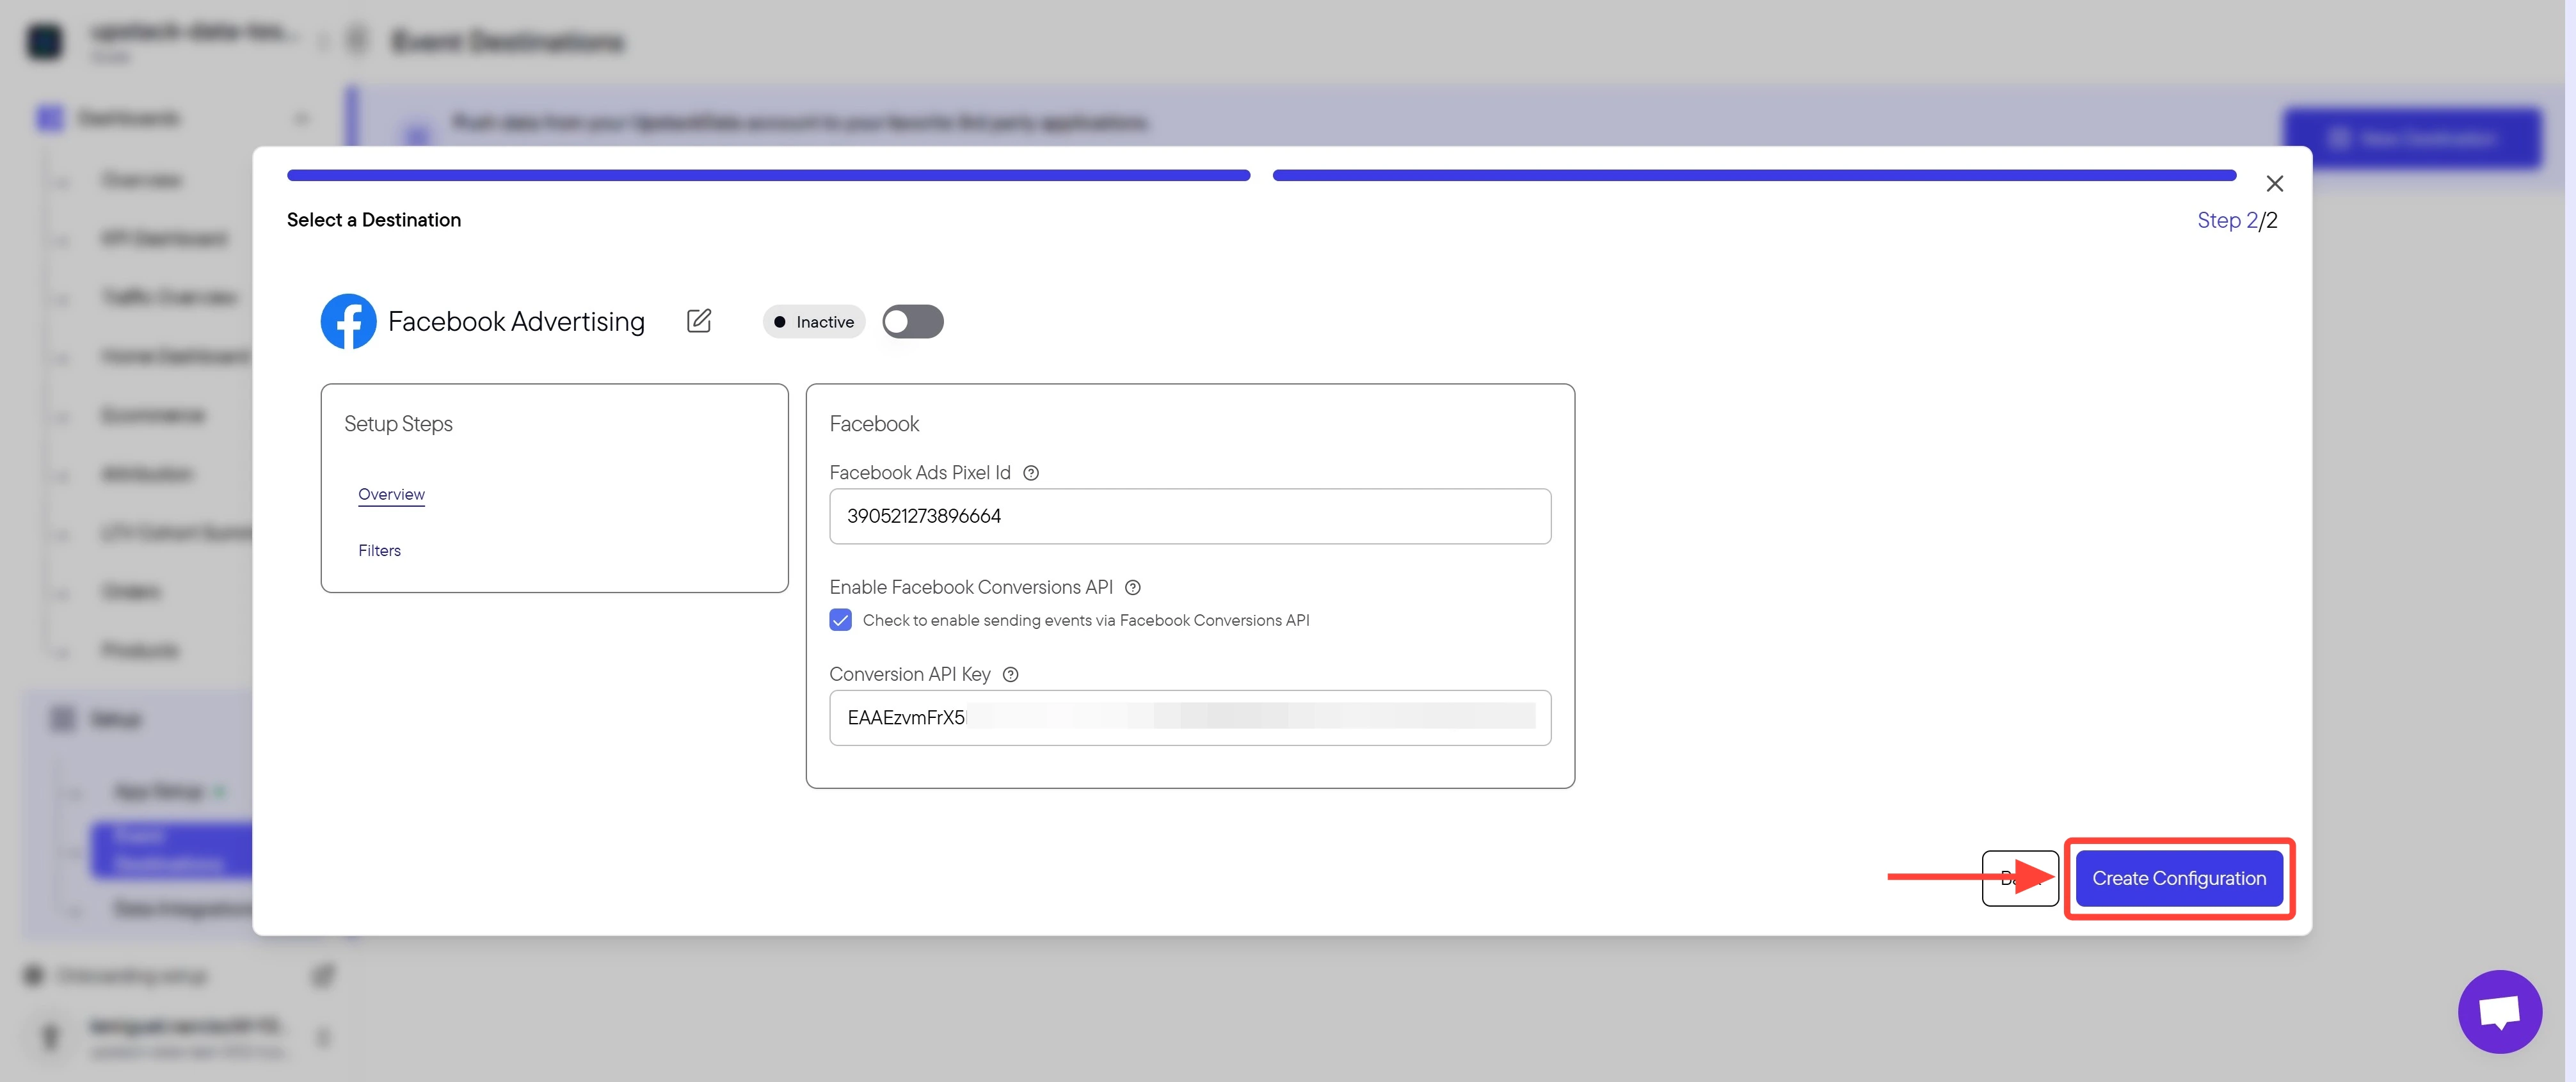
* Click **Create Configuration** and verify the destination shows **Healthy**.
**What this setup enables**
Setting up the Meta Ads Pixel destination in Upstack Data enables dual tracking via browser pixel and server-side Conversions API (CAPI), ensuring accurate conversion data despite iOS restrictions and ad blockers.
## Prerequisites
Before you start, you need:
* An active Upstack Data account ([sign up](https://app.upstackdata.com))
* Admin access to a **Meta Business Manager** account
* A configured **Meta Pixel** in [Meta Events Manager](https://business.facebook.com/events_manager) — see [How to find your Meta Pixel ID](/guides/facebook-ads/how-do-i-find-my-facebook-ads-pixel-dataset-id)
* A **Conversions API access token** — see [How to generate your CAPI token](/guides/facebook-ads/how-to-generate-my-facebook-conversion-api-key)
## Configuration steps
Sign in to Upstack Data at [app.upstackdata.com](https://app.upstackdata.com/pixel/event-destinations).
In the Upstack dashboard, navigate to **Event Destinations**.
Click **+ New Destination** in the top-right of the page.
 In the **Select a Destination** popup, click **Facebook Advertising**, then click **Next**.
 Fill in the form:
1. **Meta Pixel ID** — the 15–16 digit number, no prefix (e.g., `123456789012345`). Meta Pixel IDs do **not** have an `AW-` prefix; that prefix belongs to Google Ads.
2. Check the box **Check to enable sending events via Facebook Conversions API**.
3. **CAPI token** — starts with `EAA`, approximately 190 characters long.
The Conversions API checkbox **must be selected** for server-side tracking to work.
Fill in the form:
1. **Meta Pixel ID** — the 15–16 digit number, no prefix (e.g., `123456789012345`). Meta Pixel IDs do **not** have an `AW-` prefix; that prefix belongs to Google Ads.
2. Check the box **Check to enable sending events via Facebook Conversions API**.
3. **CAPI token** — starts with `EAA`, approximately 190 characters long.
The Conversions API checkbox **must be selected** for server-side tracking to work.
 **Need help finding these?**
* [How to find your Meta Pixel ID](/guides/facebook-ads/how-do-i-find-my-facebook-ads-pixel-dataset-id)
* [How to generate your CAPI token](/guides/facebook-ads/how-to-generate-my-facebook-conversion-api-key)
Click the **Create Configuration** button.
**Need help finding these?**
* [How to find your Meta Pixel ID](/guides/facebook-ads/how-do-i-find-my-facebook-ads-pixel-dataset-id)
* [How to generate your CAPI token](/guides/facebook-ads/how-to-generate-my-facebook-conversion-api-key)
Click the **Create Configuration** button.
 You should see a confirmation message and the Meta destination will appear in your **Event Destinations** list.
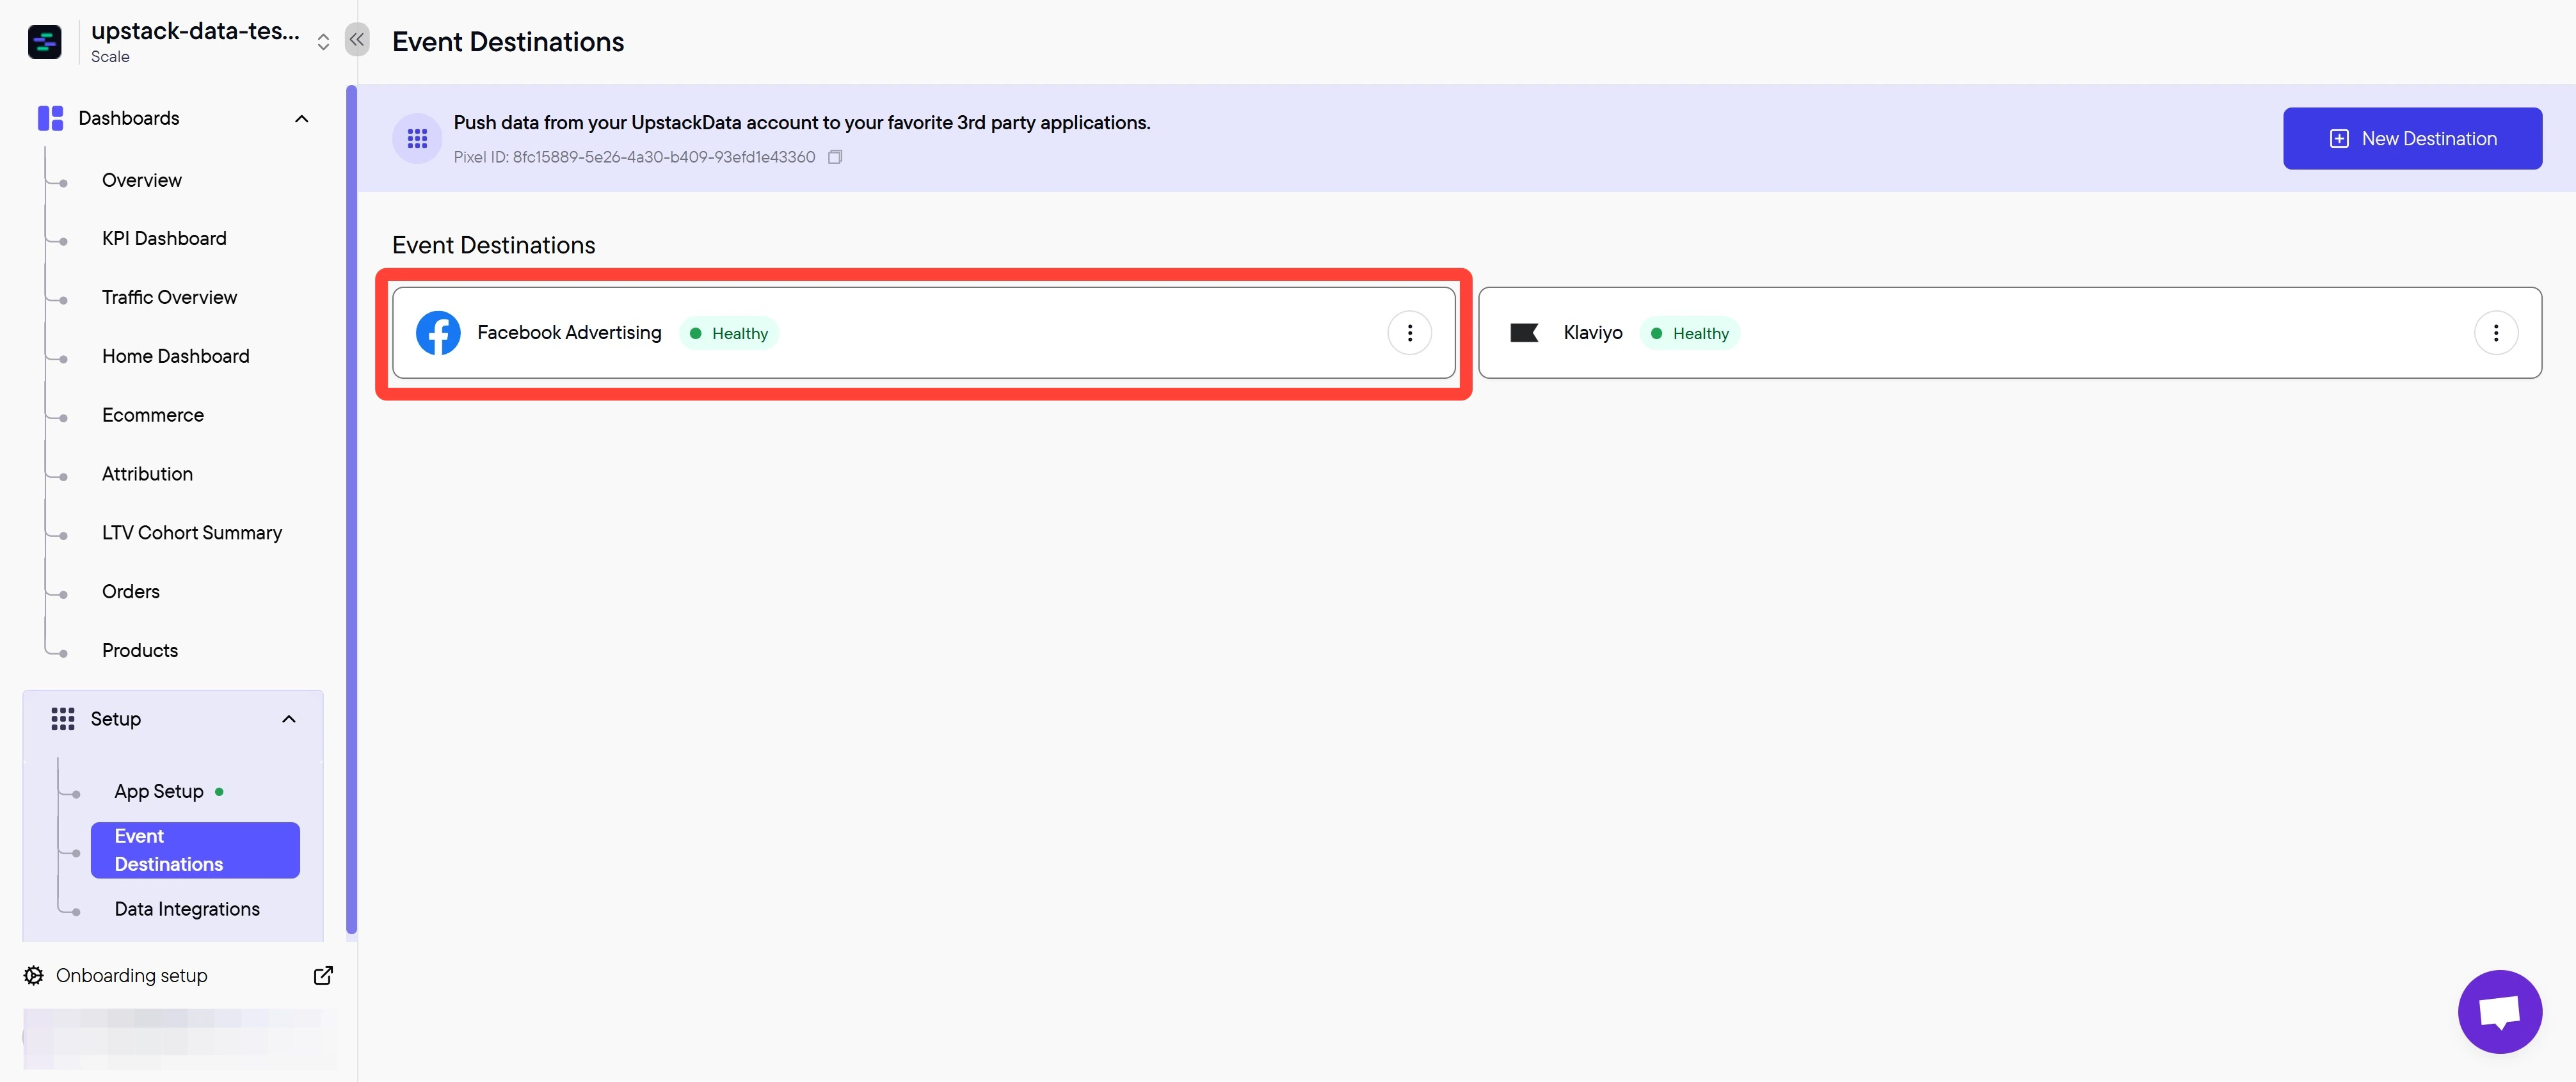 In the Upstack dashboard, the Meta destination card should display **Healthy** with a green status indicator within 5 minutes.
If the status shows **Unhealthy**:
* Confirm your **Pixel ID** is correct (15–16 digits, no leading/trailing spaces, no prefix).
* Confirm your **CAPI token** is the full string starting with `EAA`.
* Confirm the **Conversions API** checkbox was selected.
* See [How to update your CAPI token](/guides/facebook-ads/how-to-update-facebook-meta-conversion-api-key) if your token may have expired.
In the Upstack dashboard, the Meta destination card should display **Healthy** with a green status indicator within 5 minutes.
If the status shows **Unhealthy**:
* Confirm your **Pixel ID** is correct (15–16 digits, no leading/trailing spaces, no prefix).
* Confirm your **CAPI token** is the full string starting with `EAA`.
* Confirm the **Conversions API** checkbox was selected.
* See [How to update your CAPI token](/guides/facebook-ads/how-to-update-facebook-meta-conversion-api-key) if your token may have expired.