> ## Documentation Index
> Fetch the complete documentation index at: https://docs.upstackdata.com/llms.txt
> Use this file to discover all available pages before exploring further.
# How to Generate my Facebook Conversion API Key?
> Generate a Facebook (Meta) Conversion API access token in Meta Events Manager and paste it into Upstack Data to enable server-side conversion forwarding via CAPI.
* Sign in to [Meta Events Manager](https://business.facebook.com/events_manager) and open your pixel.
* Open the **Settings** tab and scroll to the **Conversions API** section.
* Click **Generate access token** and copy the token immediately — it is shown only once.
* Paste the **CAPI token** (starts with `EAA`) into your Upstack Meta destination.
**What is a CAPI token?**
A **Conversions API (CAPI) token** is a Meta access token that lets Upstack Data send conversions from your server to Meta, improving accuracy for iOS users and ad-blocked traffic.
## Prerequisites
Before you start, you need:
* **Admin access** (or full access) to a **Meta Business Manager** account
* A pixel already created in [Meta Events Manager](https://business.facebook.com/events_manager) — see [How to find your Meta Pixel ID](/guides/facebook-ads/how-do-i-find-my-facebook-ads-pixel-dataset-id)
* An Upstack Data account ready to receive the token ([sign in](https://app.upstackdata.com))
## Steps to generate your CAPI token
Sign in to Meta Events Manager at [business.facebook.com/events\_manager](https://business.facebook.com/events_manager).
**If you already have a pixel**, you'll see it listed in the **Data Sources** panel — proceed to the next step.
**If you need to create one:**
* Click the green **Connect Data Sources** button
* Select **Web**
* Click **Next** or **Get Started**
* Follow the instructions to create a new Meta Pixel
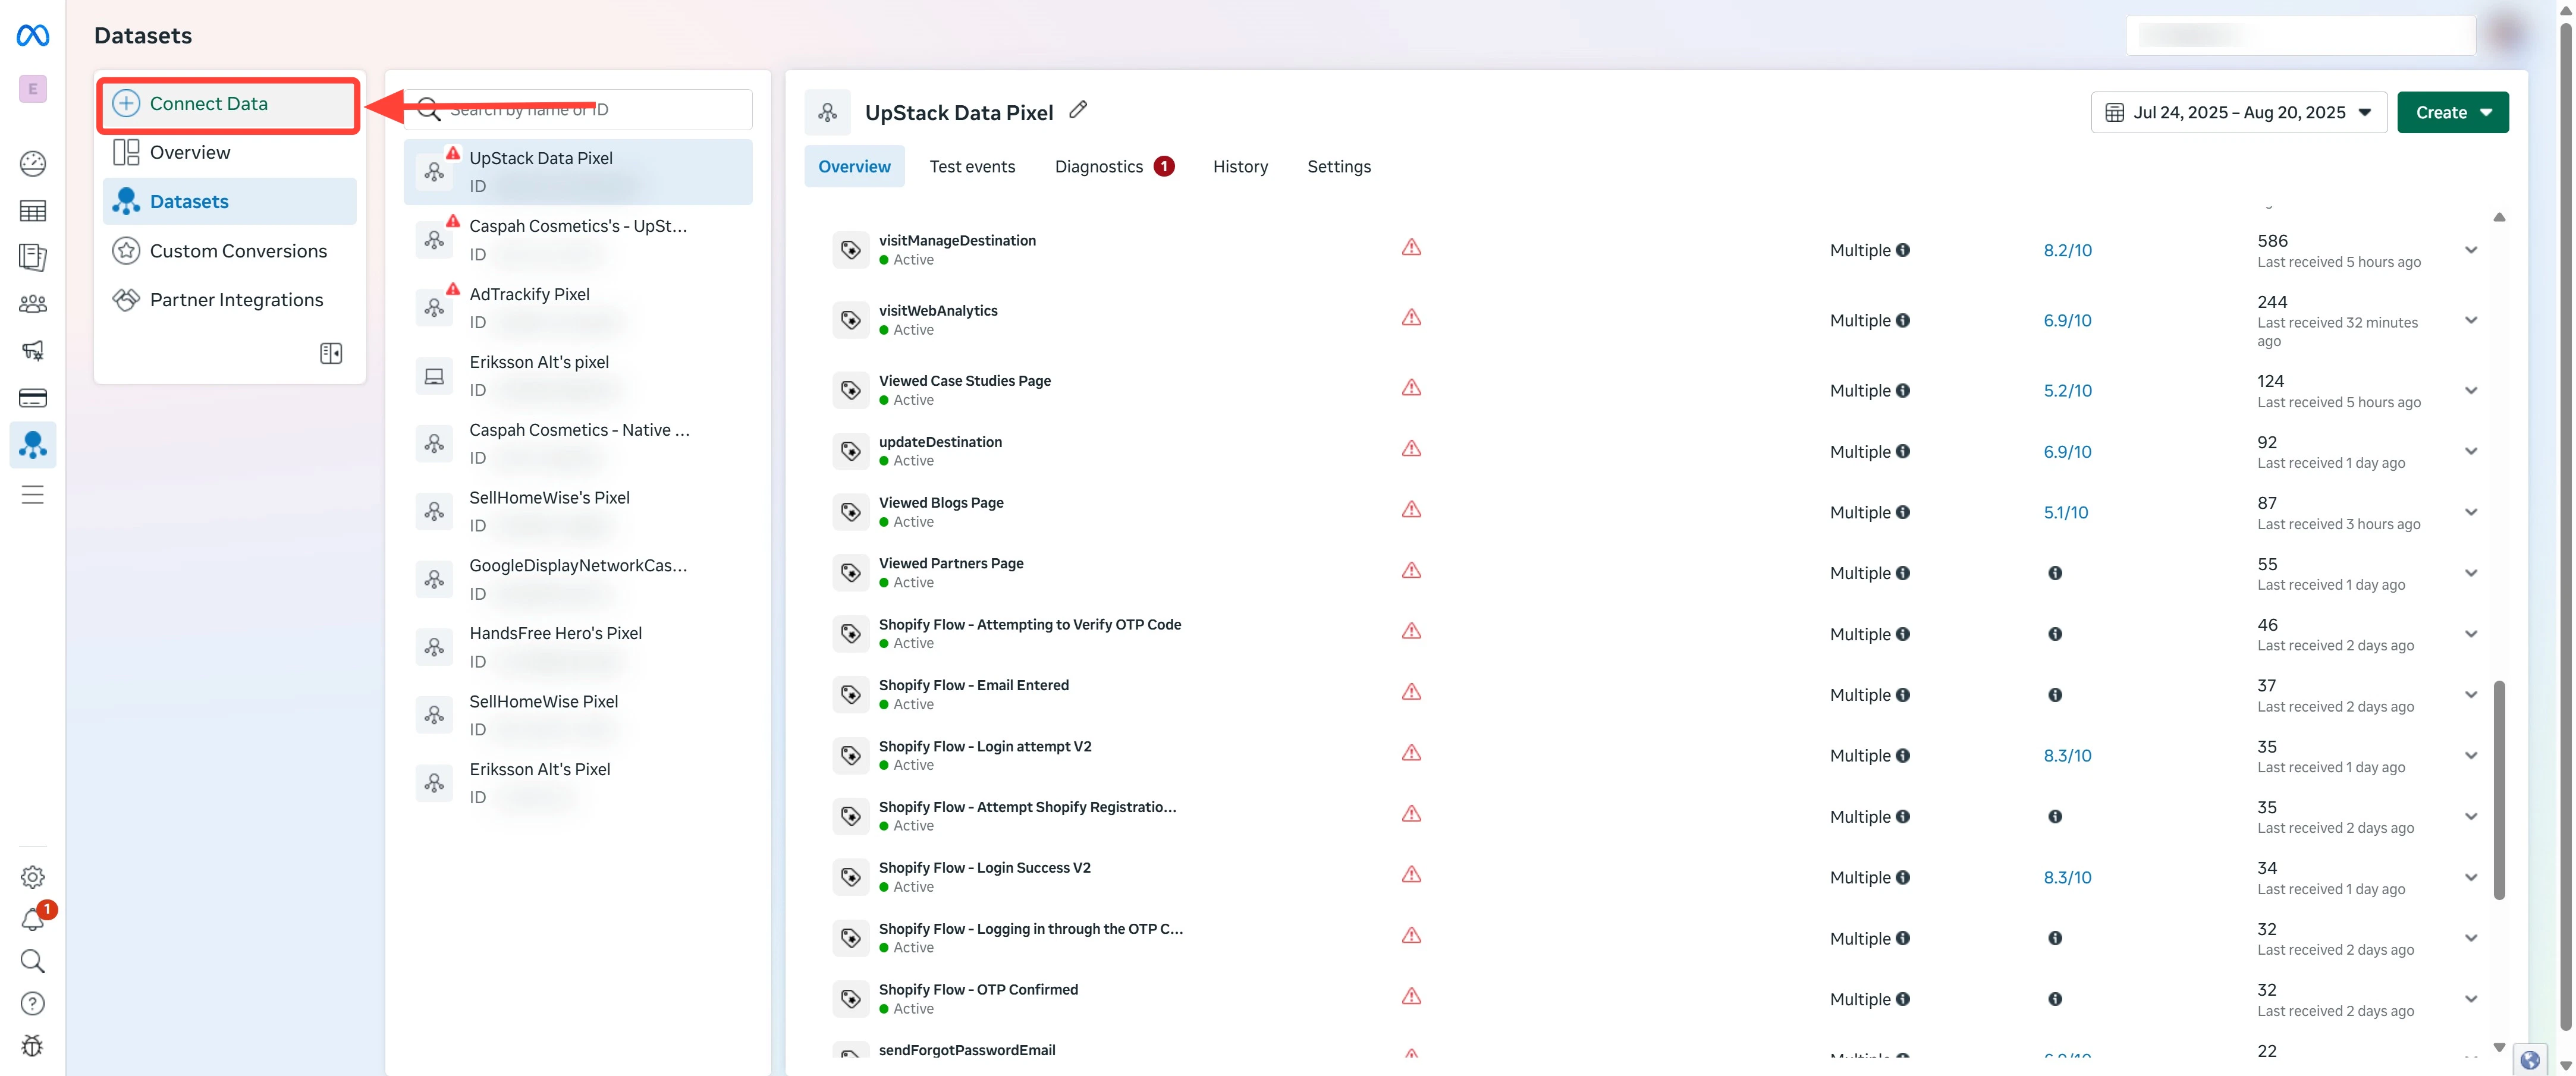
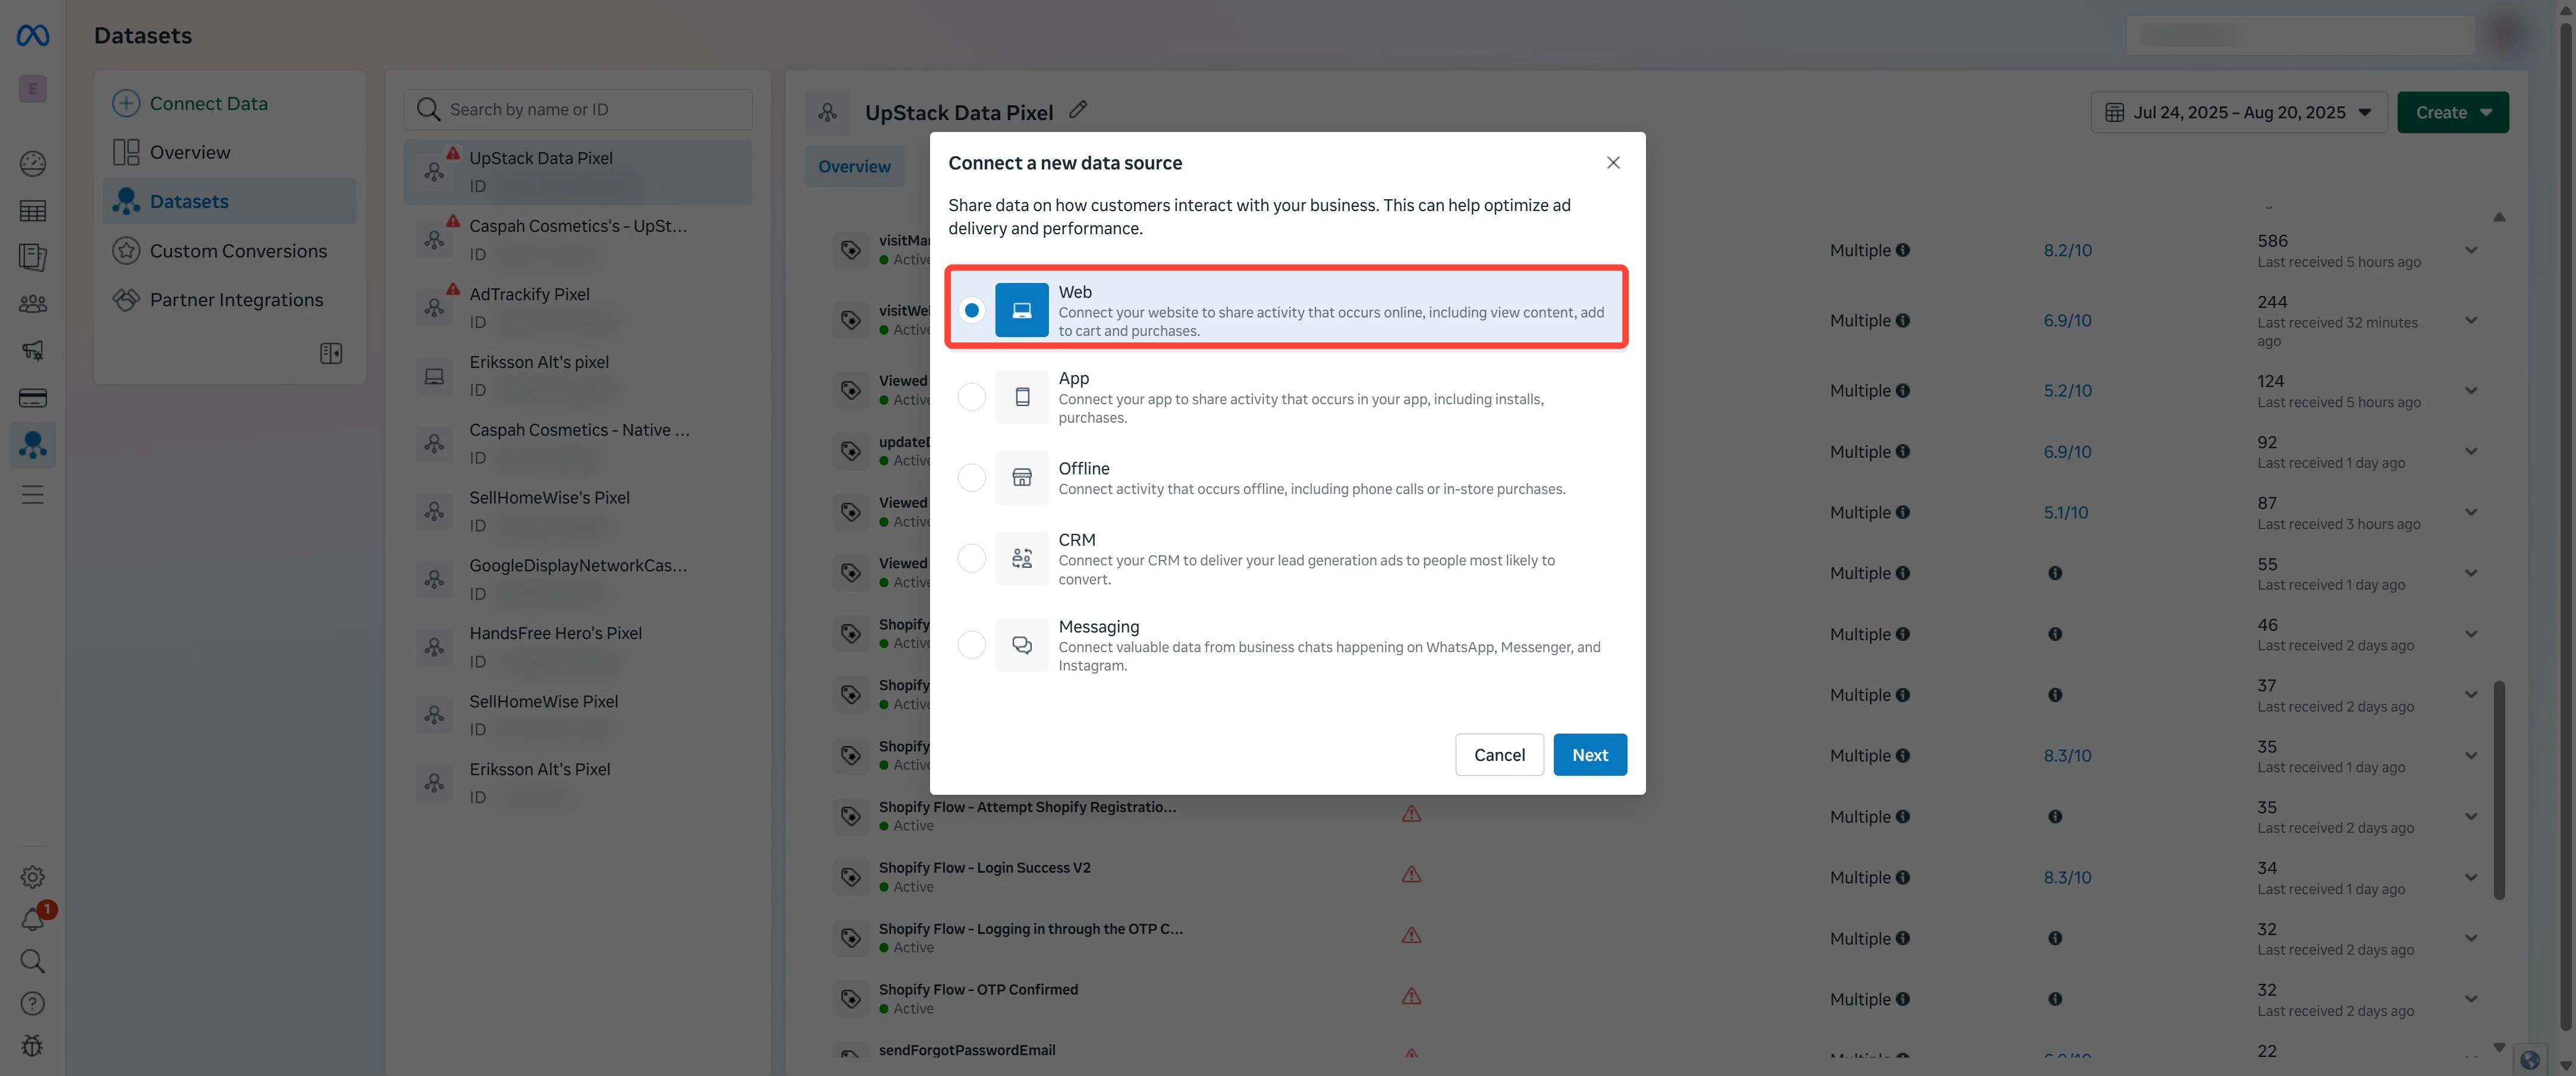 In the **Data Sources** list, click your pixel's name. You'll land on the pixel's **Overview** page.
On the pixel **Overview** page, click the **Settings** tab in the left-hand menu.
In the **Data Sources** list, click your pixel's name. You'll land on the pixel's **Overview** page.
On the pixel **Overview** page, click the **Settings** tab in the left-hand menu.
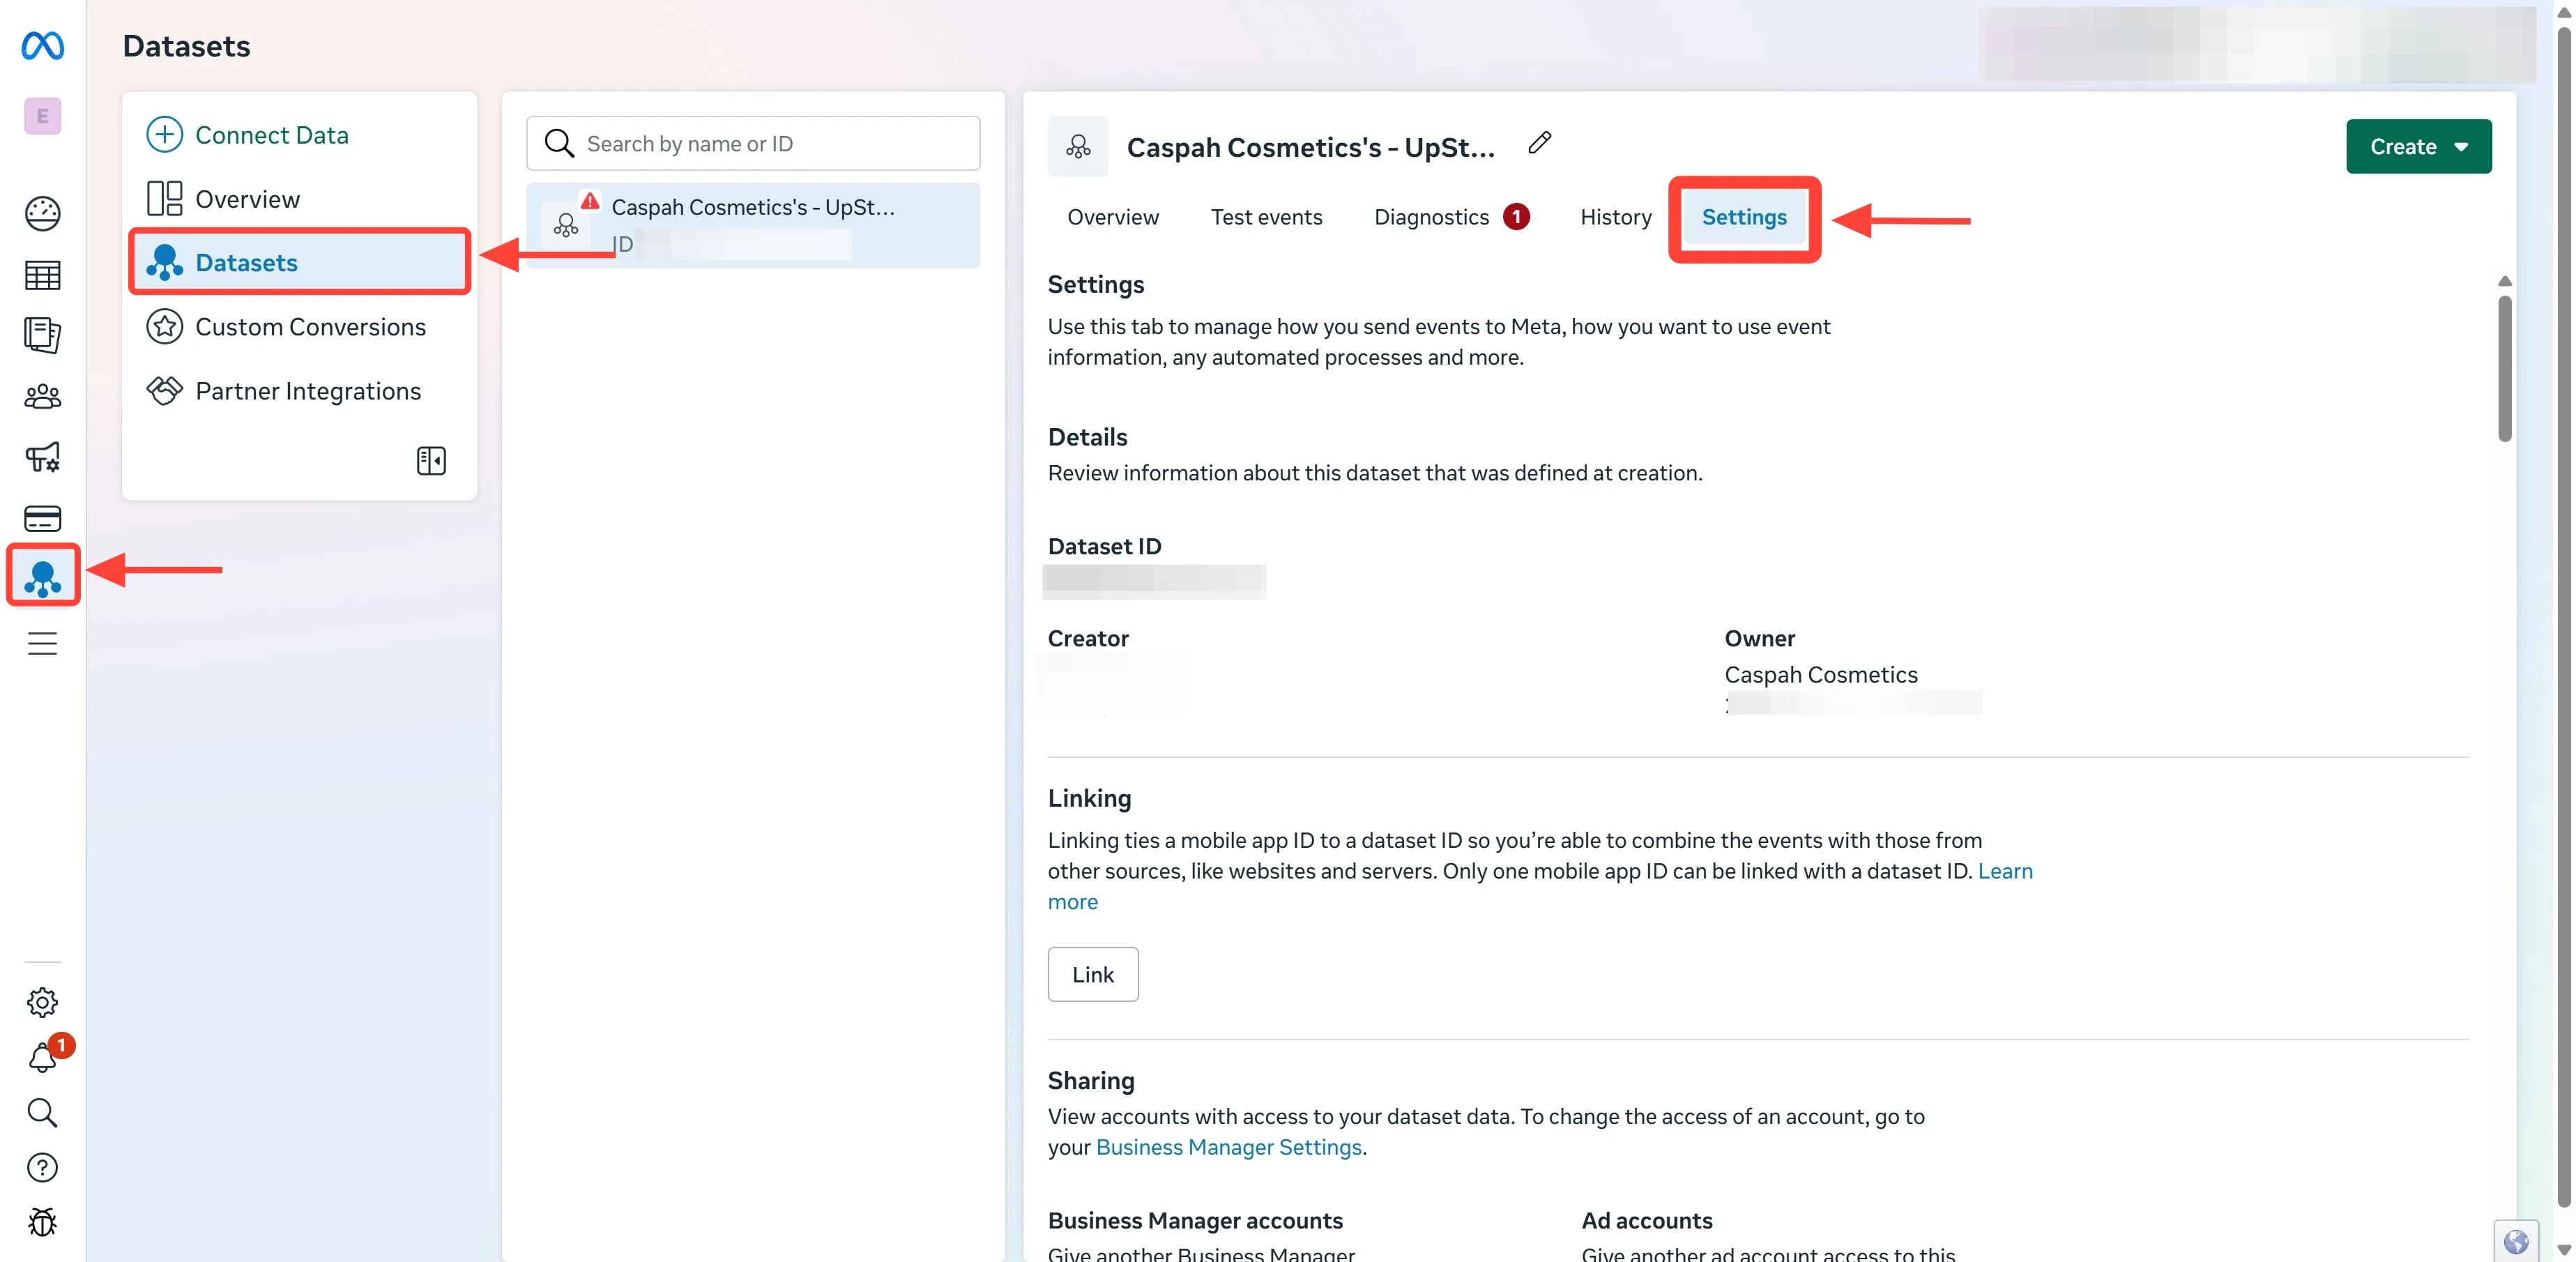 On the **Settings** tab, scroll down to the **Conversions API** section and click **Generate access token**.
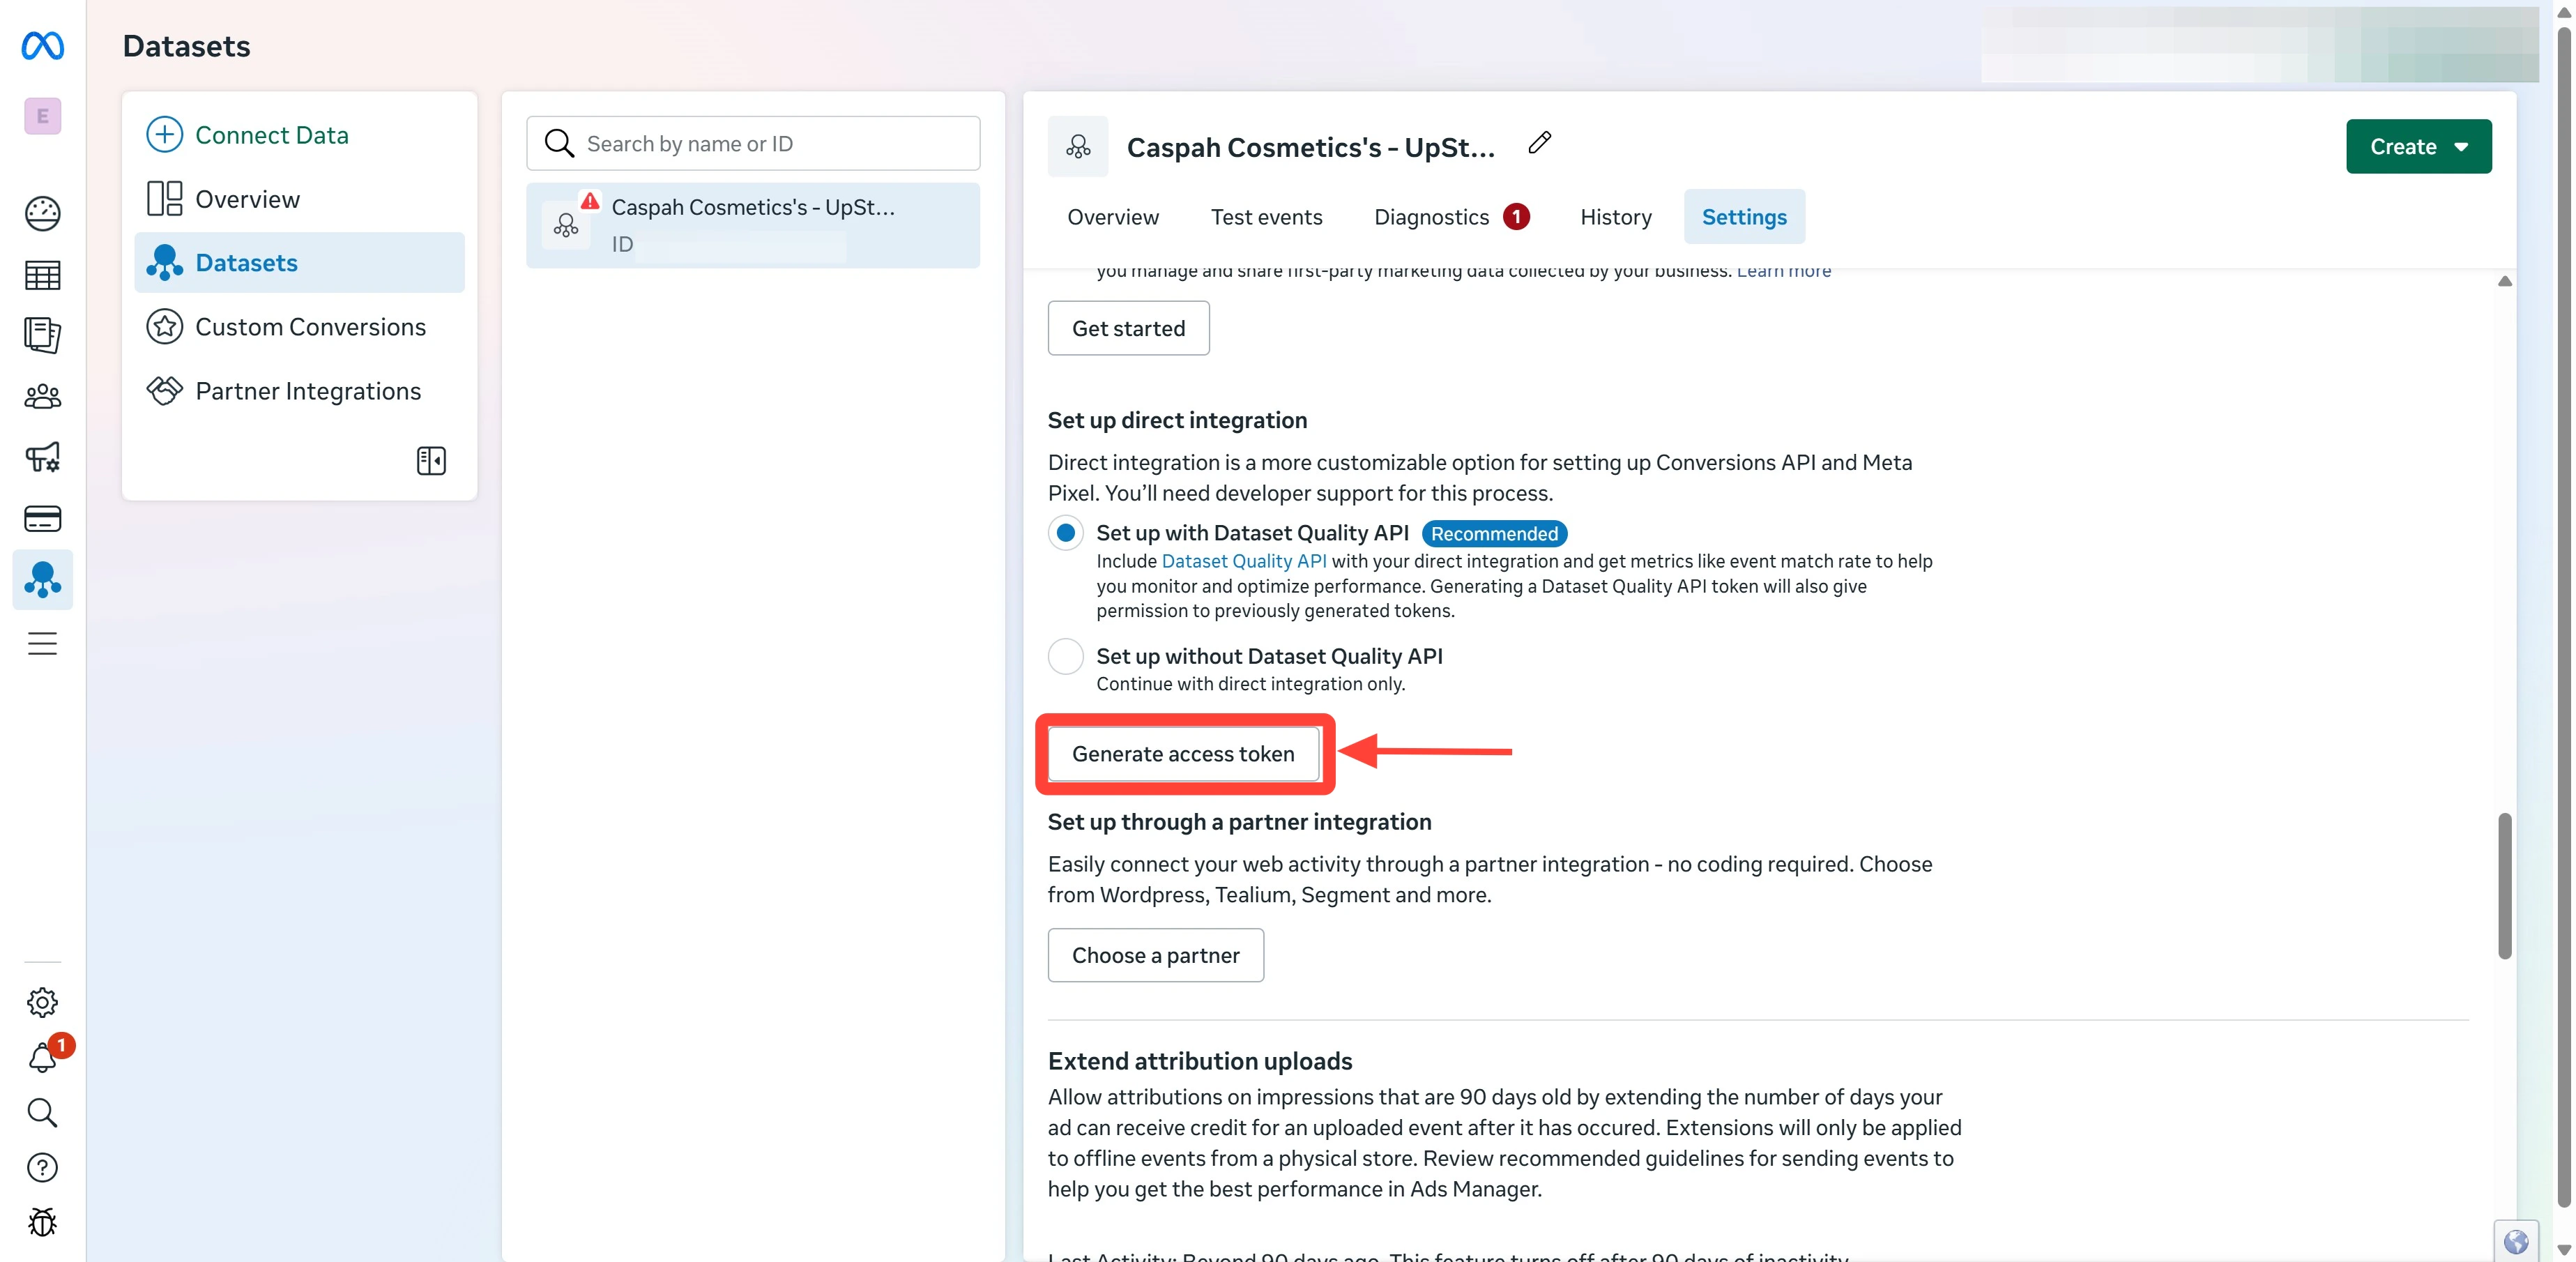 Copy the value of the access token shown in the dialog. This is your **CAPI token**.
The token is shown **only once** — copy it immediately to a secure location. If you close the dialog without copying, you'll need to generate a new one.
Copy the value of the access token shown in the dialog. This is your **CAPI token**.
The token is shown **only once** — copy it immediately to a secure location. If you close the dialog without copying, you'll need to generate a new one.
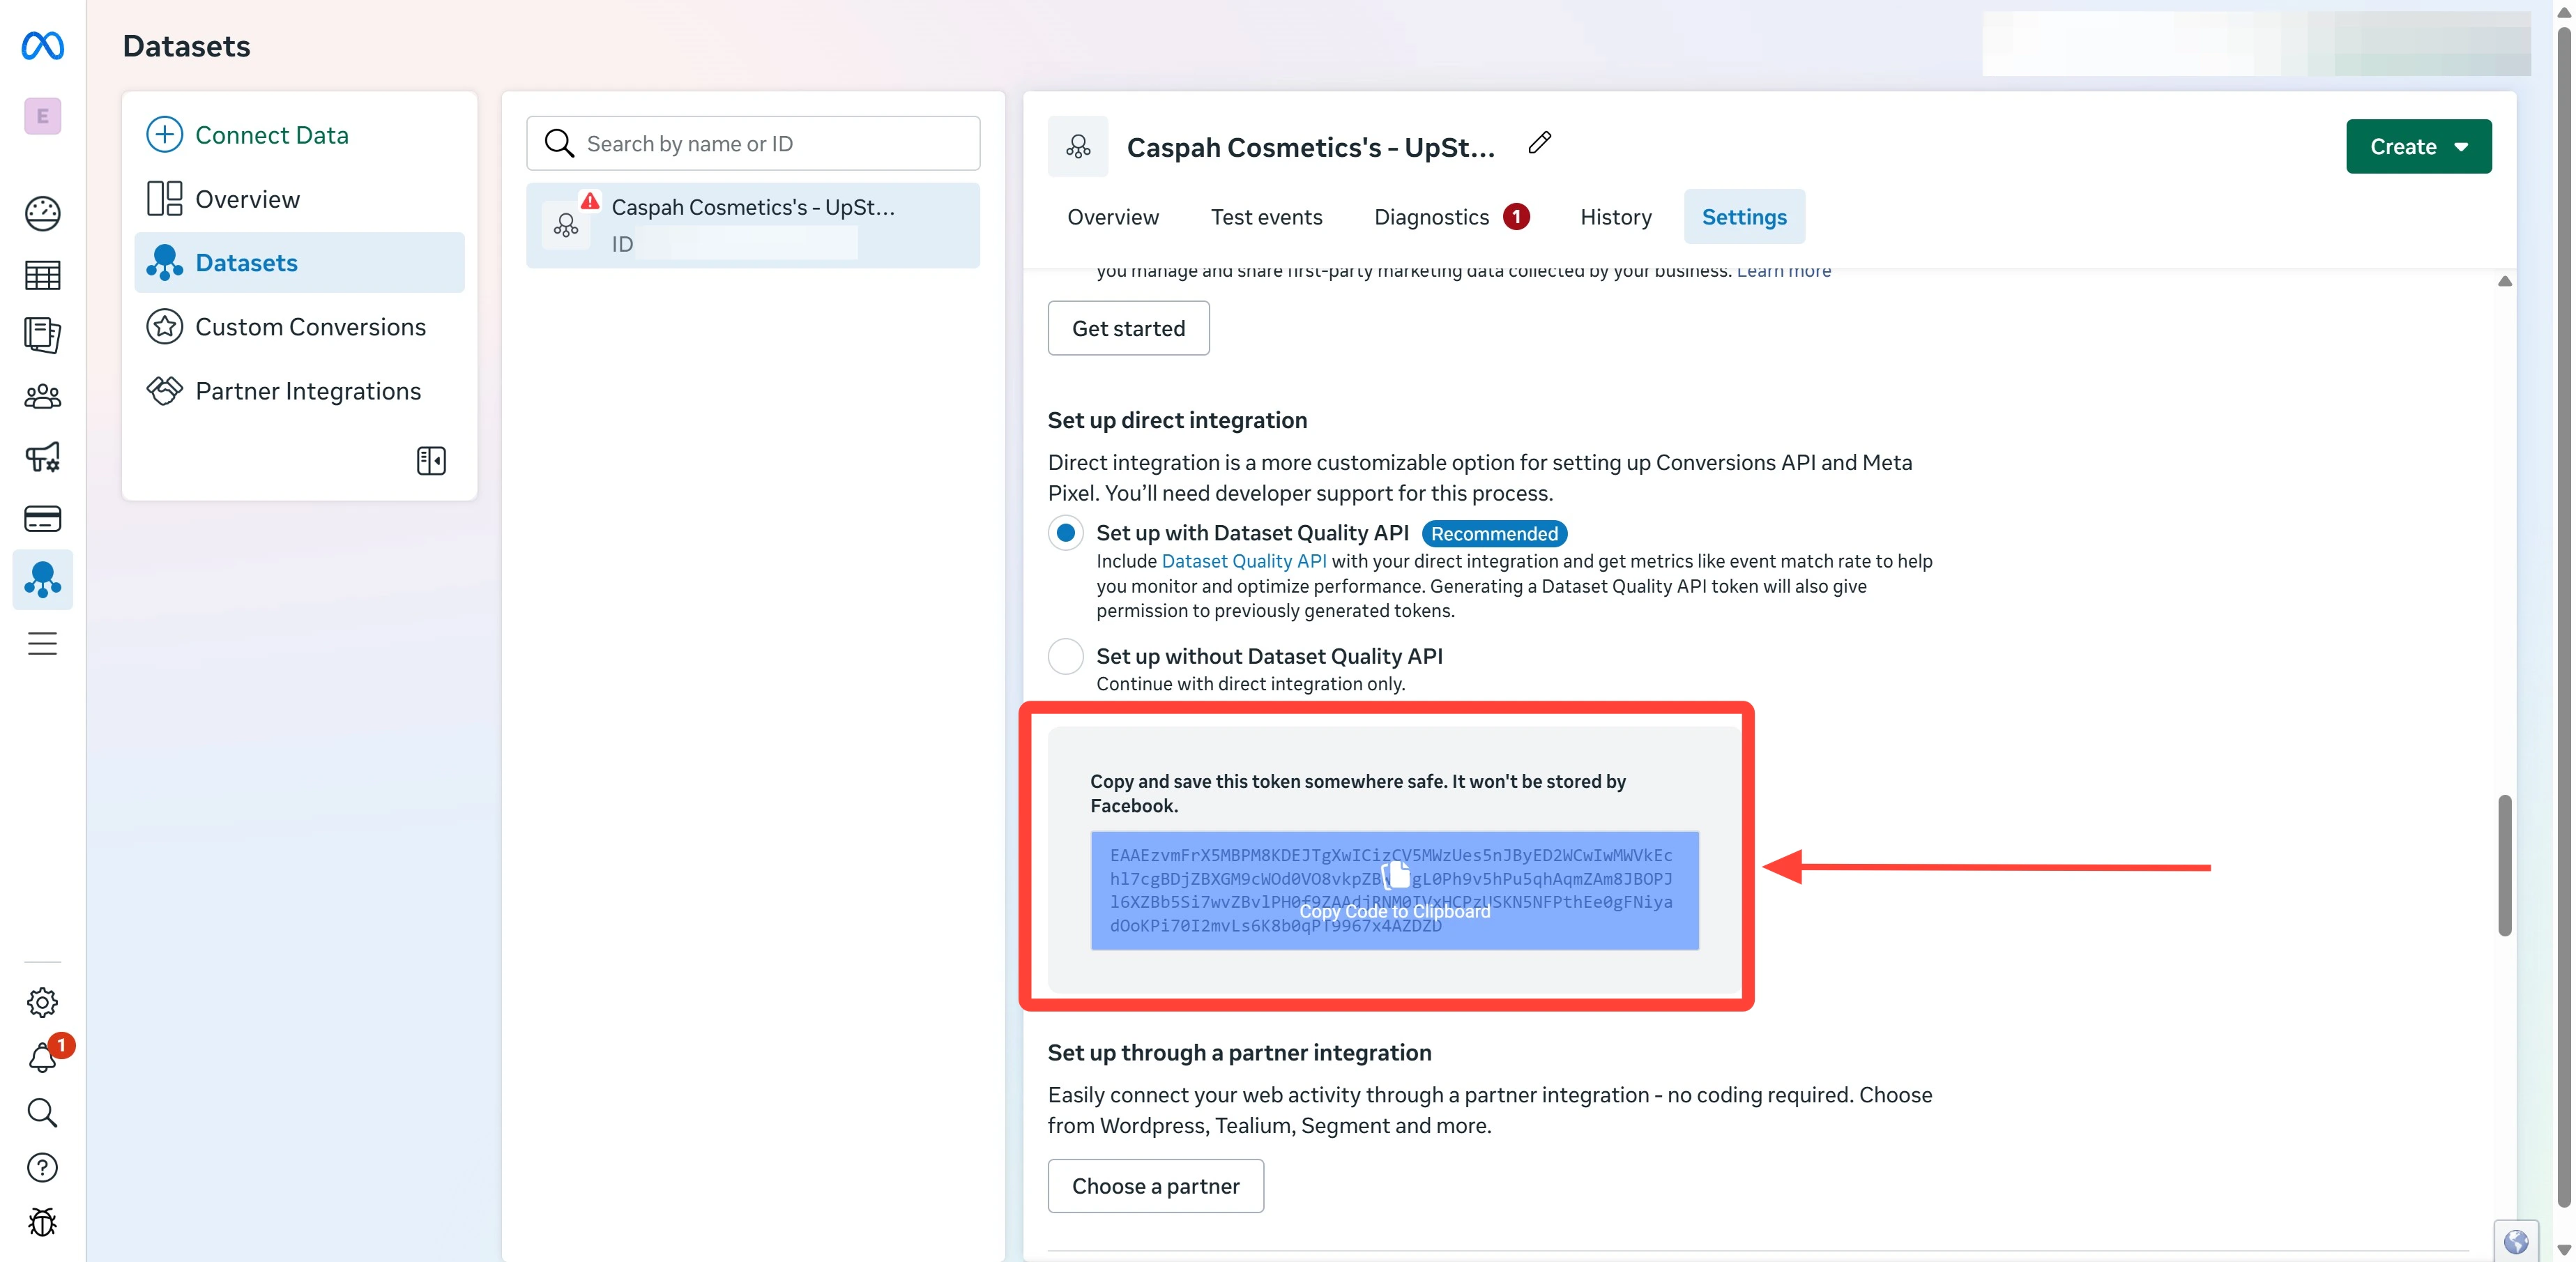 **Token format:** starts with `EAA`, approximately 190 characters long (e.g., `EAAxxxxxxxxxxxxxxxxxxxxxxxxxxxxxxxx...`).
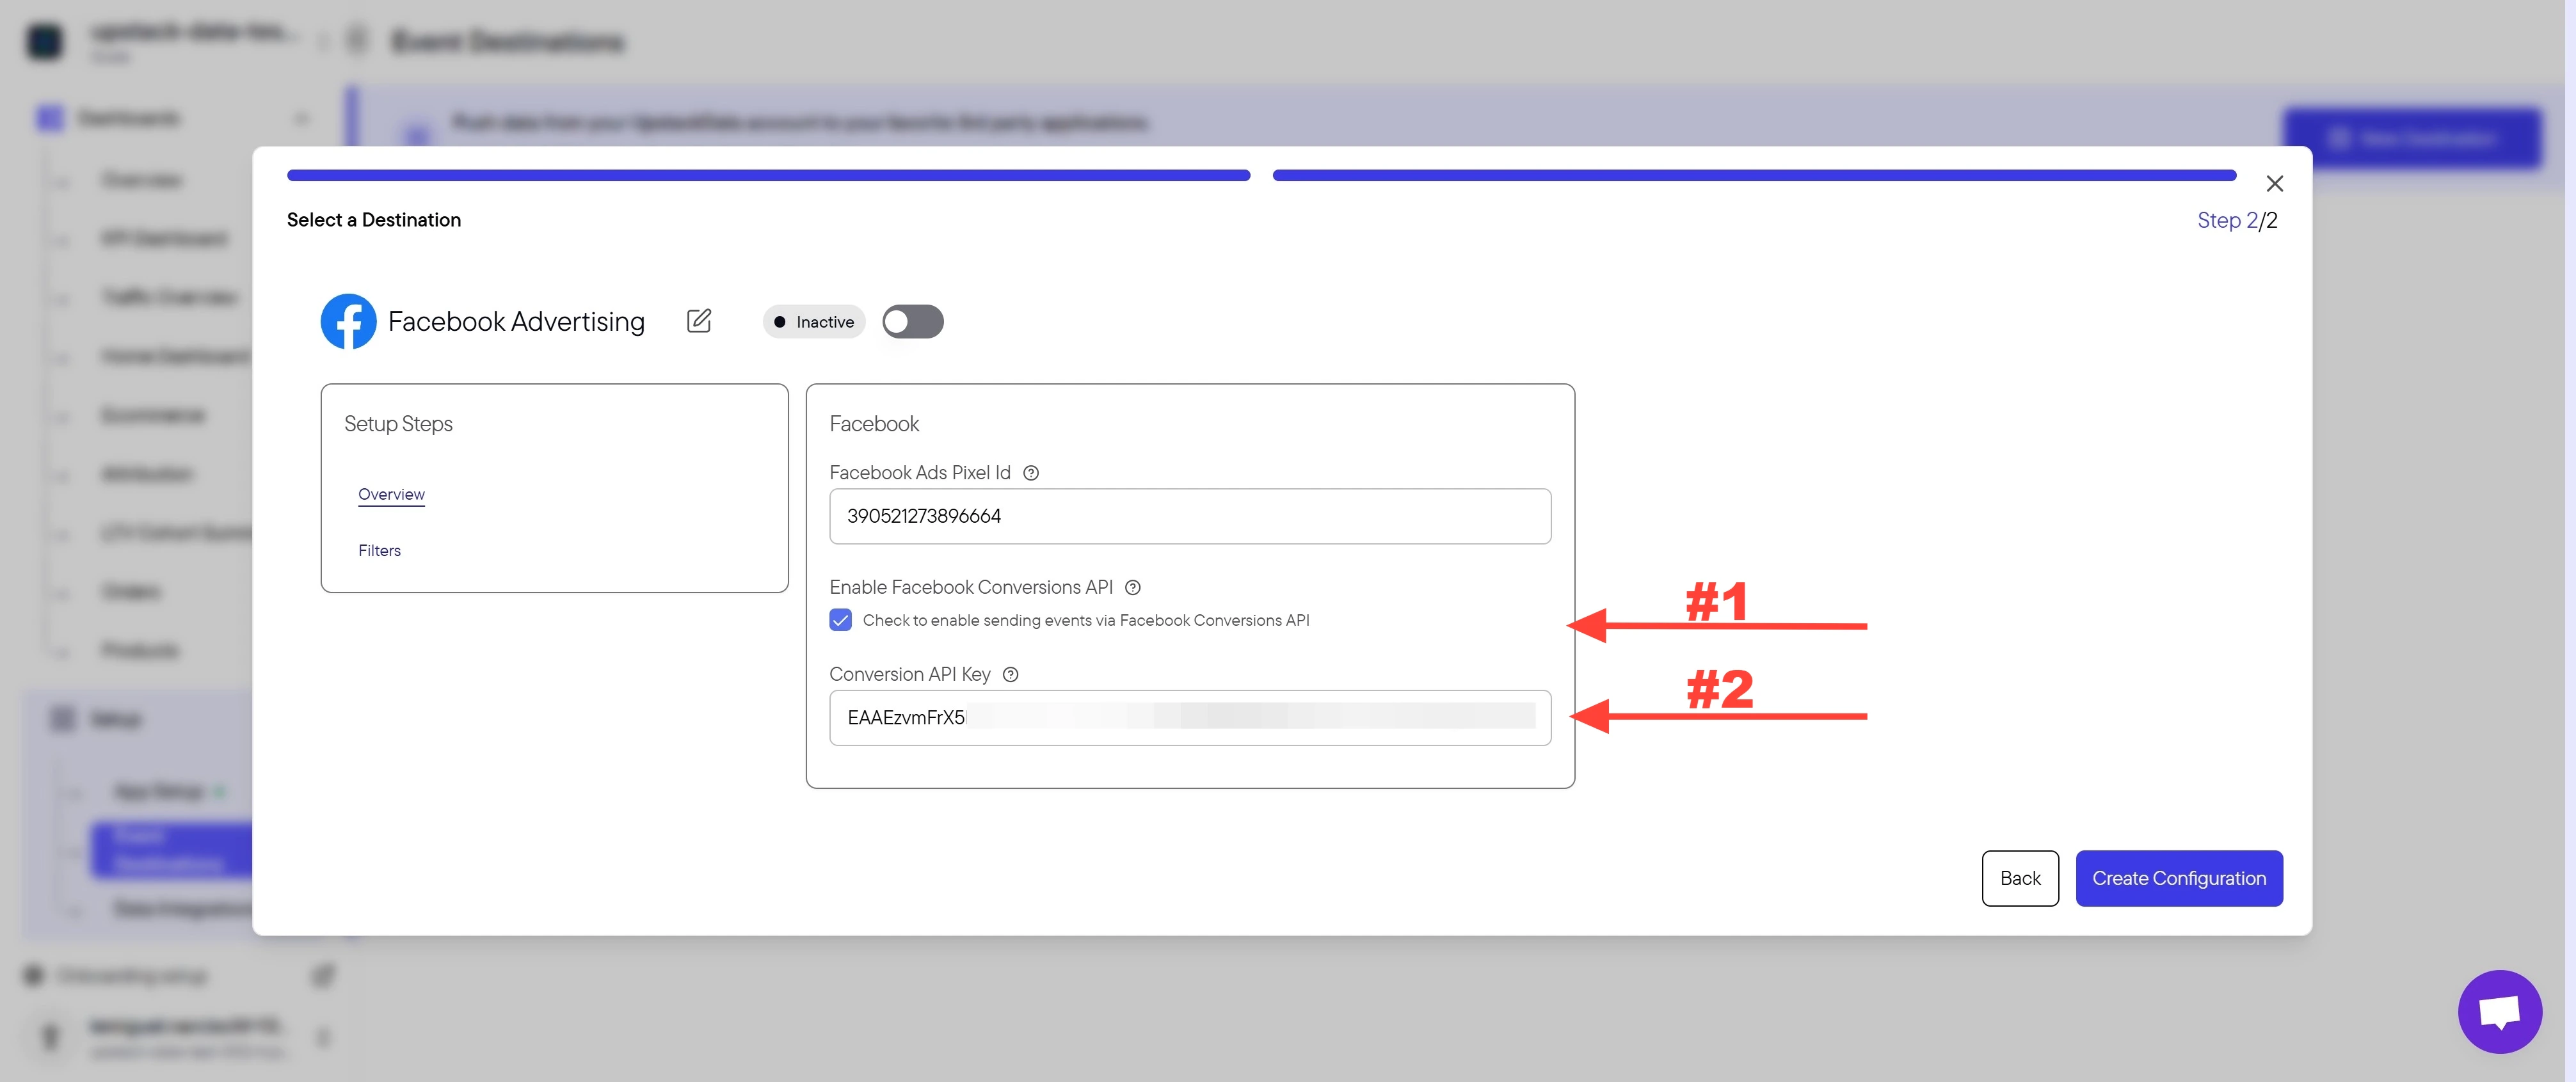
Sign in to Upstack Data at [app.upstackdata.com](https://app.upstackdata.com/pixel/event-destinations) and open your **Meta** destination under **Event Destinations**. Paste the token into the **Conversions API token** field.
Make sure the **Check to enable sending events via Facebook Conversions API** checkbox is selected.
**Token format:** starts with `EAA`, approximately 190 characters long (e.g., `EAAxxxxxxxxxxxxxxxxxxxxxxxxxxxxxxxx...`).
Sign in to Upstack Data at [app.upstackdata.com](https://app.upstackdata.com/pixel/event-destinations) and open your **Meta** destination under **Event Destinations**. Paste the token into the **Conversions API token** field.
Make sure the **Check to enable sending events via Facebook Conversions API** checkbox is selected.
 The CAPI token is sensitive — store it securely. The token is tied to a single Meta ad account and cannot be reused across accounts.
In the Upstack dashboard, the Meta destination card should show **Healthy** with a green status indicator within 5 minutes.
If the status shows **Unhealthy**:
* Confirm the token starts with `EAA` and was pasted in full (no truncation, no whitespace).
* Confirm the **Conversions API** checkbox is selected.
* Confirm the Pixel ID matches the pixel you generated the token for.
**Need help with the Pixel ID?** See [How to find your Meta Pixel ID](/guides/facebook-ads/how-do-i-find-my-facebook-ads-pixel-dataset-id).
## Related Articles
The CAPI token is sensitive — store it securely. The token is tied to a single Meta ad account and cannot be reused across accounts.
In the Upstack dashboard, the Meta destination card should show **Healthy** with a green status indicator within 5 minutes.
If the status shows **Unhealthy**:
* Confirm the token starts with `EAA` and was pasted in full (no truncation, no whitespace).
* Confirm the **Conversions API** checkbox is selected.
* Confirm the Pixel ID matches the pixel you generated the token for.
**Need help with the Pixel ID?** See [How to find your Meta Pixel ID](/guides/facebook-ads/how-do-i-find-my-facebook-ads-pixel-dataset-id).
## Related Articles