How do I add the Upstack Data custom pixel in Shopify?
1
Copy the pixel code from Upstack
- Sign in to the Upstack dashboard.
- In the sidebar, click Onboarding.
- Next to Install tracking pixel, click Set up.
- If the drawer opens on Storefront tracking, click I’ve turned it on to move to Checkout tracking.
- Click Copy code.
2
Open Customer events in Shopify Admin
In your Shopify Admin, click Settings → Customer events. You can also click Open Customer events in the Upstack drawer.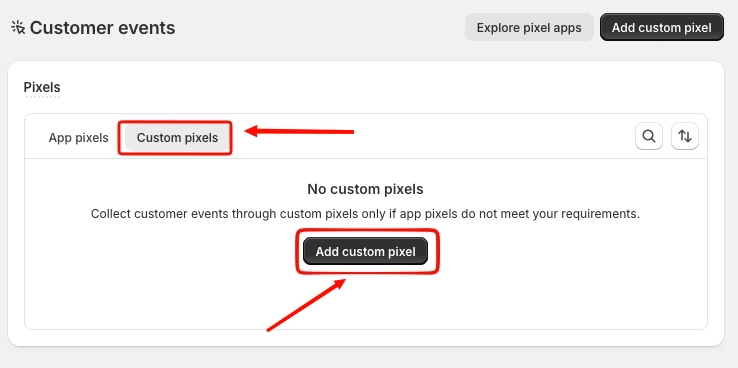
3
Add the custom pixel
- Click Add custom pixel.
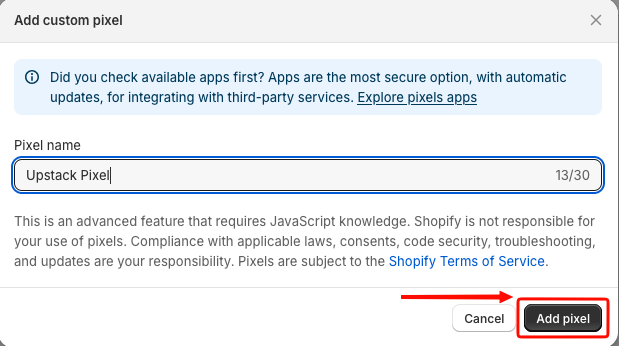
- Set the pixel name to Upstack Data Pixel.
- Click Add pixel.
4
Set the privacy settings
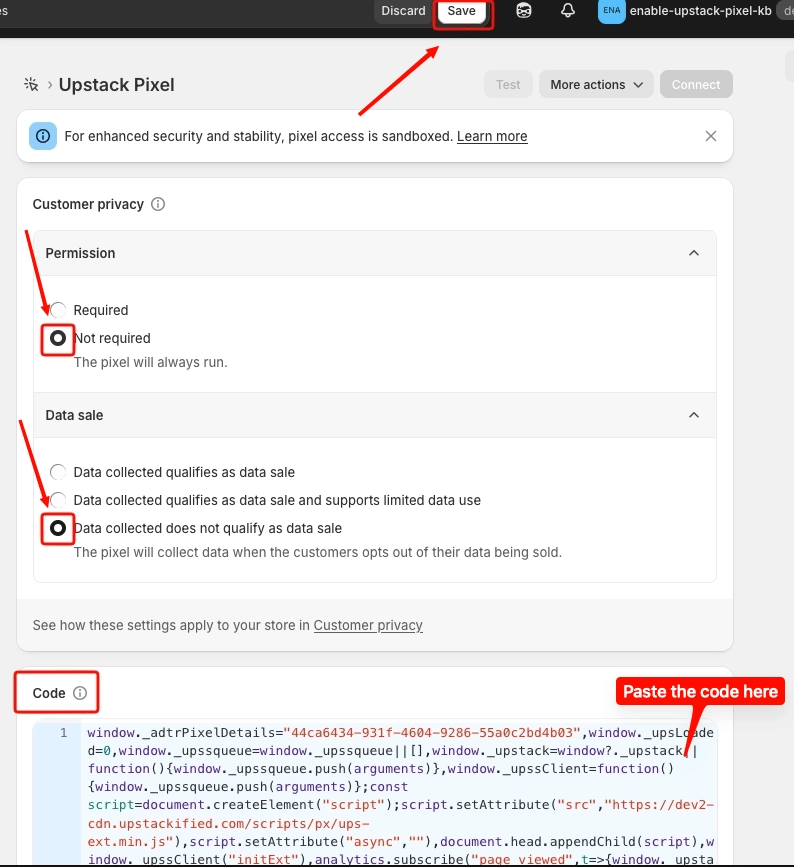
Set Permission and Data sale on the pixel page. One common setup: How to Set Up Upstack Custom Pixel Privacy Settings.
5
Paste the code and save
- Paste the pixel code into the code box.
- Click Save.
-
Click Connect.
6
Confirm the connection
In the popup, click Connect.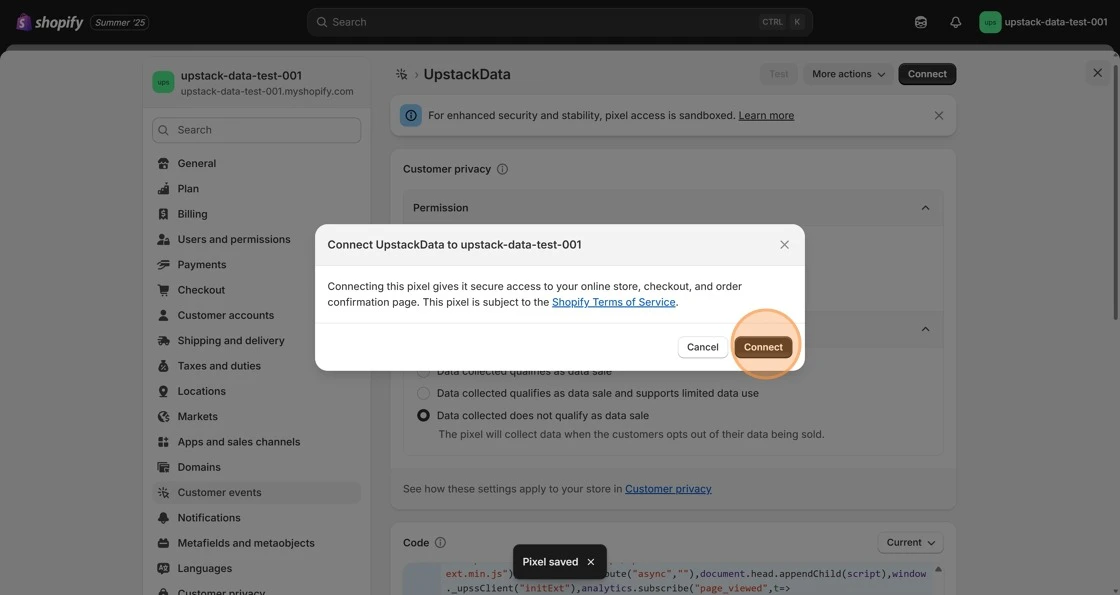
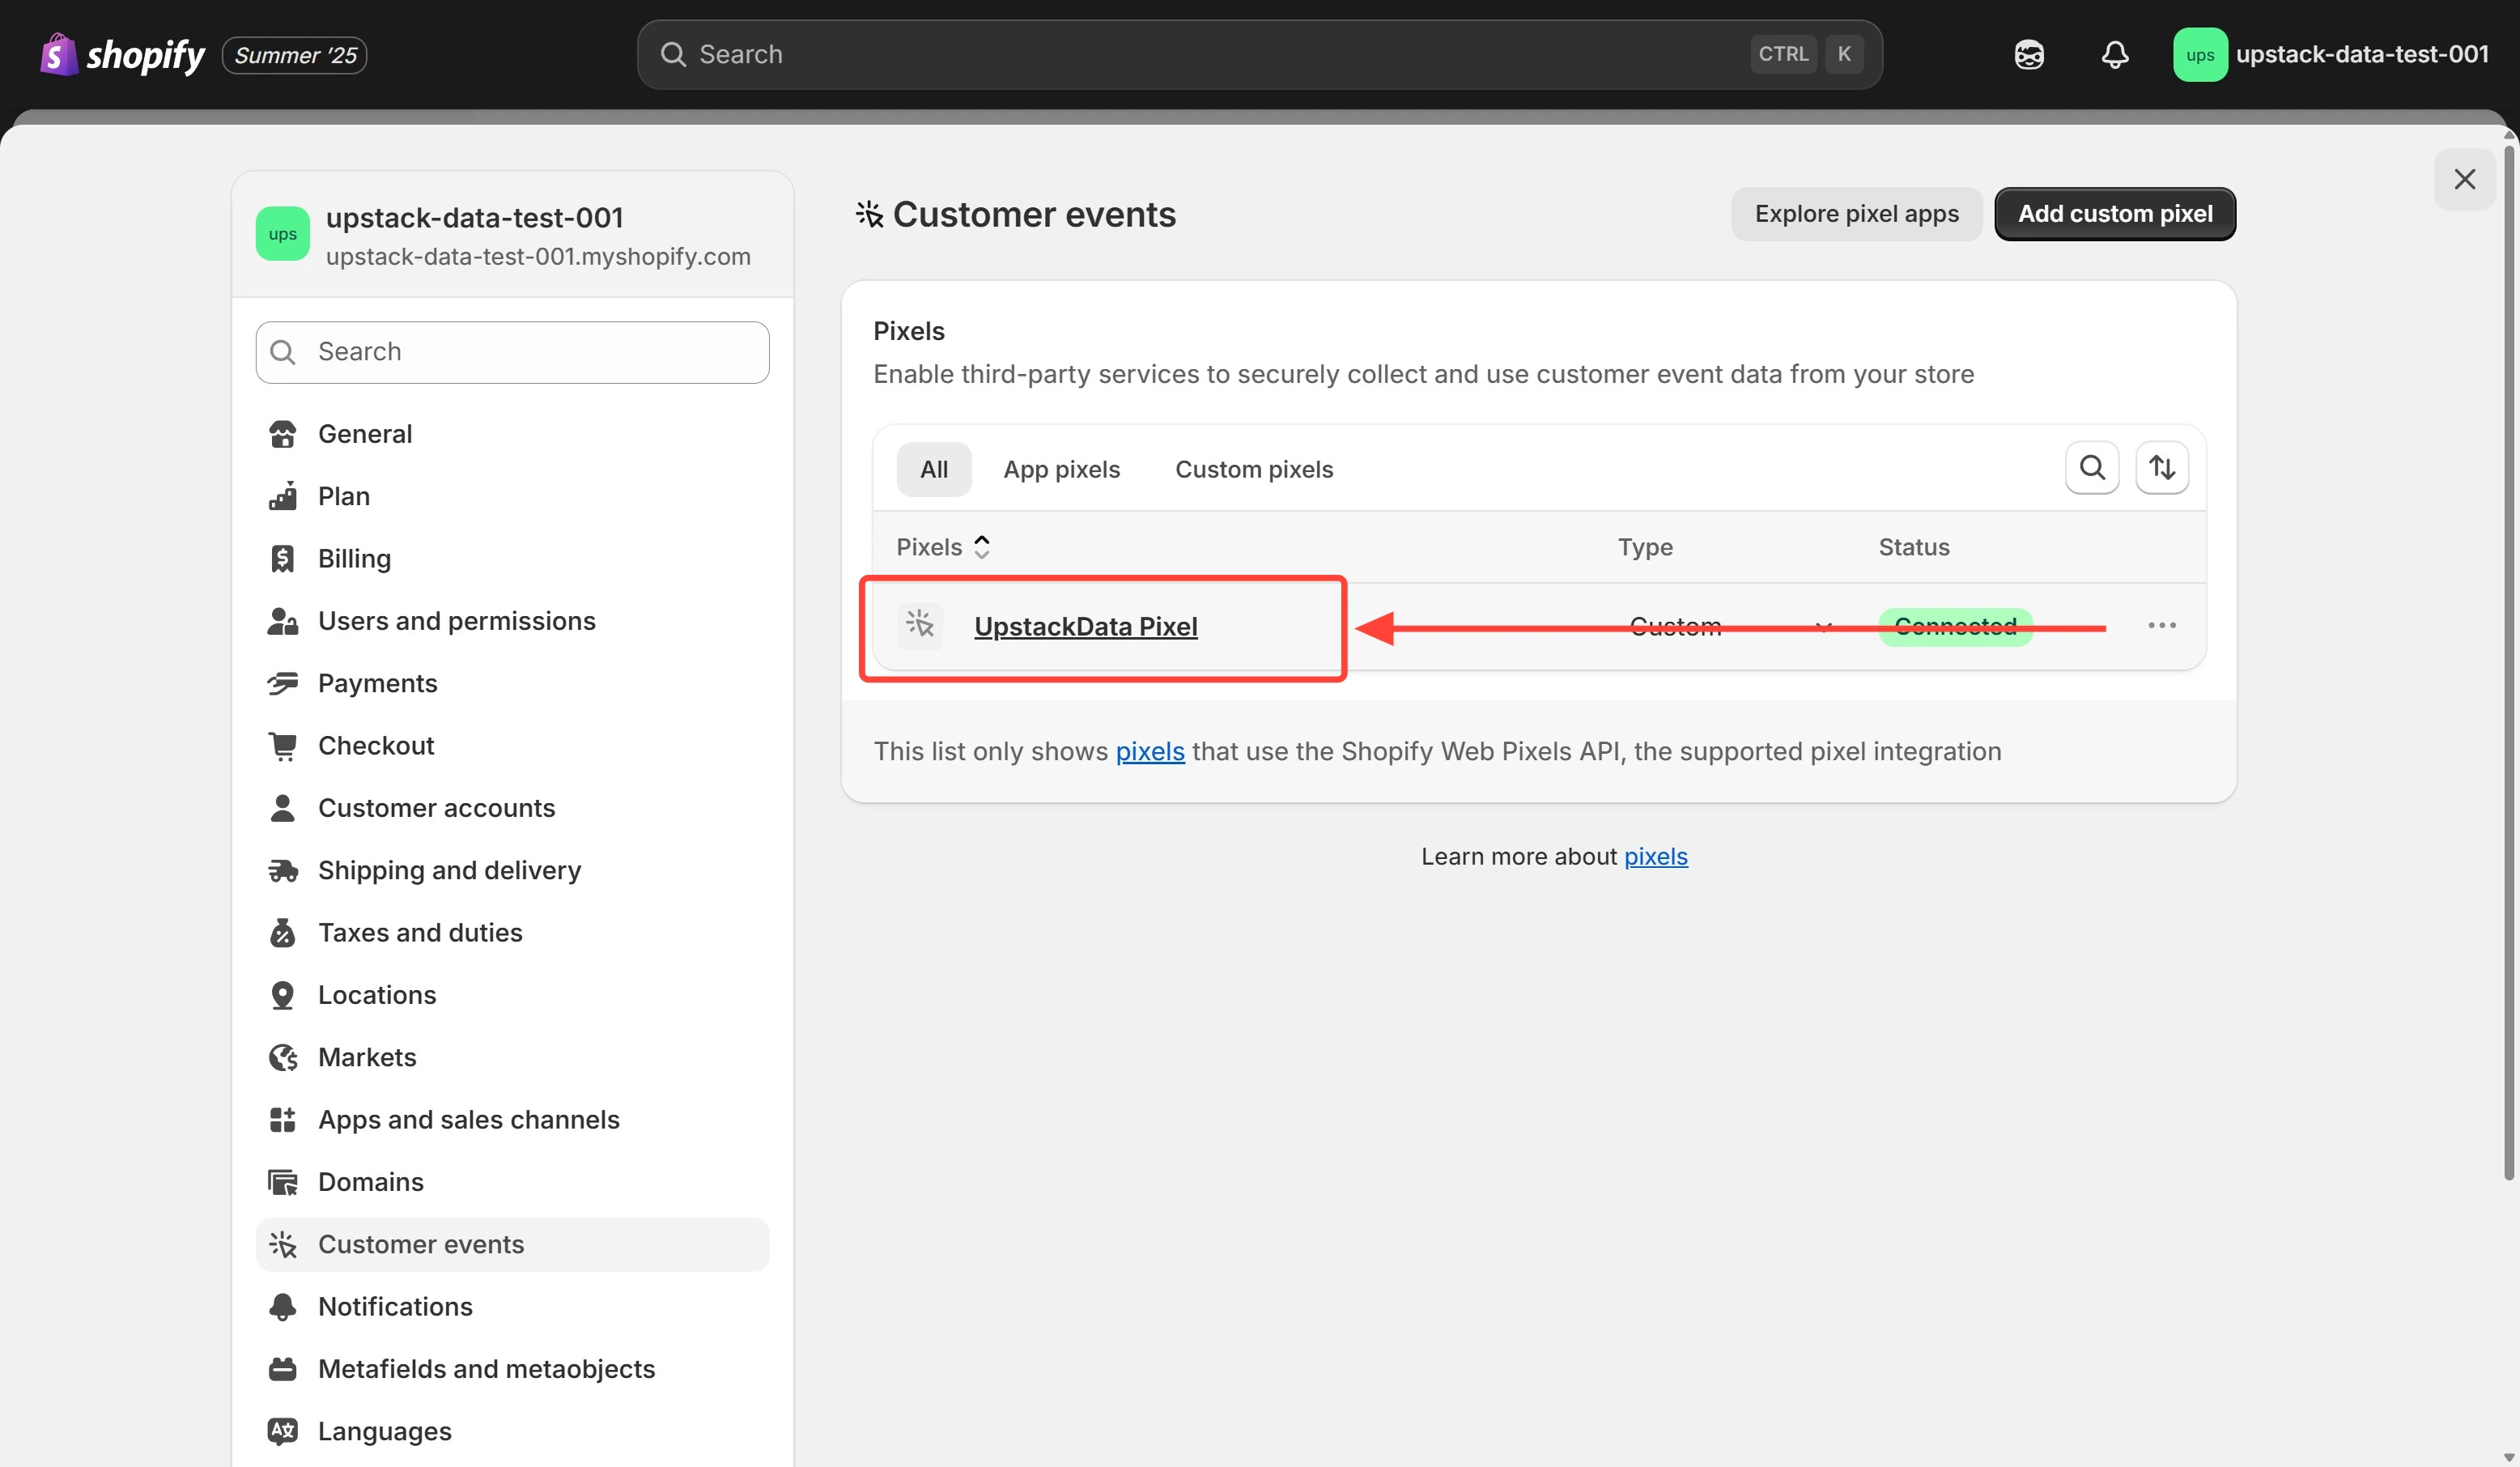
How do I check the custom pixel is connected?
- In Shopify Admin, click Settings → Customer events.
- Check that Upstack Data Pixel shows Connected. Older installs show UpstackData.
- In the Upstack drawer, click I’ve connected the pixel.