Prerequisites
- An Upstack Data account with the email and password you used during sign-up.
- The Upstack Data app installed on your Shopify store (your Pixel ID is generated when the app is installed).
Steps to Locate Your Pixel ID
Step 1: Sign in to your Upstack Data account
- Go to https://app.upstackdata.com/login.
- Enter your email and password.
- Click Sign In.
Step 2: Open the Event Health page
- Once signed in, click Settings in the bottom-left of the Upstack dashboard.
- In the Settings menu, open Event Health.
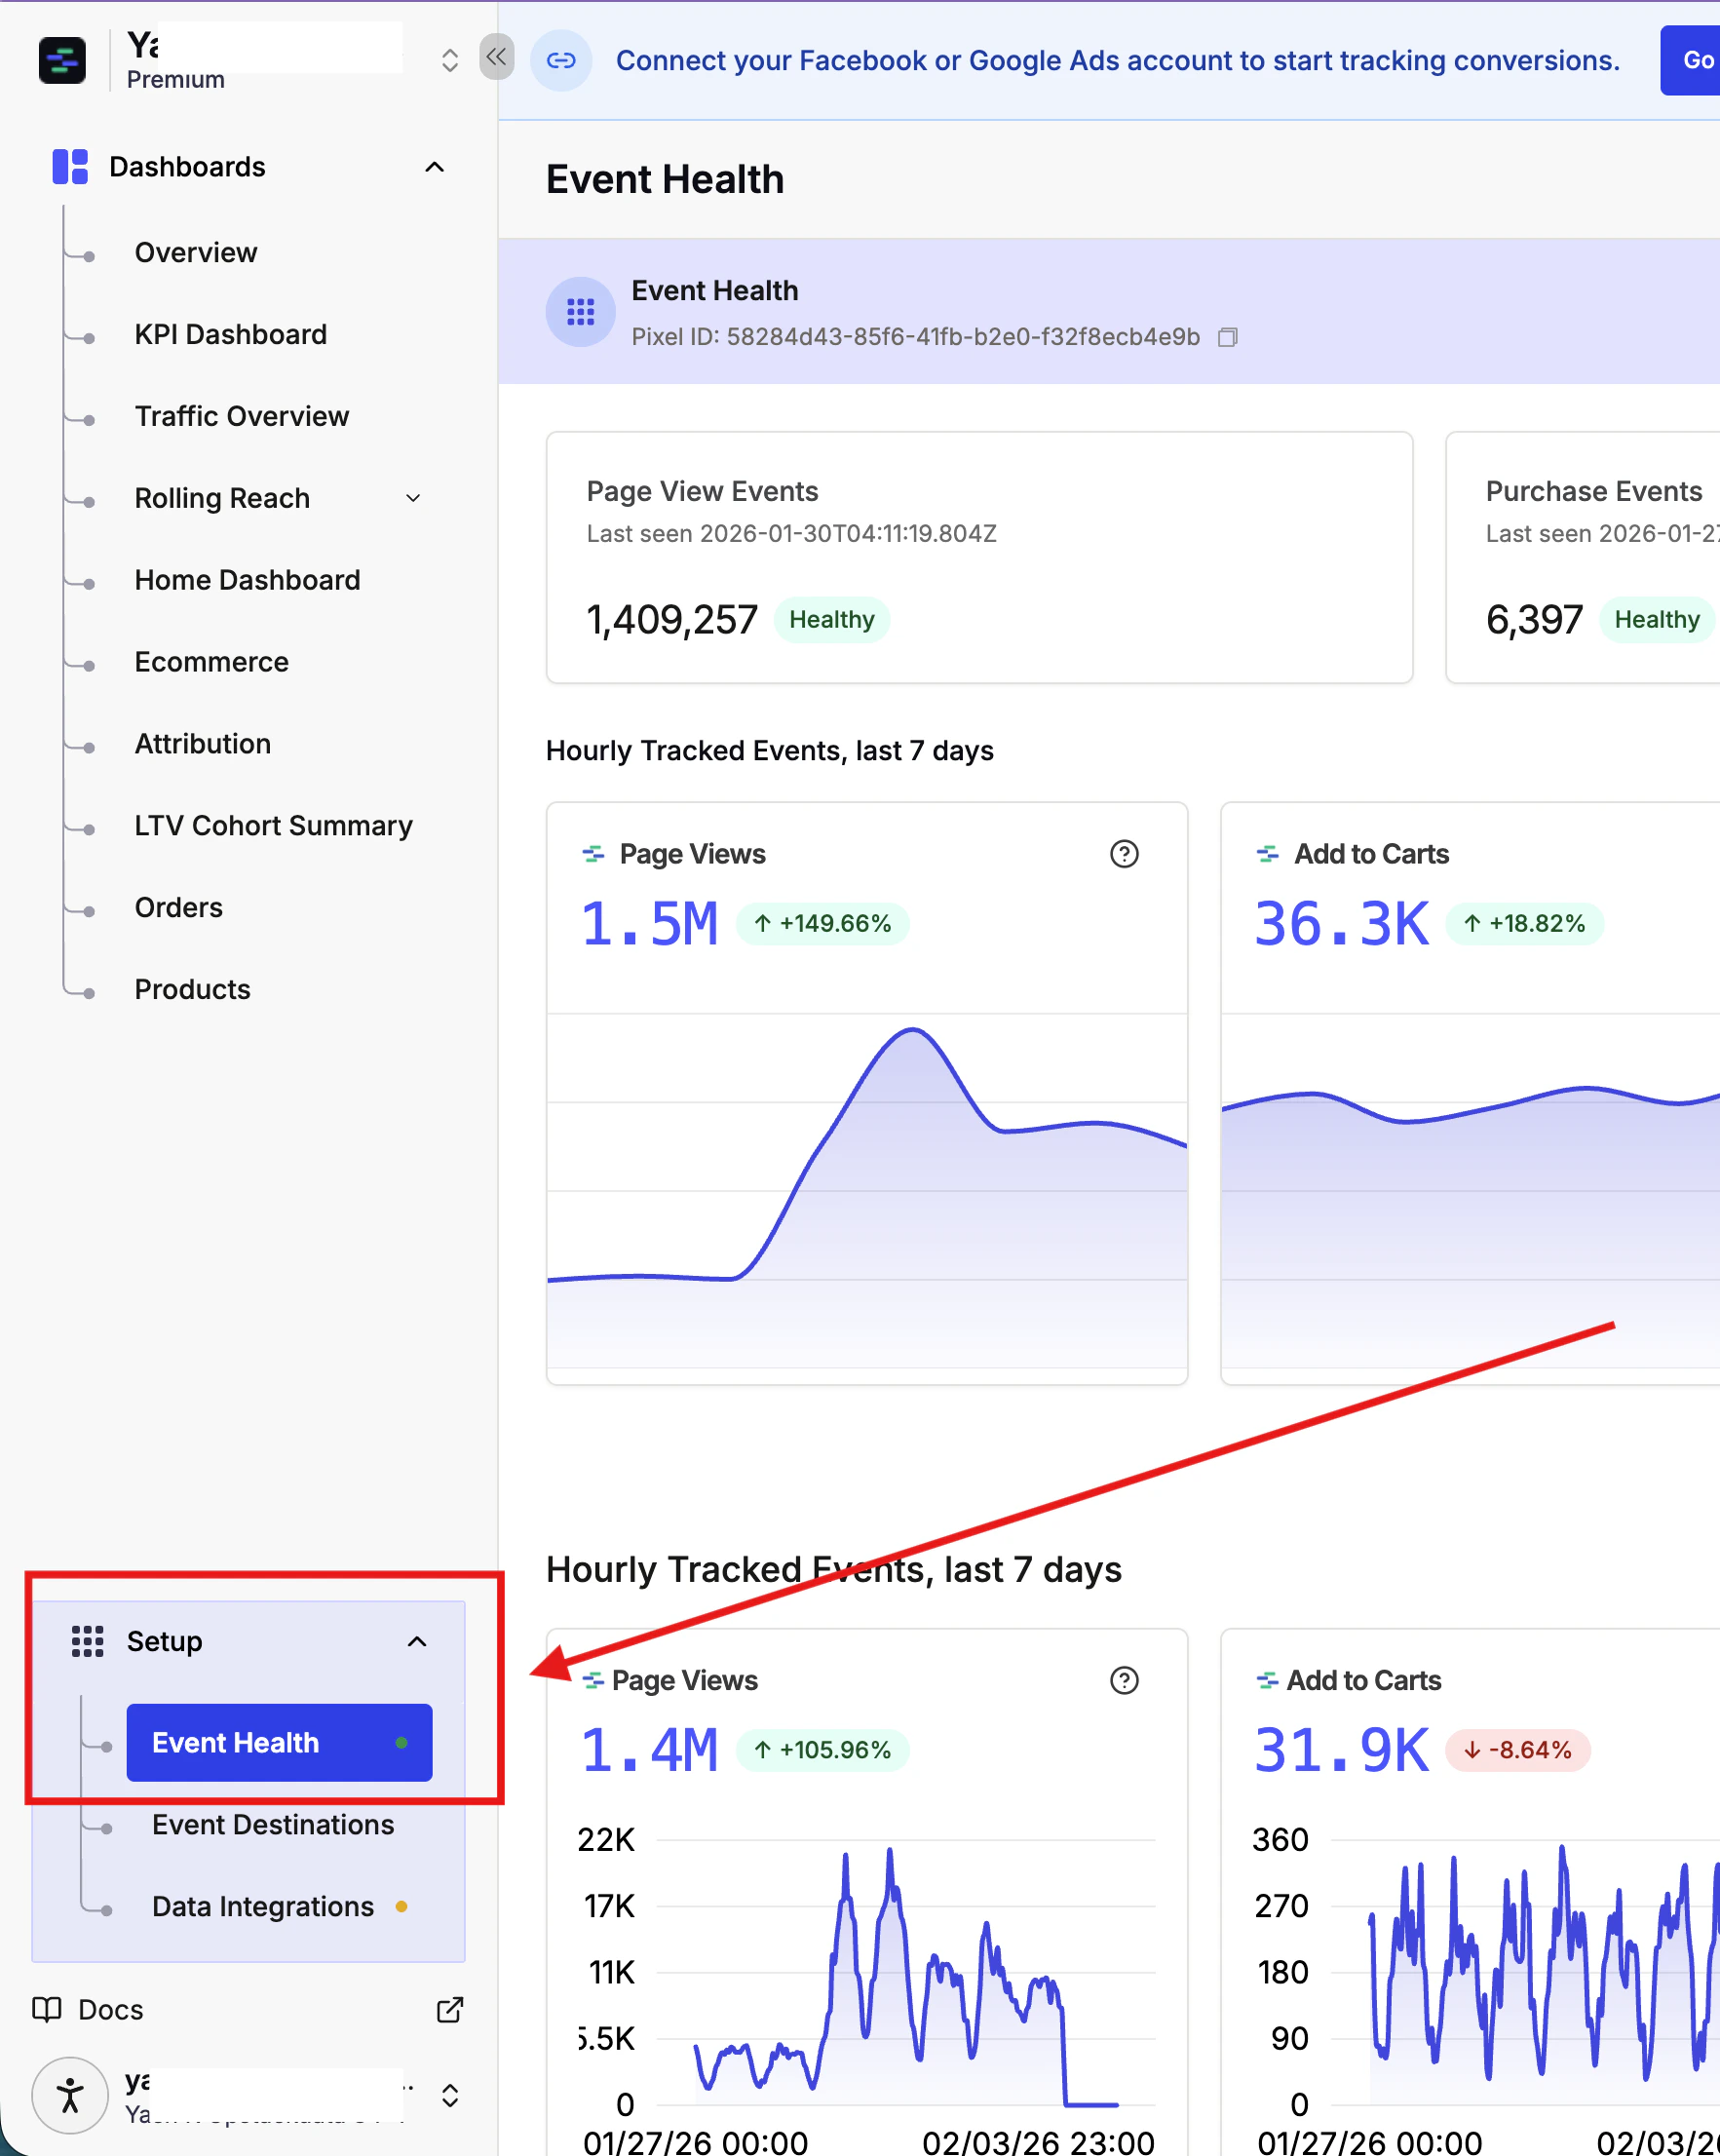
Step 3: Locate your Pixel ID
- Your Pixel ID is displayed at the top of the Event Health page, clearly labelled Pixel ID.

XXXXXXXX-XXXX-XXXX-XXXX-XXXXXXXXXXXX
For example: 58284d43-85f6-41fb-b2e0-f32f8ecb4e9b
Note: Your Pixel ID will be different from this example as it is unique to your Shopify store.
Step 4: Copy and save your Pixel ID
- Copy your Pixel ID for use in your setup, and store it in a secure location for future reference.
- Paste it exactly as shown — Pixel IDs are case-sensitive and any extra whitespace will break tracking.
Step 5: Verify the Pixel ID works
- Paste the Pixel ID into the destination you’re configuring (landing page, GTM, Checkout Champ, etc.).
- Visit the page in a browser and use the Upstack Data Pixel Helper to confirm the pixel fires with this Pixel ID.
- In the Upstack dashboard under Event Health, confirm the new events arrive against your Pixel ID.
Can’t see your Pixel ID?
- Make sure you’re on the Event Health page in the Upstack dashboard.
- Confirm the Upstack Data app is still installed in your Shopify Admin under Settings → Apps and sales channels.
- Contact Upstack support at support@upstackdata.com.