Prerequisites
- The Upstack Data app installed on your Shopify store
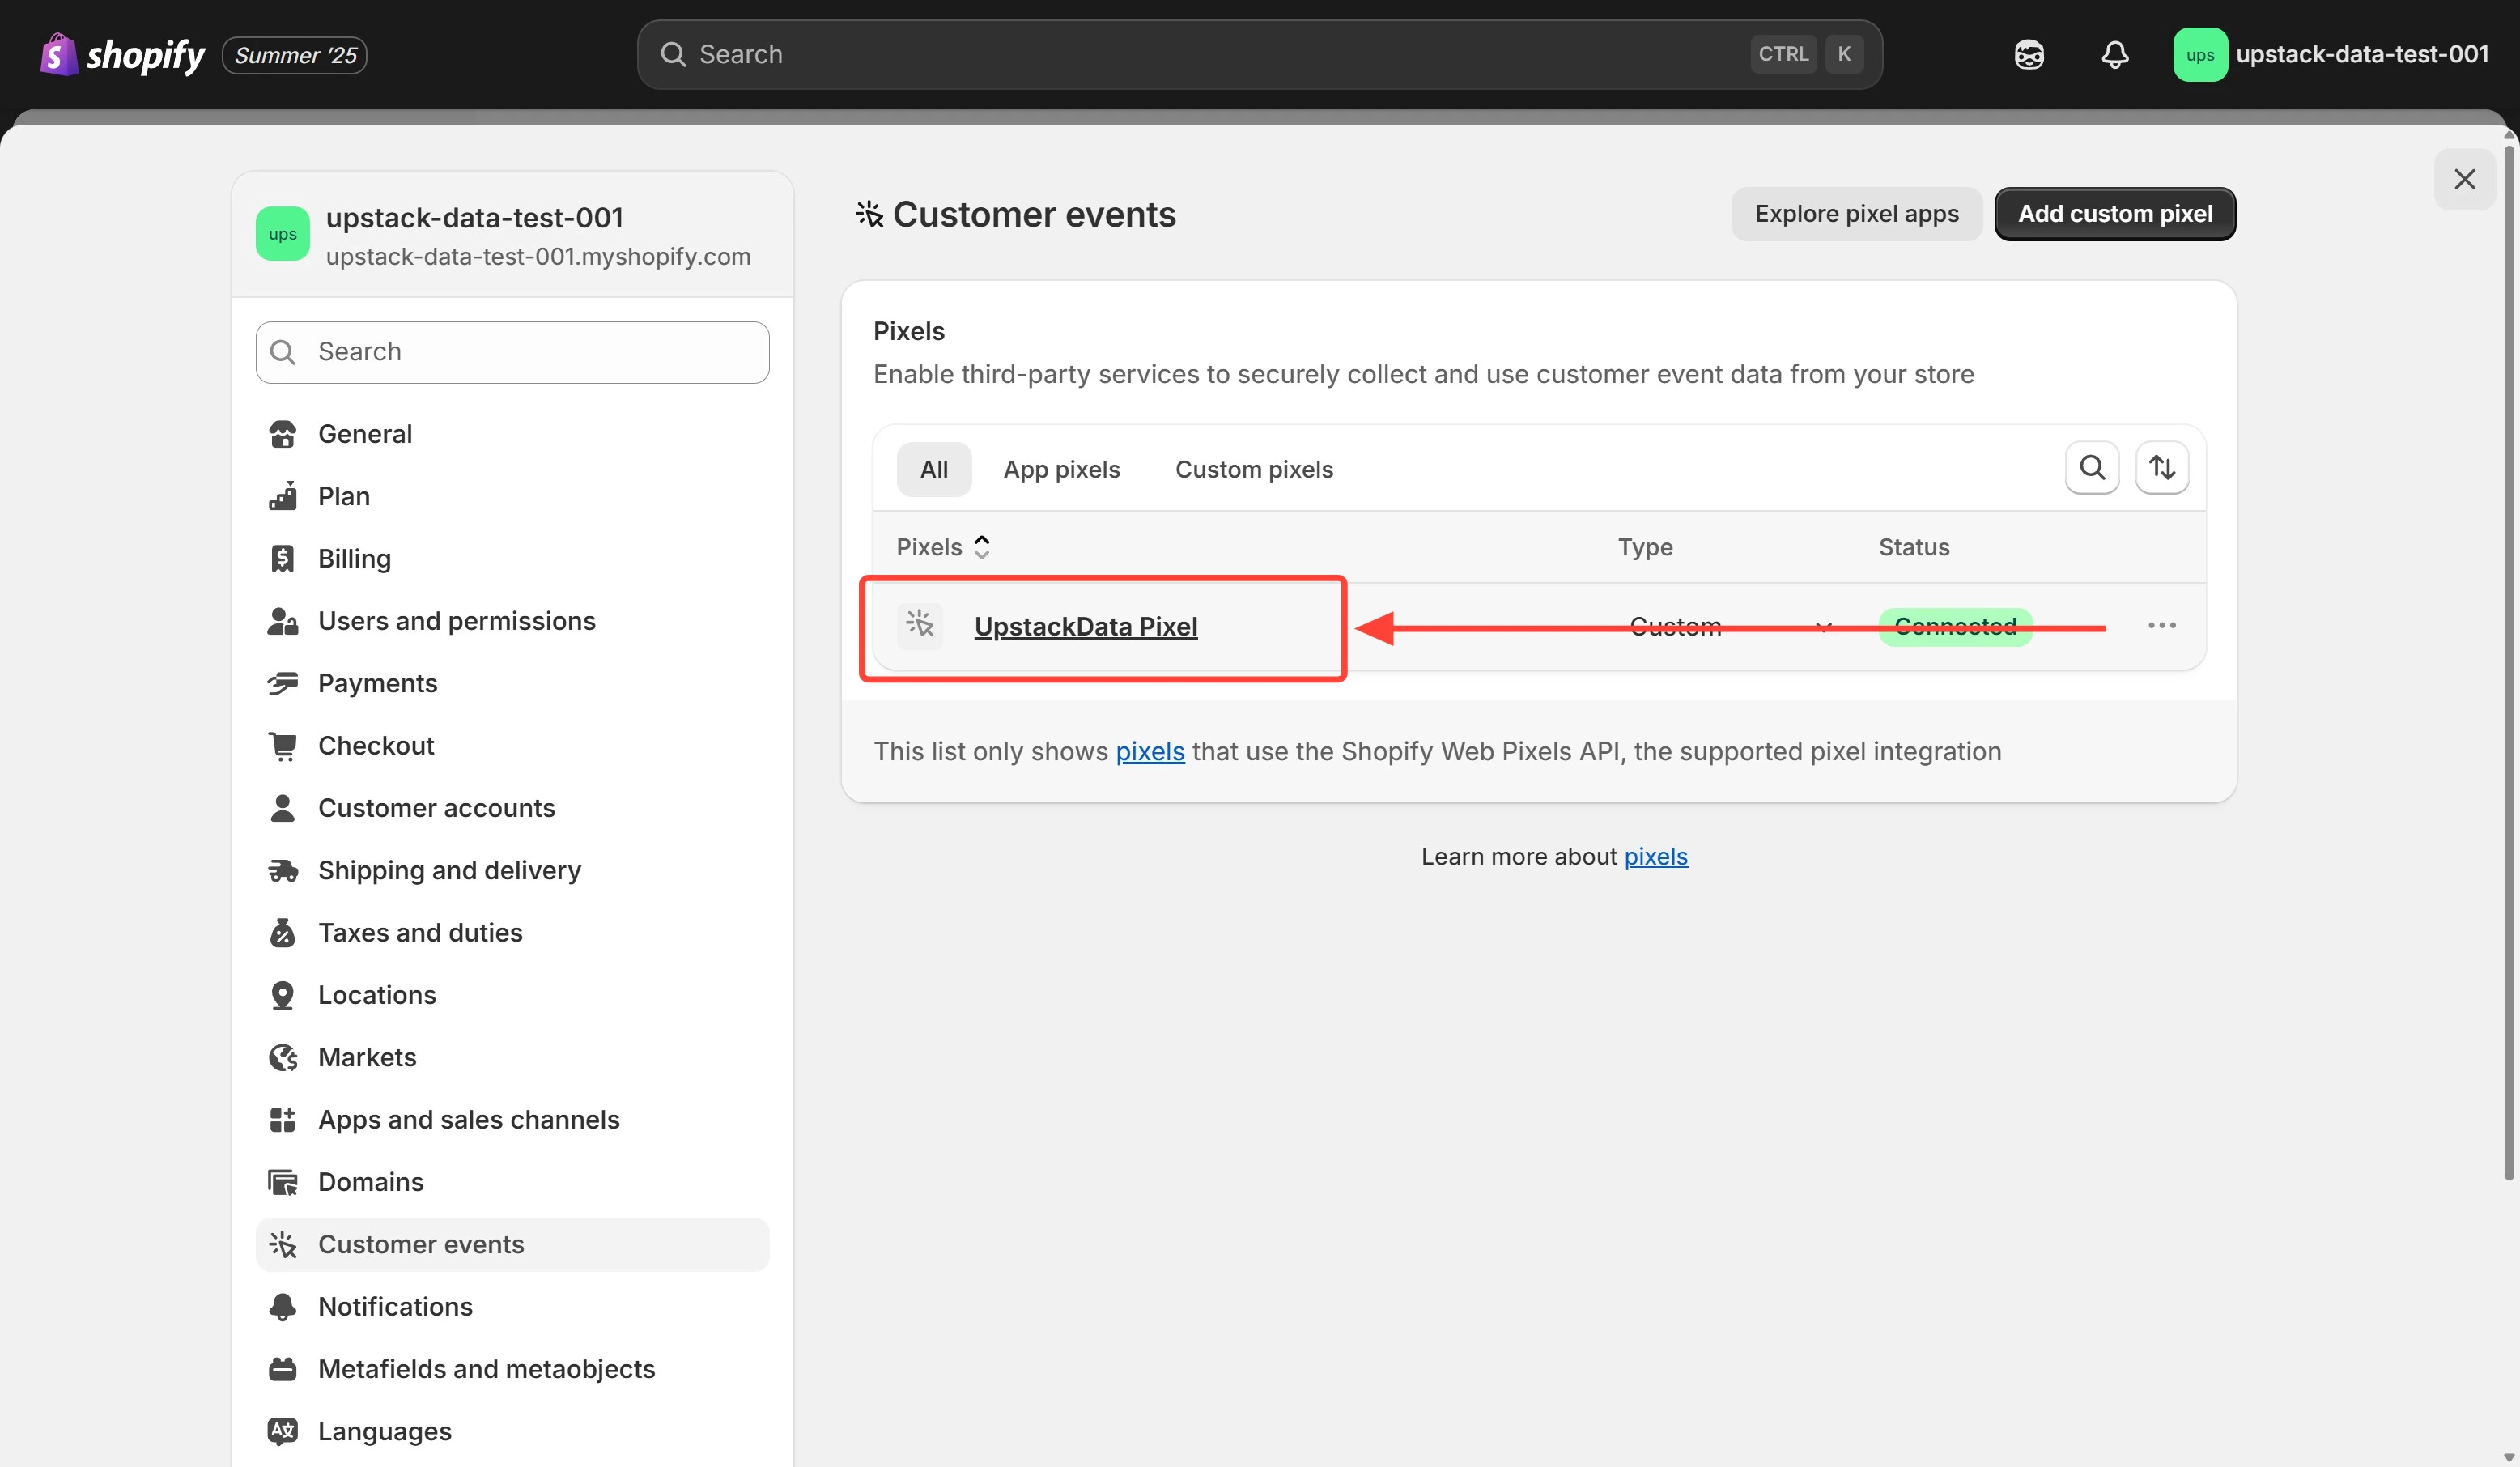
- The UpstackData Custom Pixel already added under Shopify Admin → Settings → Customer events (see Complete How-To Guide for Setting Up the Upstack Data App in Shopify)
- Shopify Admin access with permission to manage Customer Events
Key points to remember
When configuring the Upstack Data Custom Pixel in Shopify, several options control consent mode. These settings can have a material impact on your tracking, data quality, and attribution. If you are running cookie consent banners, ensure they are properly configured to get the most accurate data. If Permission: Required is set, the Custom Pixel will not load or track user behavior until the consent banner is accepted.Privacy regulations vary by jurisdiction. This does not constitute legal advice. We recommend you consult your legal representative to determine which settings are appropriate for your business.
Configuration steps
Sign in to Shopify Admin
Sign in to your Shopify Admin.
Open Customer events
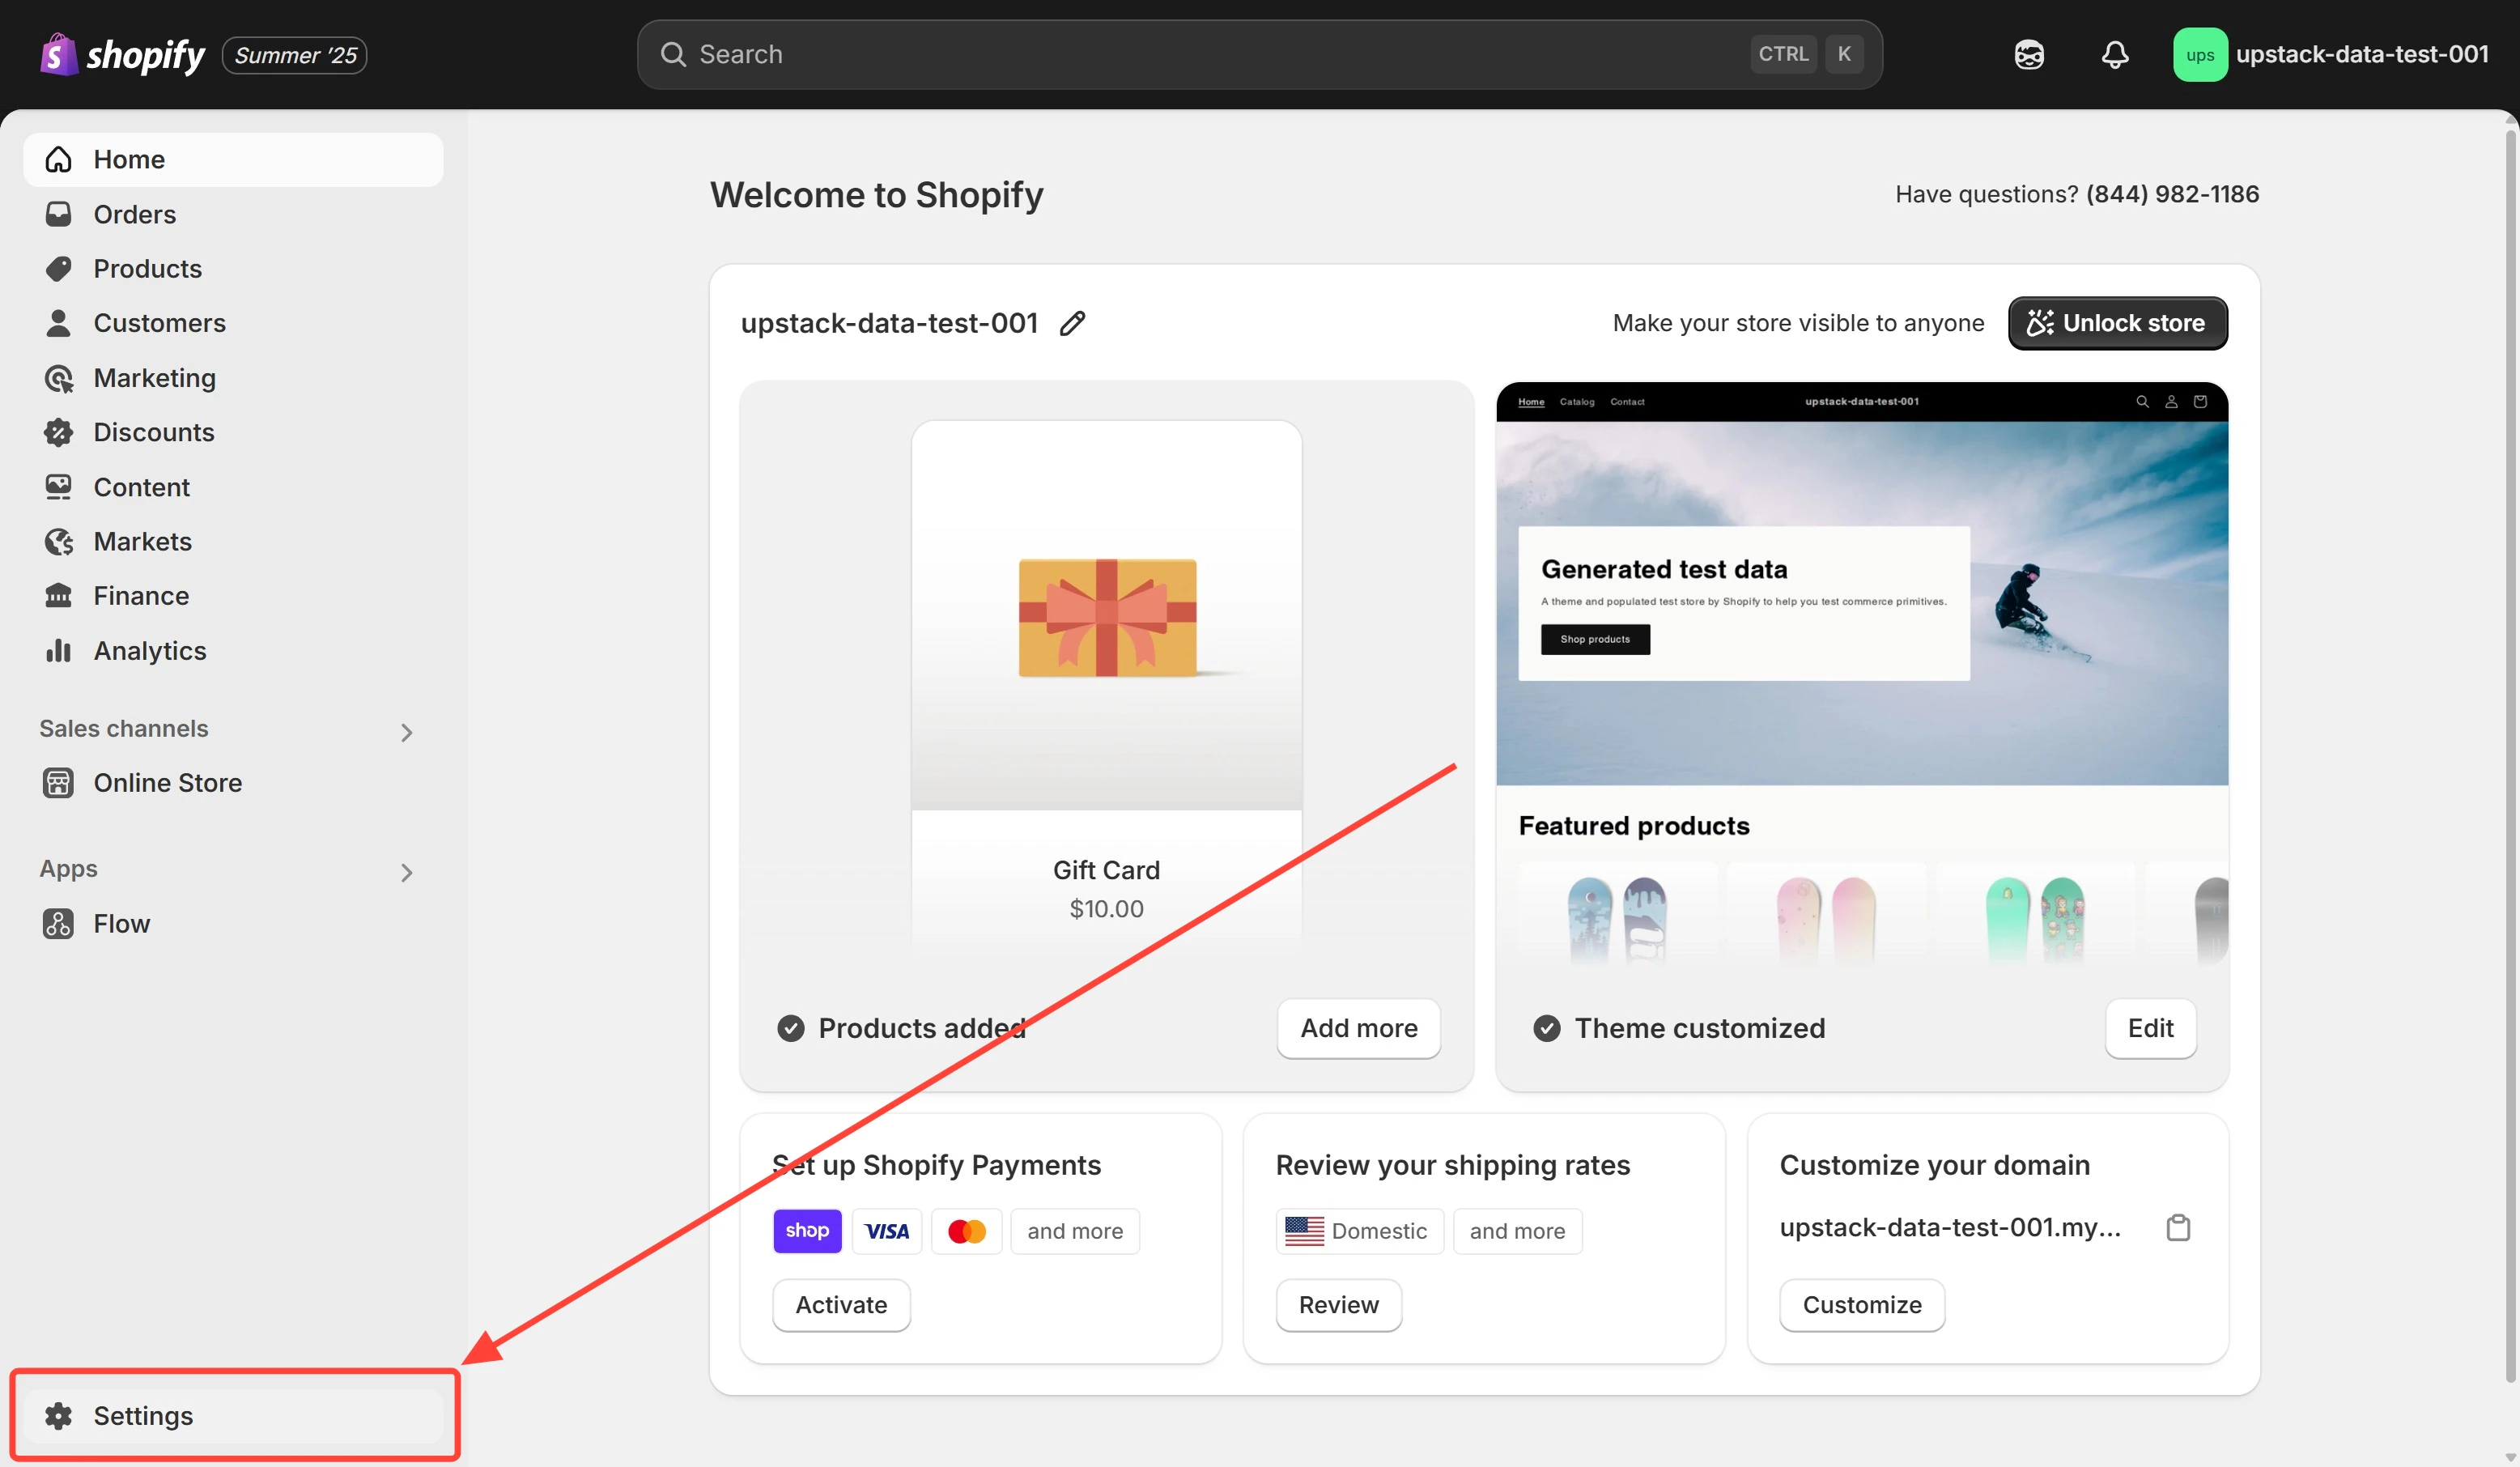
- In the bottom-left of the page, click Settings.
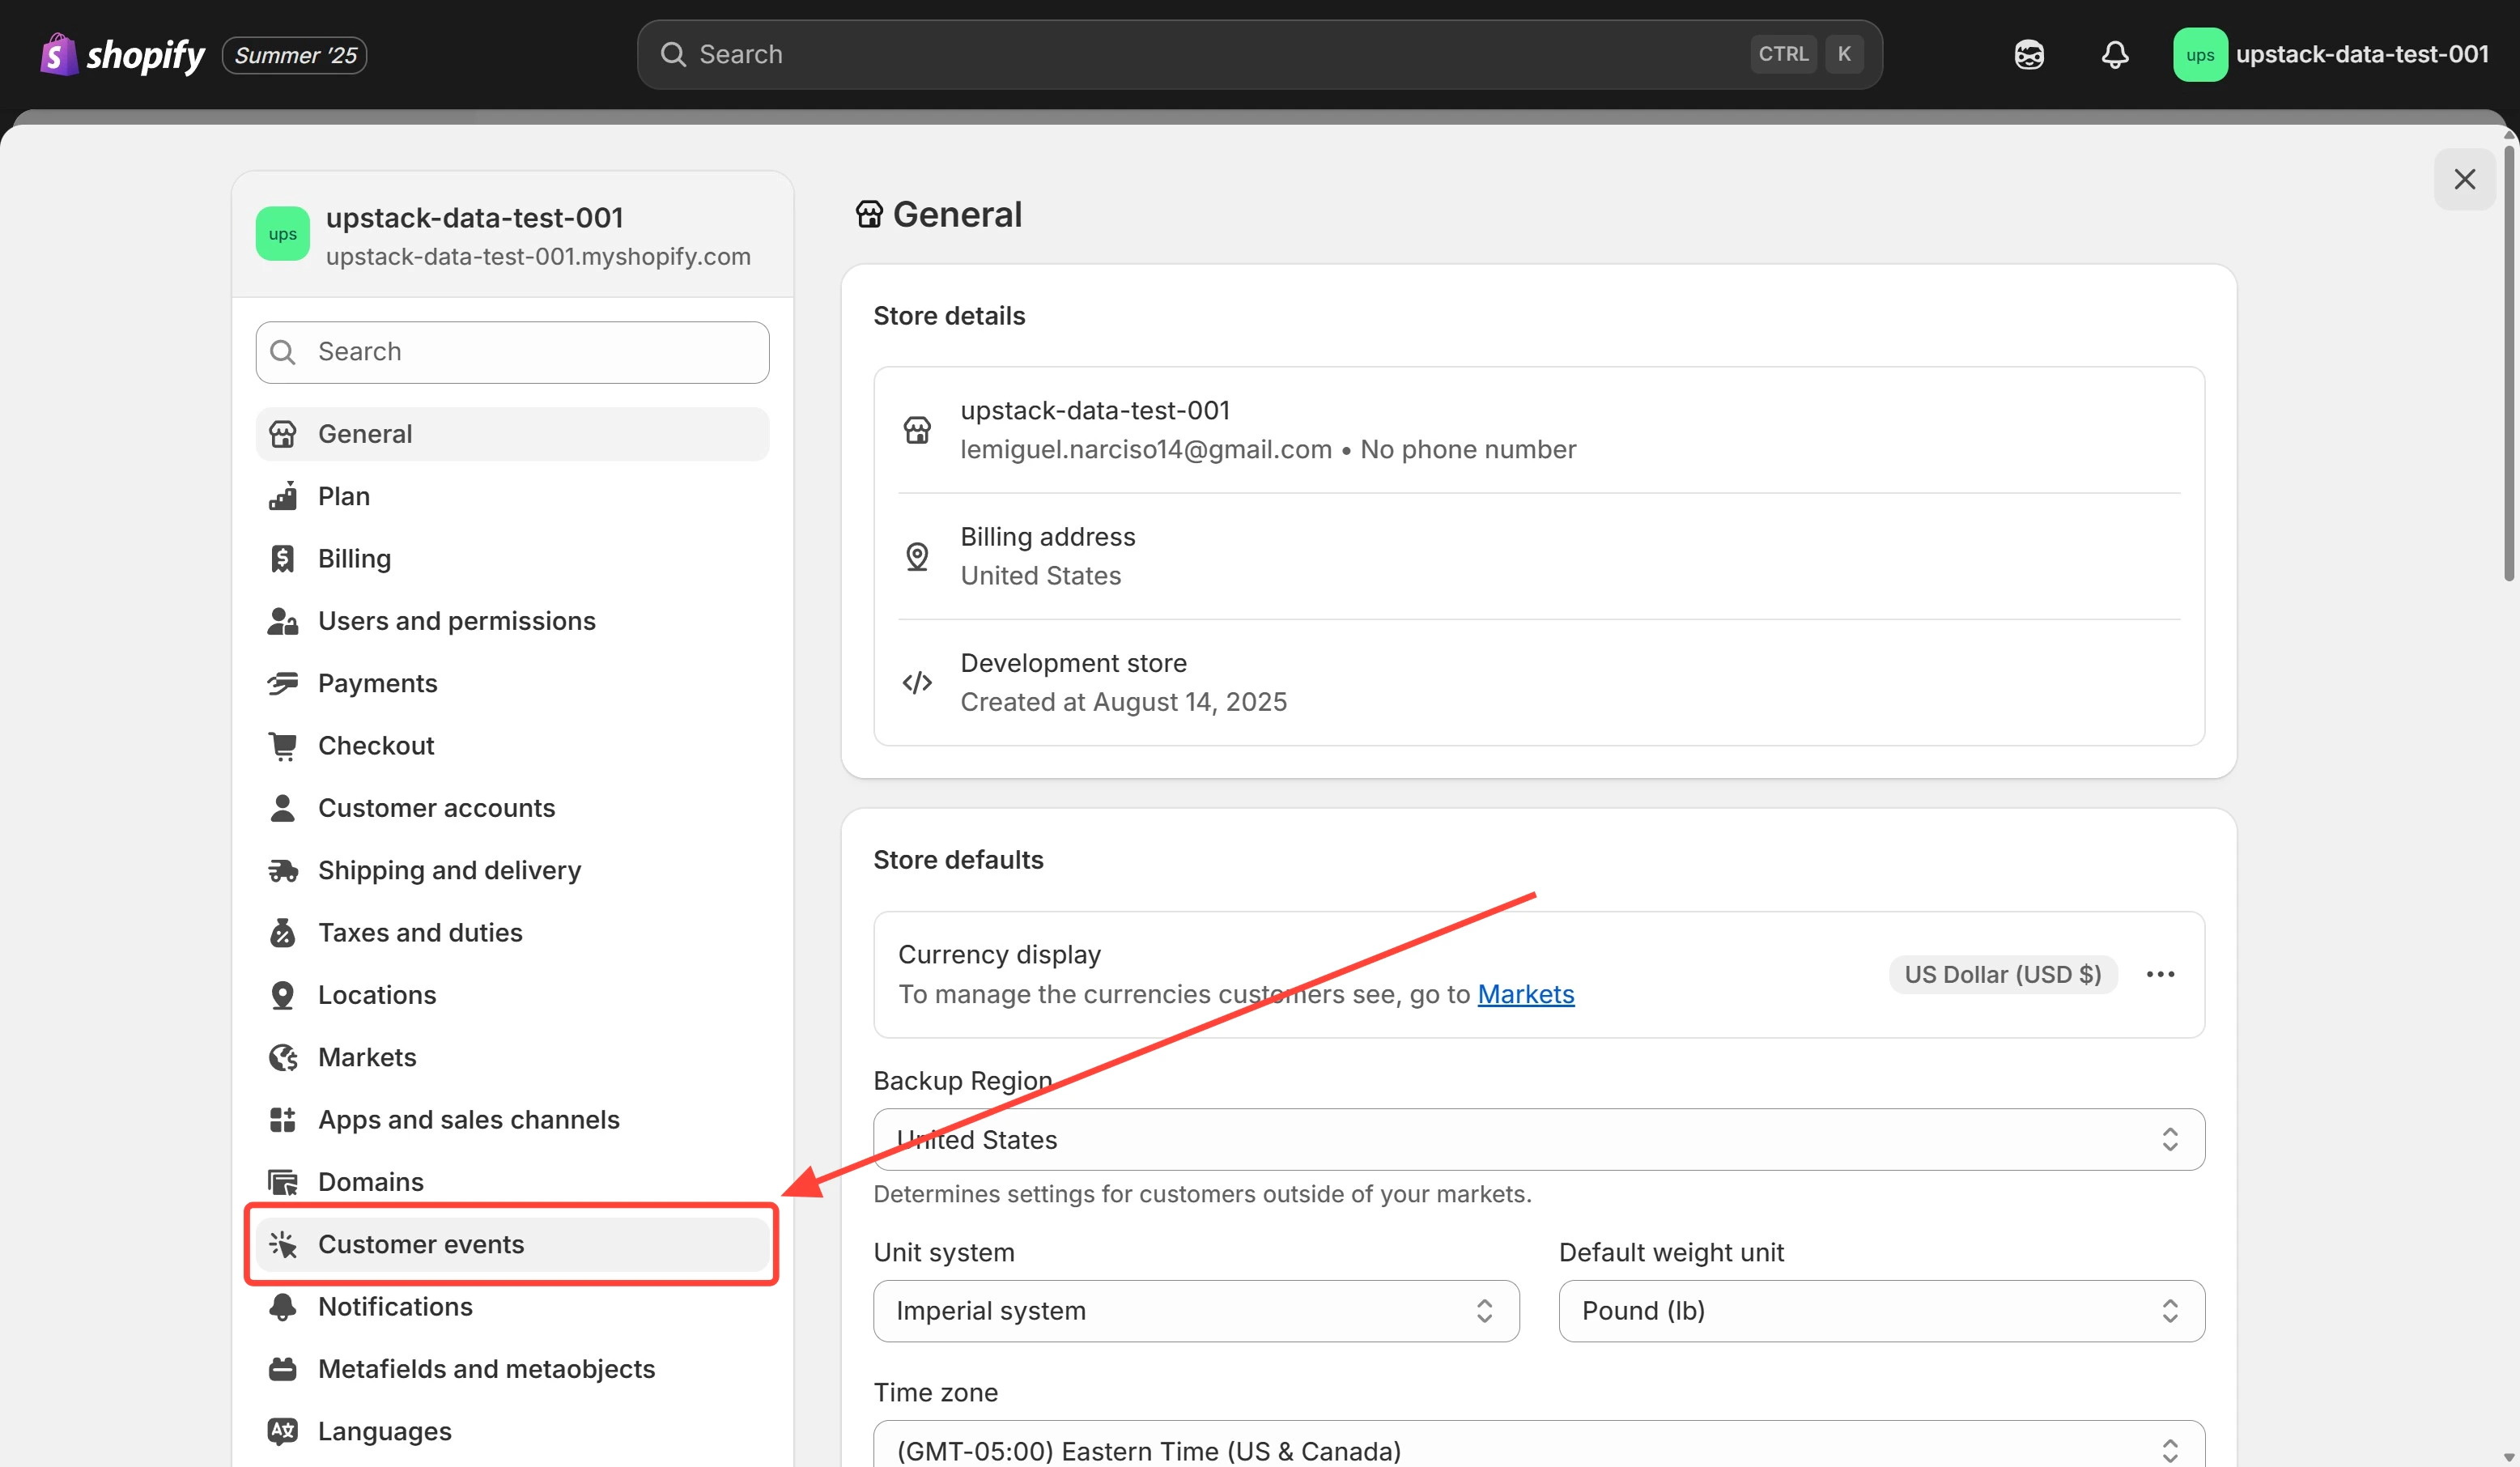
-
In the settings menu, click Customer events.
Configure privacy settings
For maximum attribution and data quality, set the following: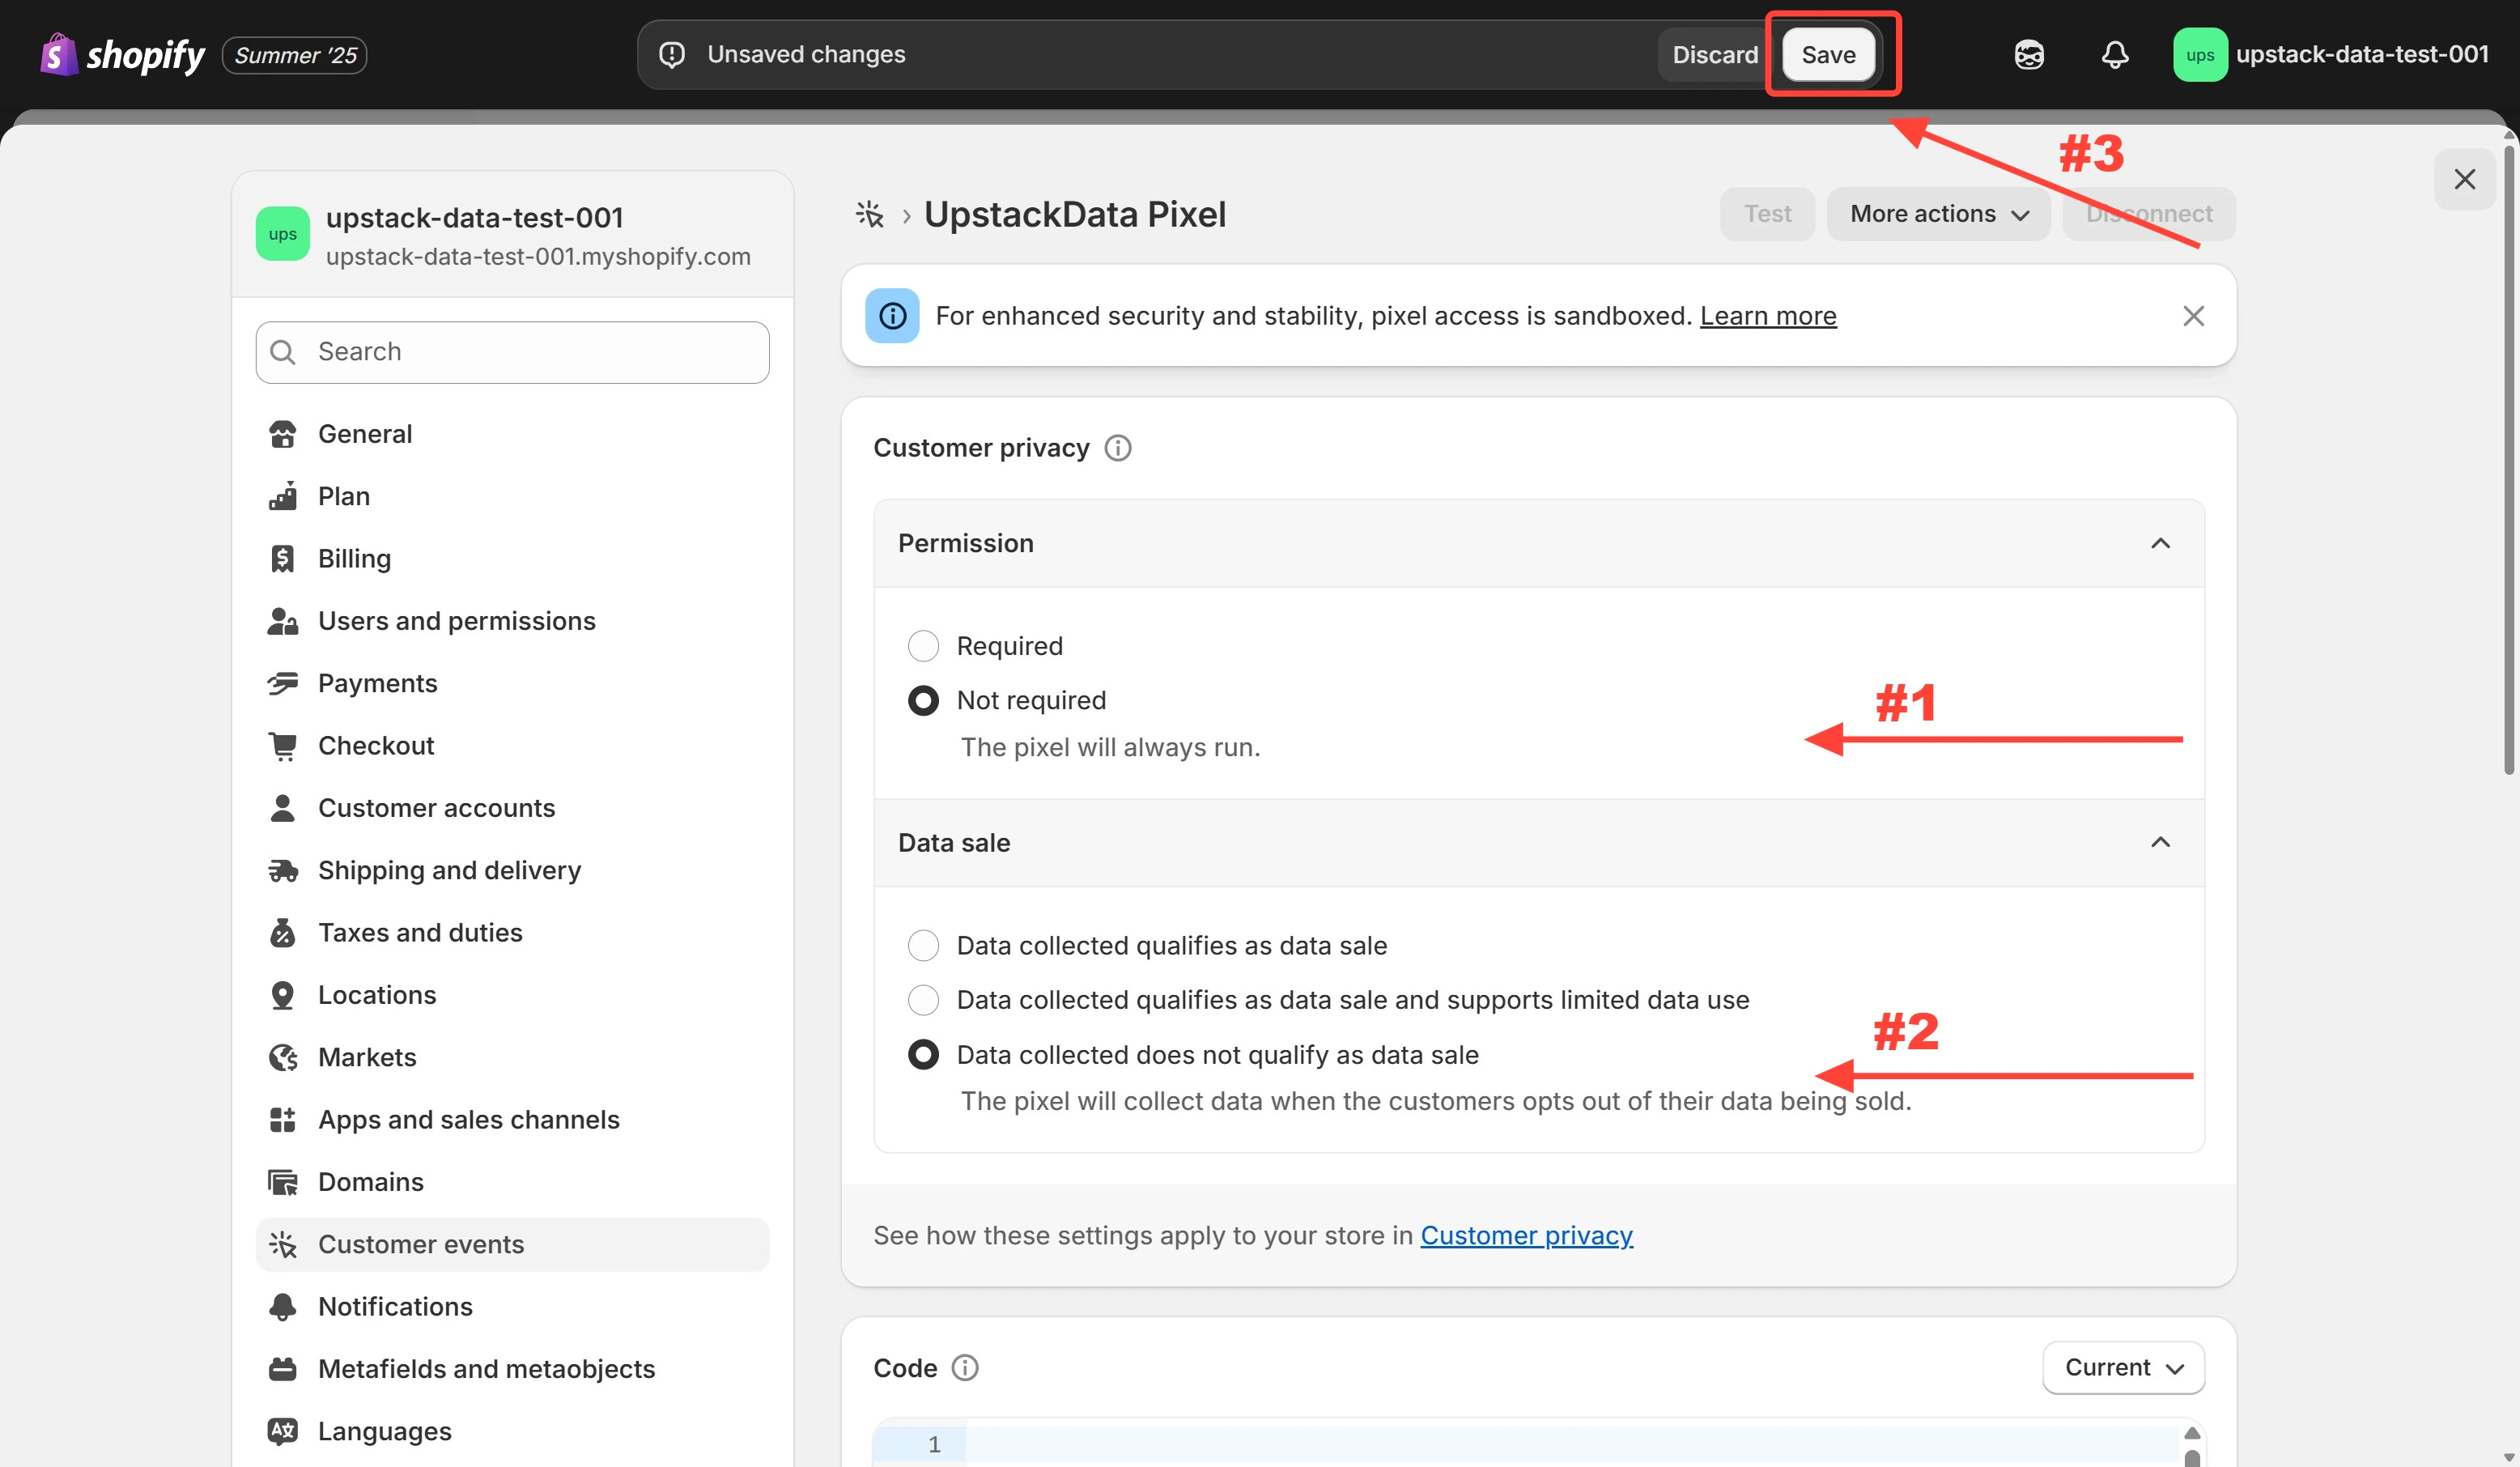
- Permission: Not required
- Data sale: Data collected does not qualify as data sale
Verify the settings are saved
- Refresh the Custom Pixel page in Shopify Admin and confirm the Permission and Data sale values match what you selected.
- In the Upstack dashboard, open Event Health and confirm events continue to arrive after the change.