Prerequisites
Before you start, you need:- Admin or Manager access to a Google Ads account
- Permission to create conversion actions in Google Ads
This guide is for the older Google Ads interface that uses Tools and Settings → Measurement → Conversions. If your account uses the newer Goals menu, follow How to Create a New Upstack Data Purchase Goal in Google Ads → instead.
Setup Instructions
Sign in to Google Ads
Sign in to Google Ads with your Google account.
Open Conversions
- In the top-right of Google Ads, click Tools and Settings (wrench icon)
- Under Measurement, select Conversions
Configure the Purchase goal
- (Optional) Enter your website domain and click Scan
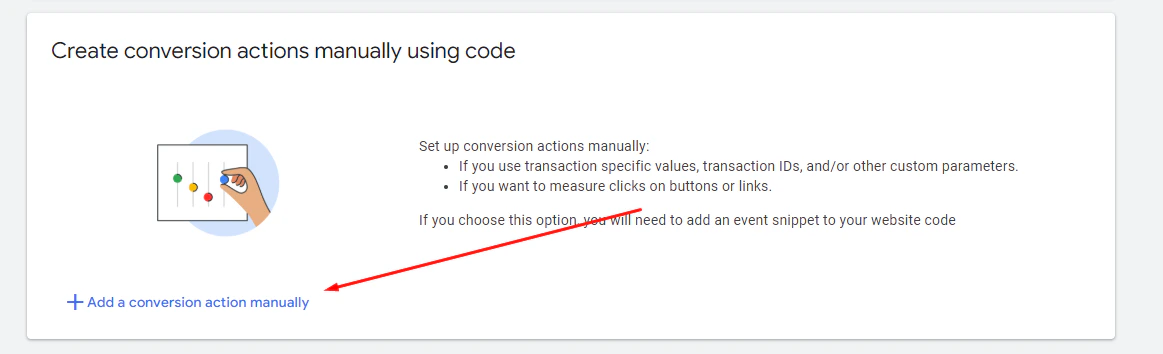
- Choose “Add a conversion action manually”
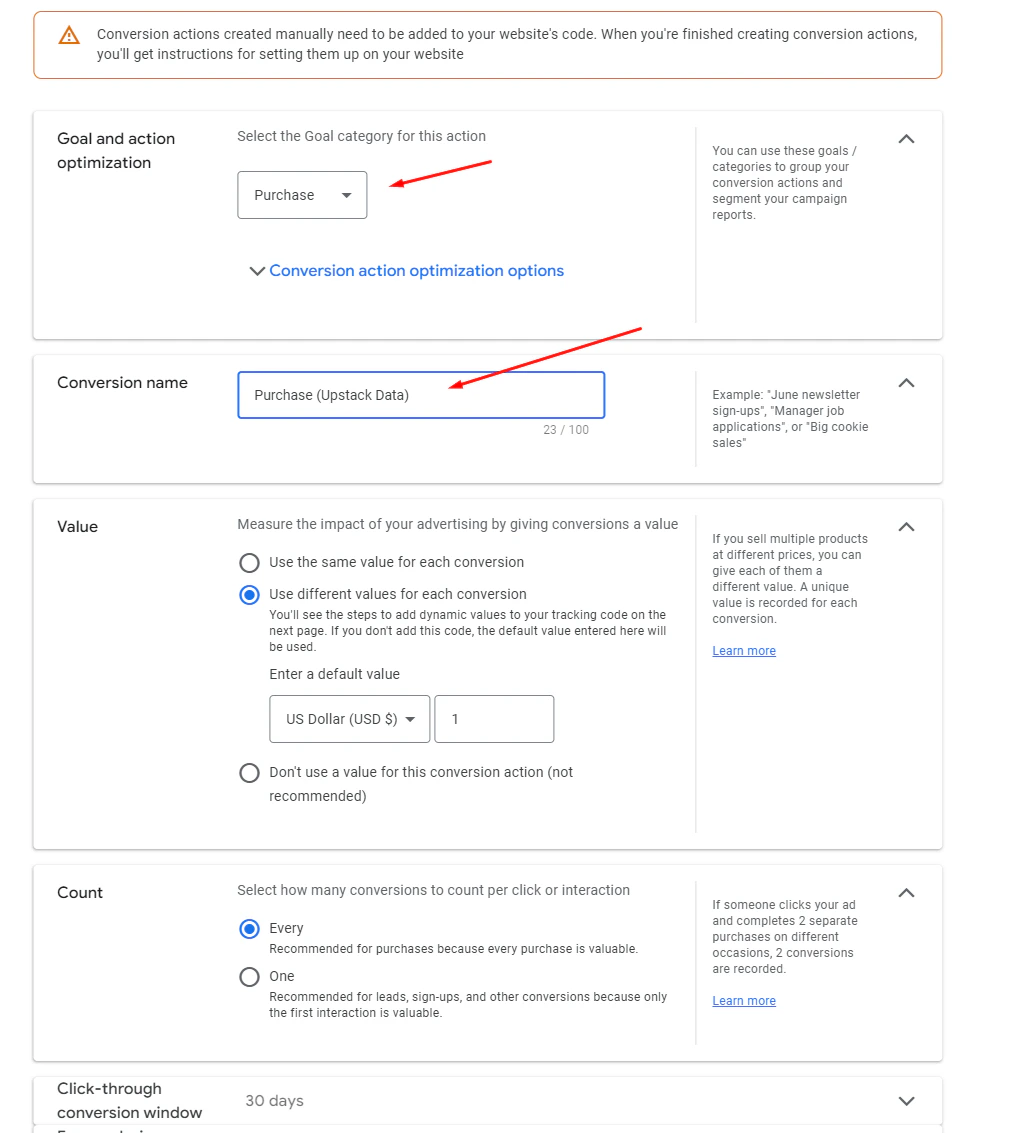
- Select Purchase as the goal and conversion action optimization
-
Set the Conversion name to “Purchase - UpstackData”
Enable Enhanced Conversions
Turn on Enhanced Conversions, then click Done.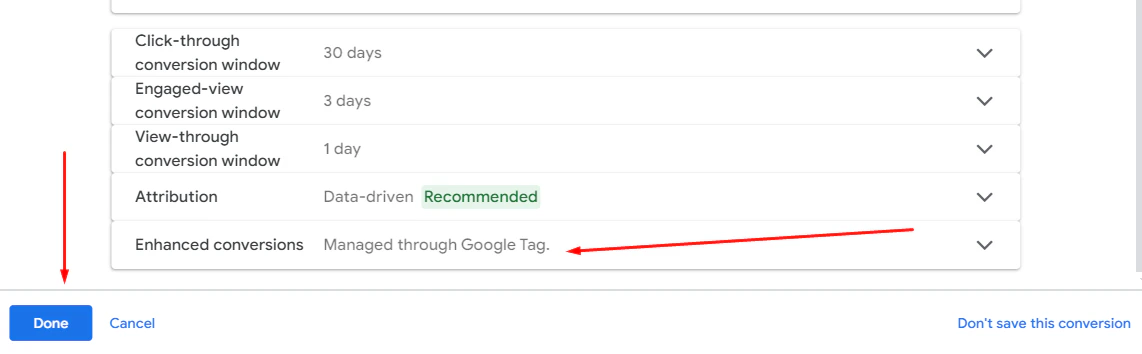
Note: Enhanced Conversions improves match rates by using first-party customer data securely.
Save the configuration
Click Save and Continue to complete the setup.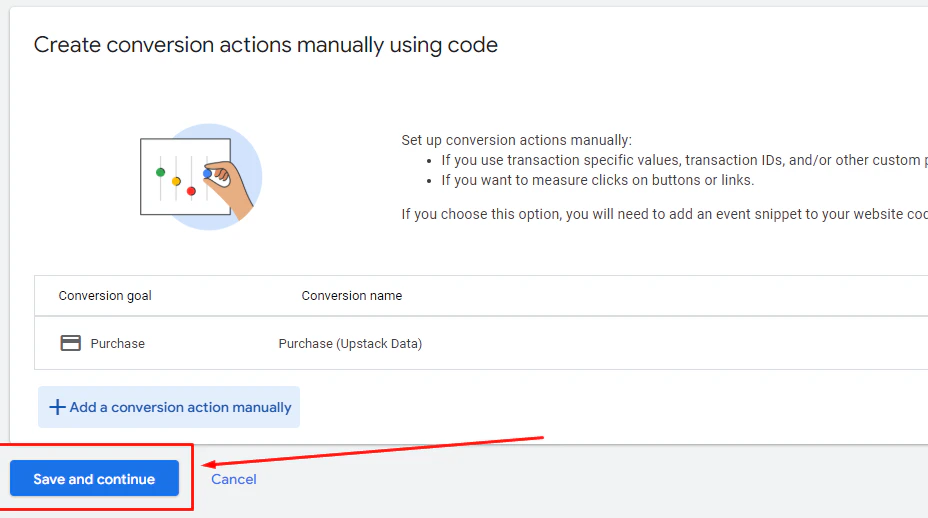
If your Google Ads interface uses the Goals menu instead, see:
**How to Create a New Upstack Data Purchase Goal in Google Ads →**
What You’ll Receive
After saving, Google Ads displays:- Conversion ID — starts with
AW-followed by 9–10 digits (e.g.,AW-123456789) - Conversion Label — 11-character alphanumeric string (e.g.,
ABc1d2EFG3h)
Verify the Setup
To confirm the goal was created correctly:- Return to Tools and Settings → Measurement → Conversions — the new “Purchase - UpstackData” conversion should appear in the list.
- Open the conversion and confirm Enhanced Conversions is enabled.