Prerequisites
Before you start, you need:- Admin or Manager access to a Google Ads account
- Permission to create conversion actions in Google Ads
Step-by-Step Instructions
Sign in to Google Ads
Sign in to Google Ads.
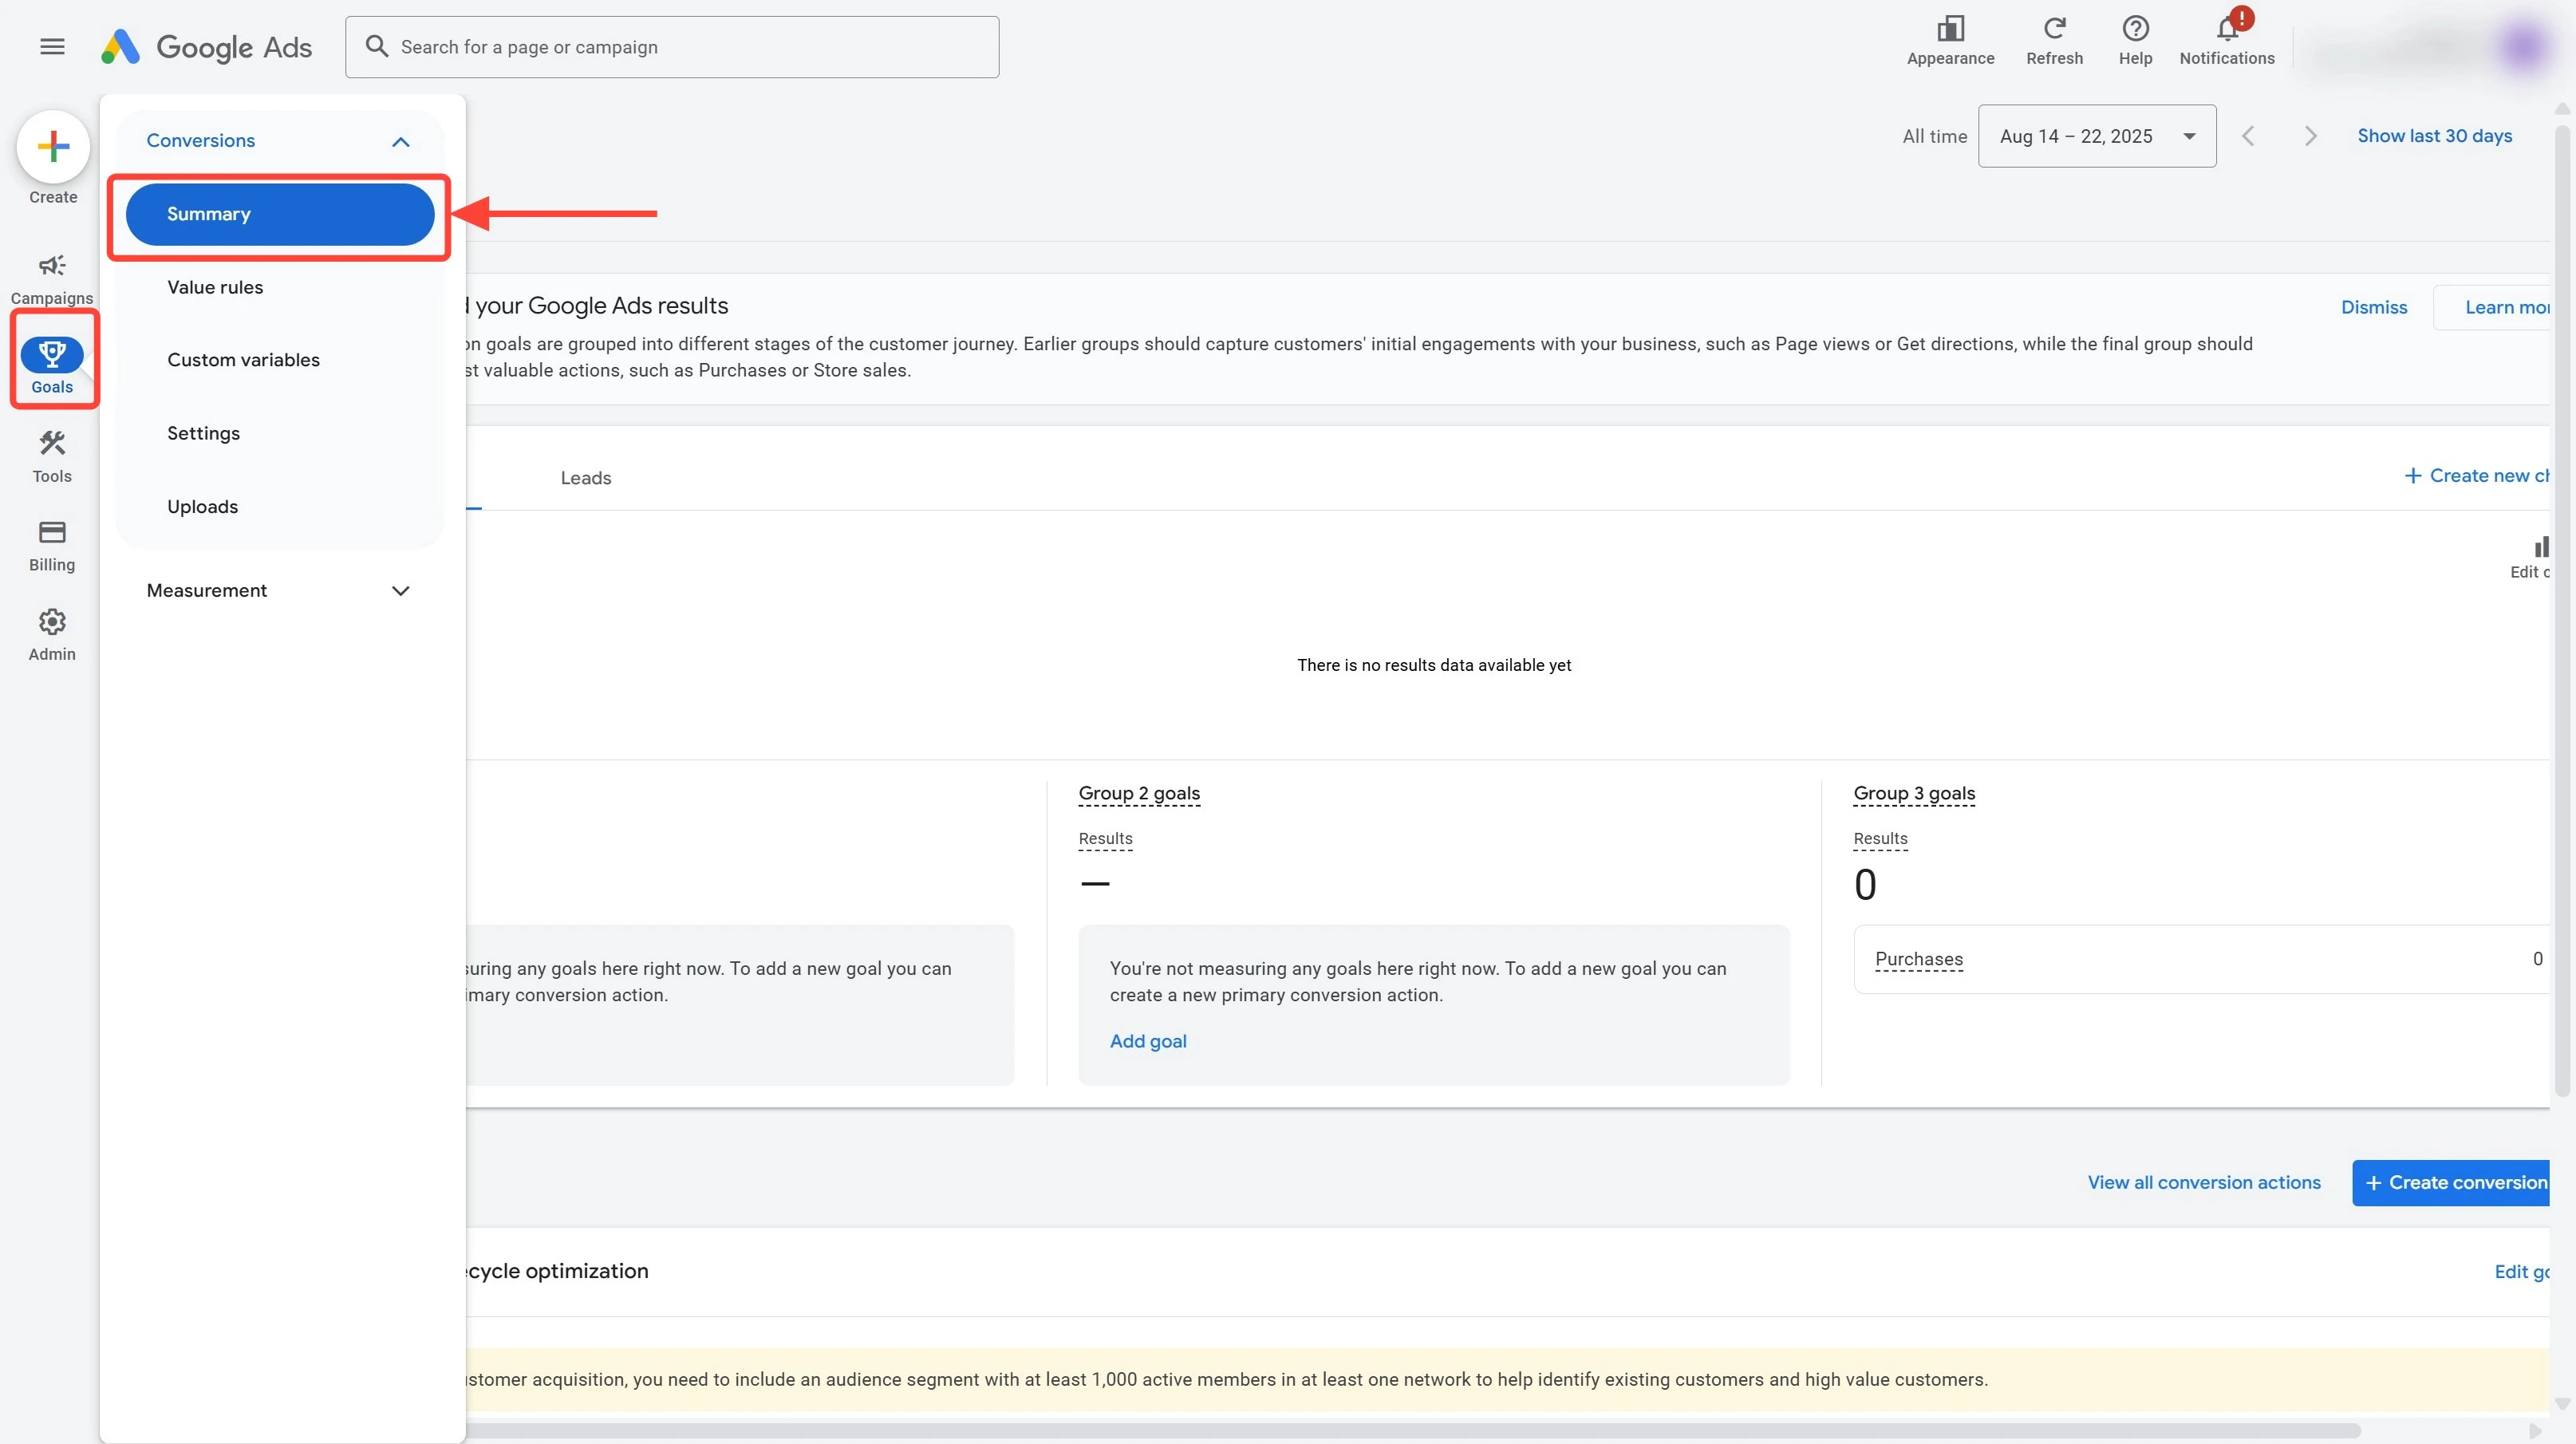
Create a new conversion action
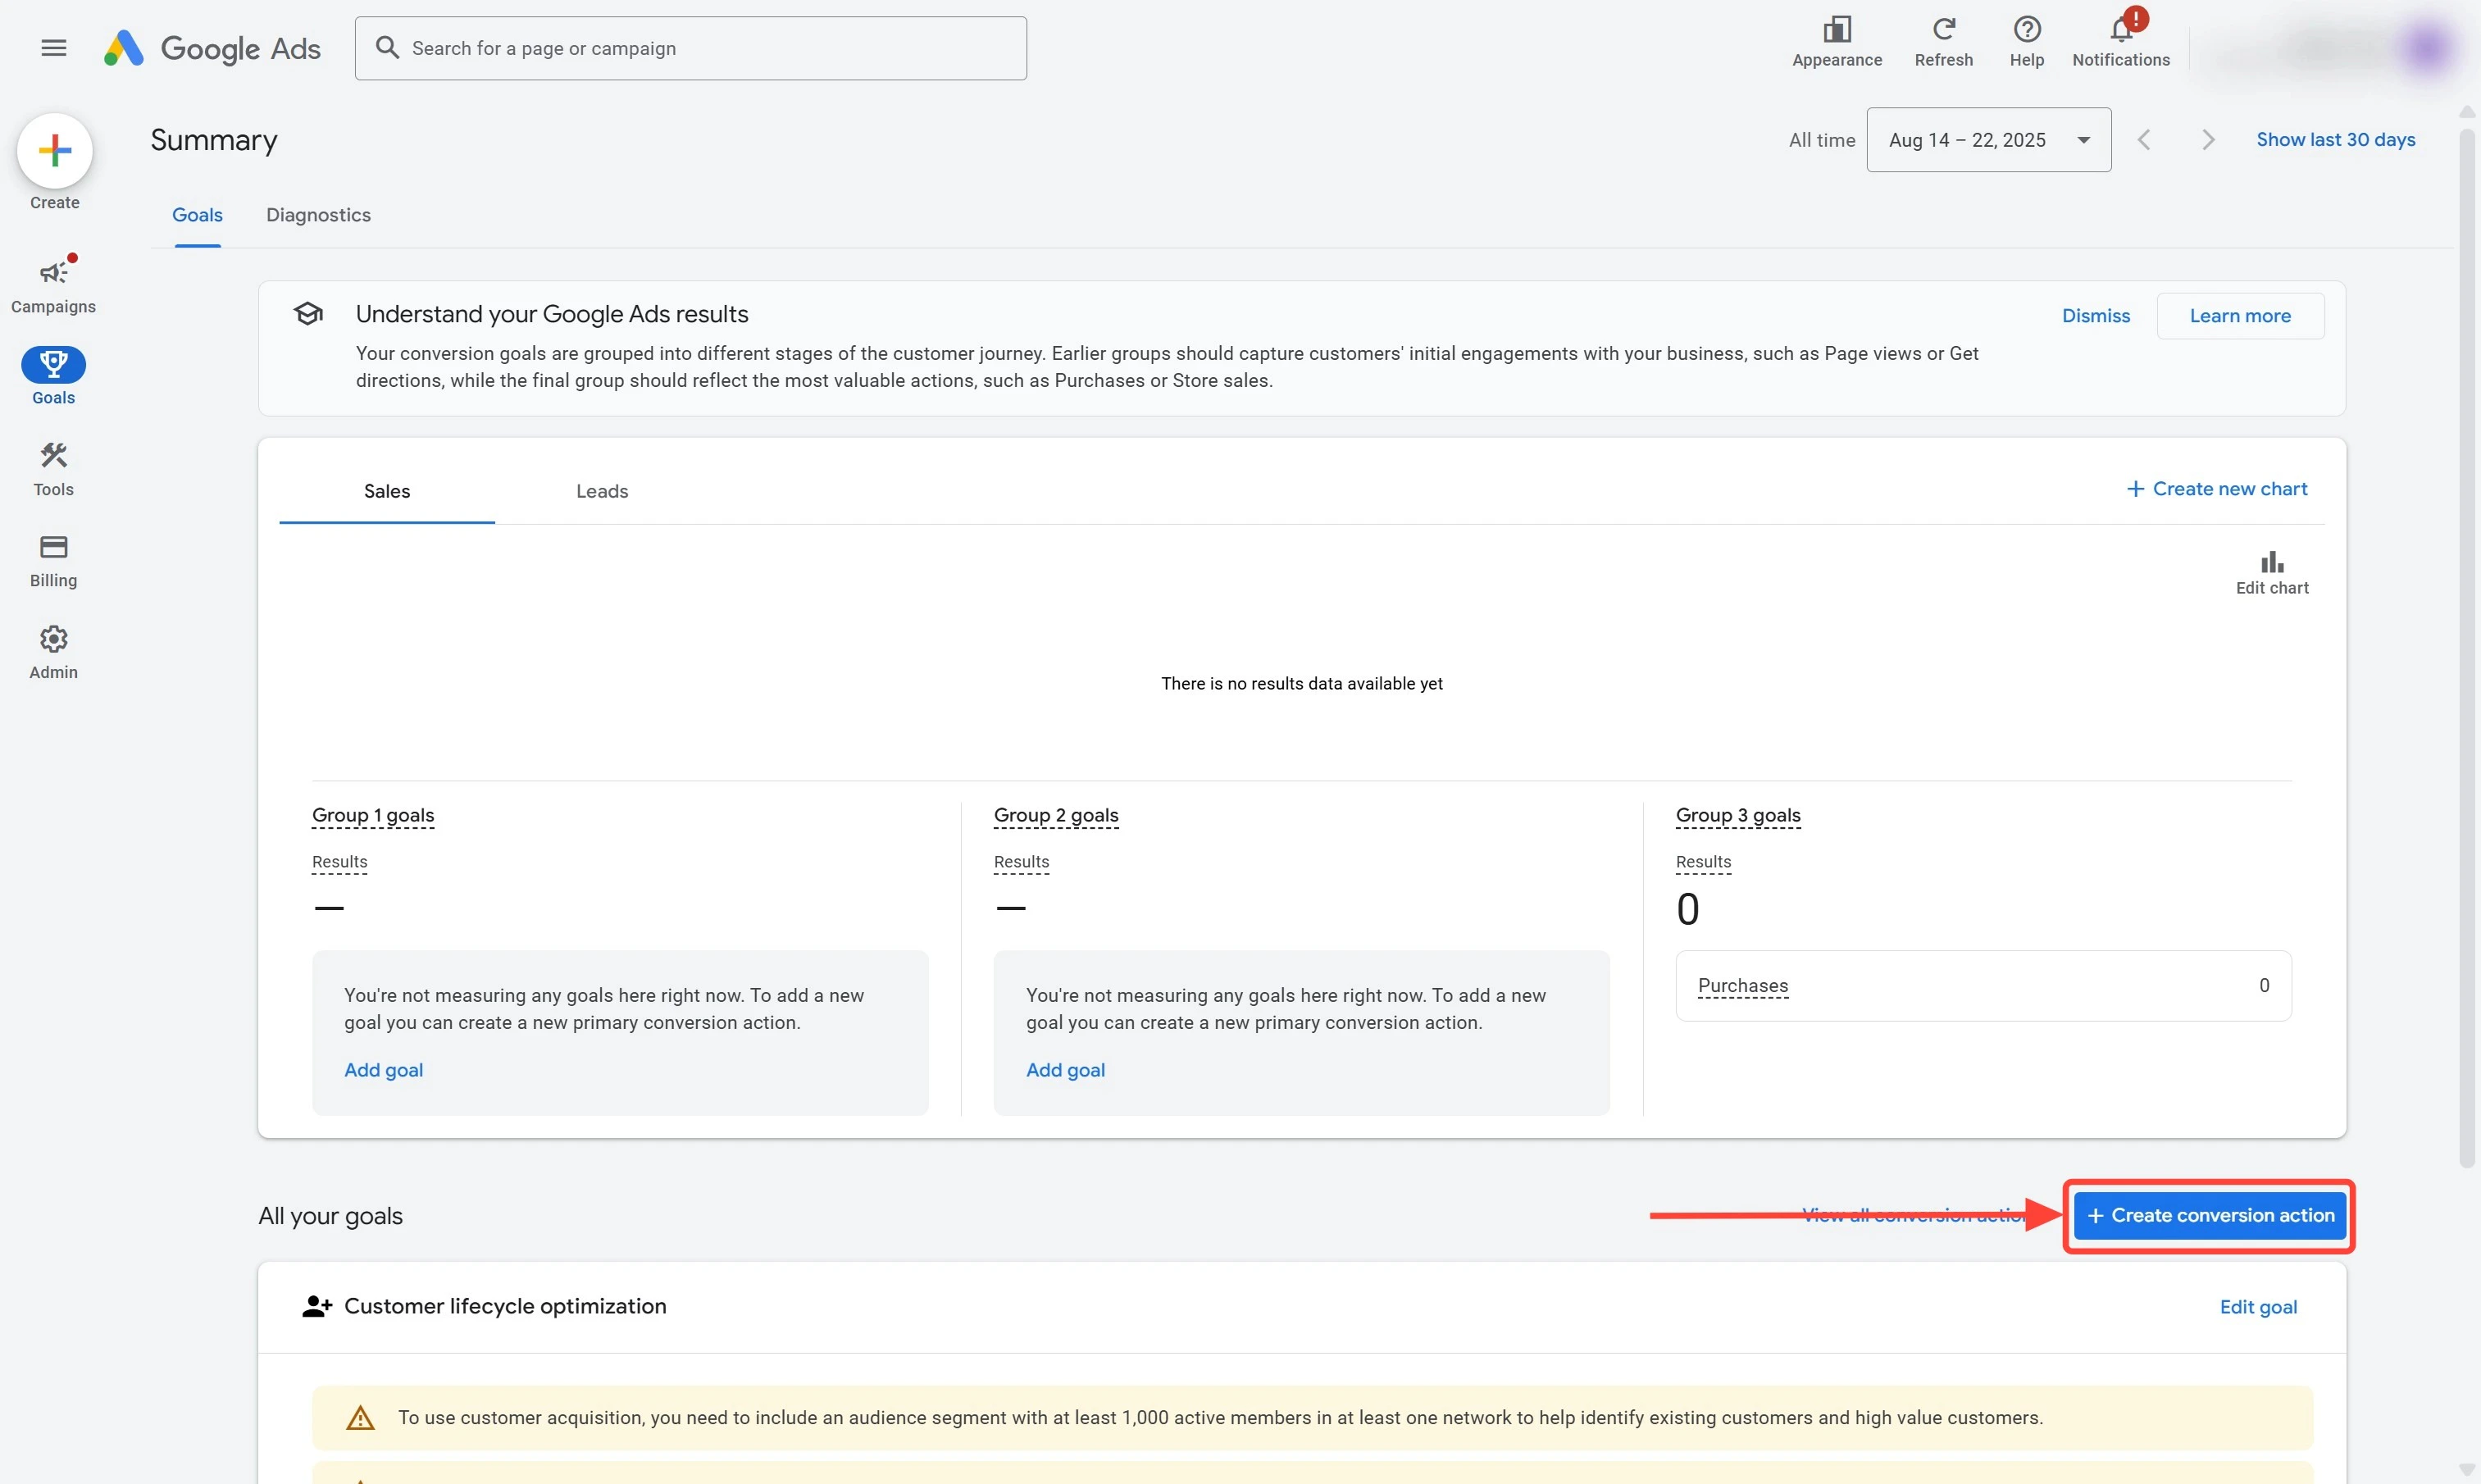
- Click the ”+ Create conversion action” button
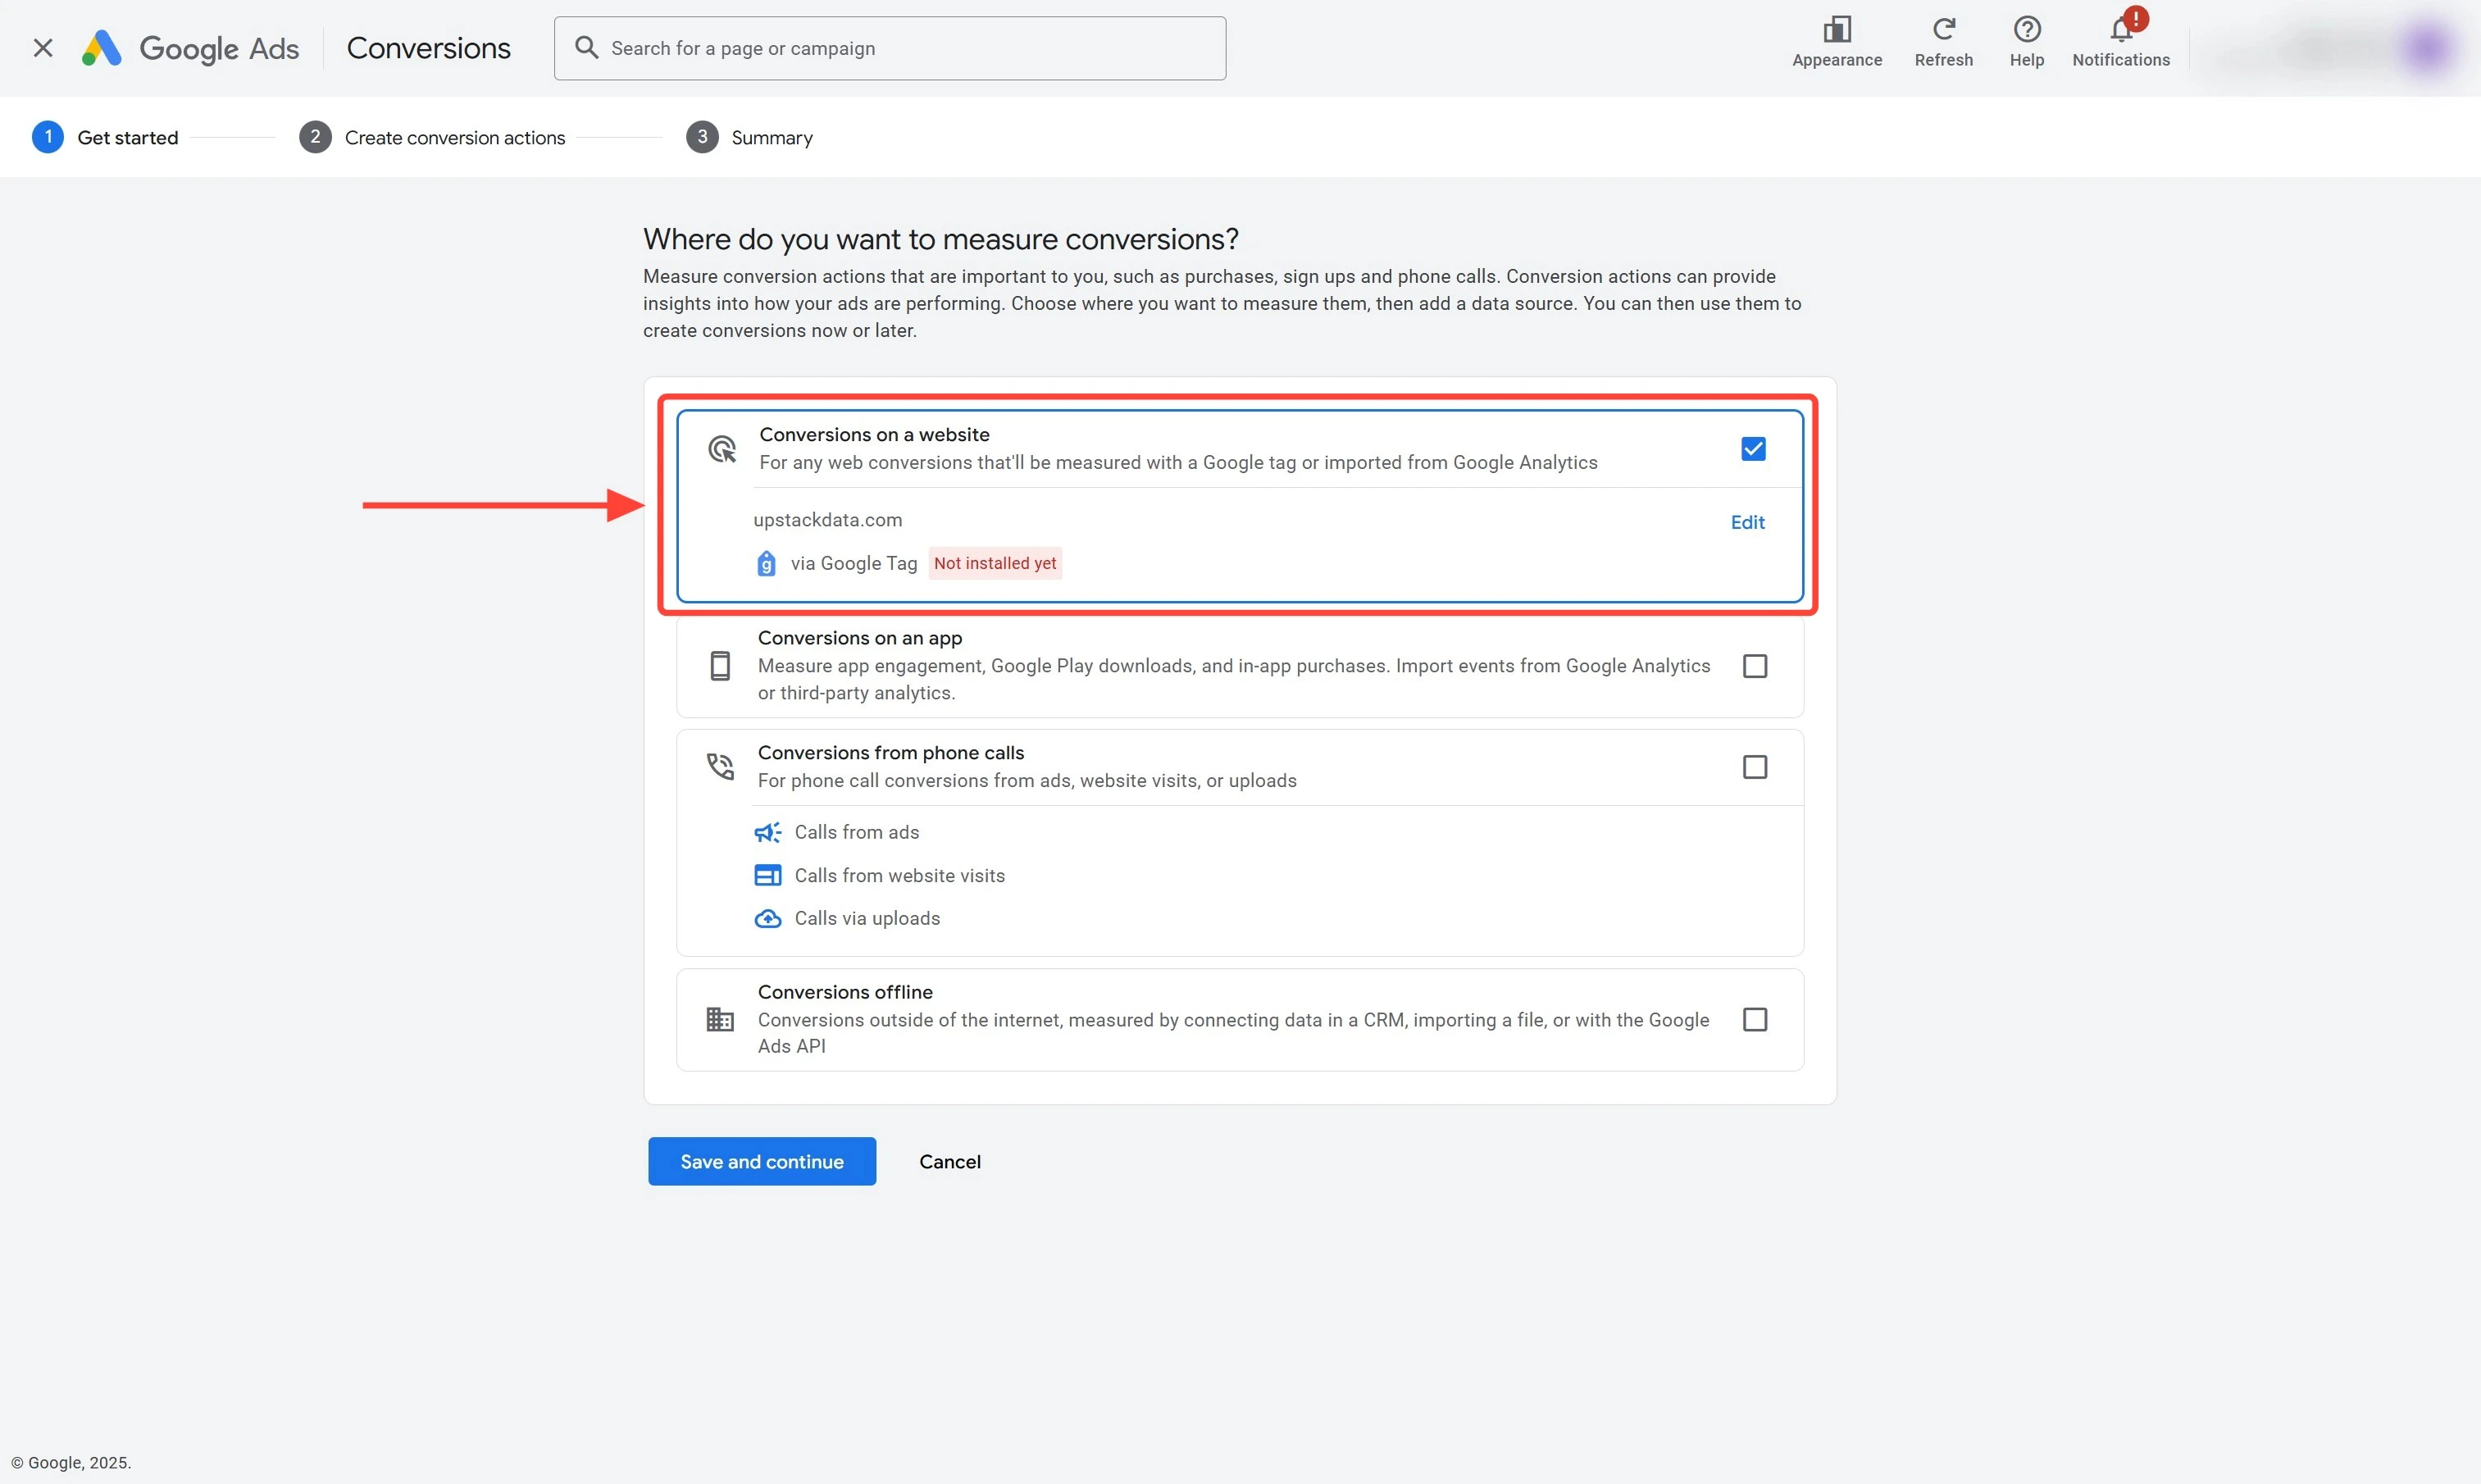
- Select “Conversions on a website” by ticking the checkbox on the right side of the panel
-
Click Save and continue
Configure the Purchase goal
- Select “Purchase” as the goal/conversion action
- In the “Choose an event to measure Purchase” panel, under “Create a new conversion action”, select “Set up manually using a code”
- Click “Conversion settings” to expand the section
- Set the Conversion name to “Purchase - UpstackData”
-
Set Click-through conversion window to 30 days
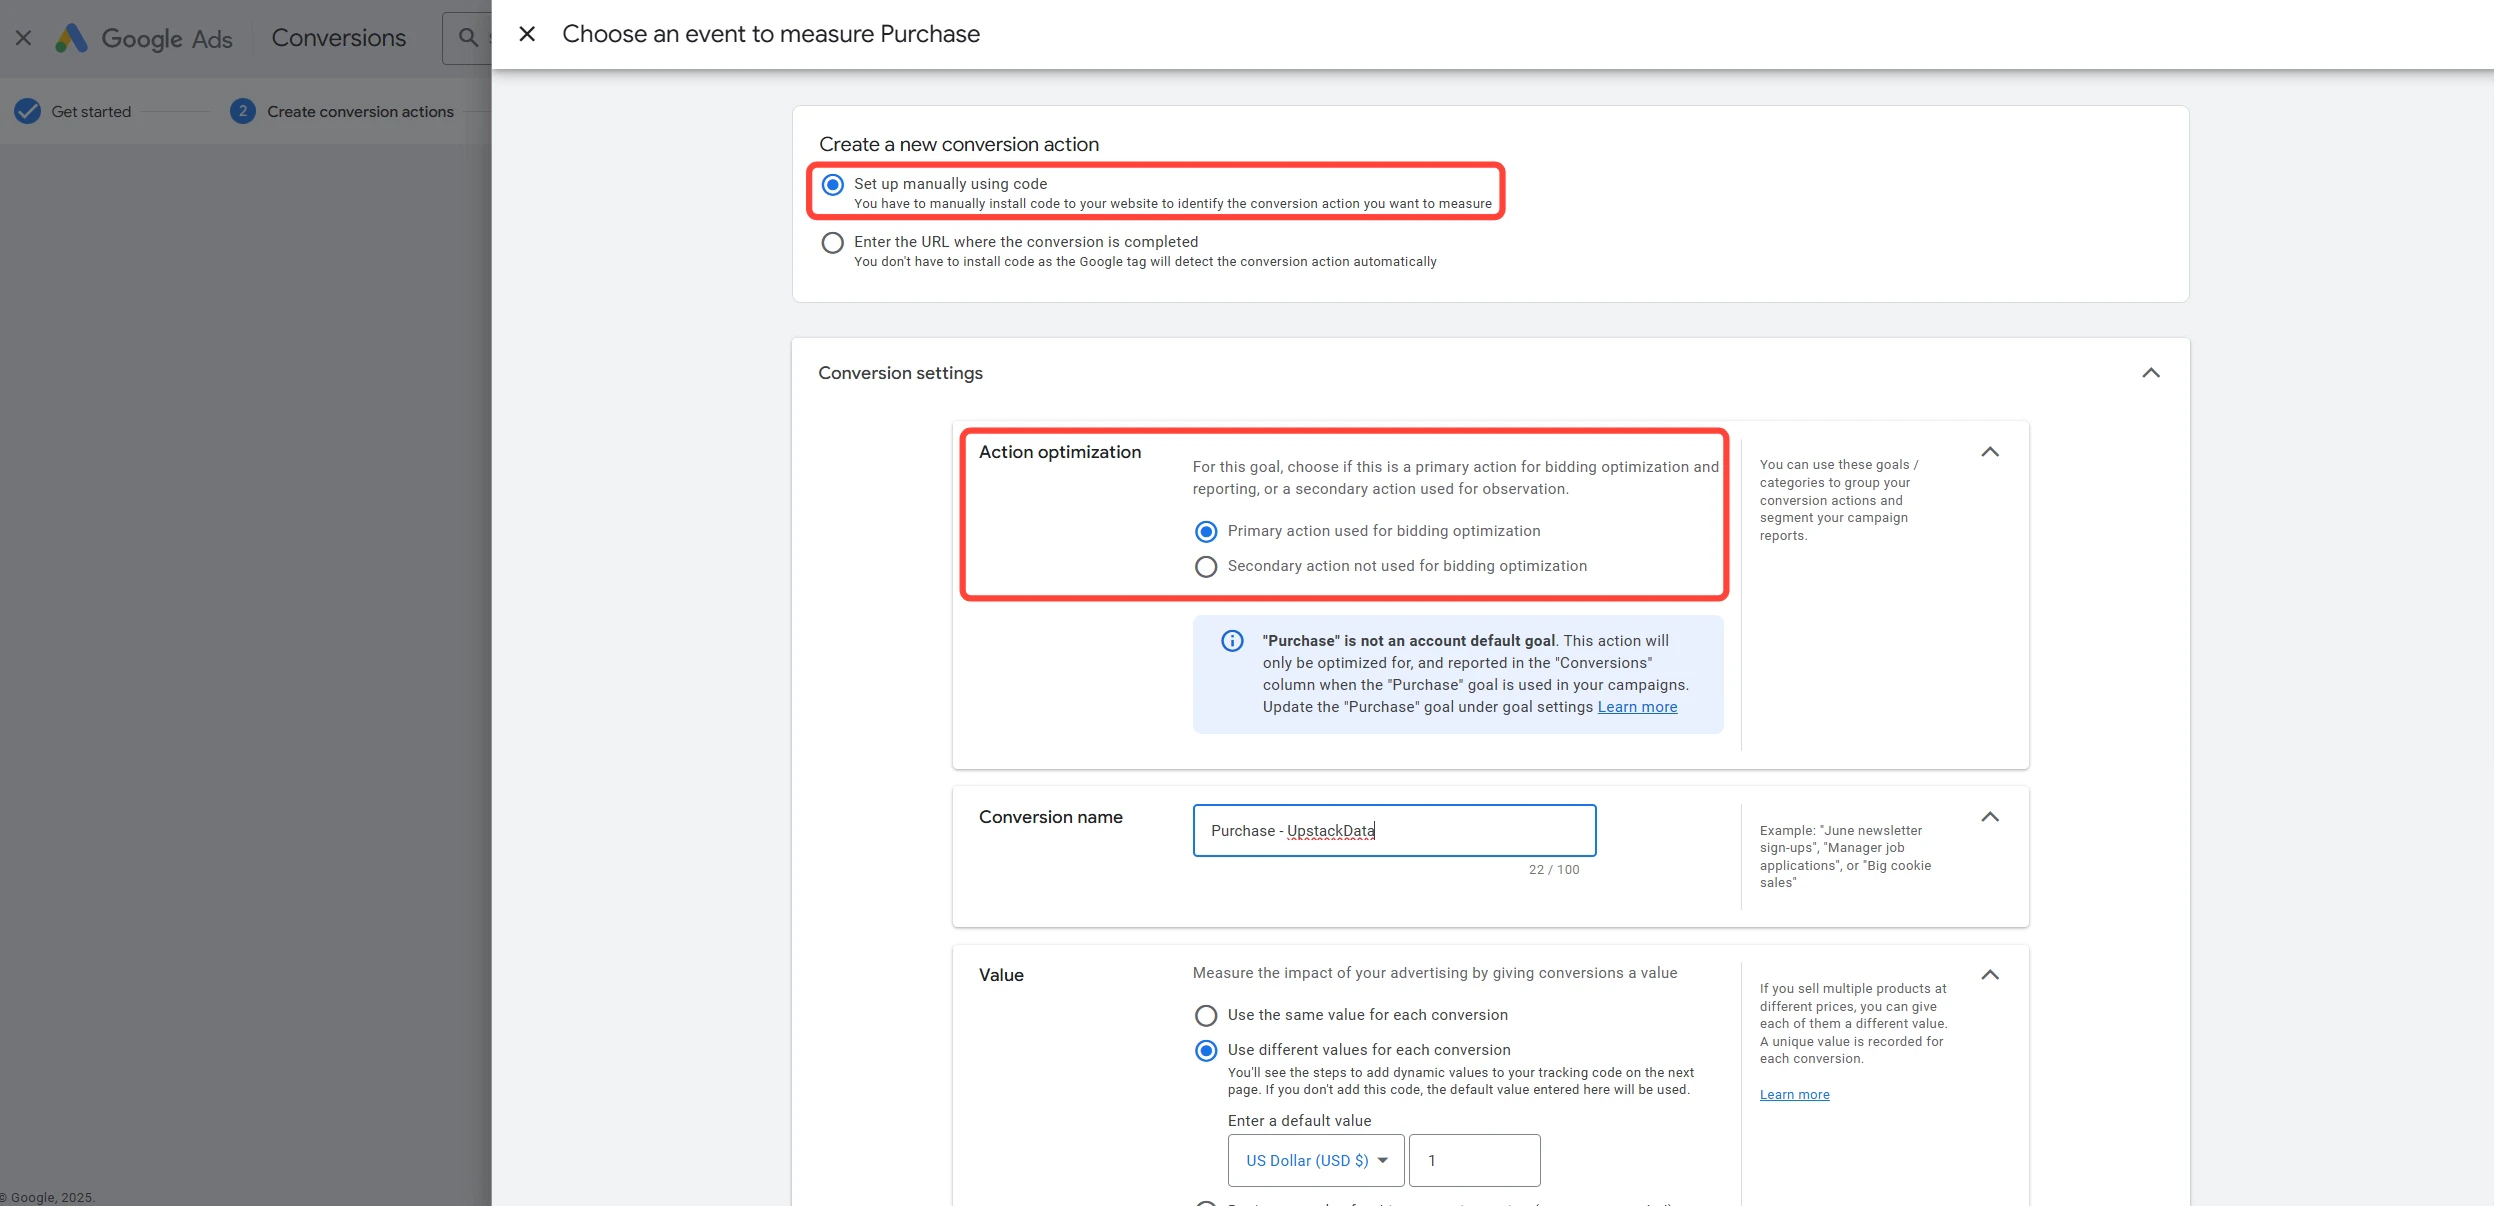
Example - select **Set up manually using a code** and **Purchase** as the Goal/Conversion action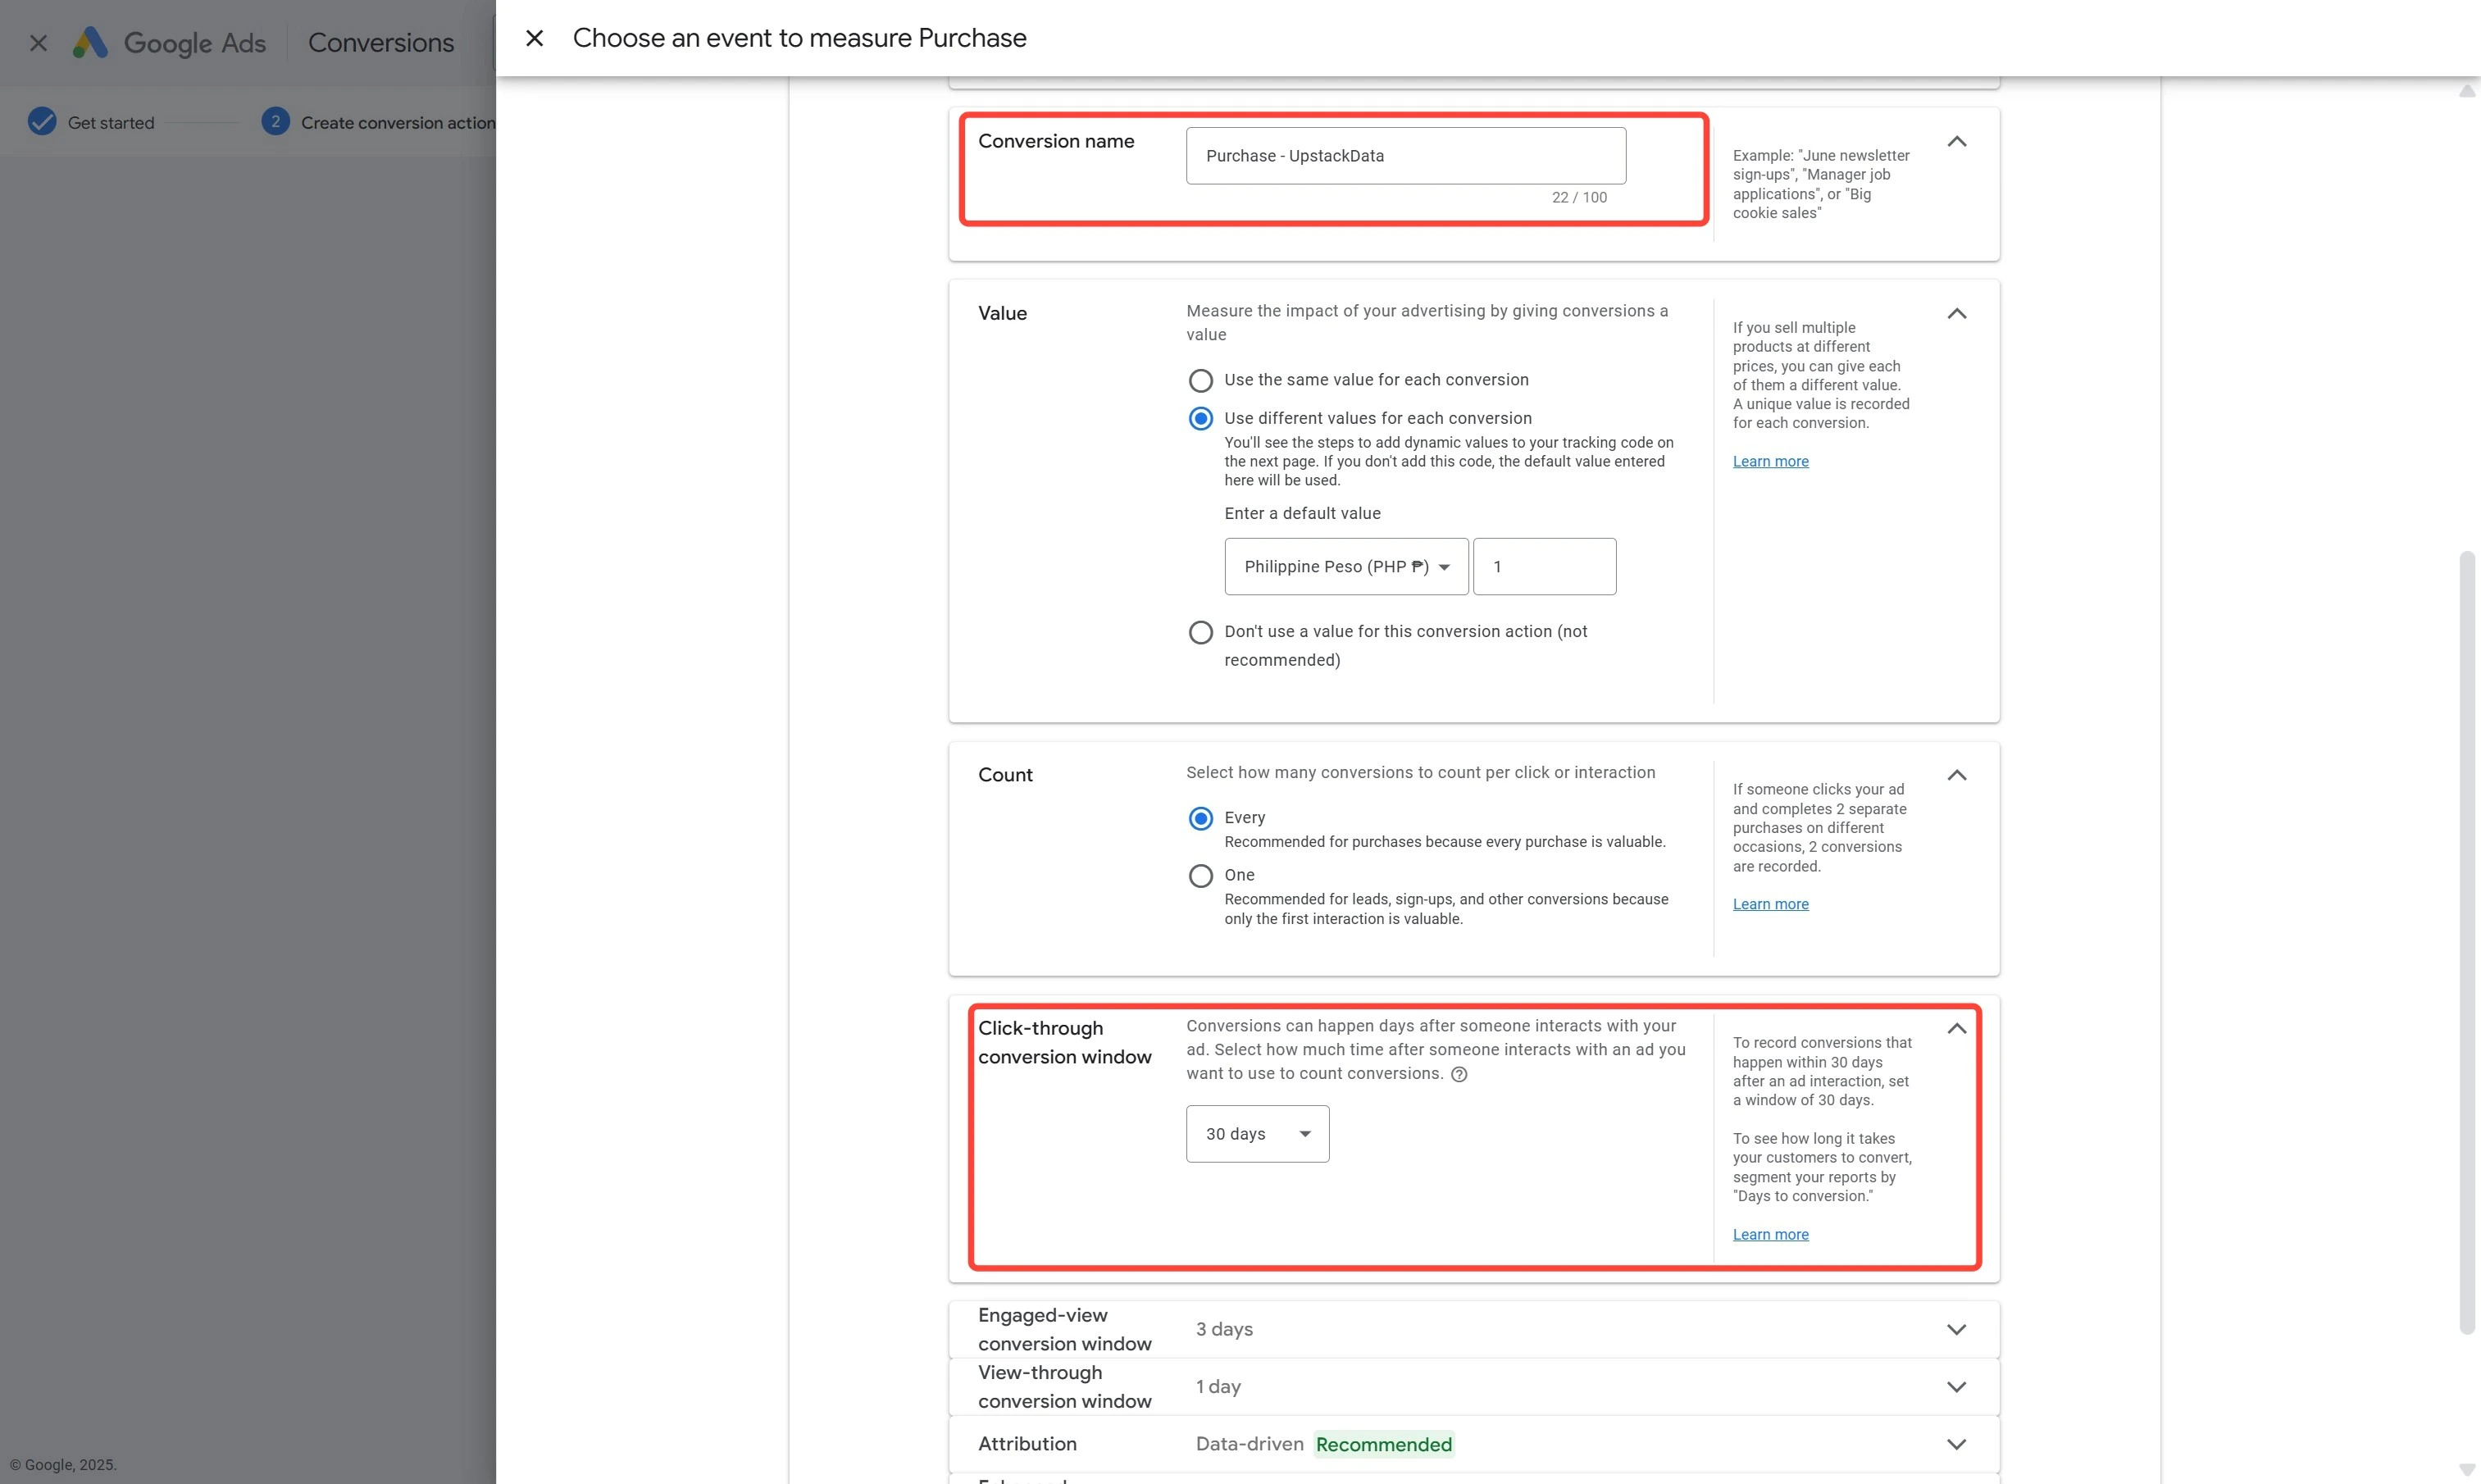
Example - Conversion name: **Purchase - UpstackData** and Click-through conversion window: **30 days**Enable Enhanced Conversions
Check the “Use enhanced conversion for conversion action” option to enable Enhanced Conversions.Click Done to save the changes and close the panel.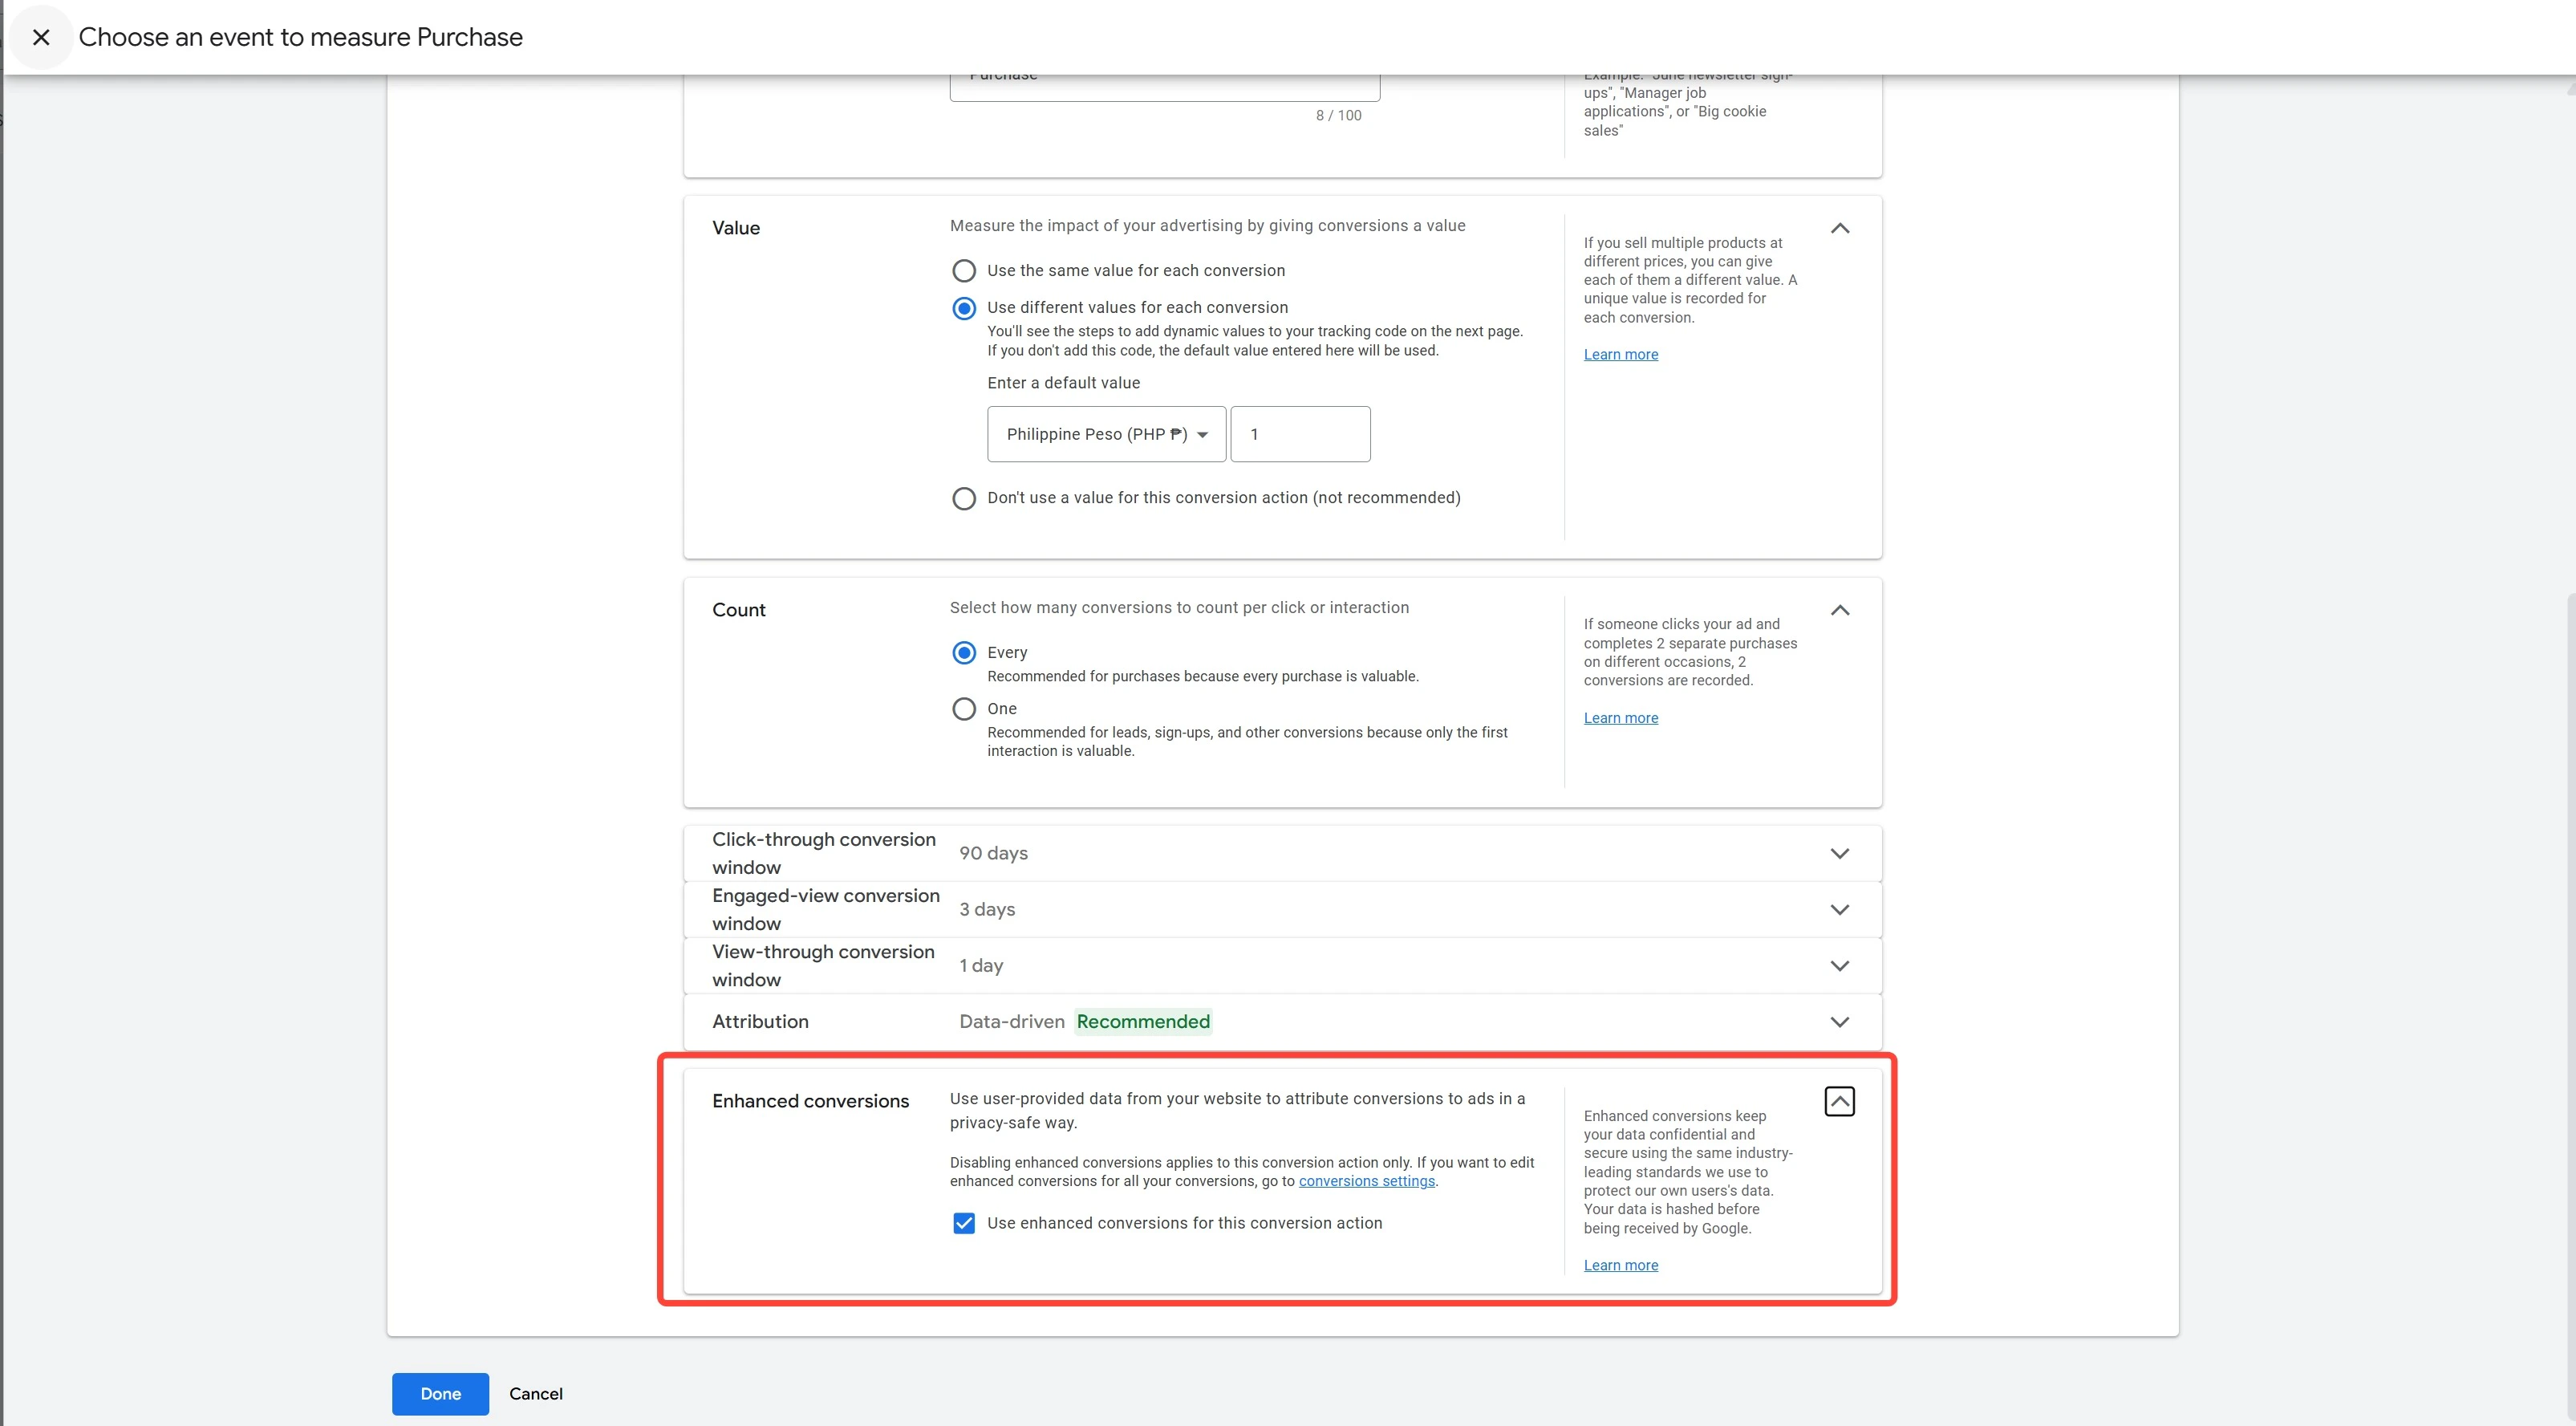
Note: Enhanced Conversions improves match rates by using first-party customer data securely.
Save the configuration
Click Save and Continue to complete the setup.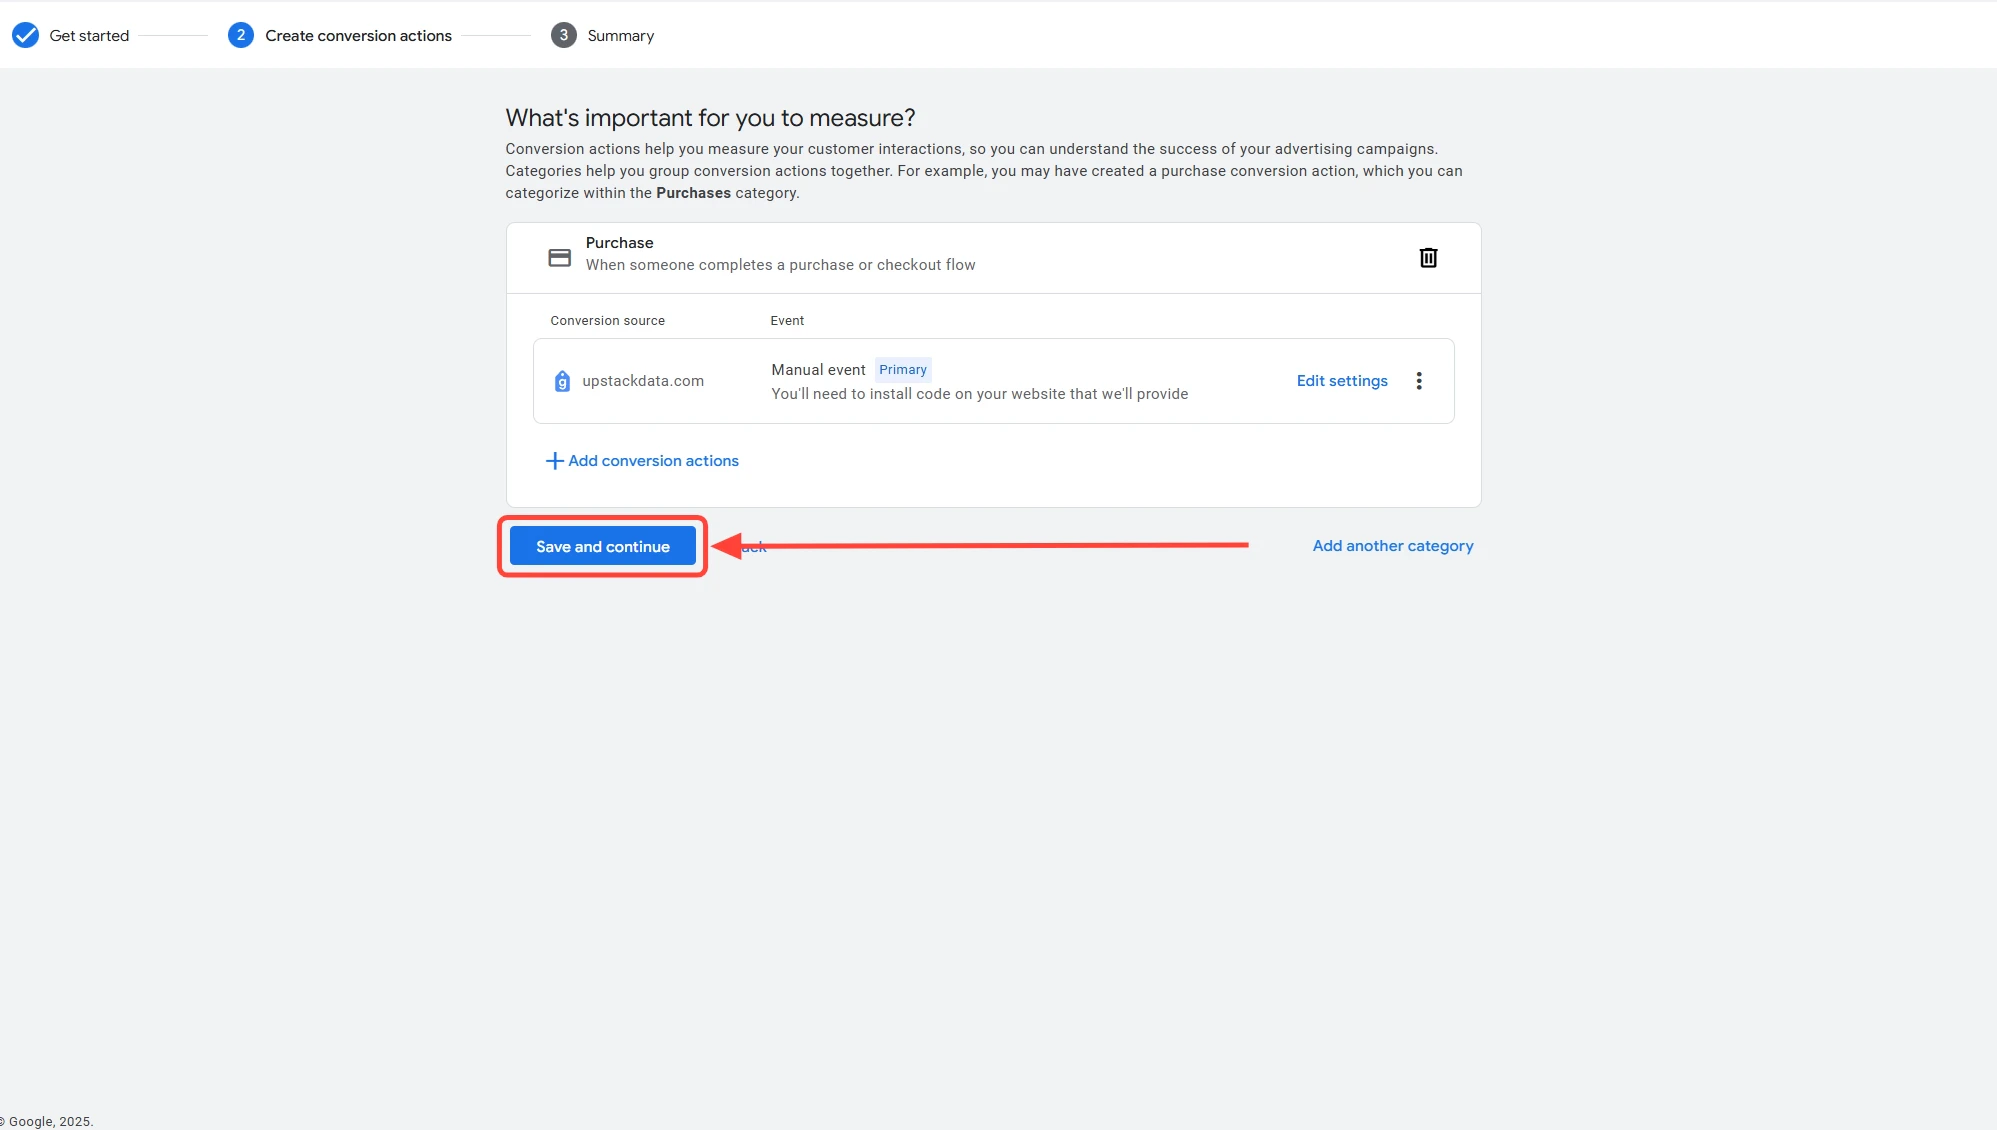
If your Google Ads interface looks different, see:
**How to Create a Purchase Goal in Google Ads Using the Google Ads Tag (For Different Interface) →**
What You’ll Receive
After saving, Google Ads displays:- Conversion ID — starts with
AW-followed by 9–10 digits (e.g.,AW-123456789) - Conversion Label — 11-character alphanumeric string (e.g.,
ABc1d2EFG3h)
Verify the Setup
To confirm the goal was created correctly:- Return to Goals → Conversions → Summary in Google Ads — the new “Purchase - UpstackData” conversion should appear in the list with a status of Inactive (it will become Active once it receives data).
- Confirm the Click-through conversion window is 30 days and Enhanced Conversions is enabled on the conversion’s detail page.