New to Upstack? Follow the getting started guide for a streamlined onboarding walkthrough.
Prerequisites
Before you start, you need:- An active Upstack Data account (sign up)
- Admin access to a Klaviyo account
- The ability to generate a Klaviyo Private API key with Full Access (learn how to generate one)
Part 1: Generate a Klaviyo Private API key
- Sign in to Klaviyo.
- Click your profile icon in the bottom-left navigation.
- Go to Settings → Account → API Keys.
- Click the Create Private API Key button.
- Name the new key
UpstackData. - Under Select Access Level, choose Full Access Key.
- Click Create.
- Copy and save the Klaviyo Private API key immediately. It starts with
pk_followed by alphanumeric characters (for example,pk_aBcDeFgHiJkLmNoPqRsTuVwXyZ012345678).
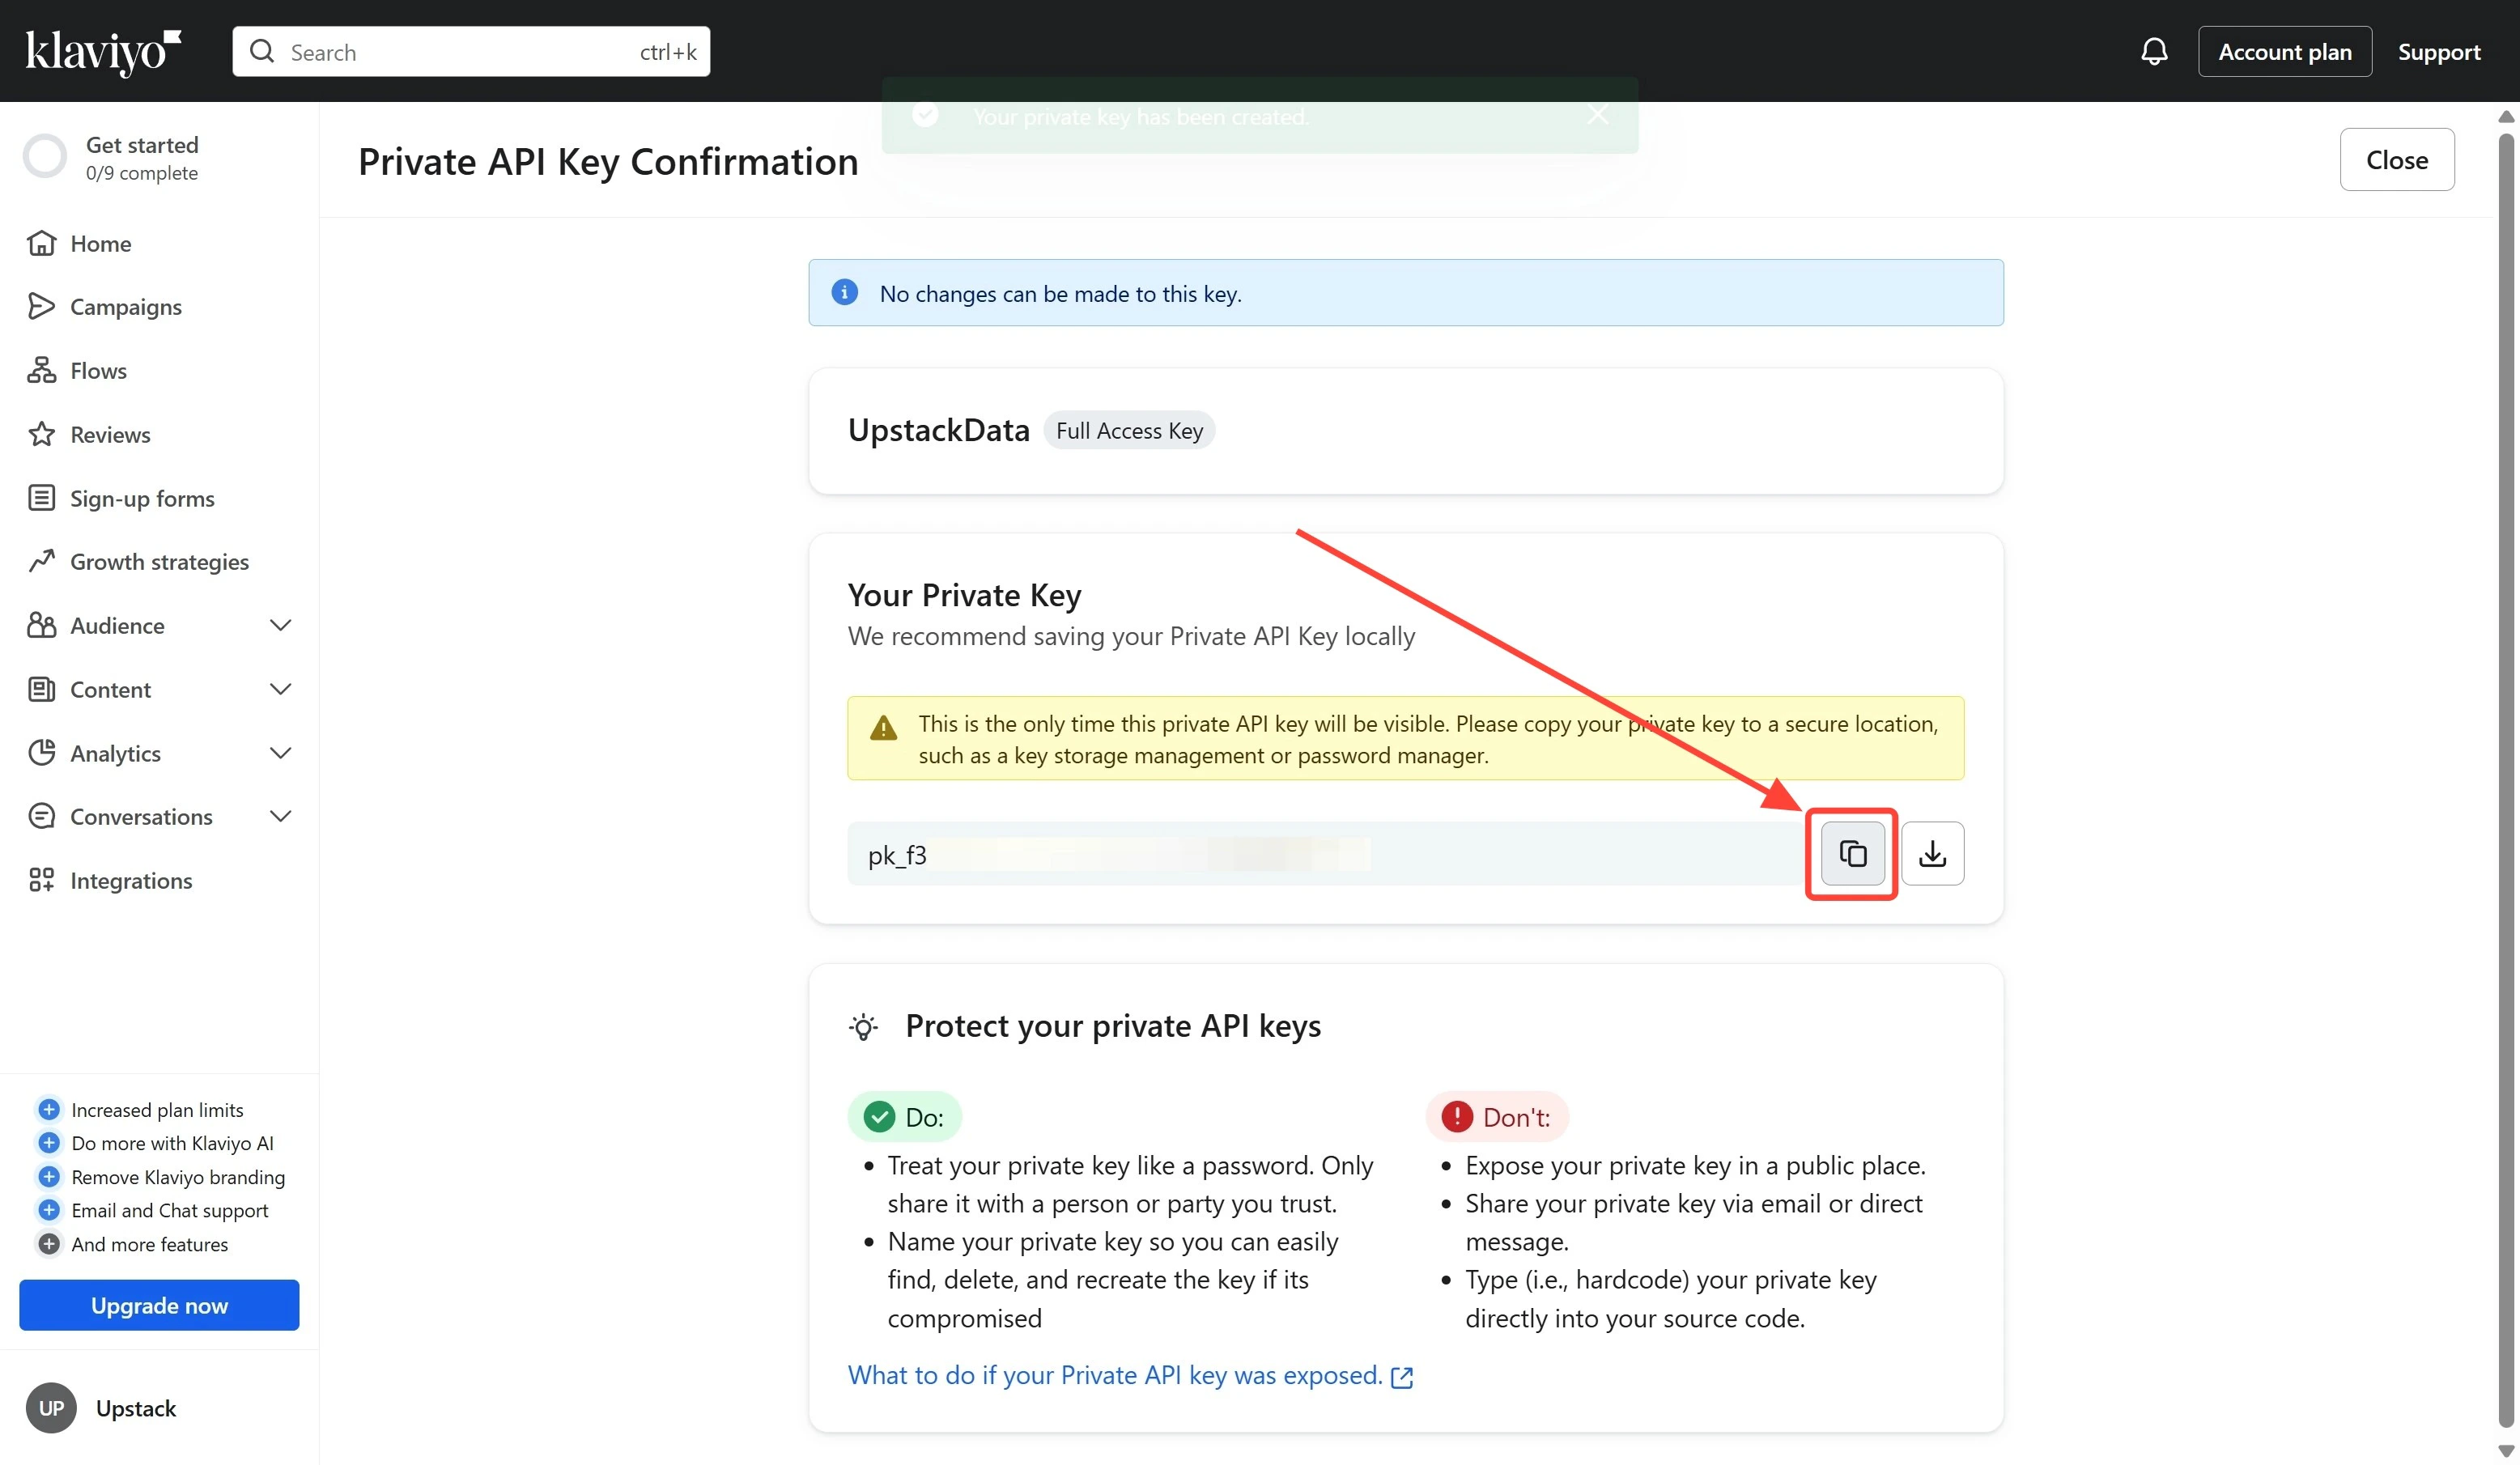
Important: This key will only be shown once.
Need a more detailed walkthrough? See How to generate a Klaviyo Private API key for Upstack Data.
Part 2: Configure the Klaviyo destination in the Upstack dashboard
- Sign in to Upstack Data.
- In the Upstack dashboard, navigate to Pixel → Event Destinations.
- Click + New Destination in the top-right of the page.
- In the Select a Destination popup, choose Klaviyo and click Next.
- Paste your Klaviyo Private API key into the Private API Key field.
- Click Create Configuration.

Success! Klaviyo is now connected to Upstack Data.
Need a more detailed walkthrough? See How to configure the Klaviyo destination in Upstack Data.
Part 3: Verify the connection
- In the Upstack dashboard, go to Pixel → Event Destinations.
- Confirm the Klaviyo destination is listed with a Healthy status.
- In Klaviyo, go to Analytics → Metrics and confirm Upstack-emitted events (for example, Viewed Product - Upstackified, Added to Cart - Upstackified, Started Checkout - Upstackified, Active on Site - Upstackified) begin appearing within a few minutes of live traffic.