Prerequisites
Before you start, you need:- An active Upstack Data account (sign up)
- Admin access to a Klaviyo account
- A Klaviyo Private API key with Full Access (learn how to generate one)
Configuration Steps
Sign in to Upstack Data
Sign in to Upstack Data.
Open the Event Destinations page
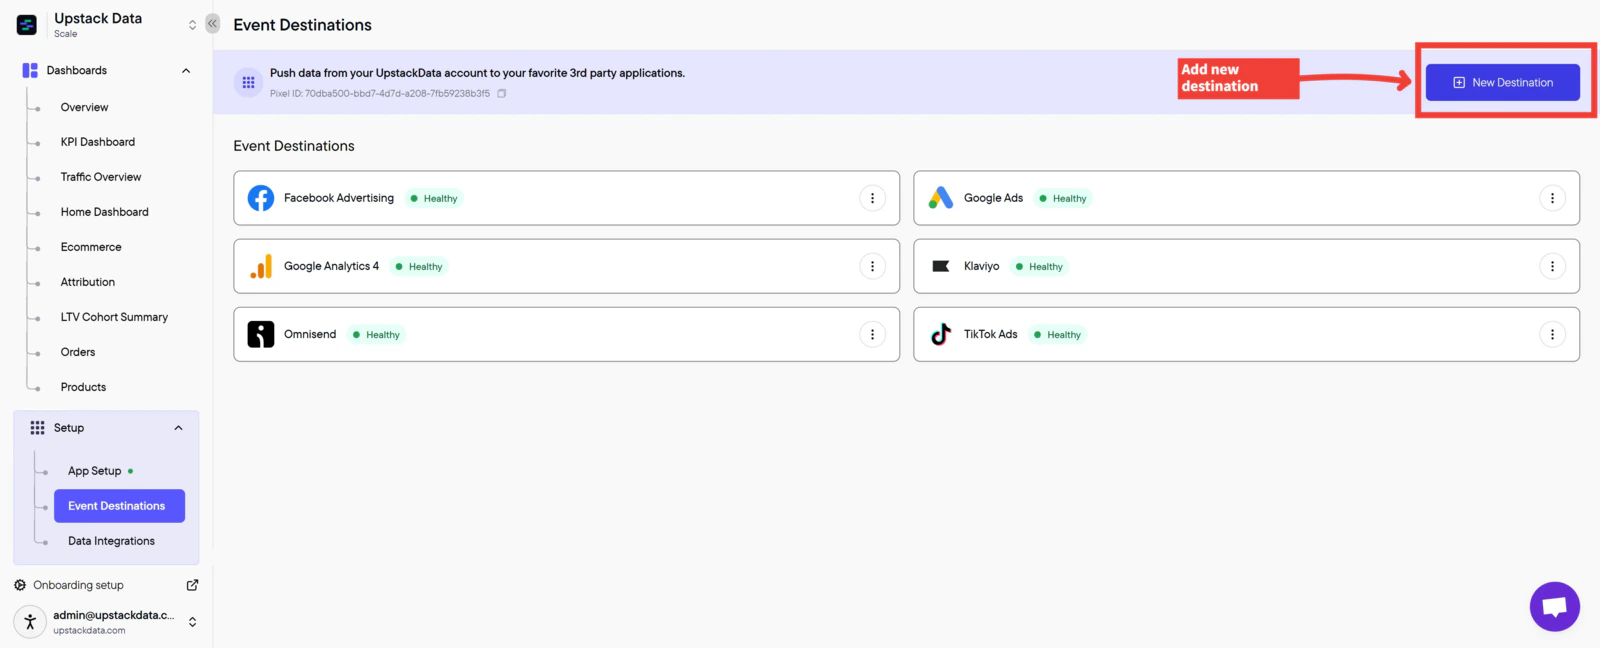
- In the Upstack dashboard, navigate to Pixel → Event Destinations (or open it directly: Event Destinations).
-
Click + New Destination in the top-right of the page.
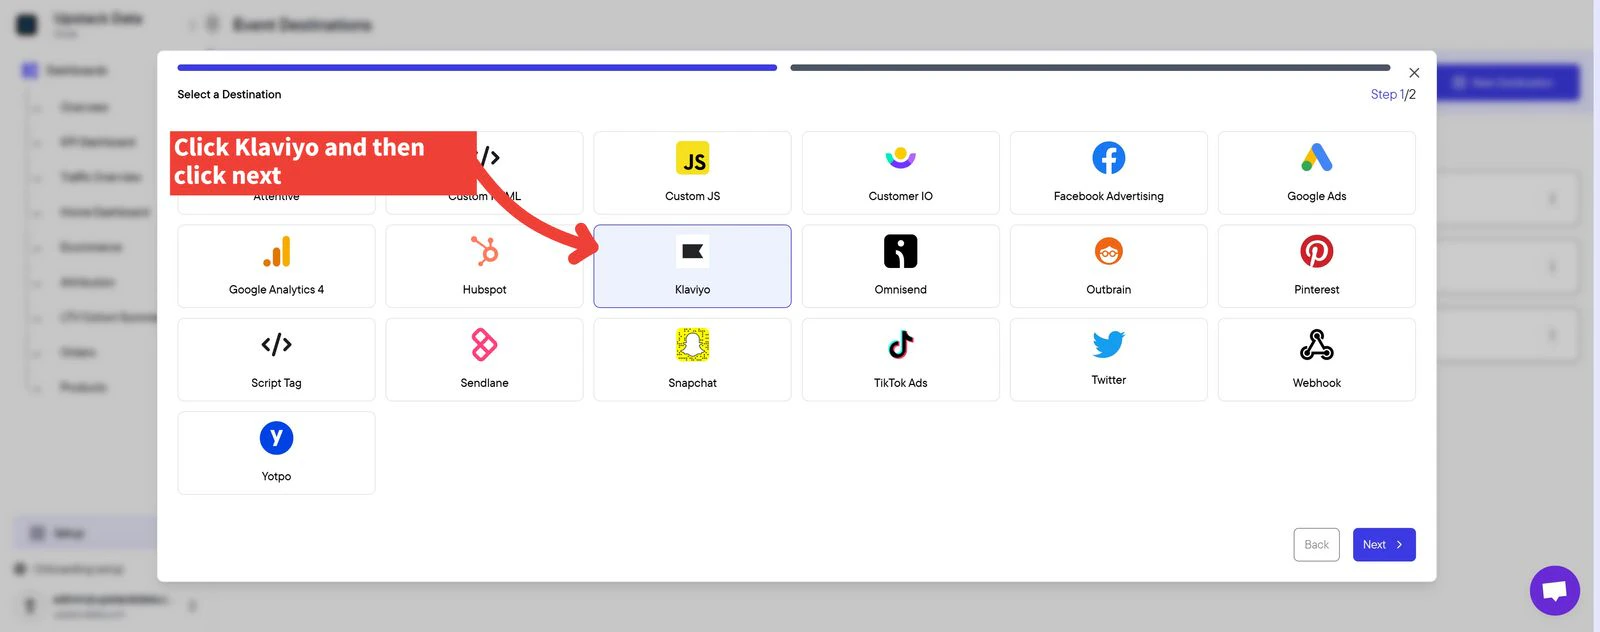
- In the Select a Destination popup, click Klaviyo.
-
Click Next.
Enter your Klaviyo Private API key
Paste your Klaviyo Private API key into the Private API Key field. The key starts with 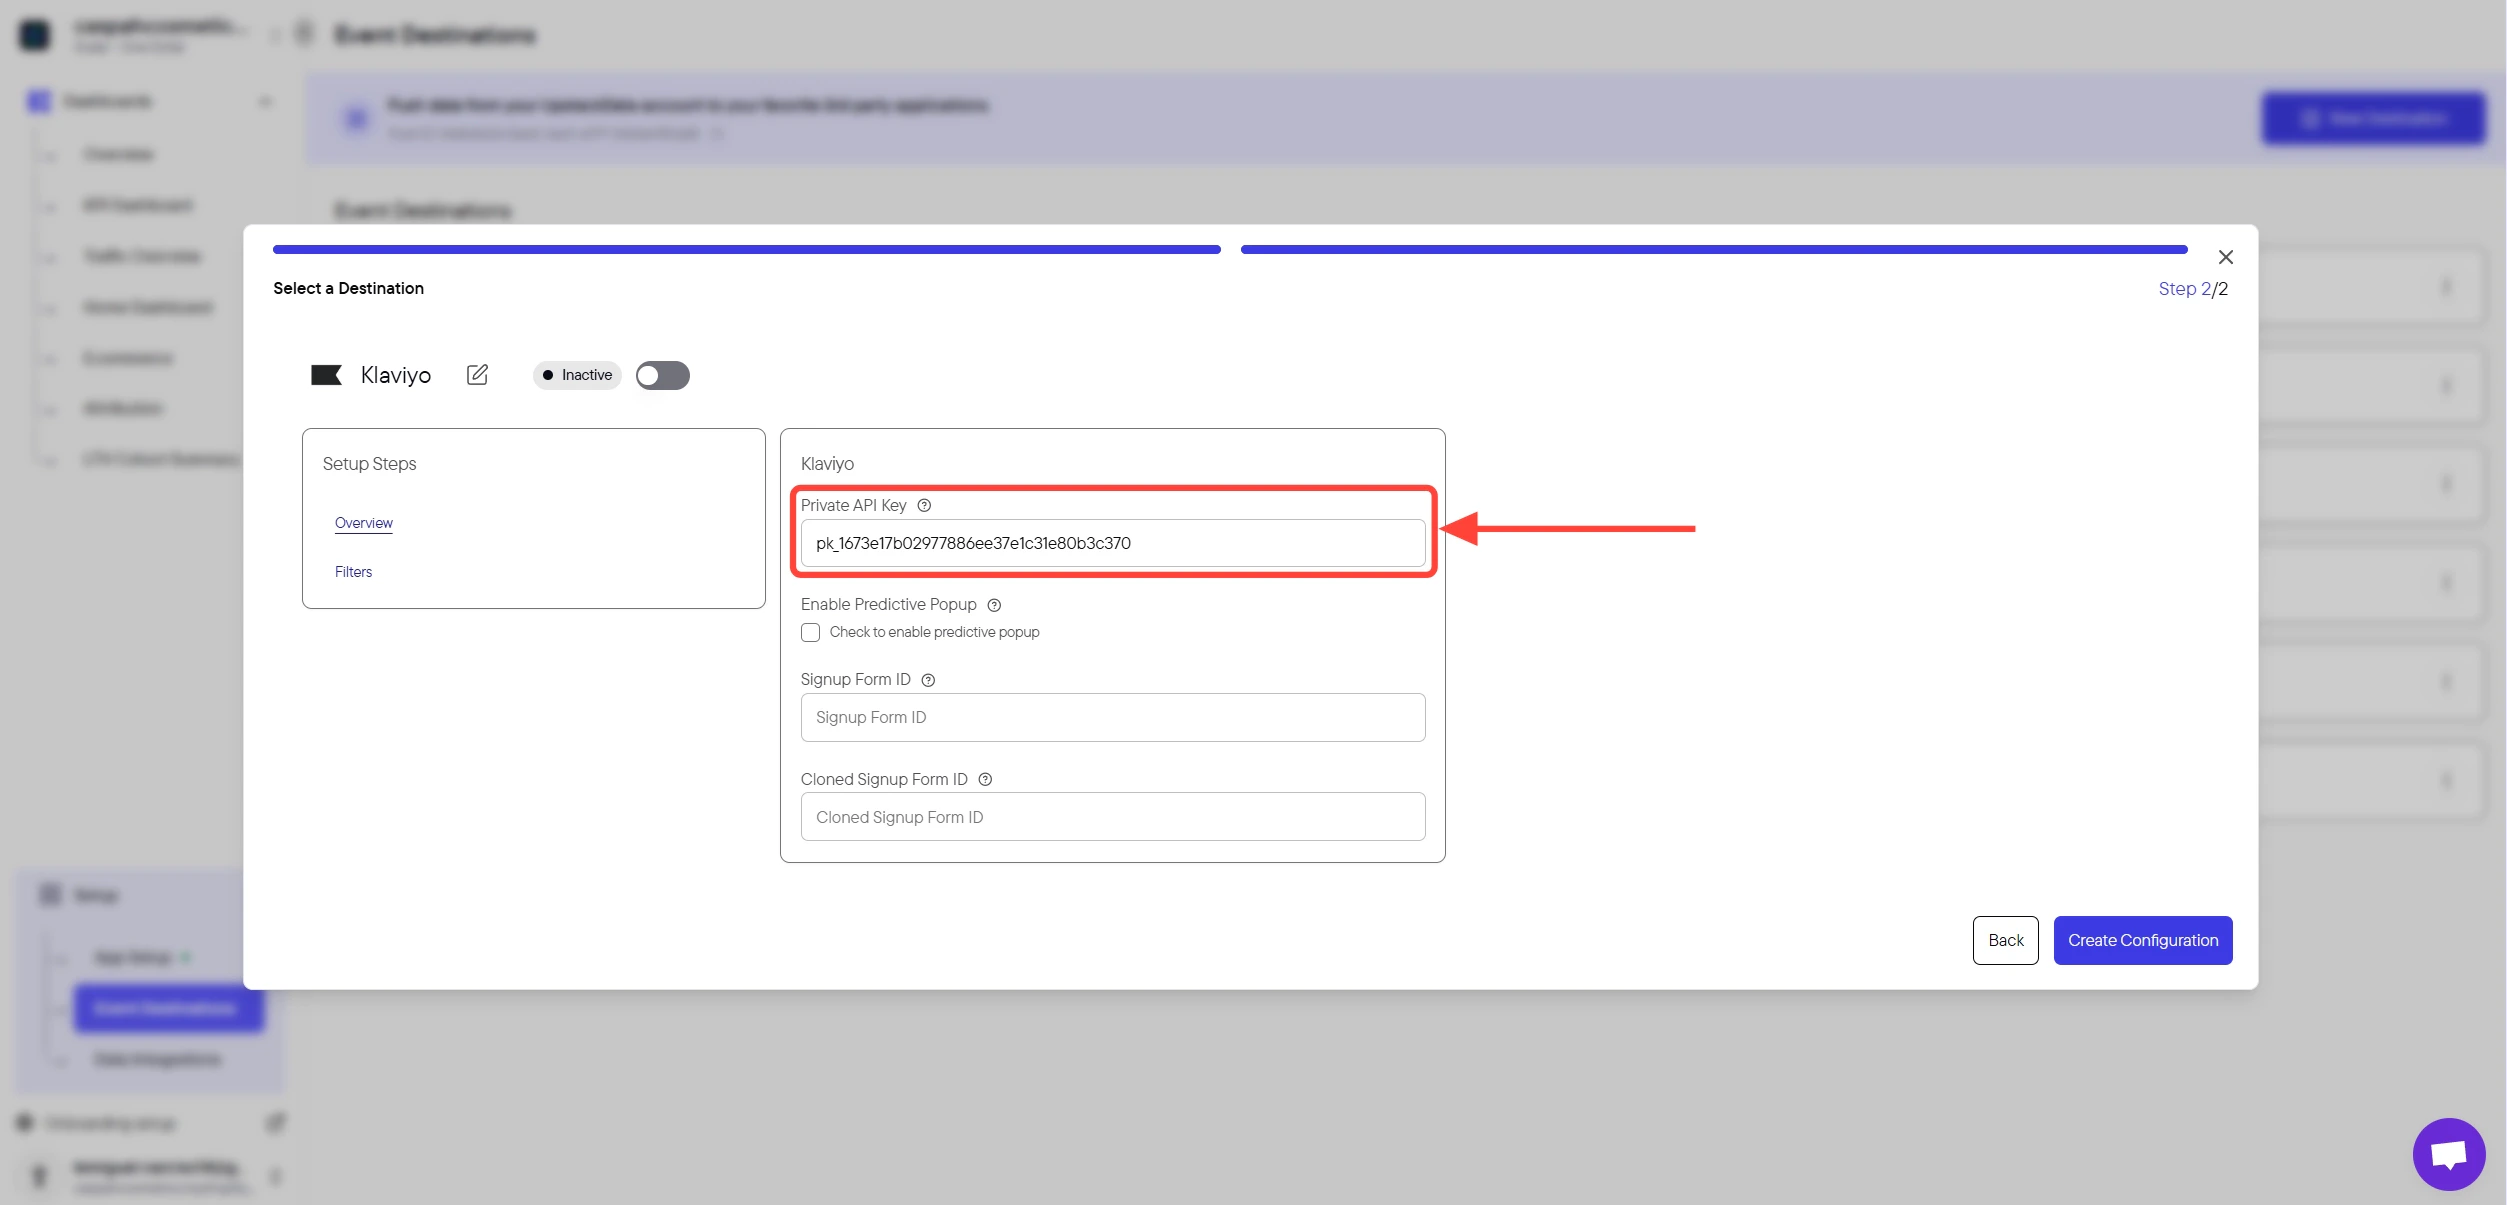
pk_ followed by alphanumeric characters (for example, pk_aBcDeFgHiJkLmNoPqRsTuVwXyZ012345678).Important: Ensure there are no extra spaces before or after the key.Need to generate the key first? See How to generate a Klaviyo Private API key for Upstack Data.
Create the configuration
Click the Create Configuration button to save the setup.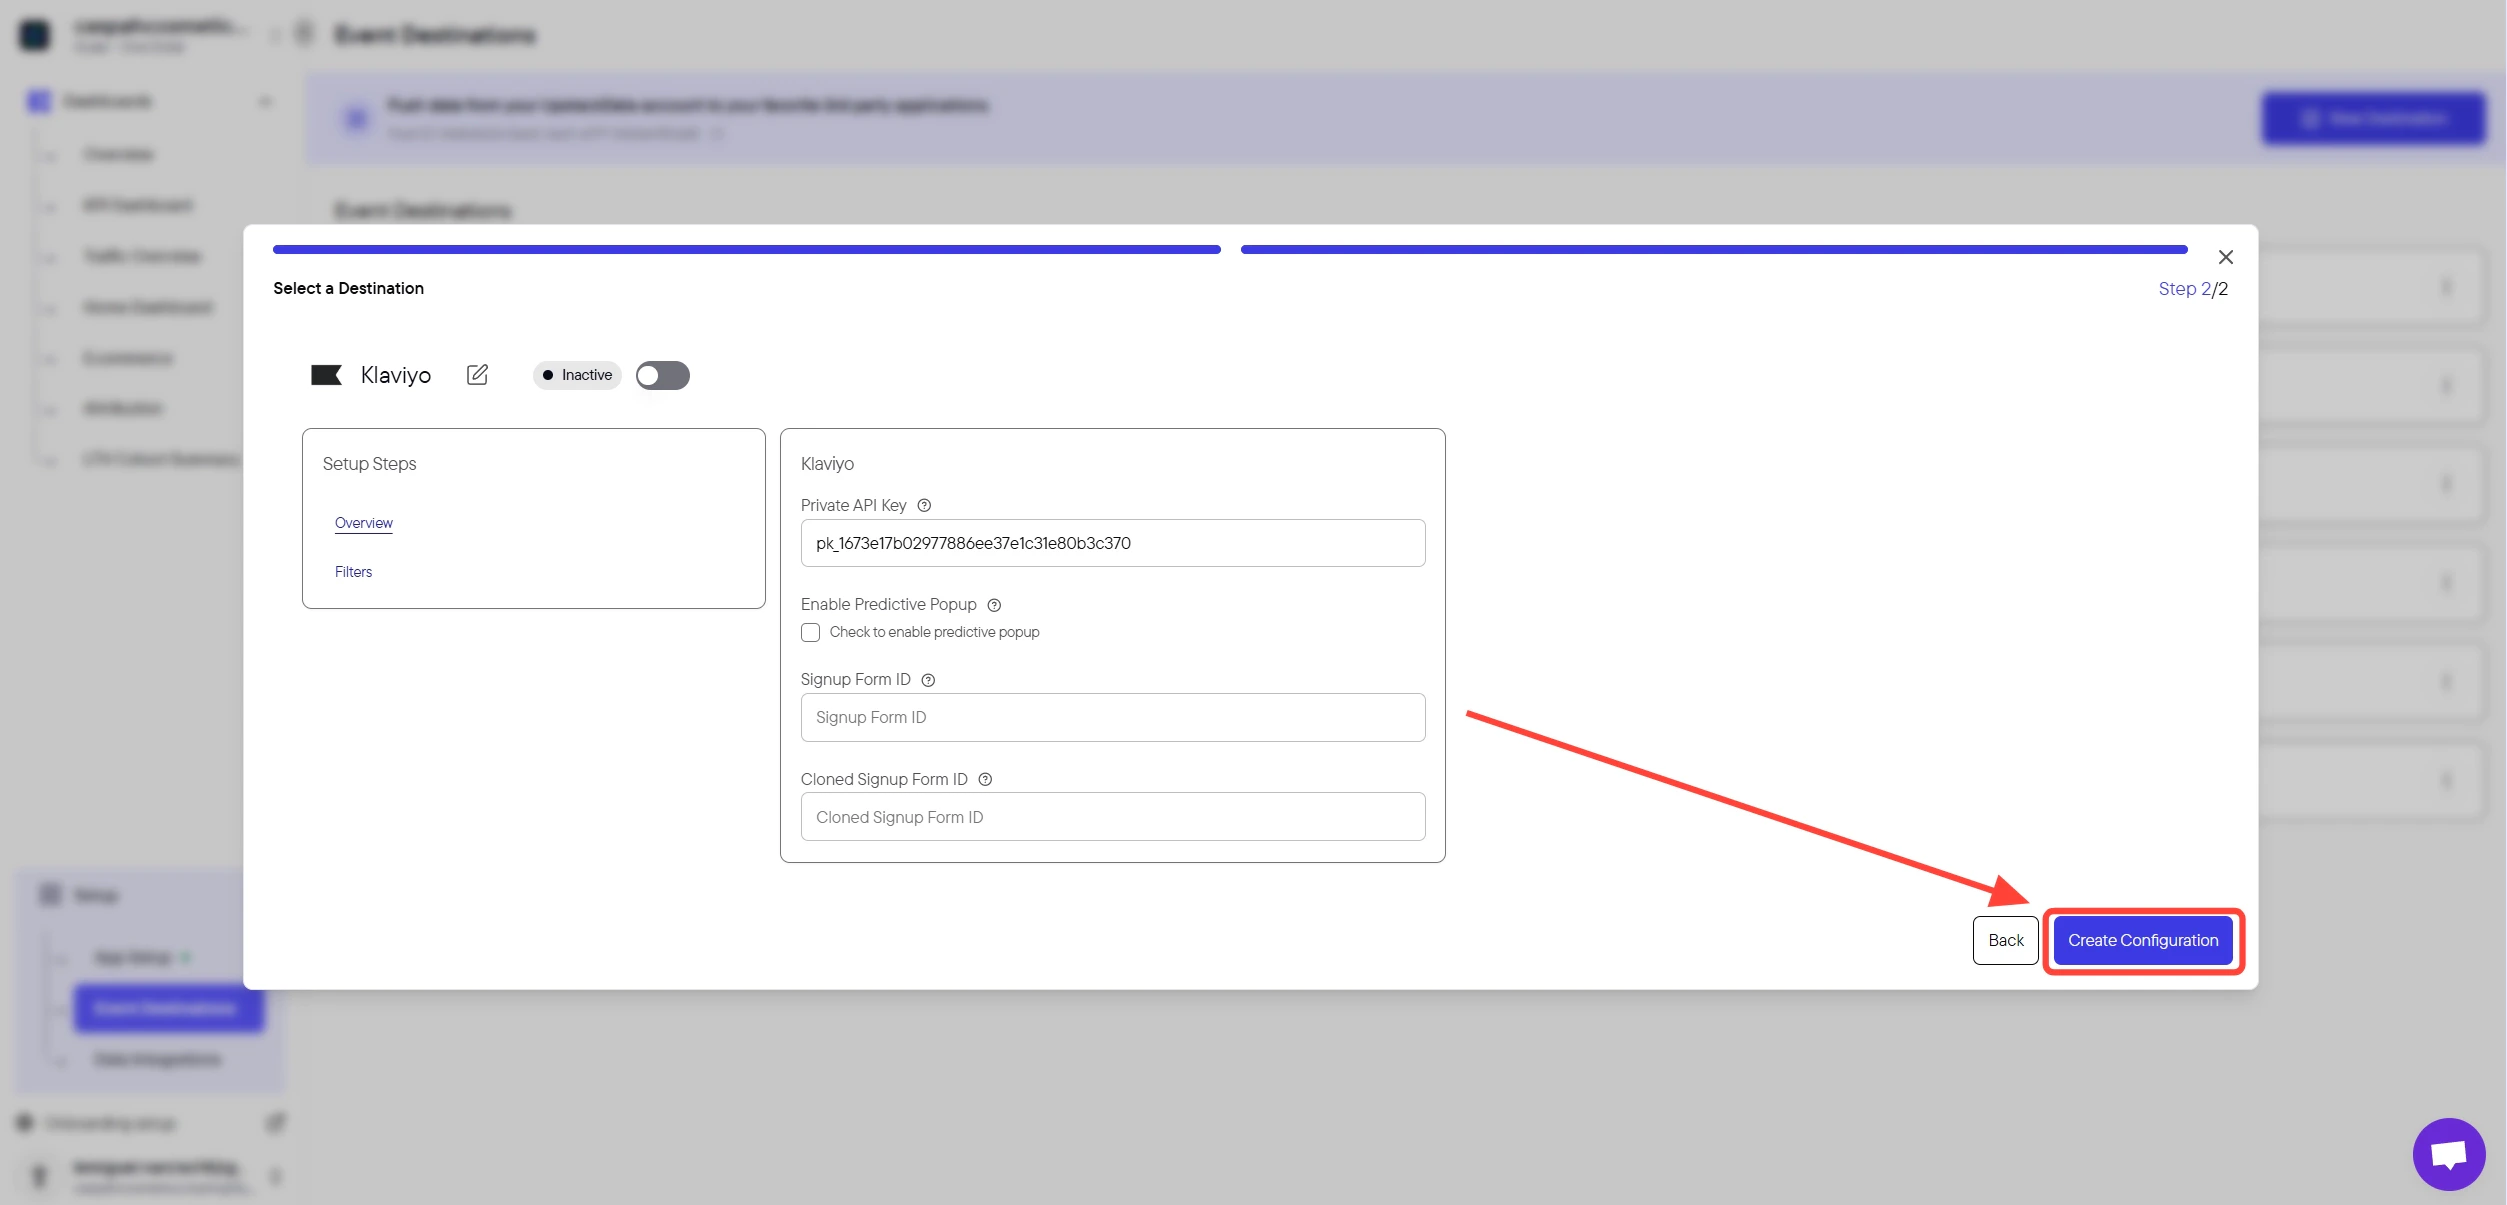

Success! 🎉 You should see a confirmation message and the Klaviyo destination will appear as Healthy in your destinations list.
Verify events are flowing to Klaviyo
- In the Upstack dashboard, return to Pixel → Event Destinations and confirm the Klaviyo row shows a Healthy status.
- In Klaviyo, navigate to Analytics → Metrics and confirm Upstack-emitted events (for example, Viewed Product - Upstackified, Added to Cart - Upstackified, Started Checkout - Upstackified, Active on Site - Upstackified) appear within a few minutes of live traffic on your store.