What this setup enablesSetting up the Meta Ads Pixel destination in Upstack Data enables dual tracking via browser pixel and server-side Conversions API (CAPI), ensuring accurate conversion data despite iOS restrictions and ad blockers.
Prerequisites
Before you start, you need:- An active Upstack Data account (sign up)
- Admin access to a Meta Business Manager account
- A configured Meta Pixel in Meta Events Manager — see How to find your Meta Pixel ID
- A Conversions API access token — see How to generate your CAPI token
Configuration steps
Sign in to Upstack Data
Sign in to Upstack Data at app.upstackdata.com.
Open the destination configuration
In the Upstack dashboard, navigate to Event Destinations.Click + New Destination in the top-right of the page.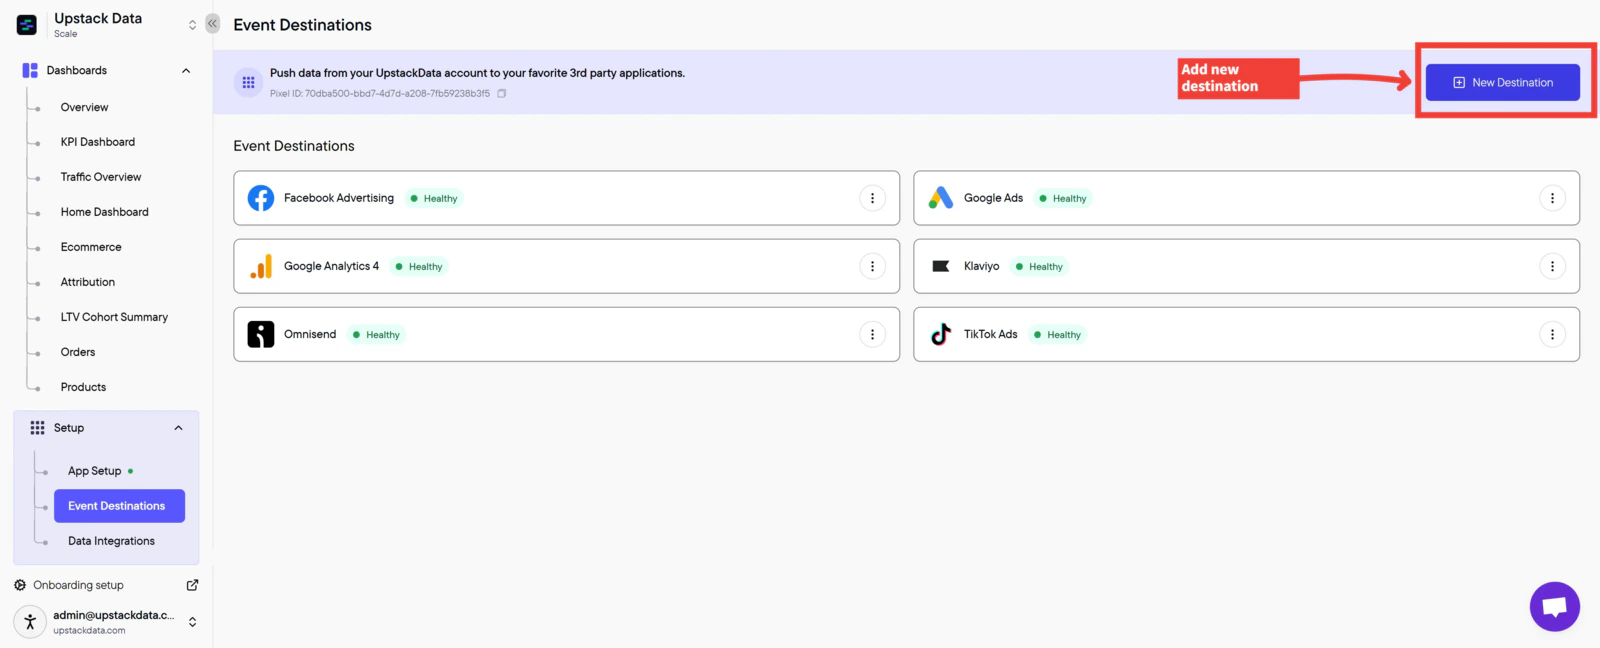
Enter your Pixel ID and CAPI token
Fill in the form: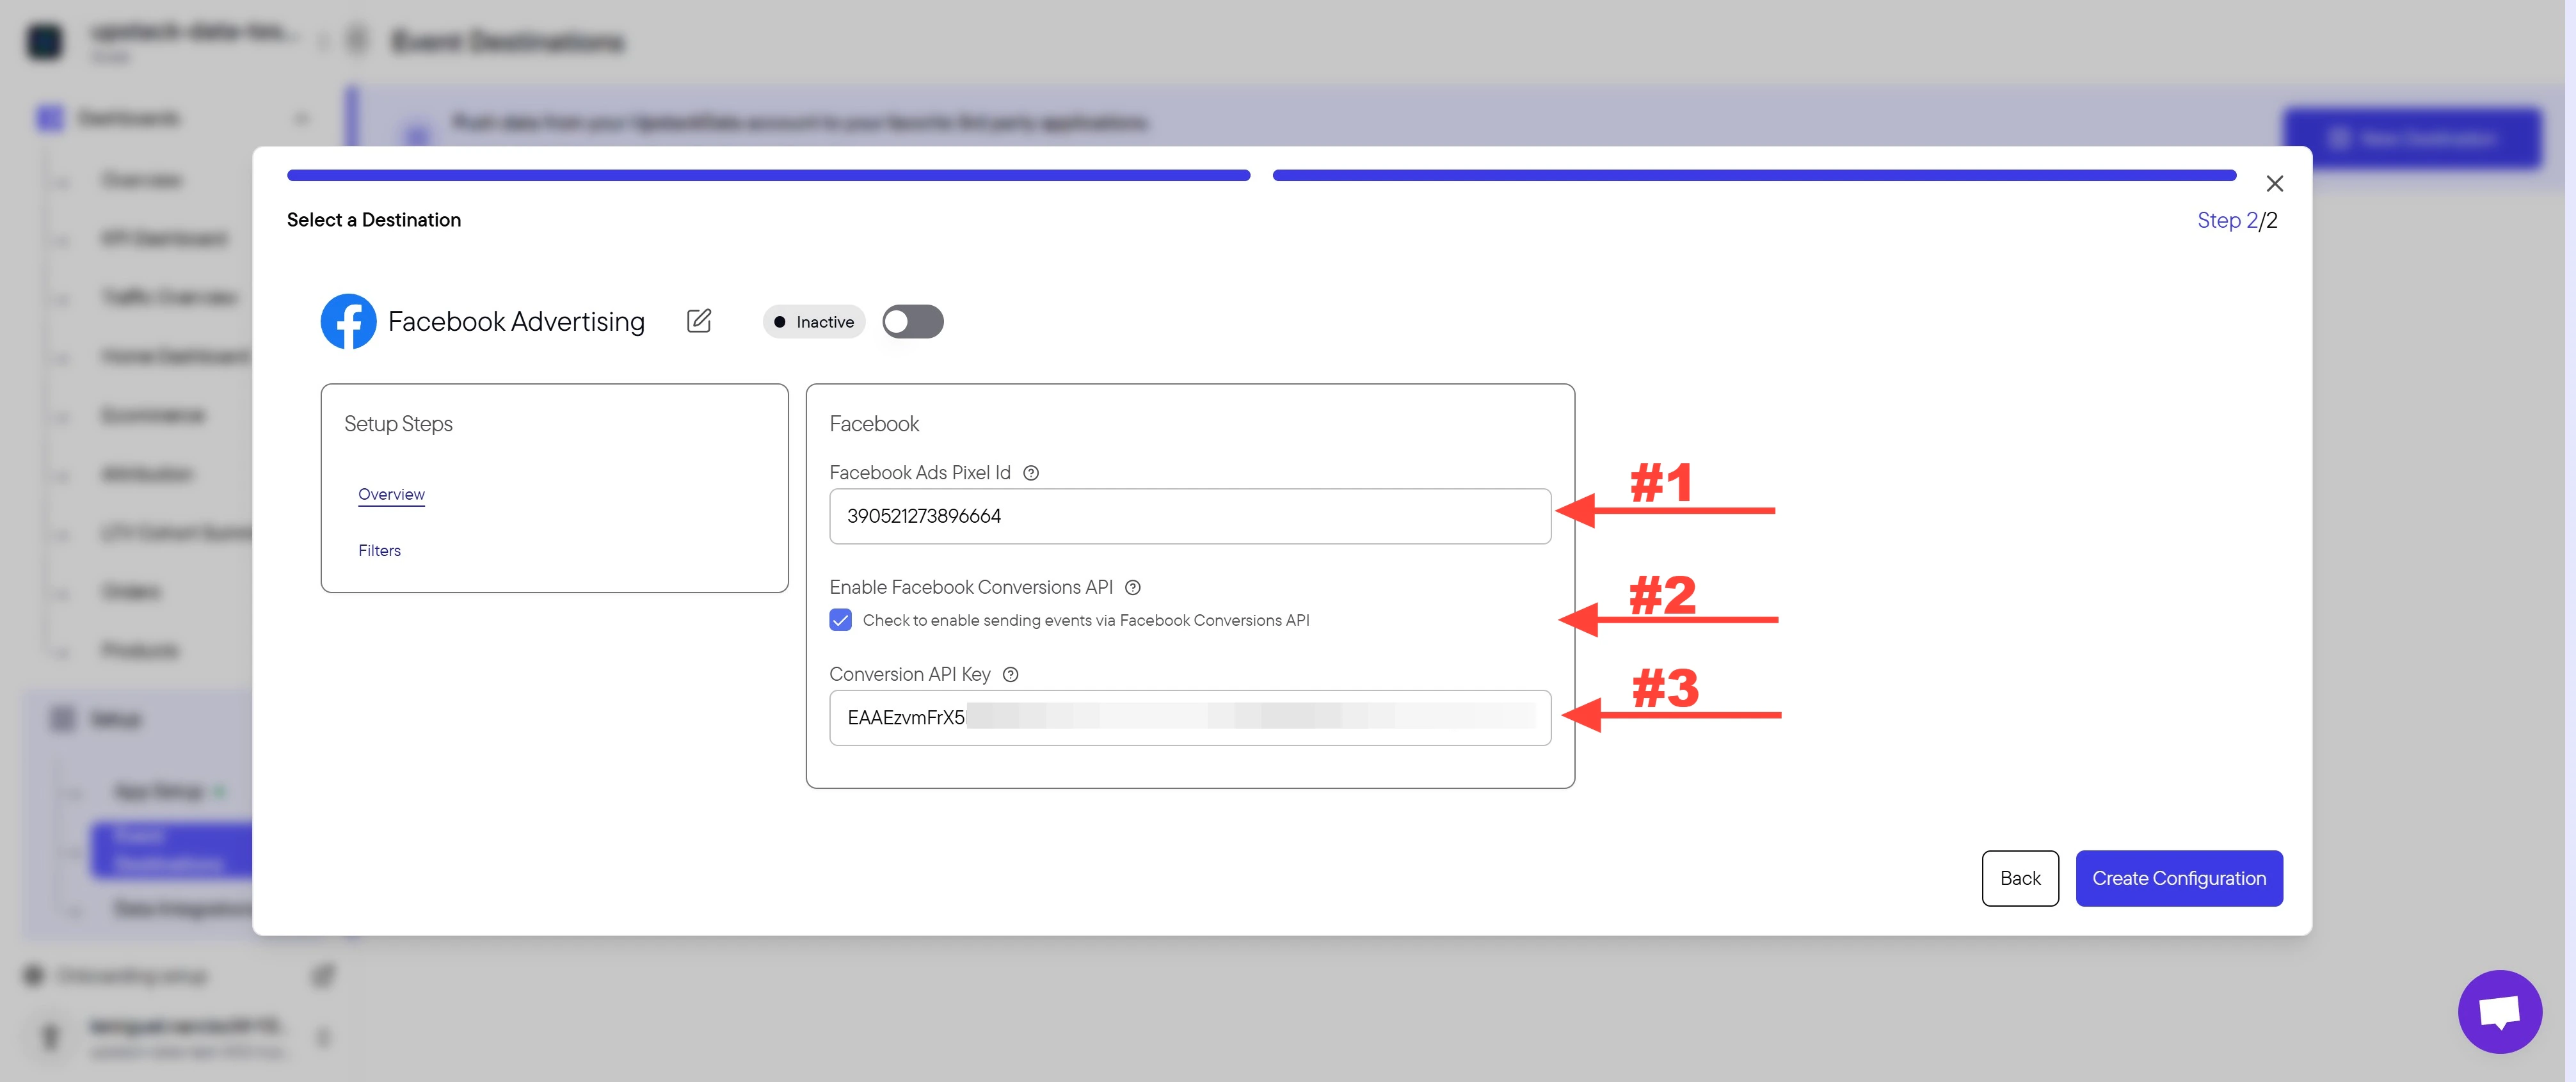
-
Meta Pixel ID — the 15–16 digit number, no prefix (e.g.,
123456789012345). Meta Pixel IDs do not have anAW-prefix; that prefix belongs to Google Ads. - Check the box Check to enable sending events via Facebook Conversions API.
-
CAPI token — starts with
EAA, approximately 190 characters long.
Need help finding these?
Create the configuration
Click the Create Configuration button.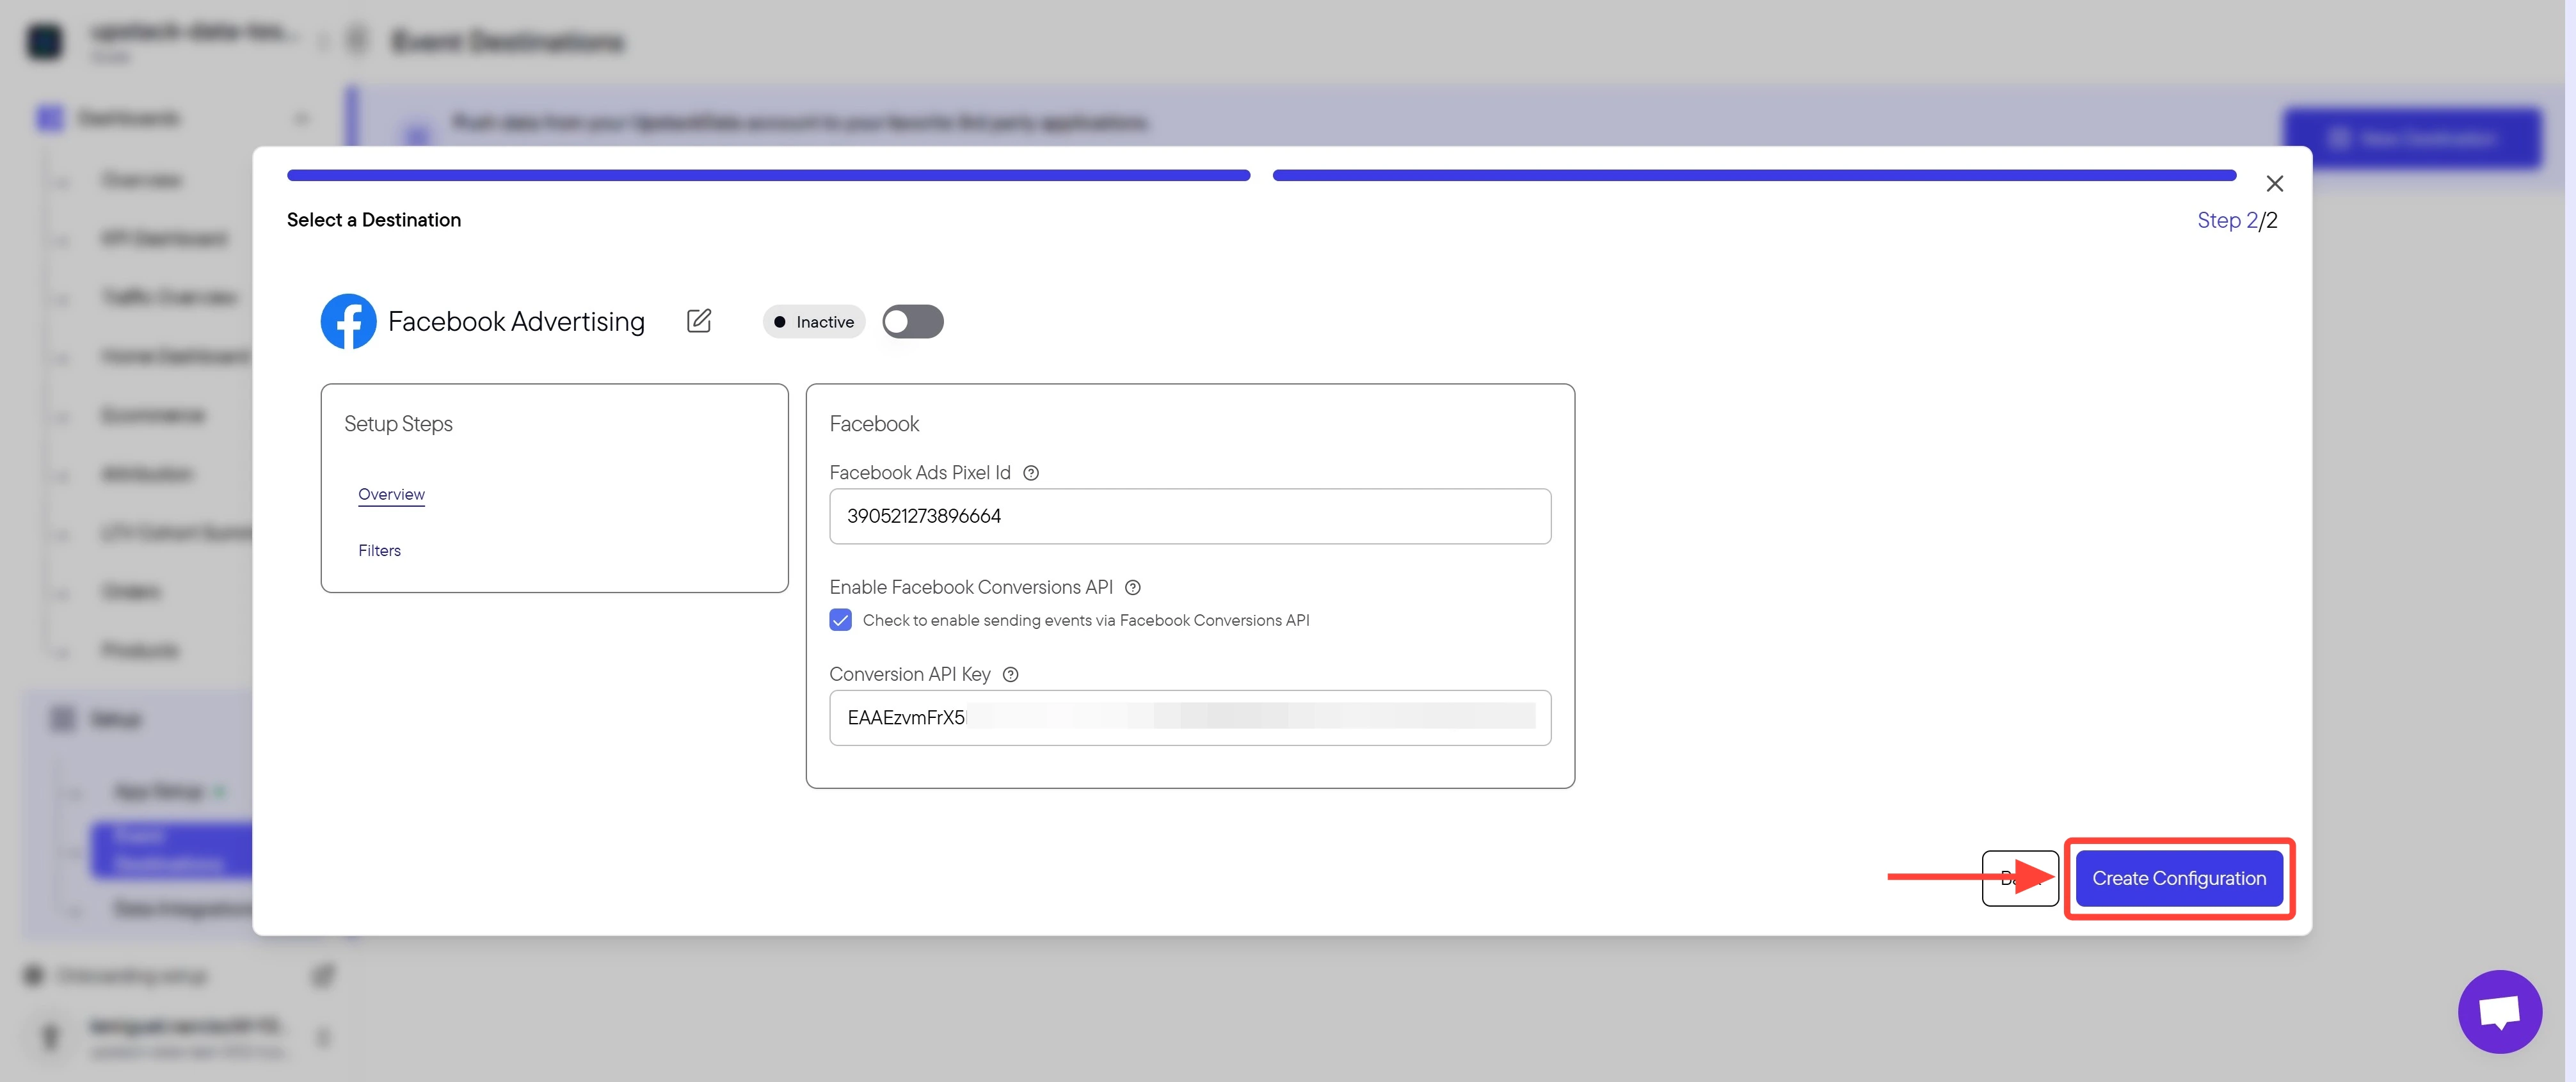
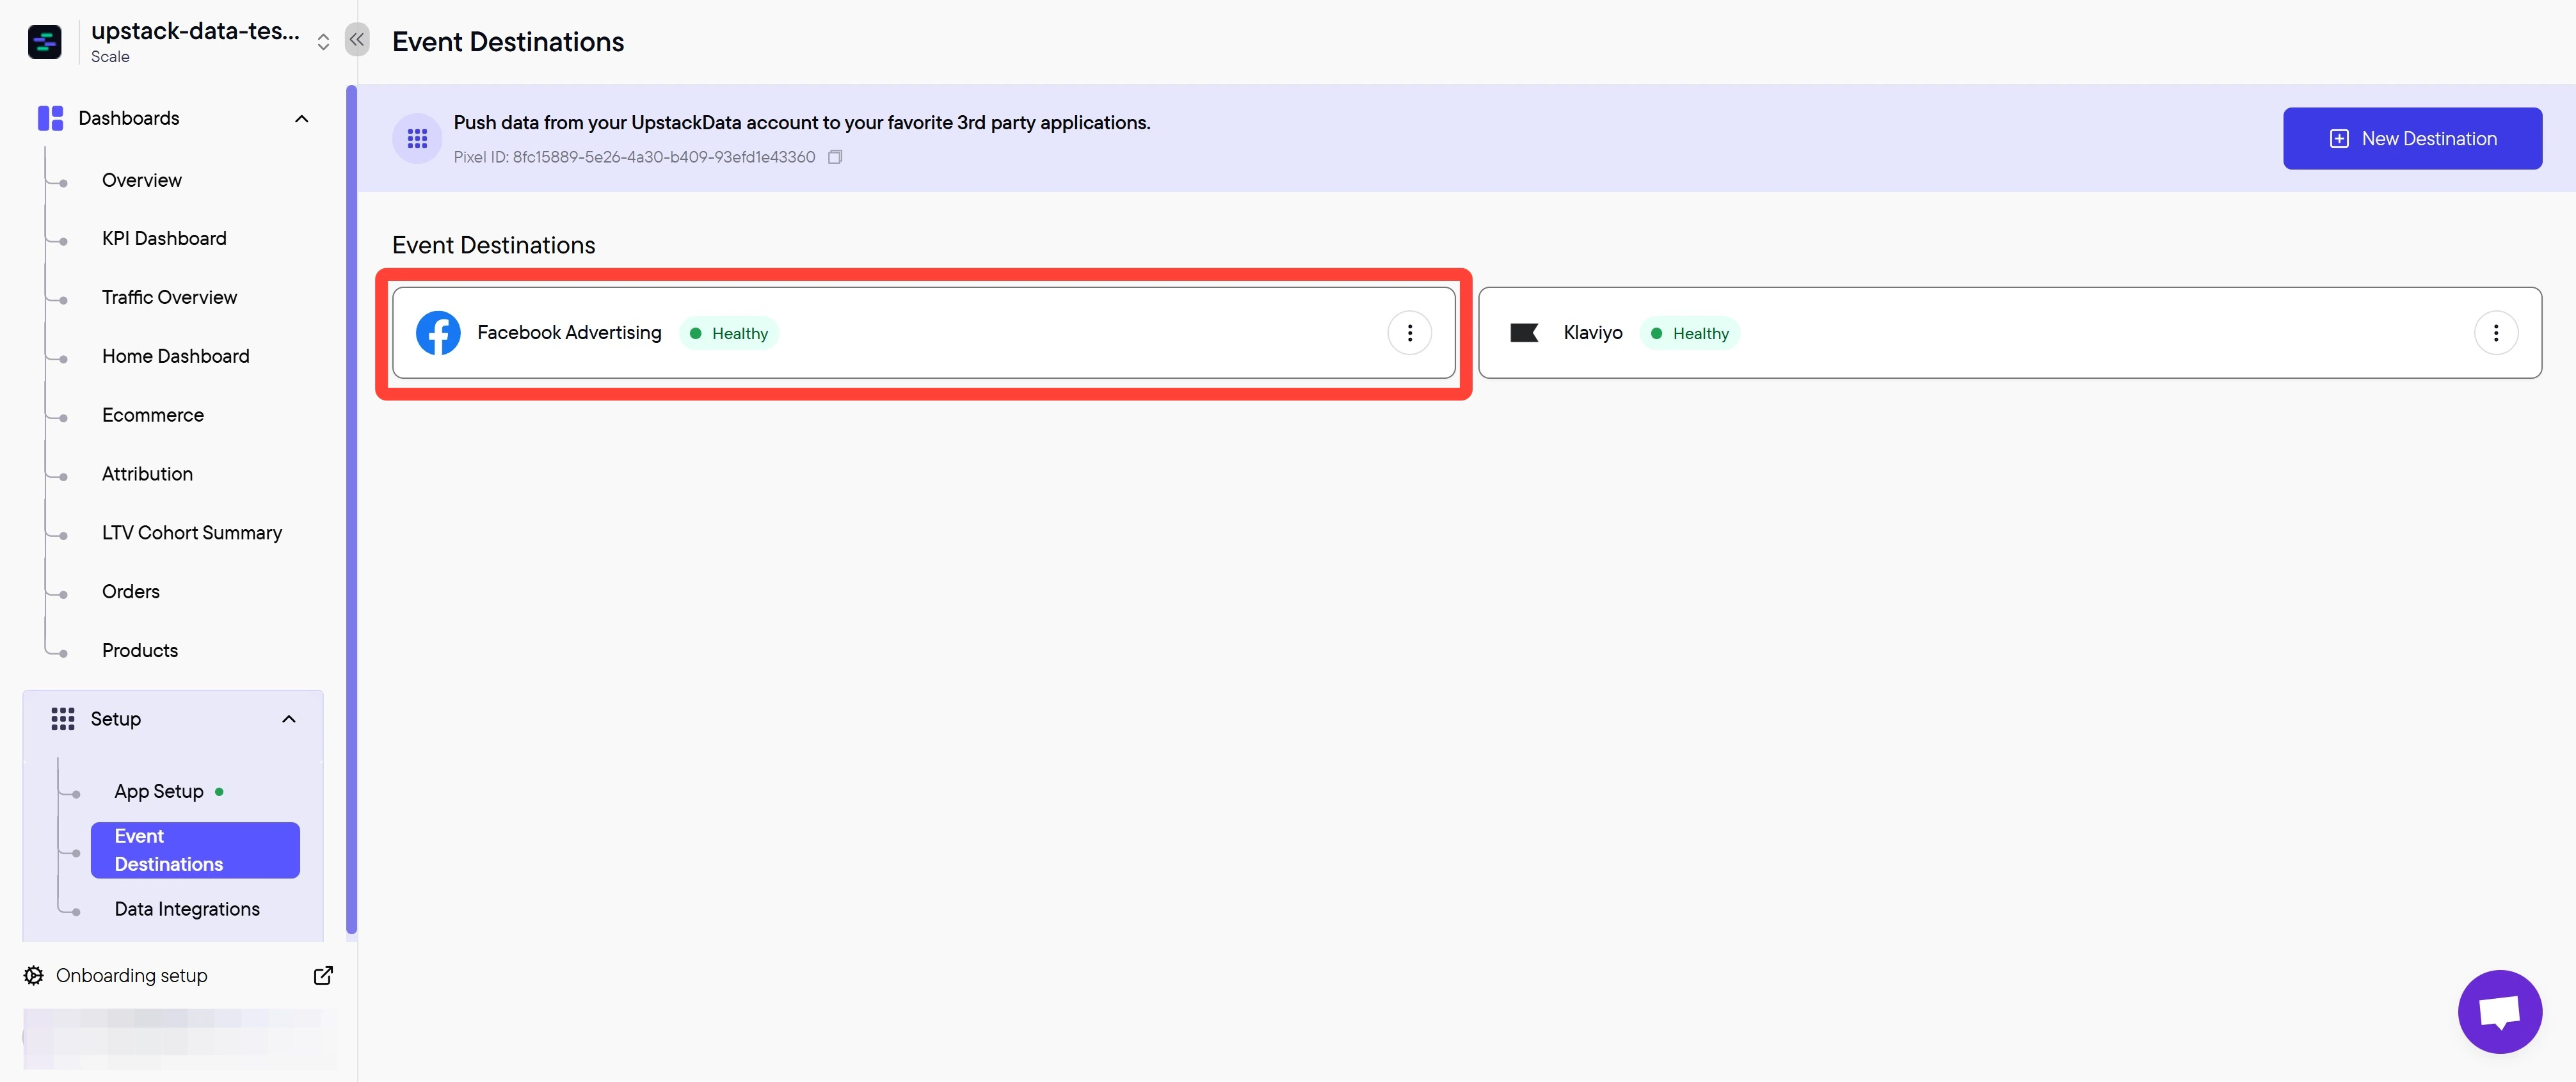
Verify the destination is healthy
In the Upstack dashboard, the Meta destination card should display Healthy with a green status indicator within 5 minutes.If the status shows Unhealthy:
- Confirm your Pixel ID is correct (15–16 digits, no leading/trailing spaces, no prefix).
- Confirm your CAPI token is the full string starting with
EAA. - Confirm the Conversions API checkbox was selected.
- See How to update your CAPI token if your token may have expired.