Prerequisites
Before you start, you need:- An active Upstack Data account (sign up)
- Admin access to your TikTok Business Center
- A TikTok Pixel configured under Events Manager → Data sources (see How to Create New TikTok Ads Pixel ID →)
- Your TikTok Pixel ID (How to Find your TikTok Ads Pixel ID →)
- A generated Access Token (How to Generate Your TikTok API Access Token →)
Configuration Steps
Sign in to Upstack Data
Sign in to Upstack Data at app.upstackdata.com.
Add a new TikTok destination
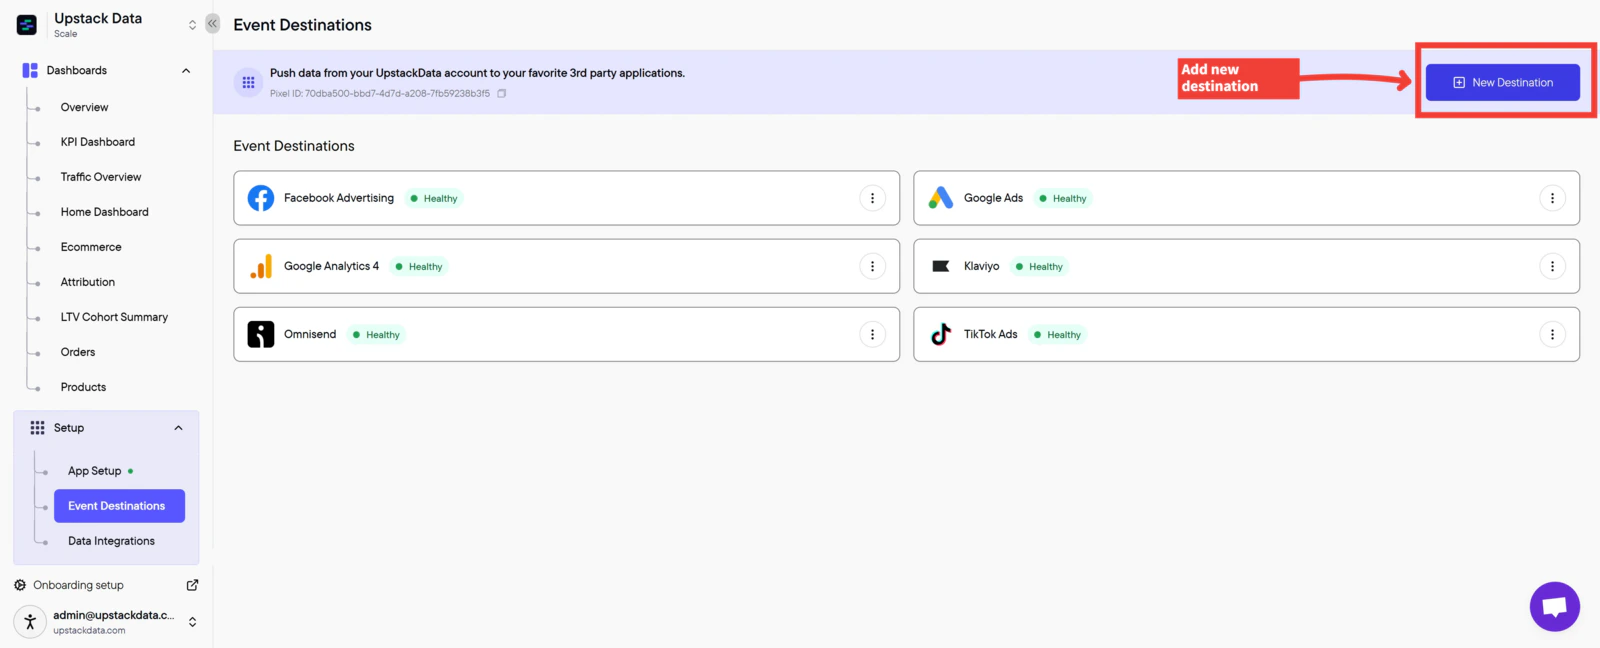
- In the Upstack dashboard, navigate to Events Destination (app.upstackdata.com/pixel/event-destinations)
-
Click ”+ New Destination” in the top-right corner of the page
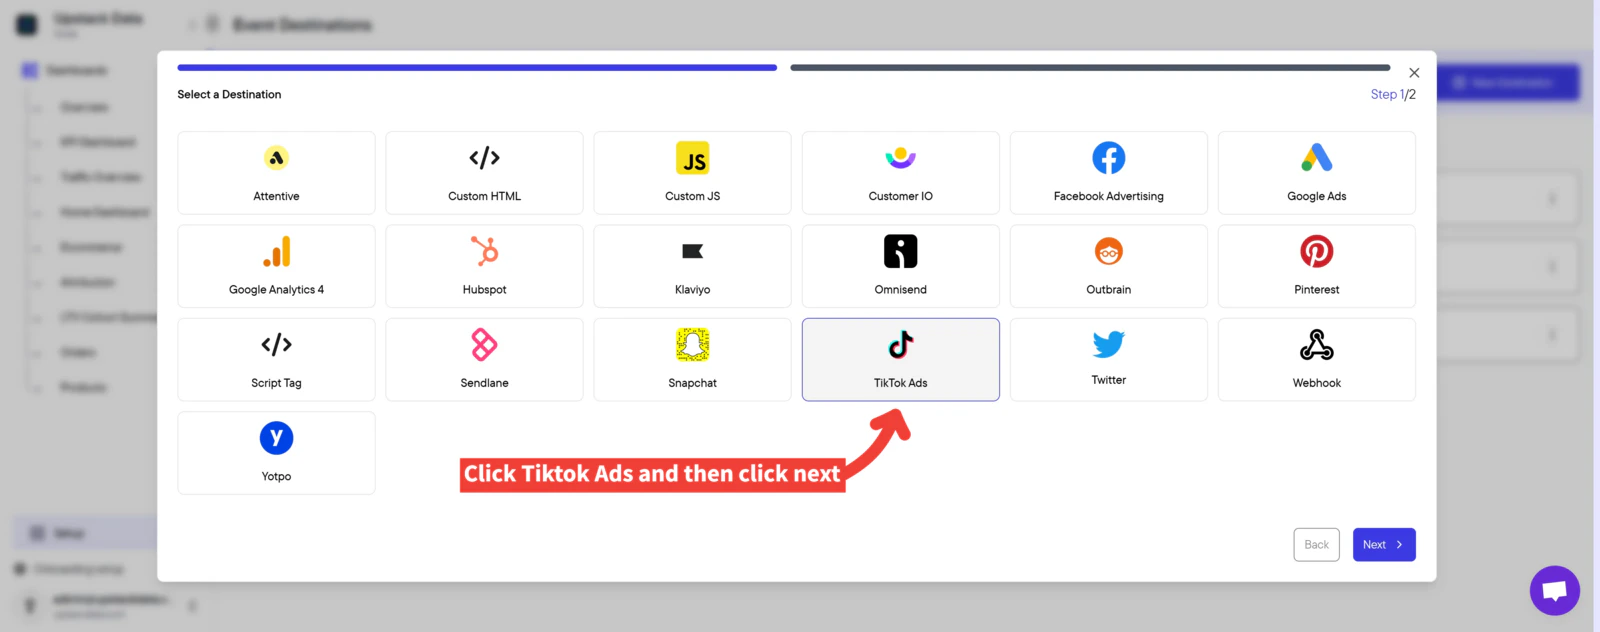
- In the Select a Destination popup, click “TikTok”
-
Click Next
Enter your Pixel ID and Access Token
Fill in the form fields: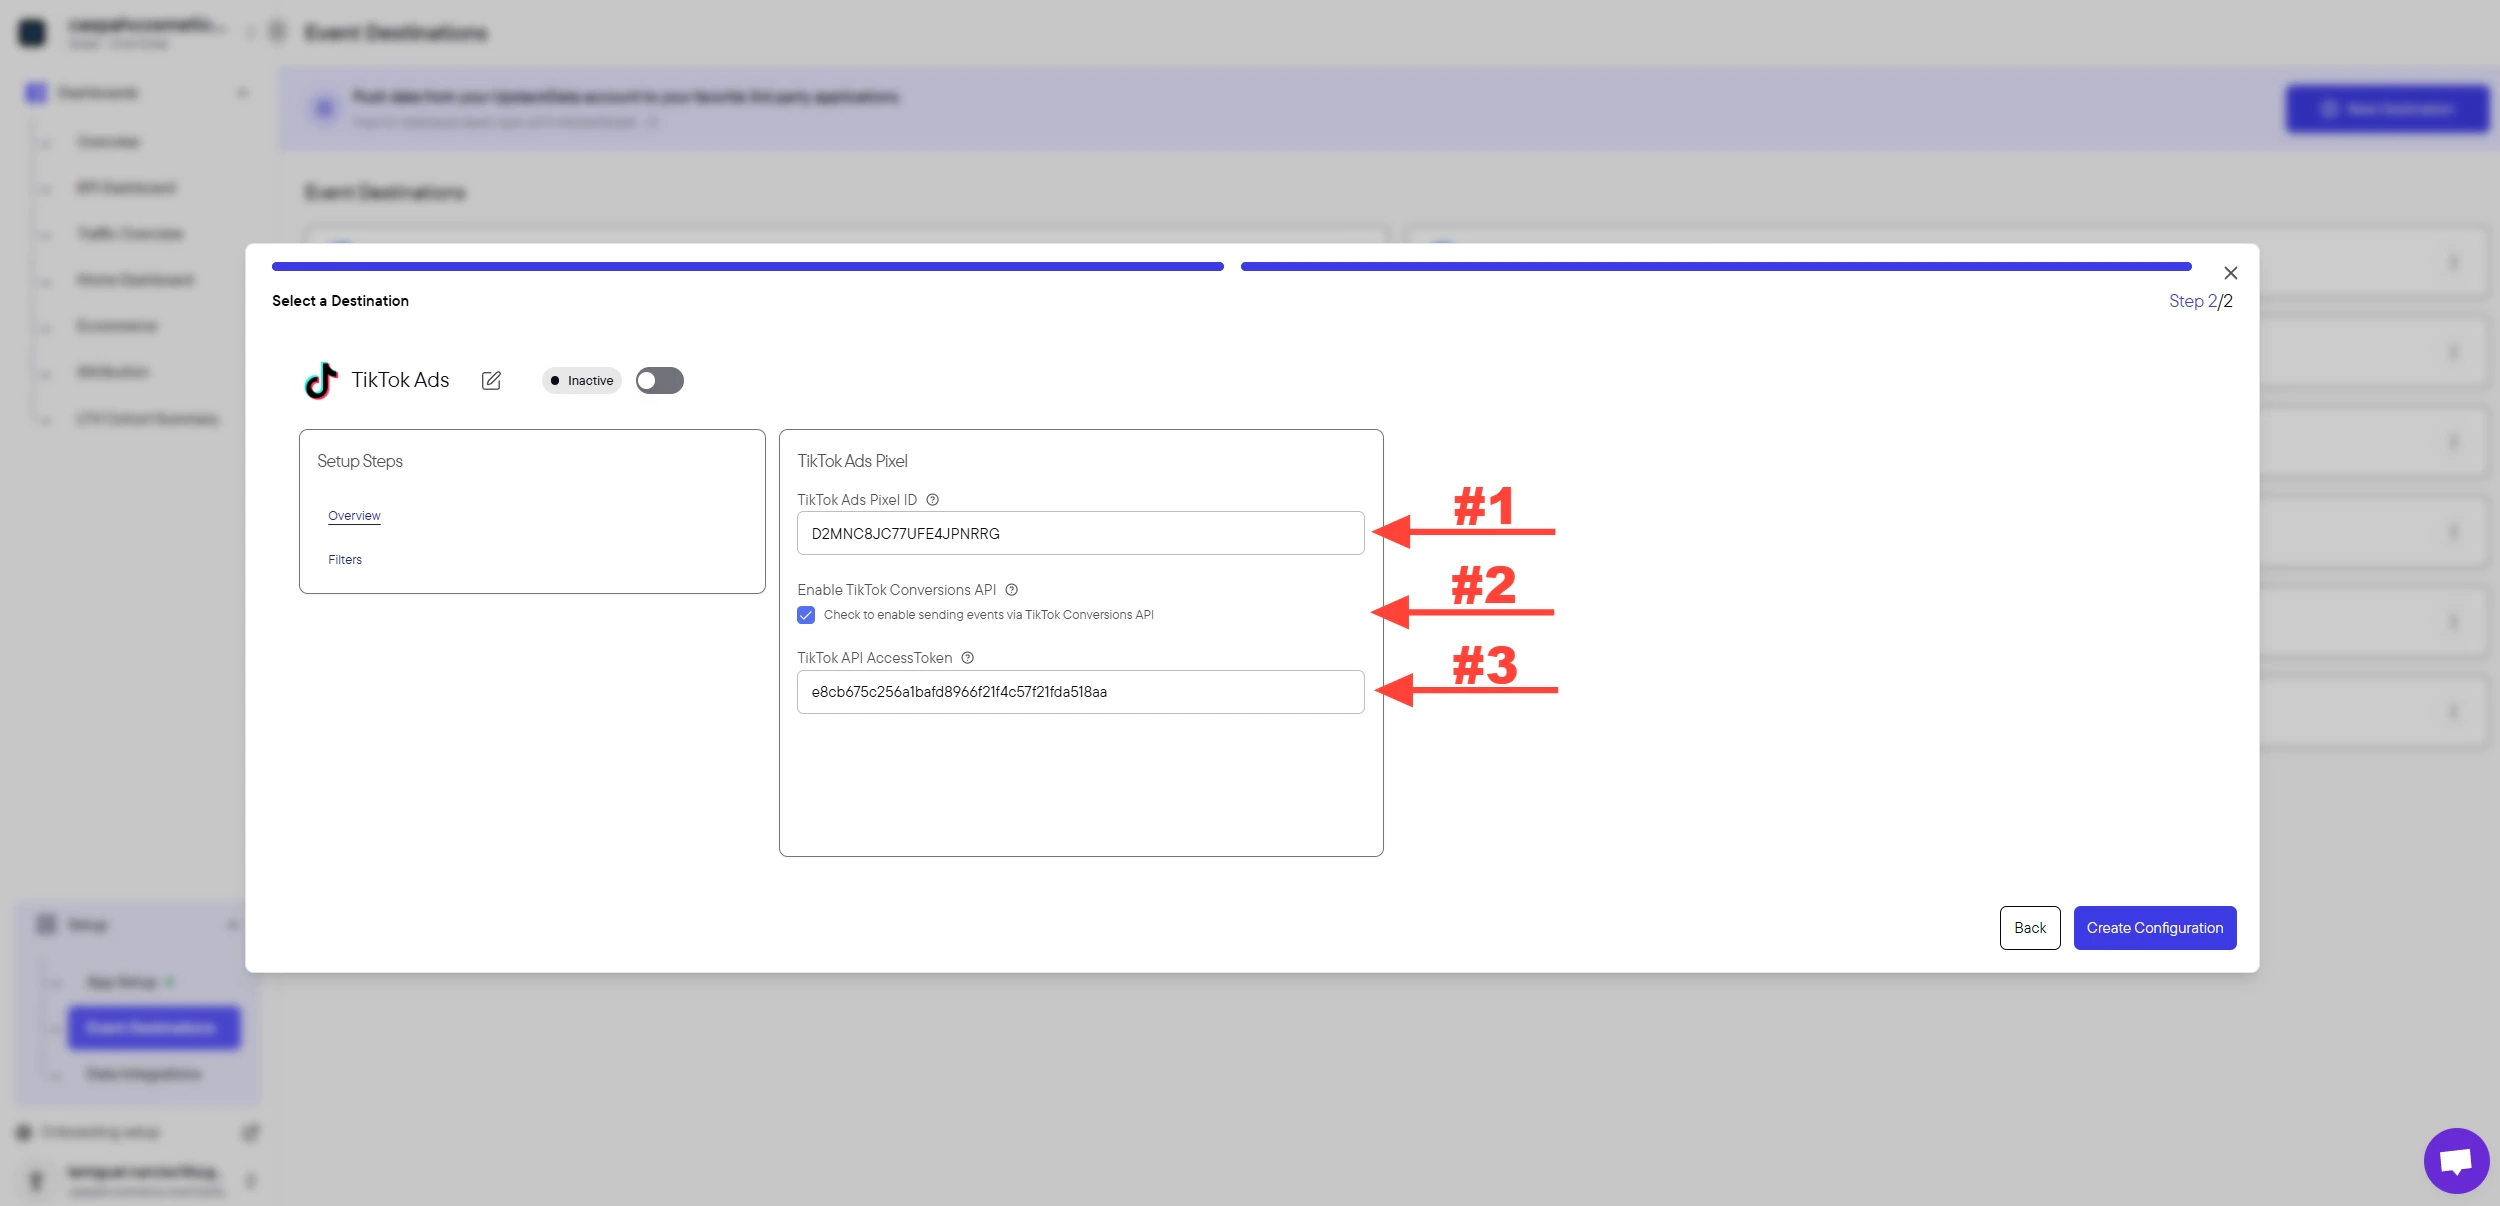
- TikTok Pixel ID — 20-character alphanumeric string (e.g.,
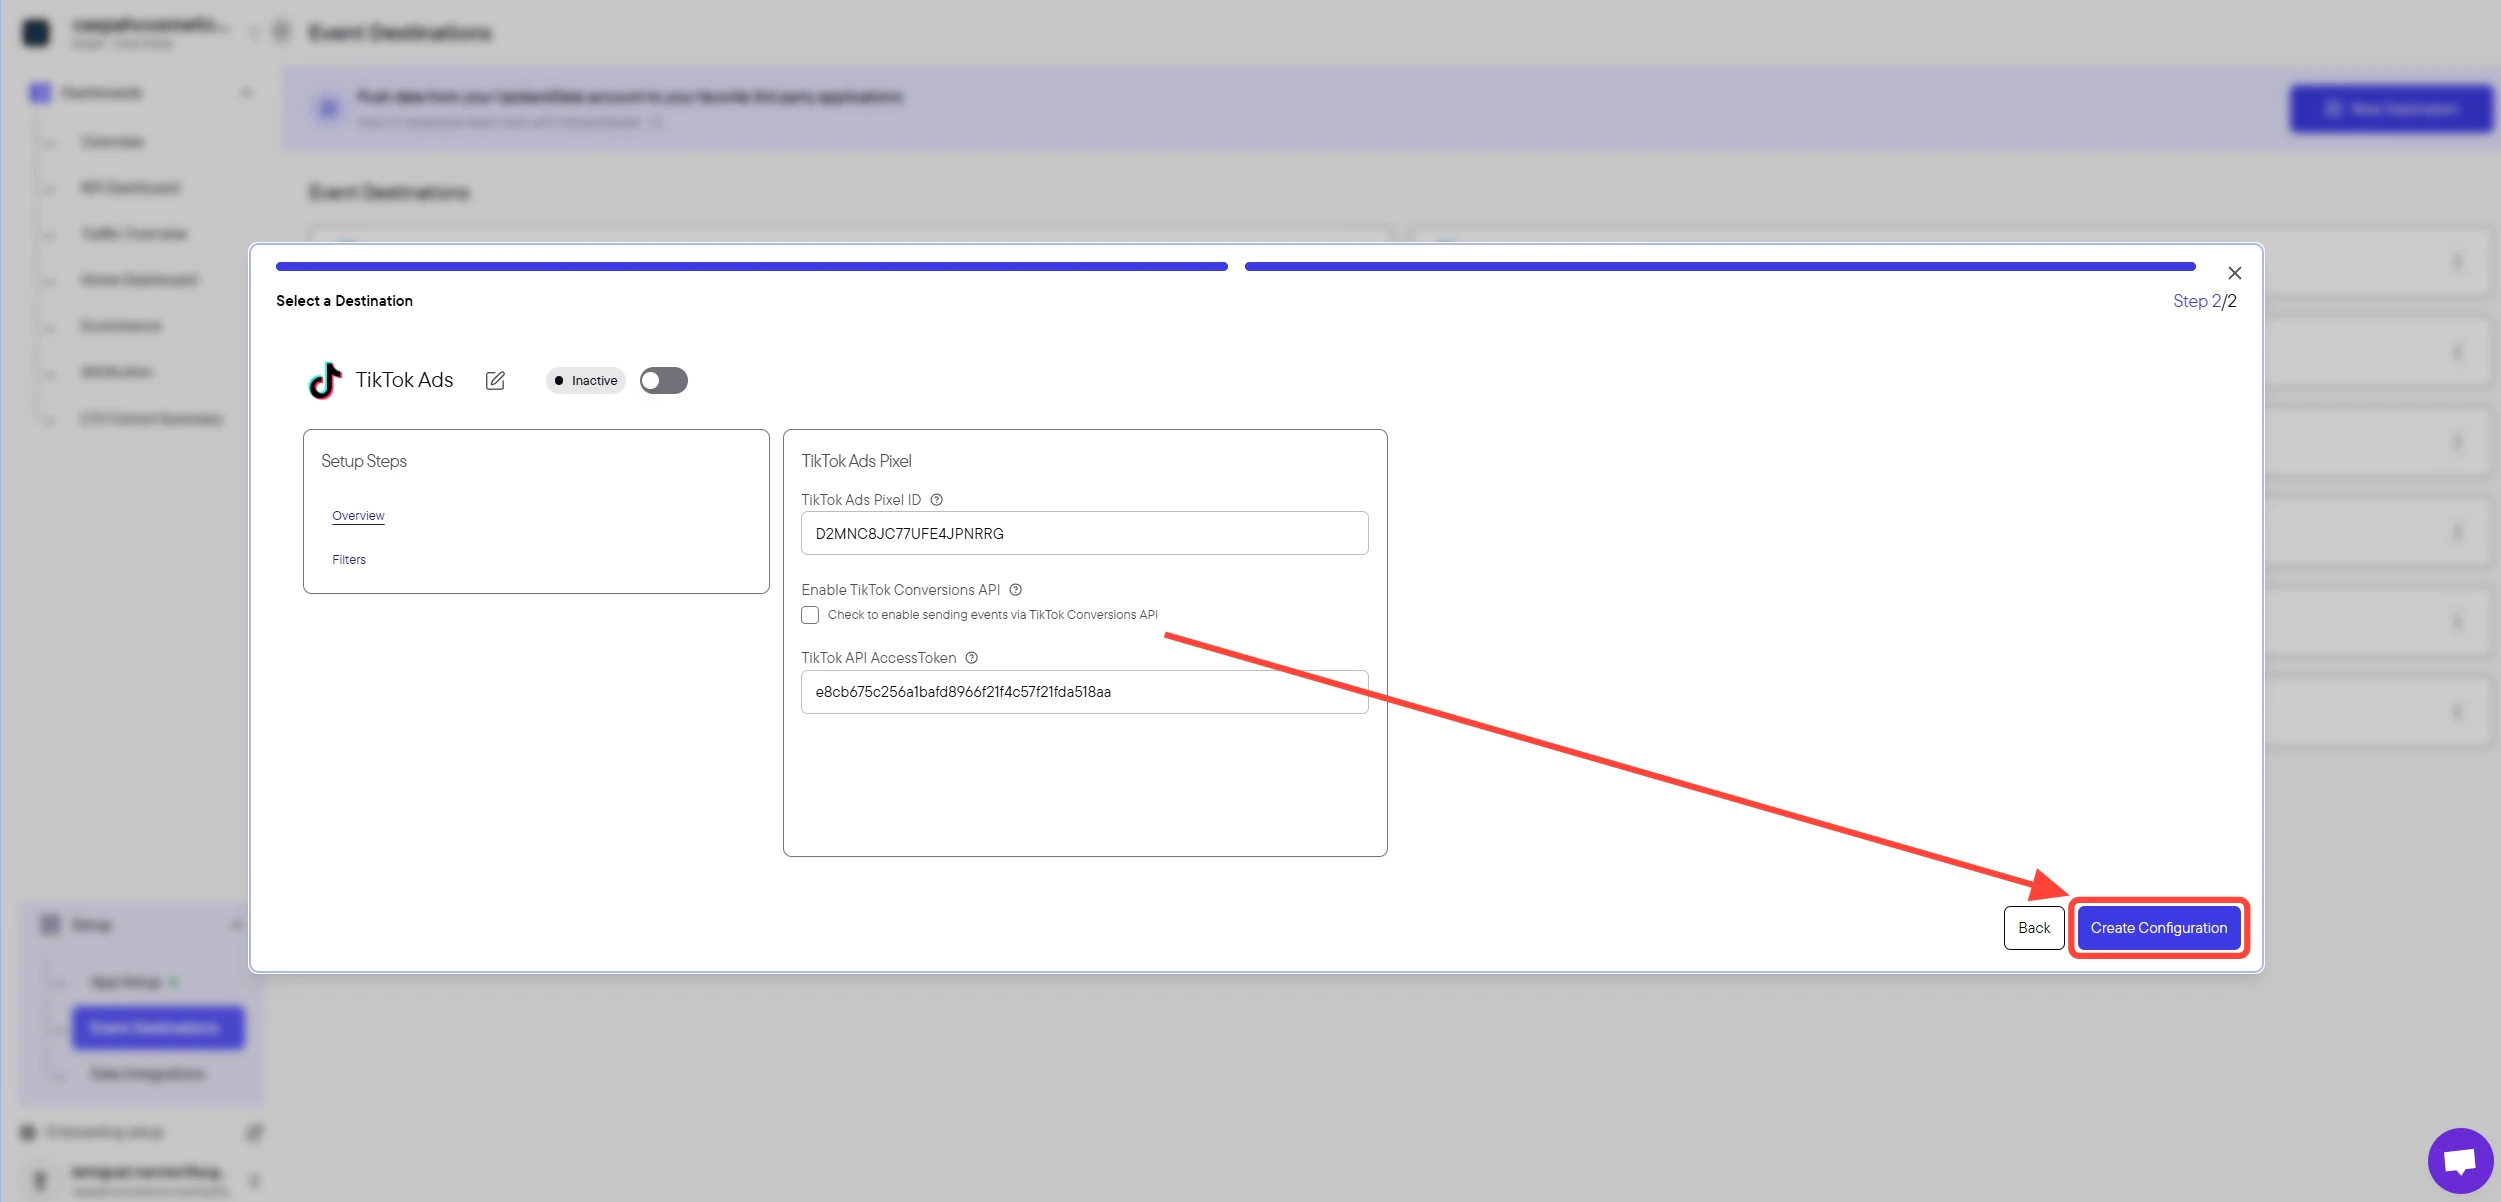
C2A3B4C5D6E7F8G9H0I1). Also called the Dataset ID. - Check the box “Check to enable sending events via TikTok Conversions API”
- Access Token — long alphanumeric string starting with letters/numbers, generated from TikTok Events Manager
Need help finding these?How to Find your TikTok Ads Pixel ID →How to Generate Your TikTok API Access Token →
Verify the Setup
To confirm the destination is working:- In the Upstack dashboard, the TikTok destination should show Healthy status under Events Destination.
- In TikTok Events Manager, open your Pixel and confirm events are arriving via both Browser and Server (CAPI).
- Place a test order on your store and check that the Purchase event appears in TikTok Events Manager within a few minutes.
- The Pixel ID is exactly 20 characters with no spaces.
- The Access Token was copied immediately after generation (TikTok shows it only once) and contains no leading or trailing spaces.
- The Conversions API checkbox is selected.