Prerequisites
Before you start, you need:- Admin access to your TikTok Business Center
- A TikTok Ads Manager account linked to your Business Center
- The URL of the website where the Pixel will be installed
Pixel Creation Process
Sign in to TikTok Events Manager
- Sign in to TikTok Events Manager
-
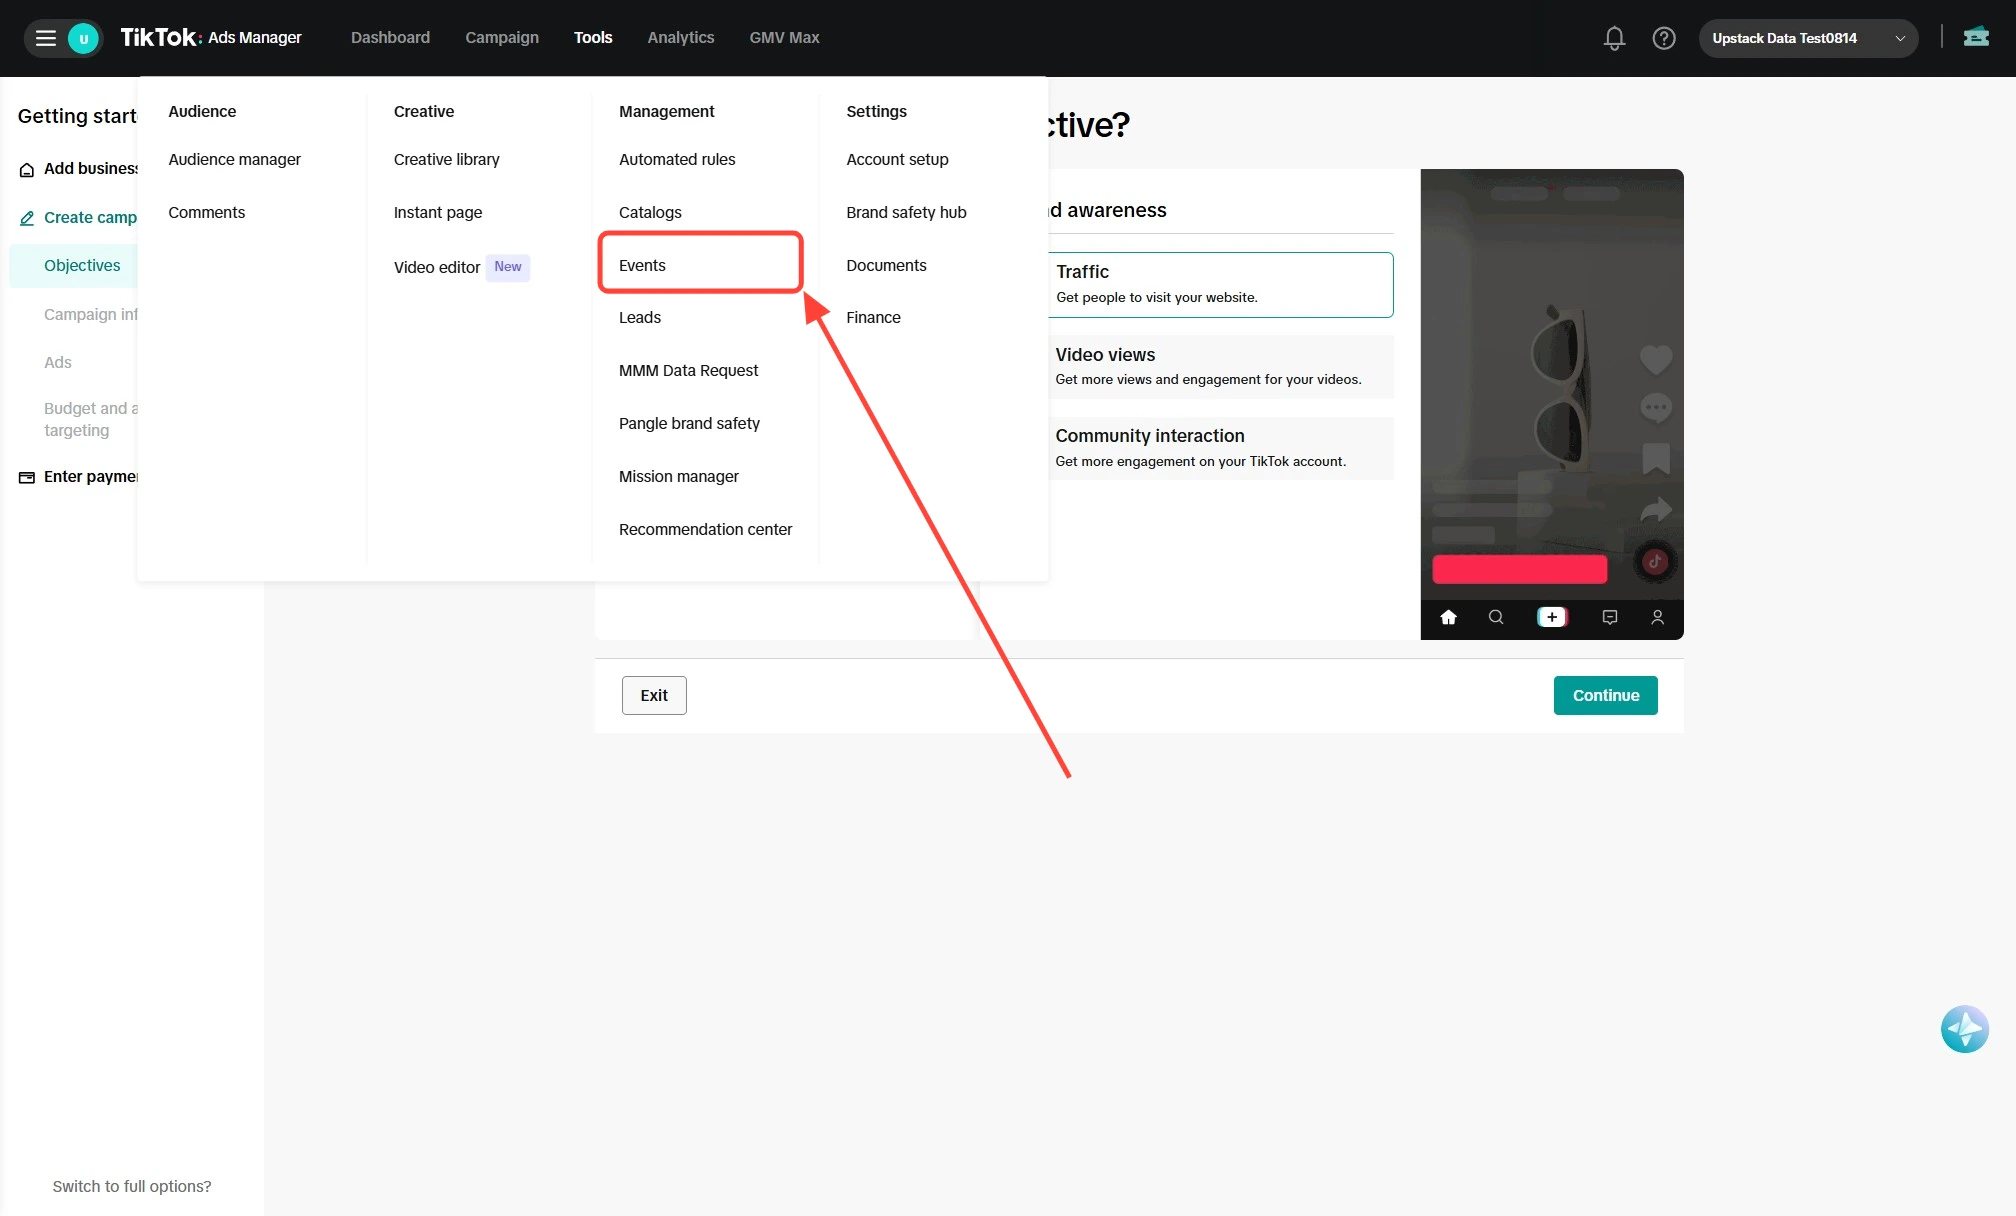
In the top navigation, click Tools → Events
Start creating a new Pixel
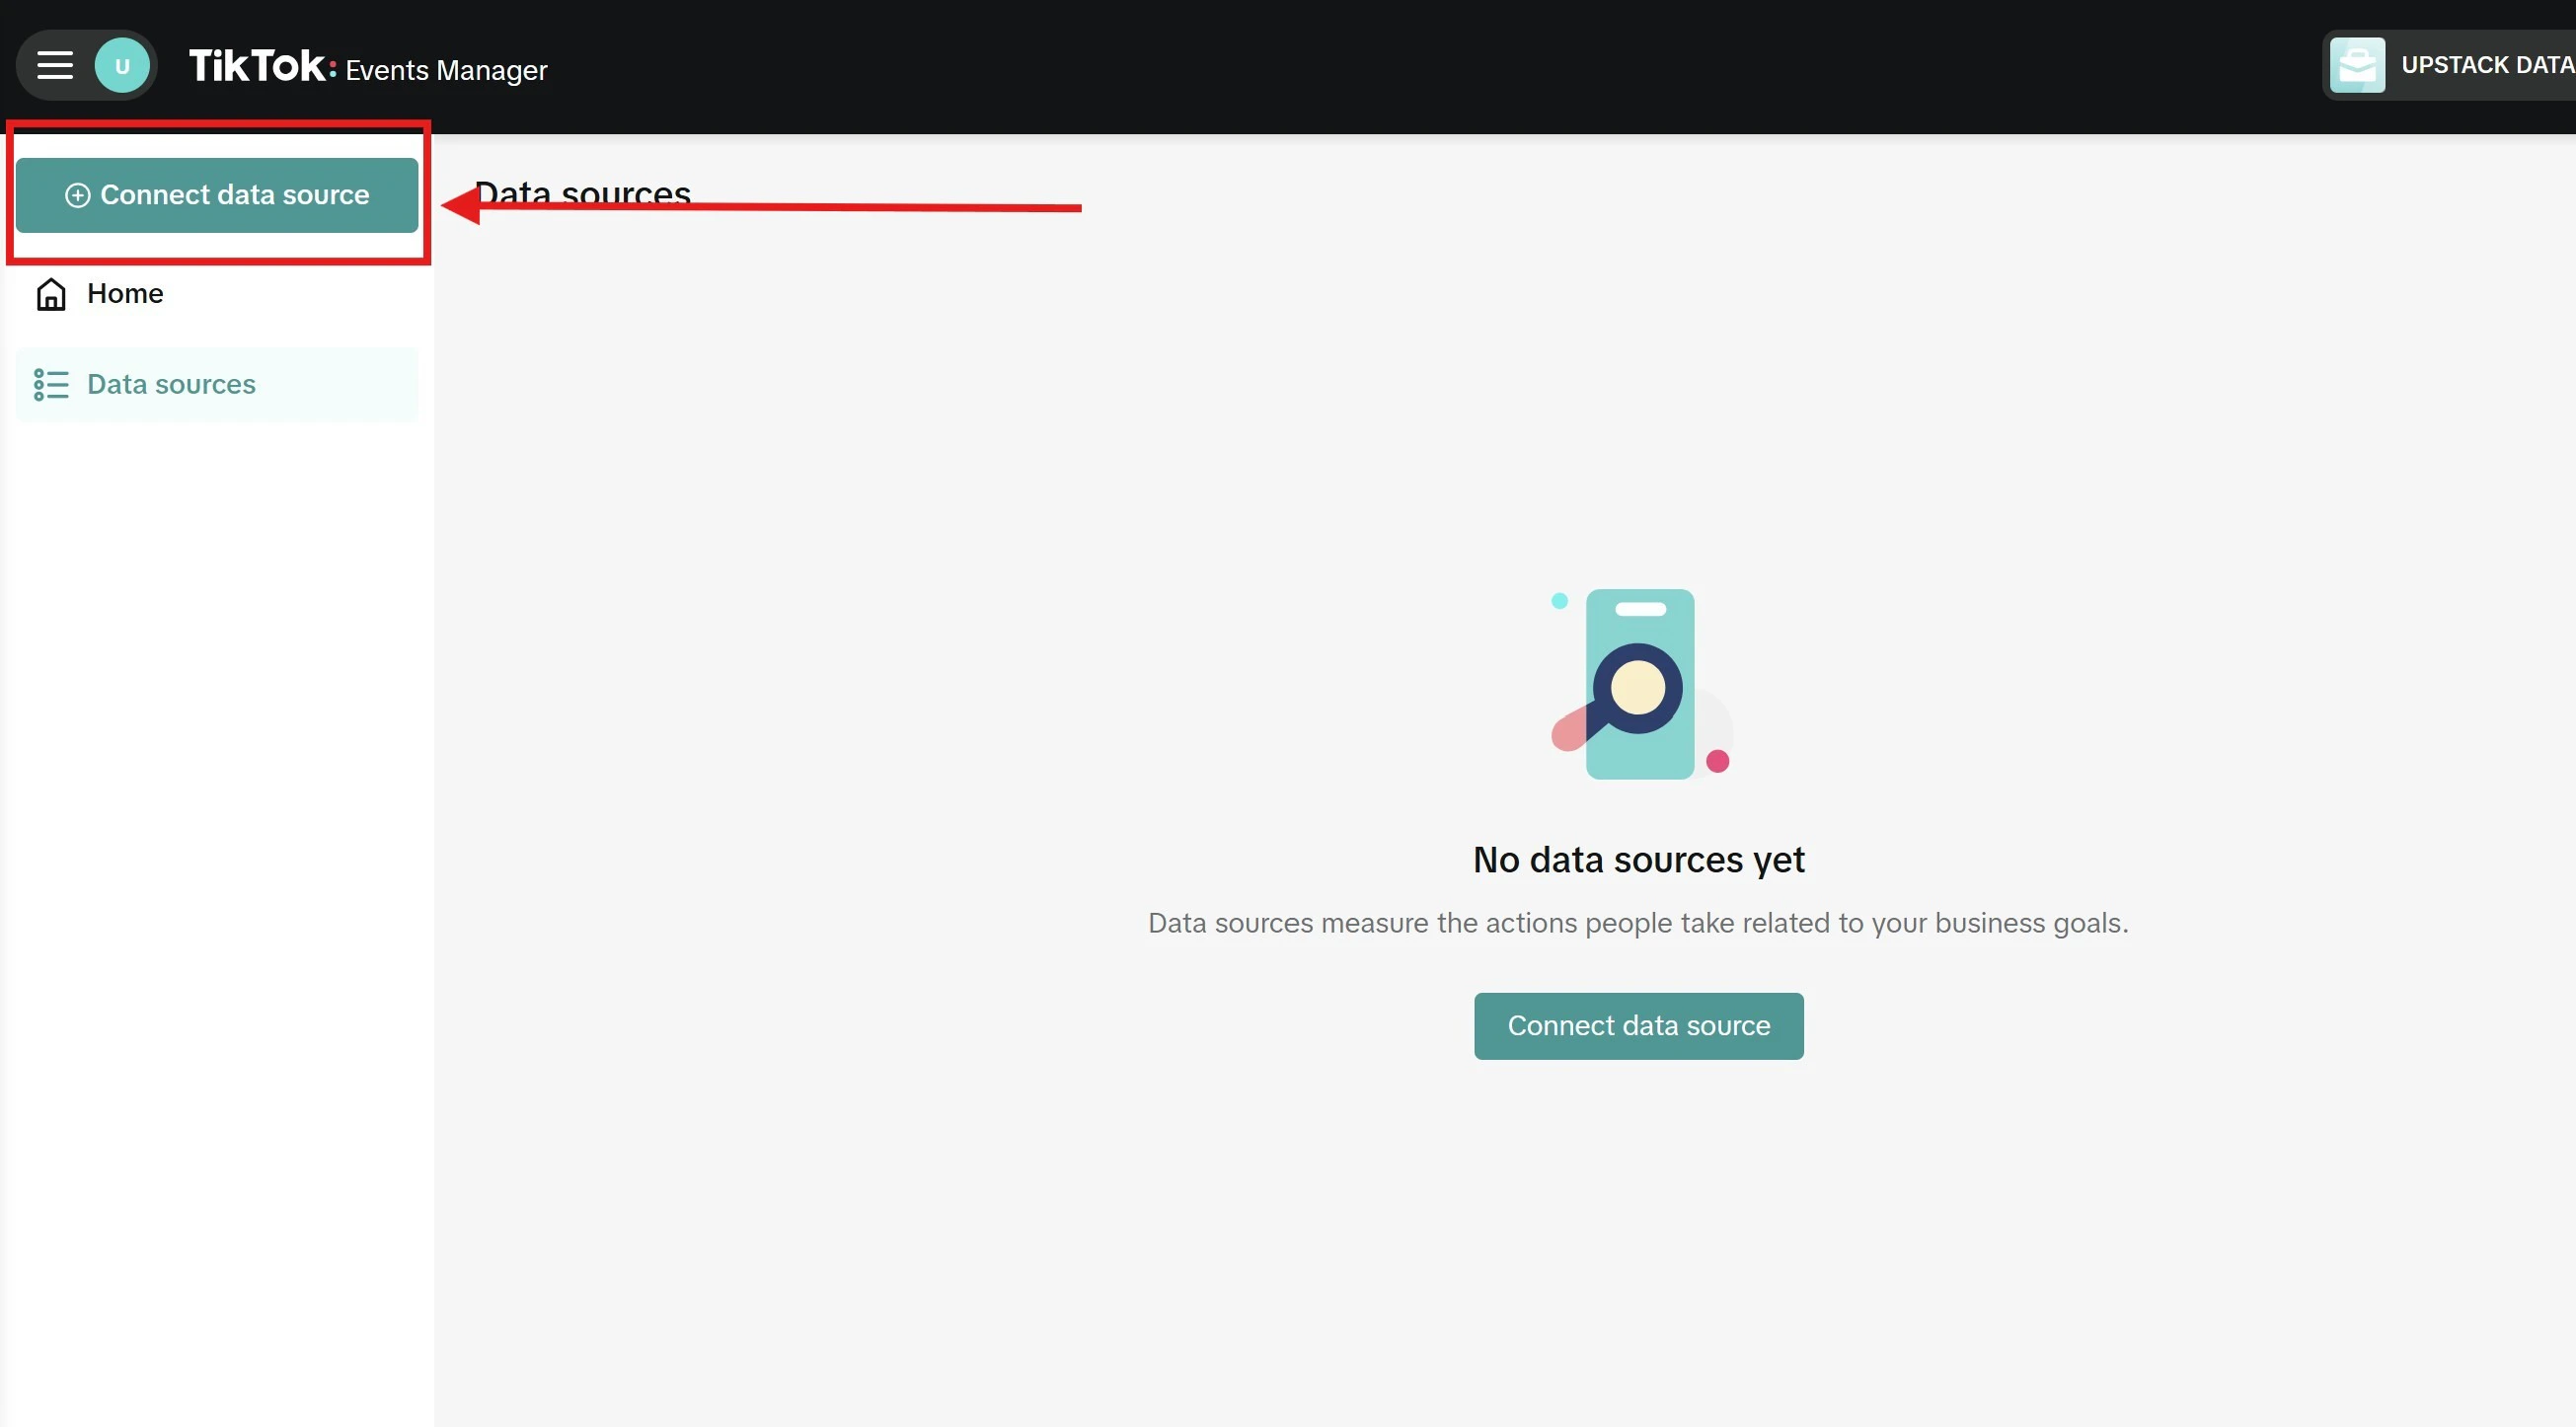
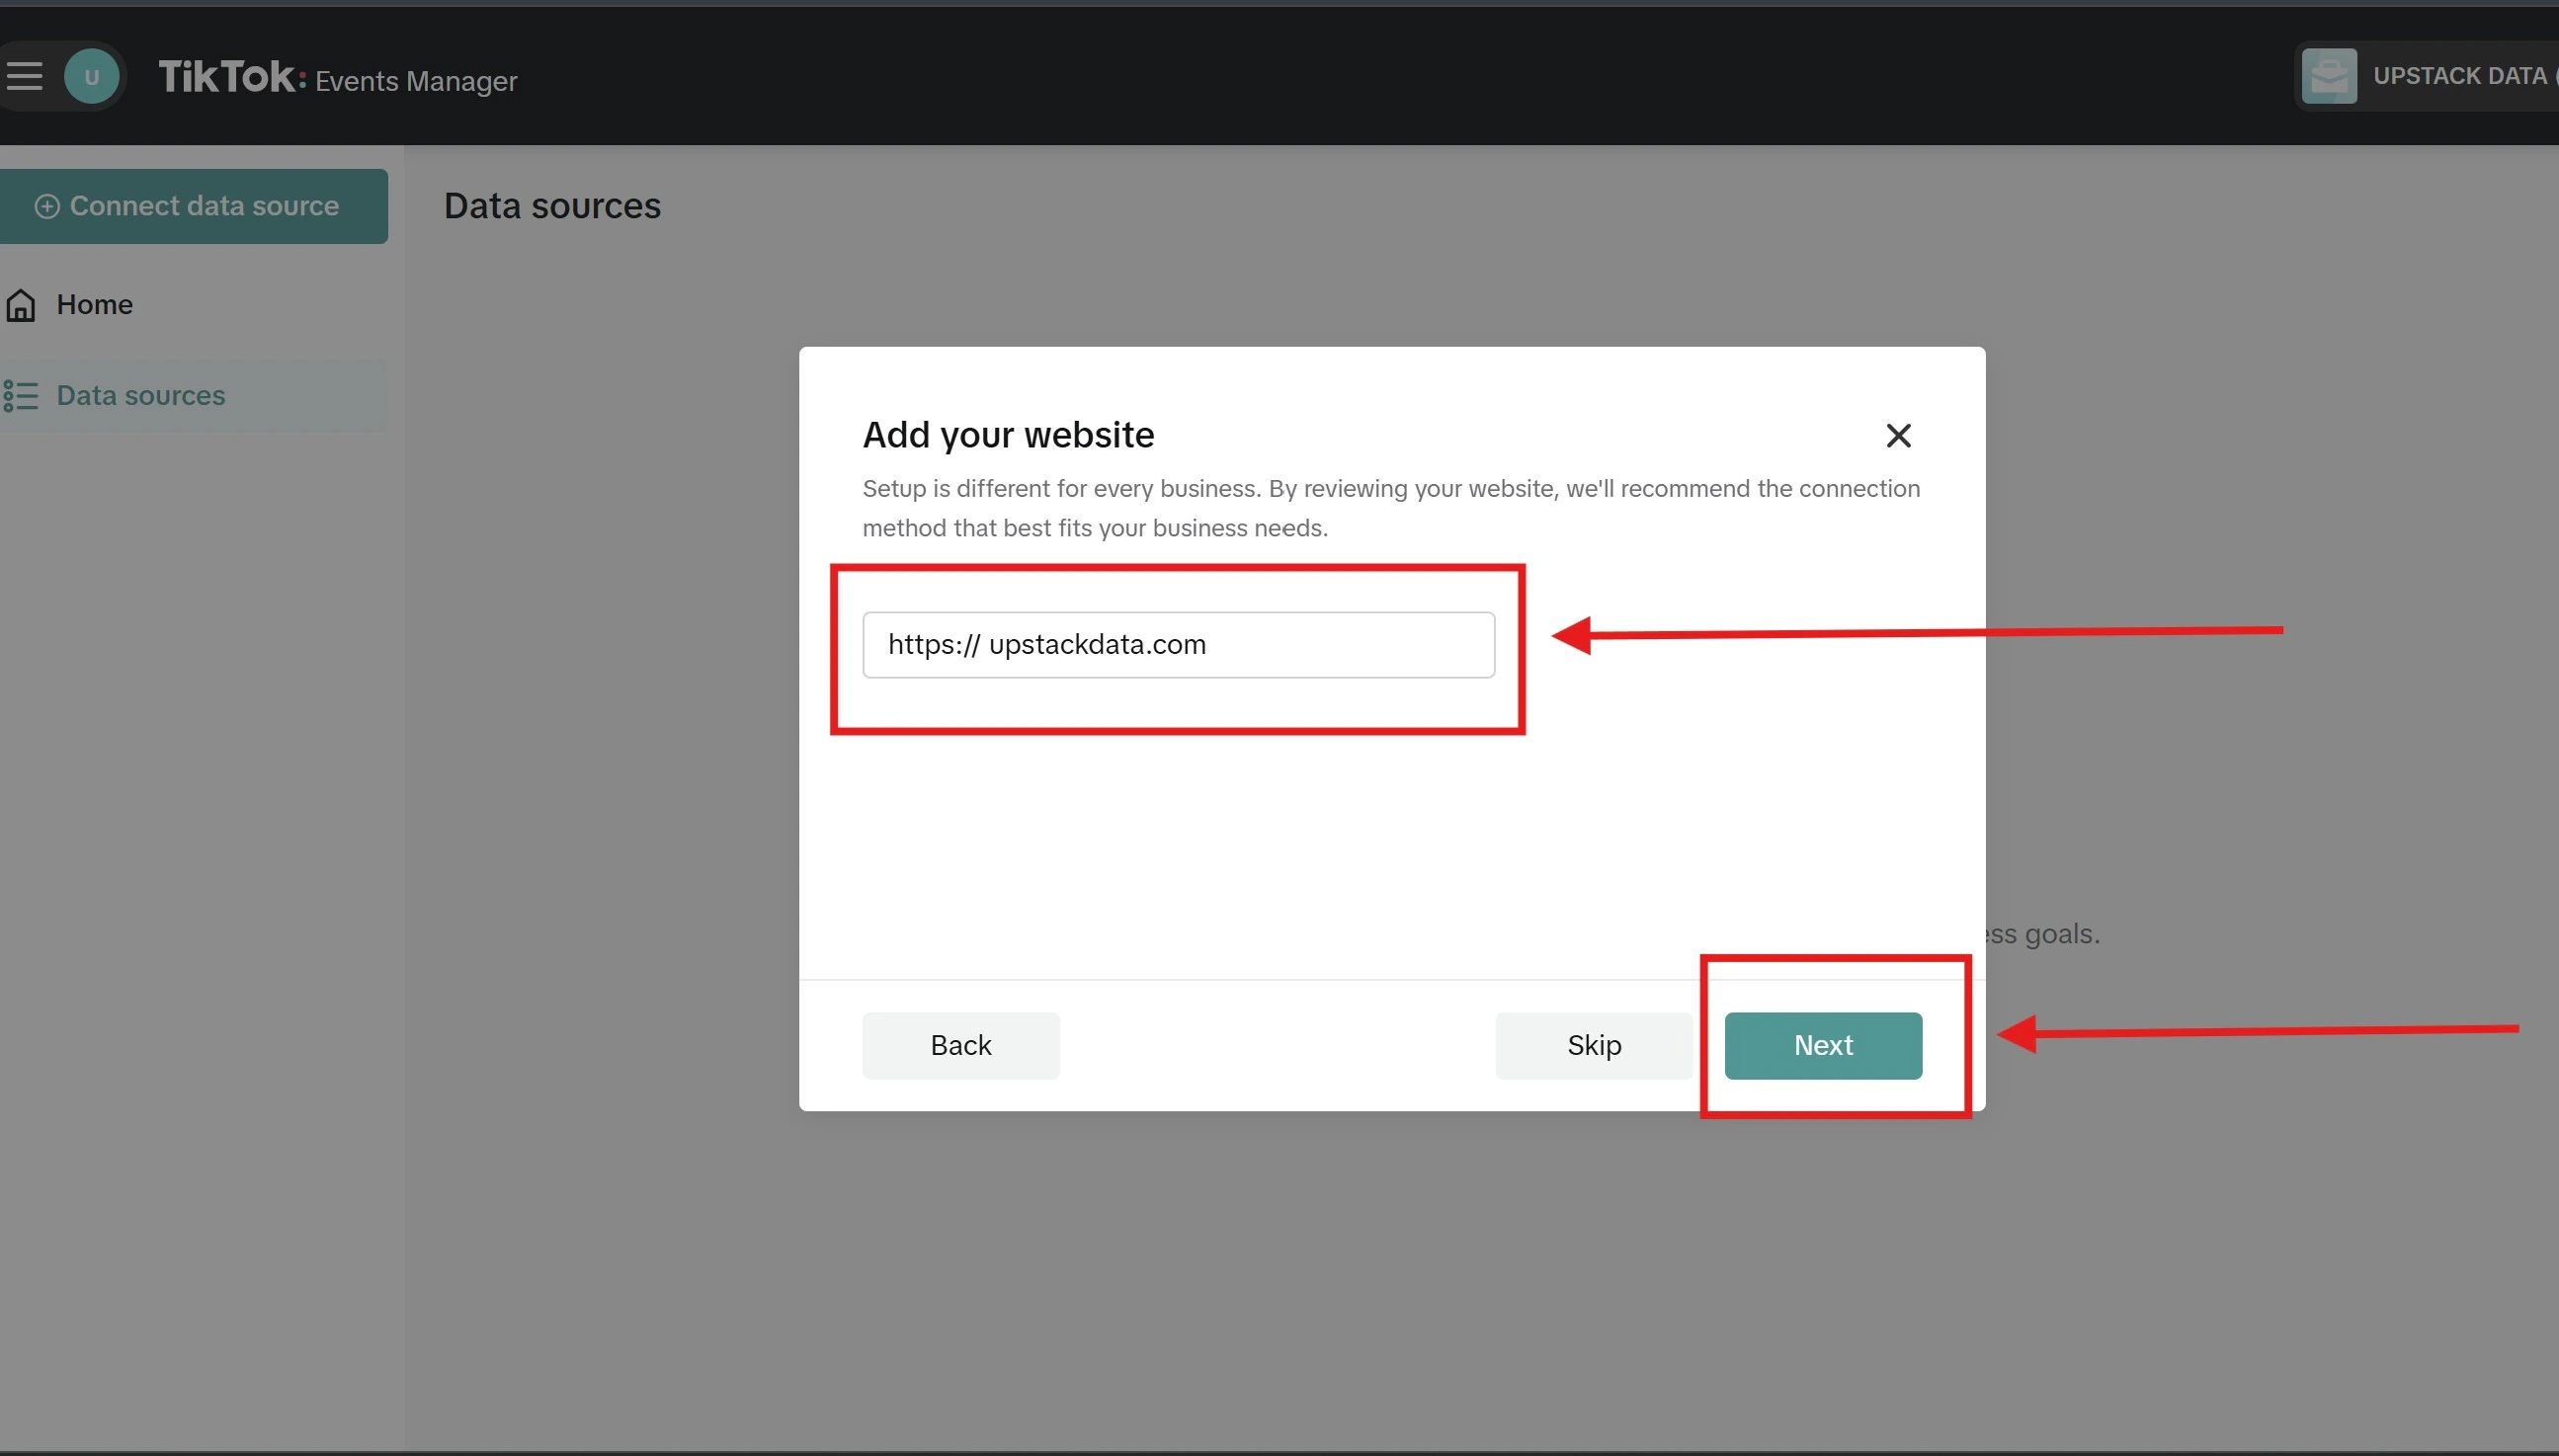
- In TikTok Events Manager, click ”+ Connect data source” in the upper-left corner of the page (or the Connect Data Sources button in the center of the screen if no data sources exist yet)
-
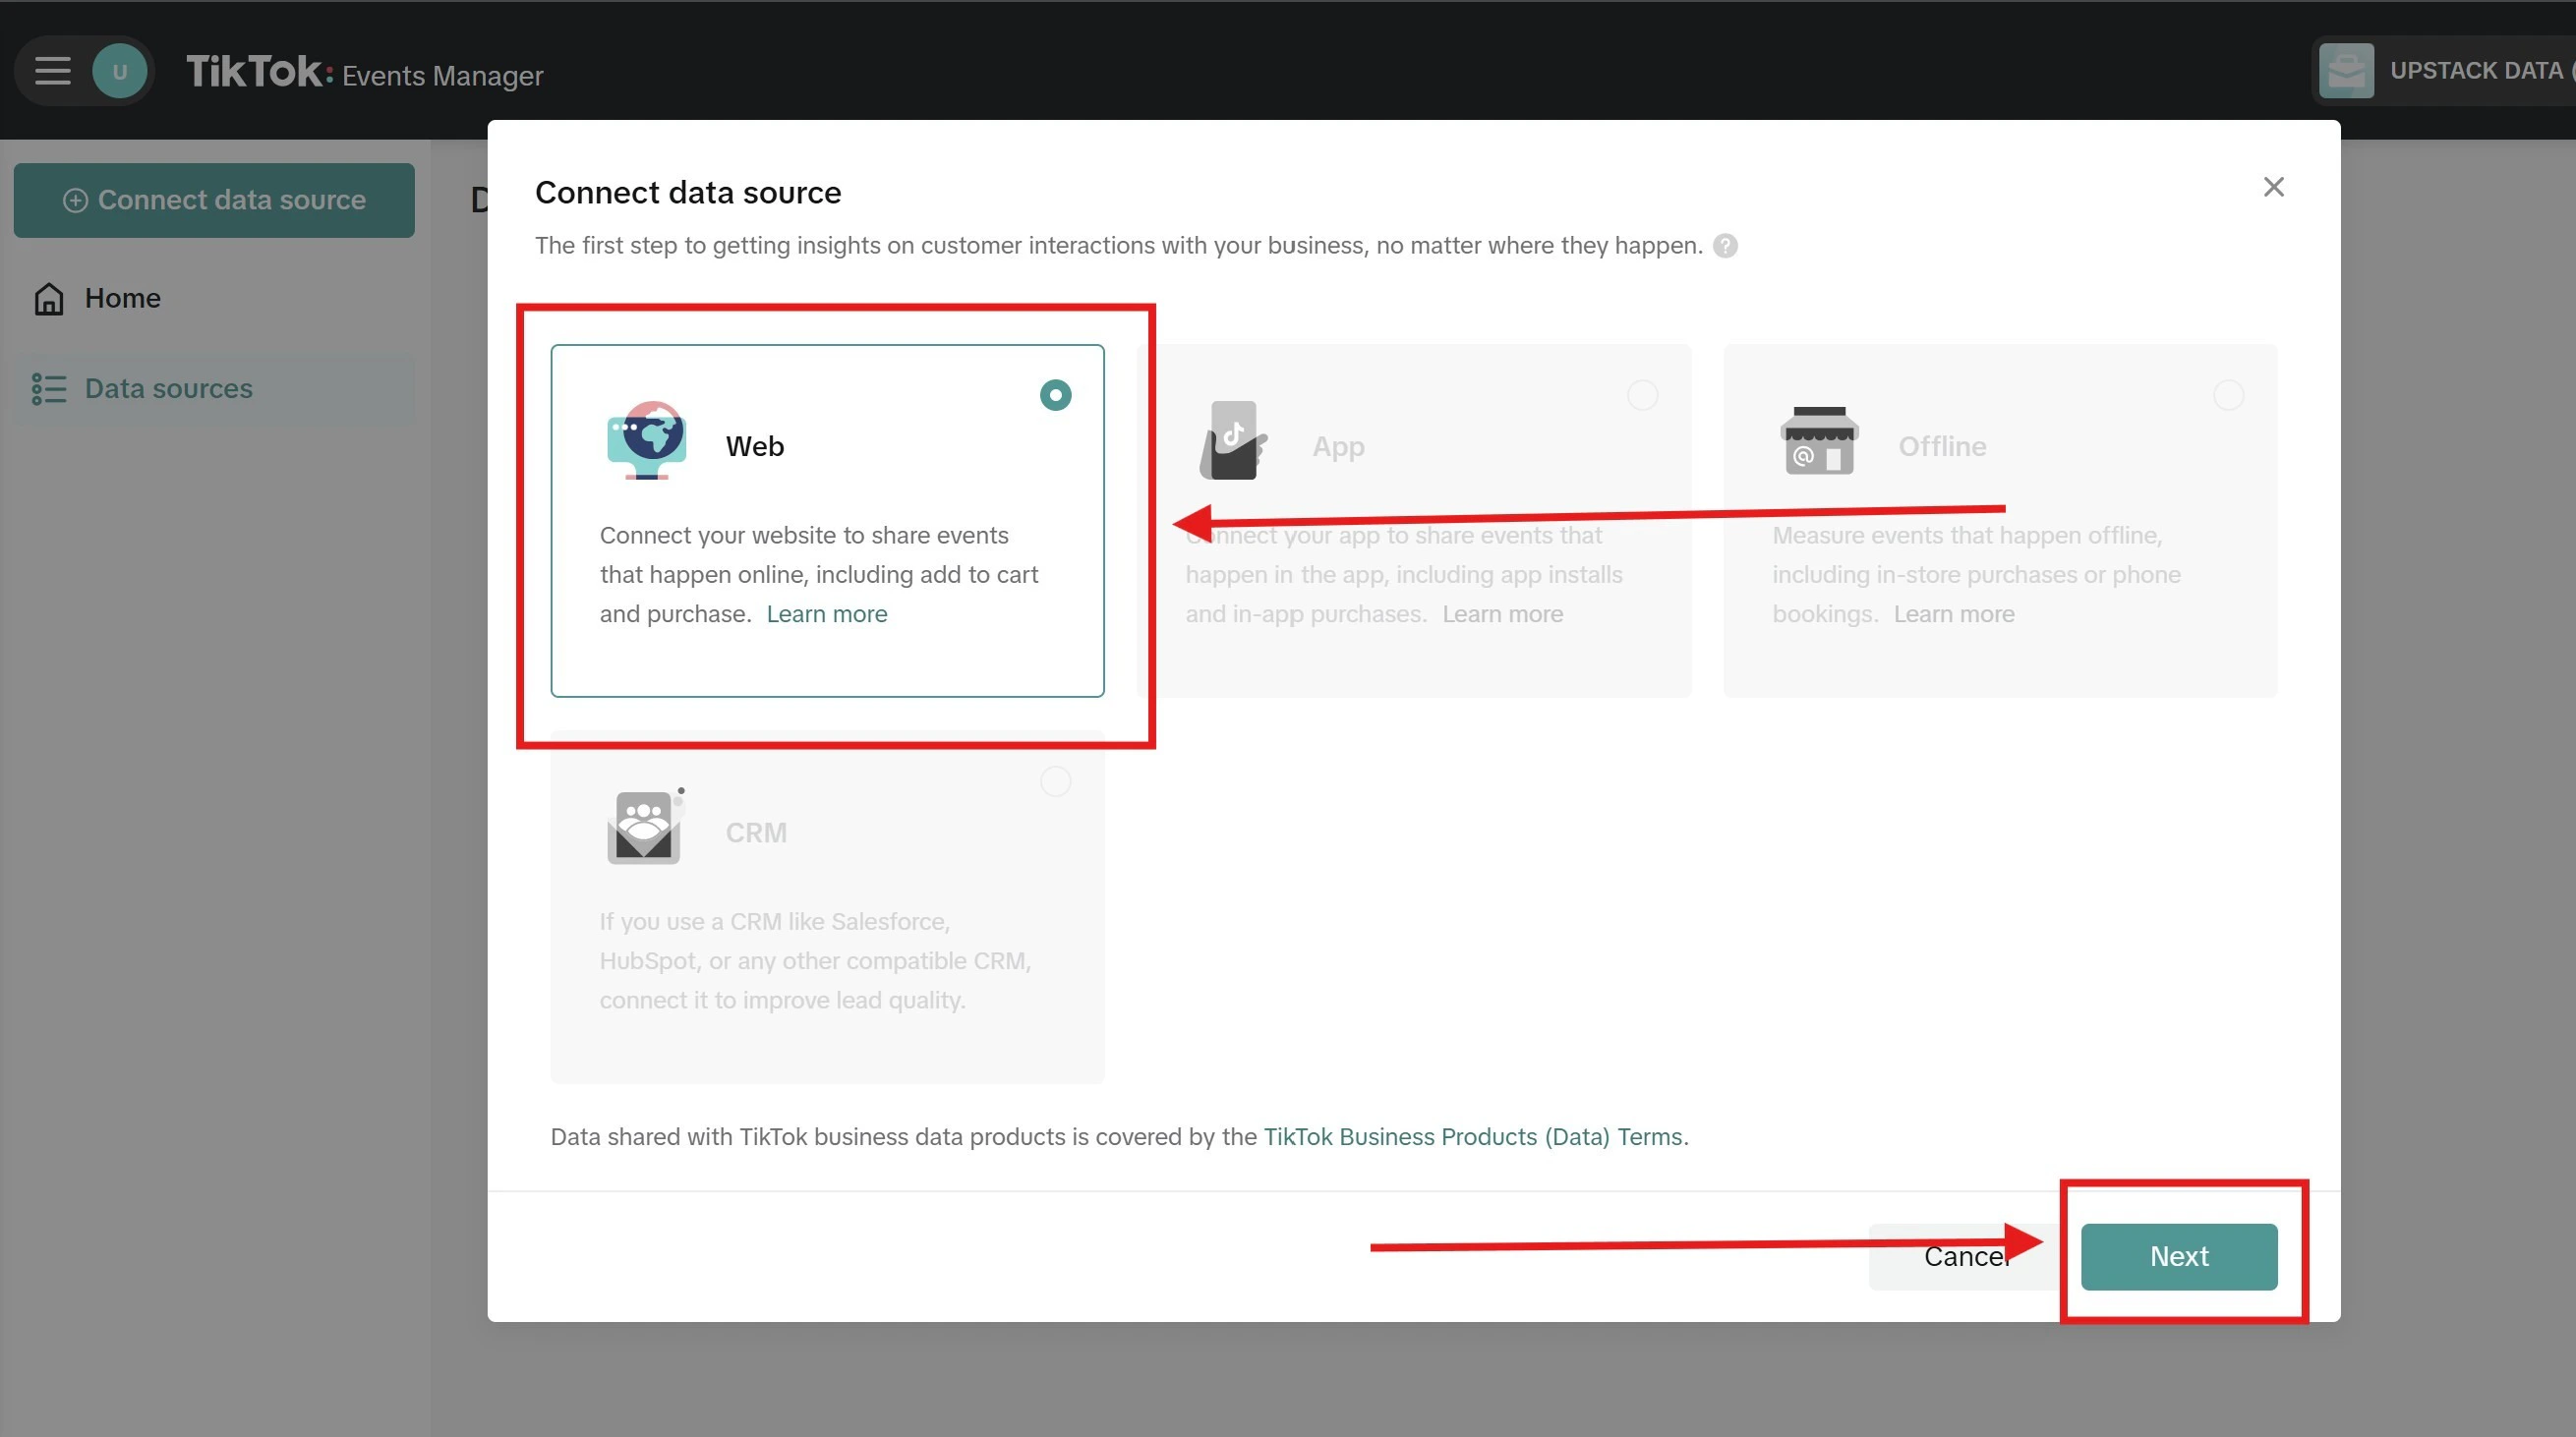
Select Web and click Next
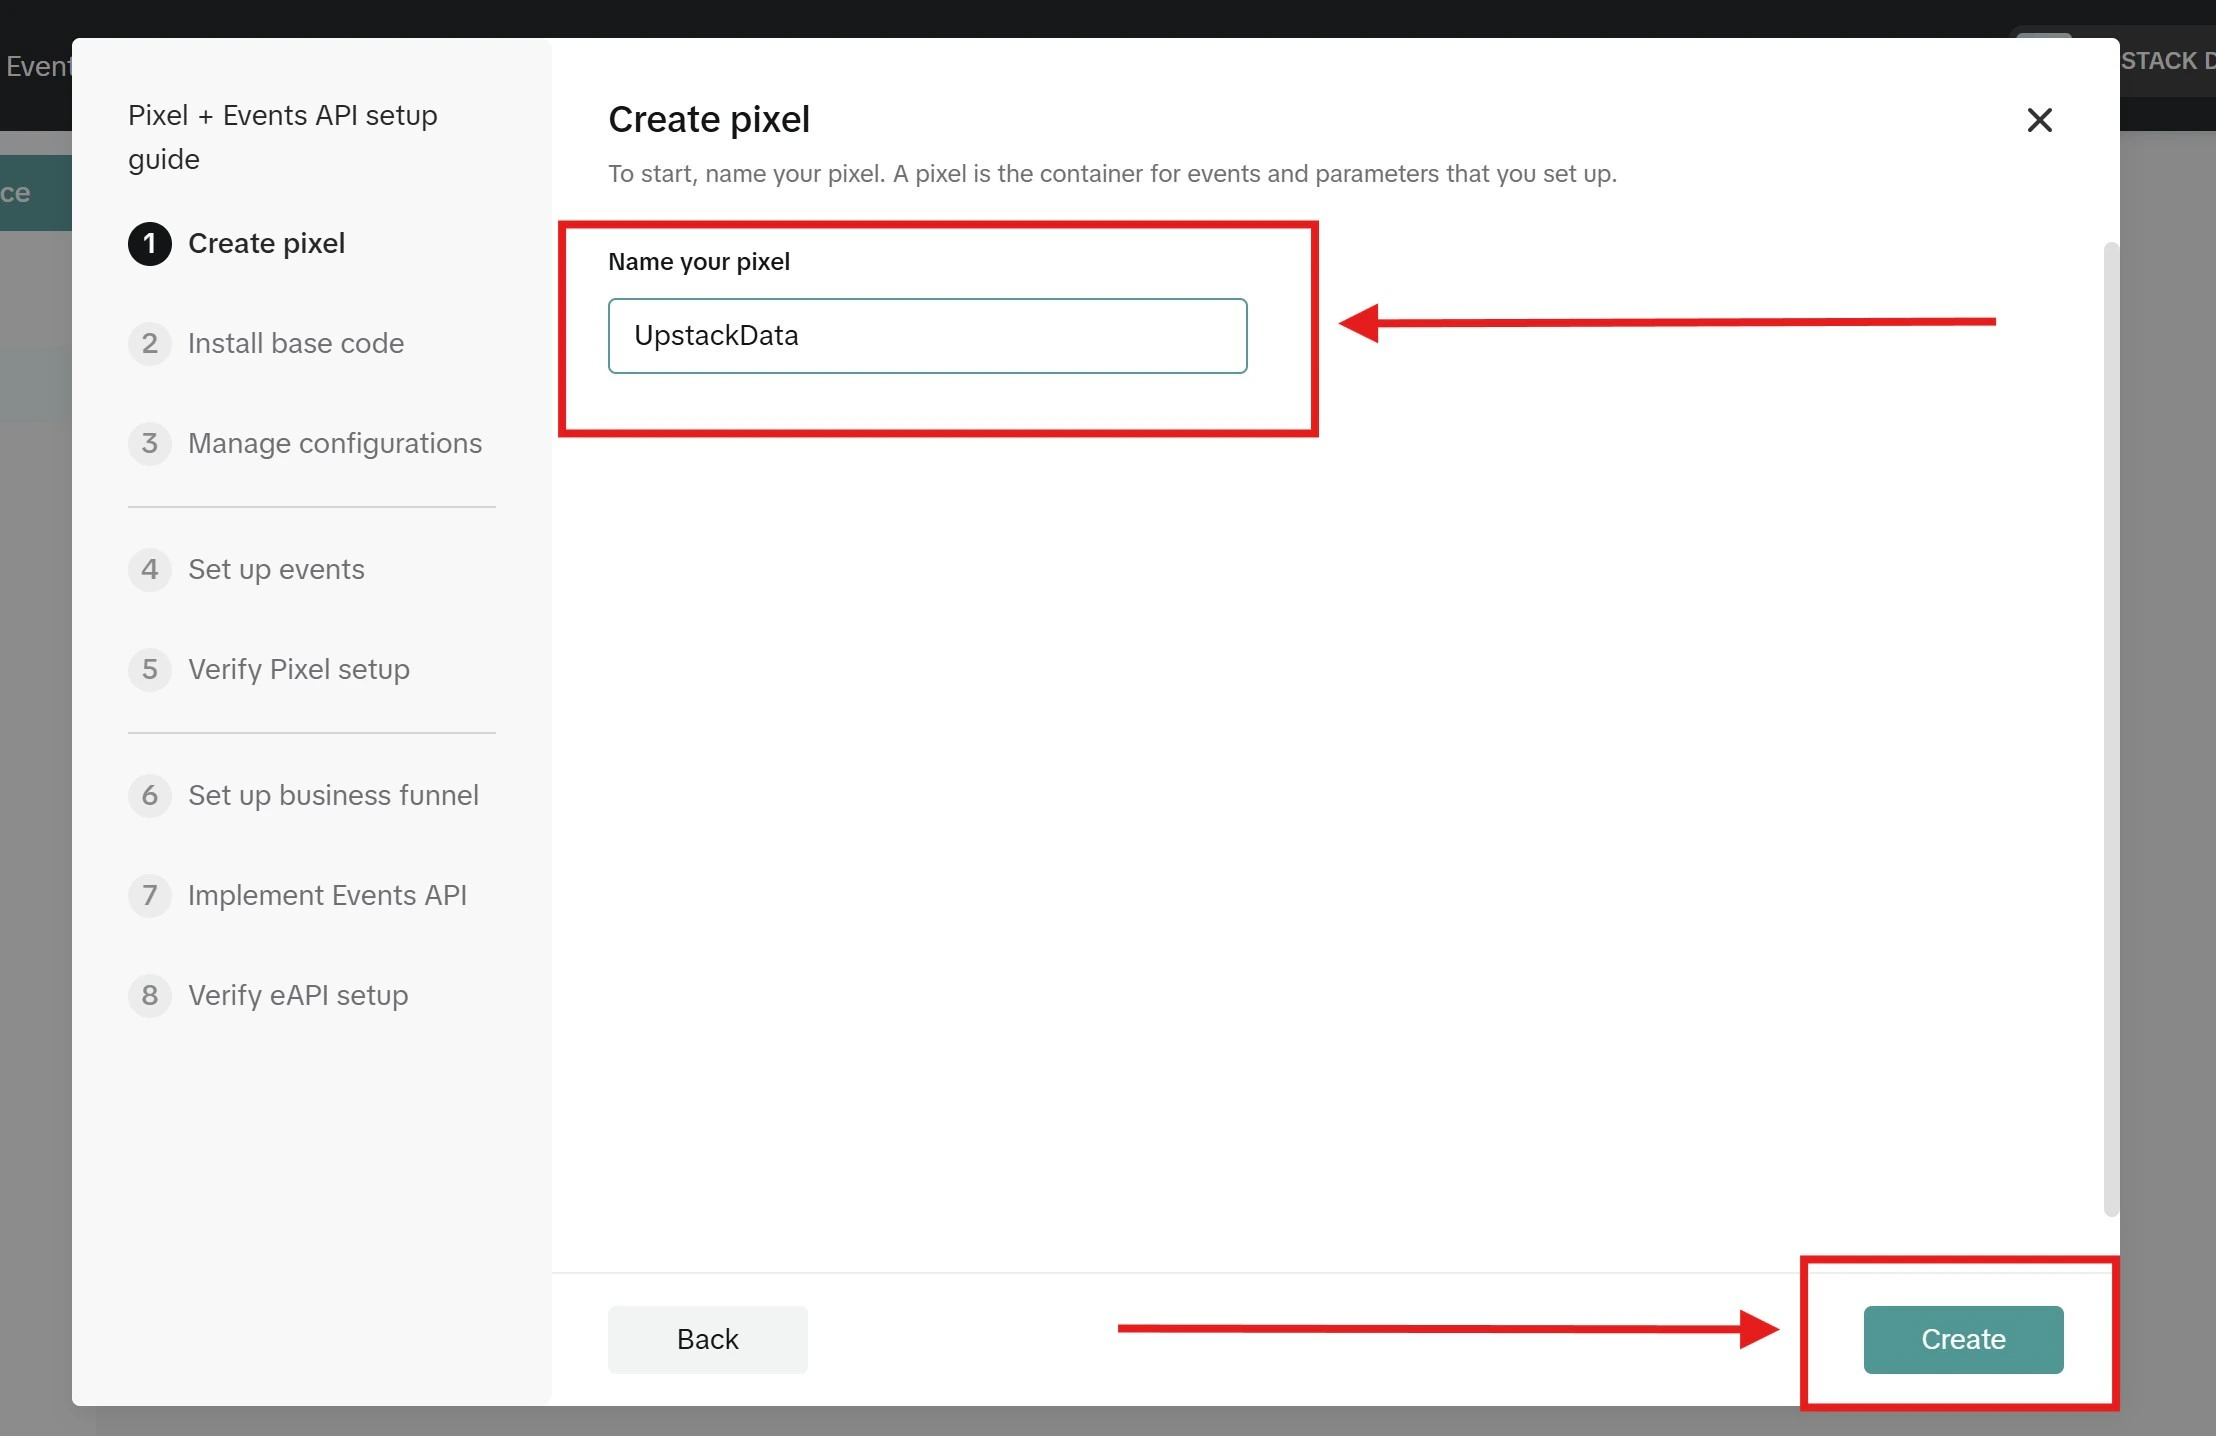
Finish the Pixel setup
- Choose an installation method (partner integration or manual code)
- Configure tracking events
- Install the Pixel code on your website
- Verify the Pixel code using TikTok’s Pixel Helper or TikTok Events Manager
-
When everything is confirmed, click Finish to complete setup
Your new TikTok Pixel is ready to integrate with Upstack Data.
Verify the Setup
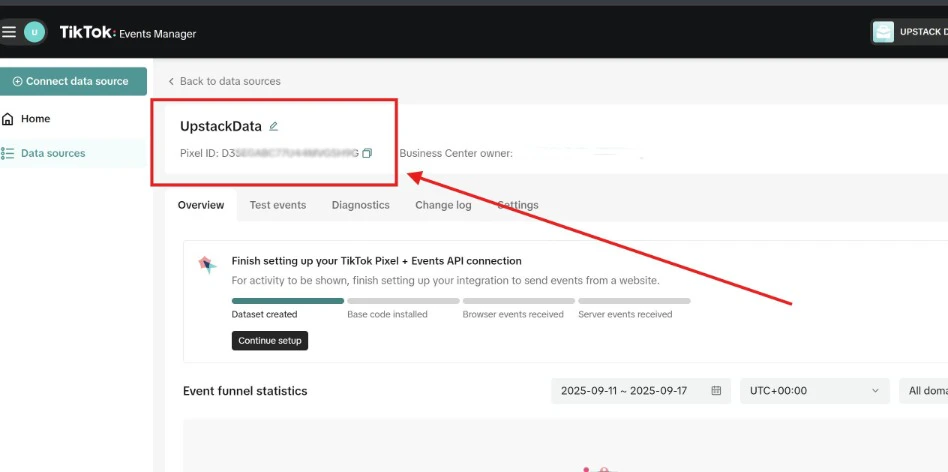
To confirm the Pixel was created:- In TikTok Events Manager, navigate to Tools → Events → Data sources — your UpstackData Pixel should appear in the list.
- Open the Pixel and confirm it has a Pixel ID (a 20-character alphanumeric string, e.g.,
C2A3B4C5D6E7F8G9H0I1).