Prerequisites
Before you start, you need:- The Klaviyo destination configured in Upstack Data (learn how)
- Existing standard abandonment flows in your Klaviyo account (Browse, Cart, Checkout, Site)
- Admin (manager) access to the store’s Klaviyo account
- Confirm the following Upstack-emitted events appear in Klaviyo under Analytics → Metrics:
- Viewed Product - Upstackified
- Added to Cart - Upstackified
- Started Checkout - Upstackified
- Active on Site - Upstackified
Important Terms
- Standard flow → the existing abandonment flow already in the brand/store’s Klaviyo account.
- Upstack copy of the flow → the cloned and modified version triggered by Upstack Data’s
*- Upstackifiedevents. Always identifiable by the- Upstack Dataname suffix.
Configuration Steps
Sign in to Klaviyo
Sign in to Klaviyo.
Enable account-wide UTM tracking
In Klaviyo, click your profile icon in the bottom-left navigation and go to Settings → Other → UTM Tracking, then ensure UTM tracking is toggled on.Detailed walkthrough: How to enable UTM tracking in Klaviyo.
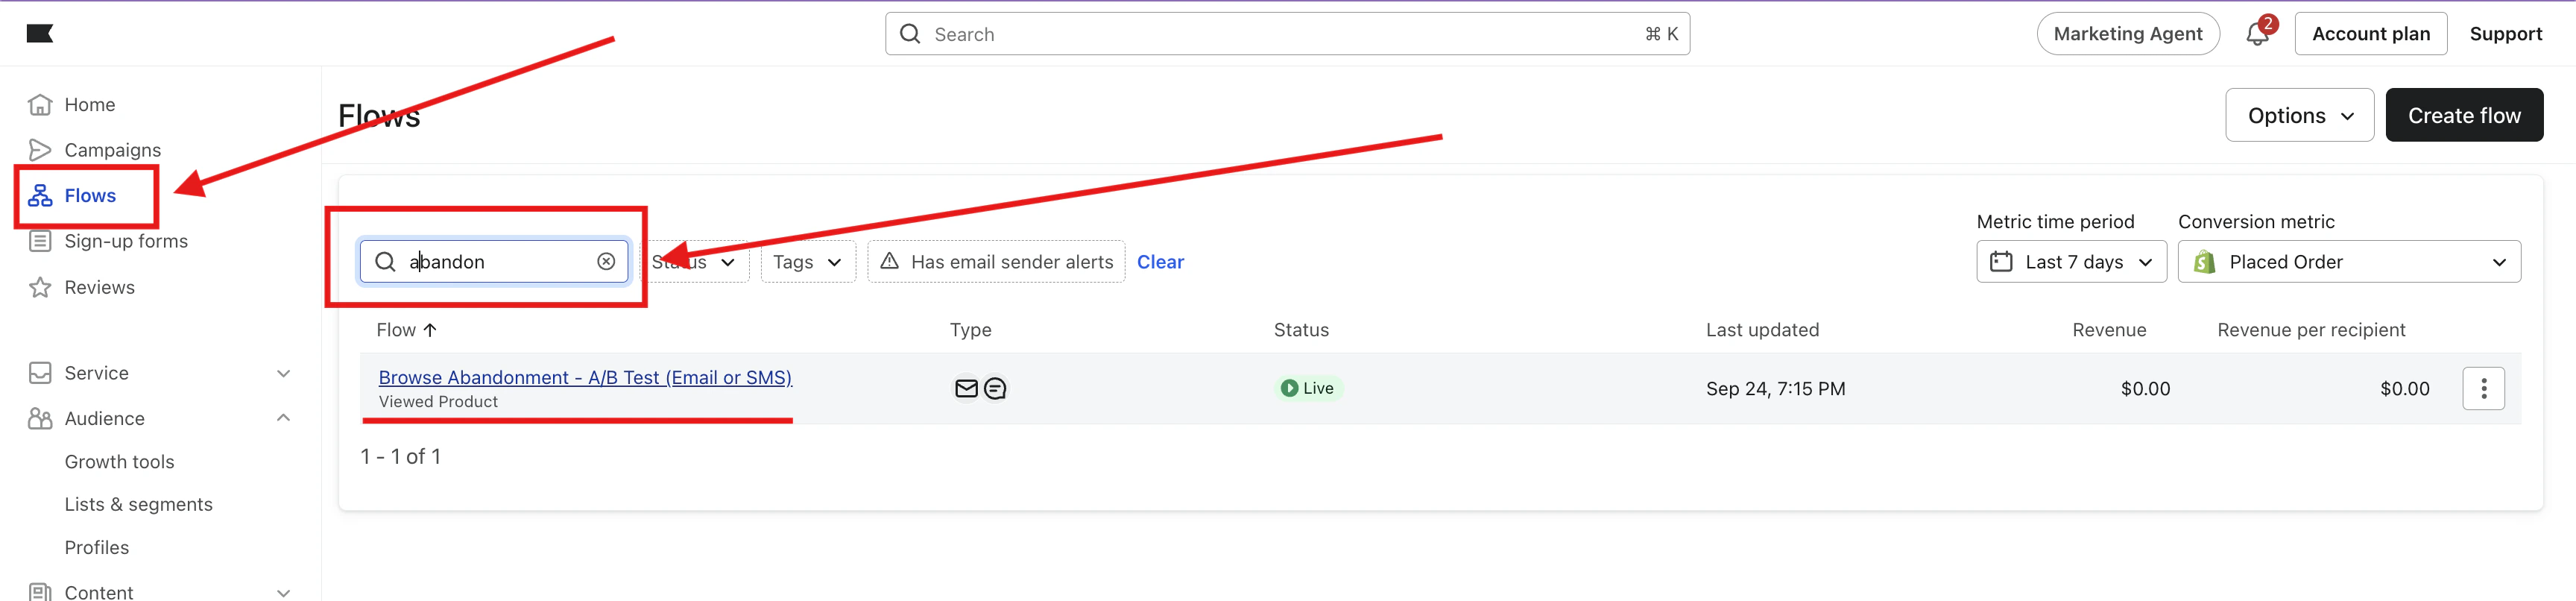
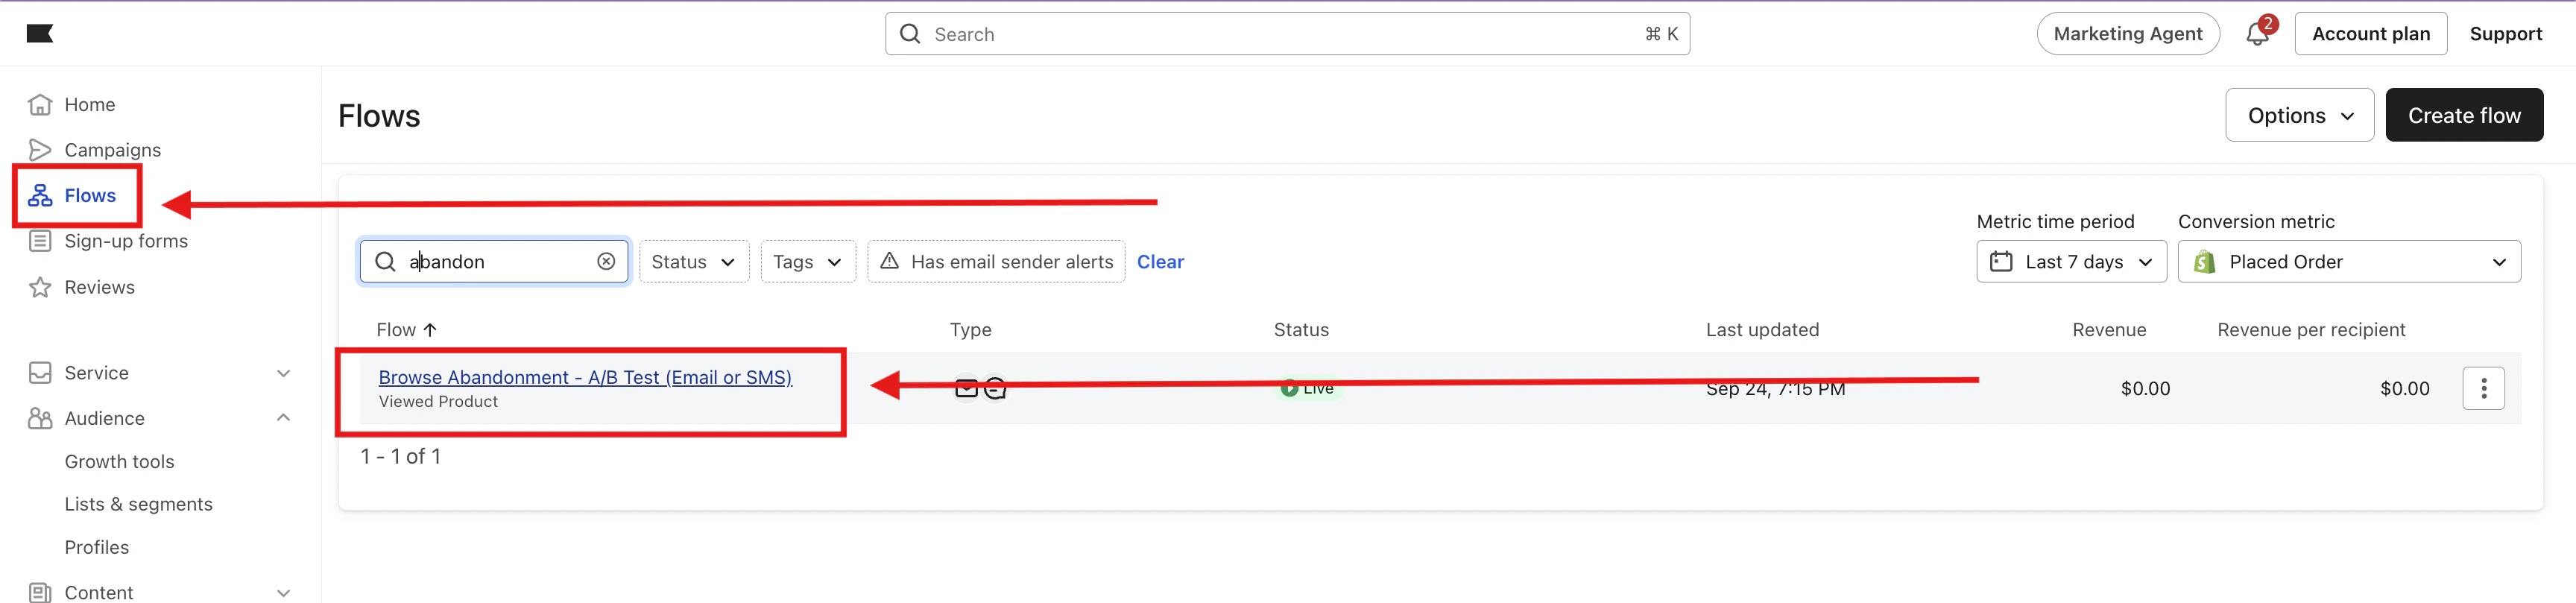
Locate the standard abandonment flows
- In Klaviyo, go to Flows in the left navigation.
- Use the search bar and type
abandon. - Identify the four standard abandonment flows:
- Cart Abandonment
- Browse Abandonment
- Site Abandonment
-
Checkout Abandonment
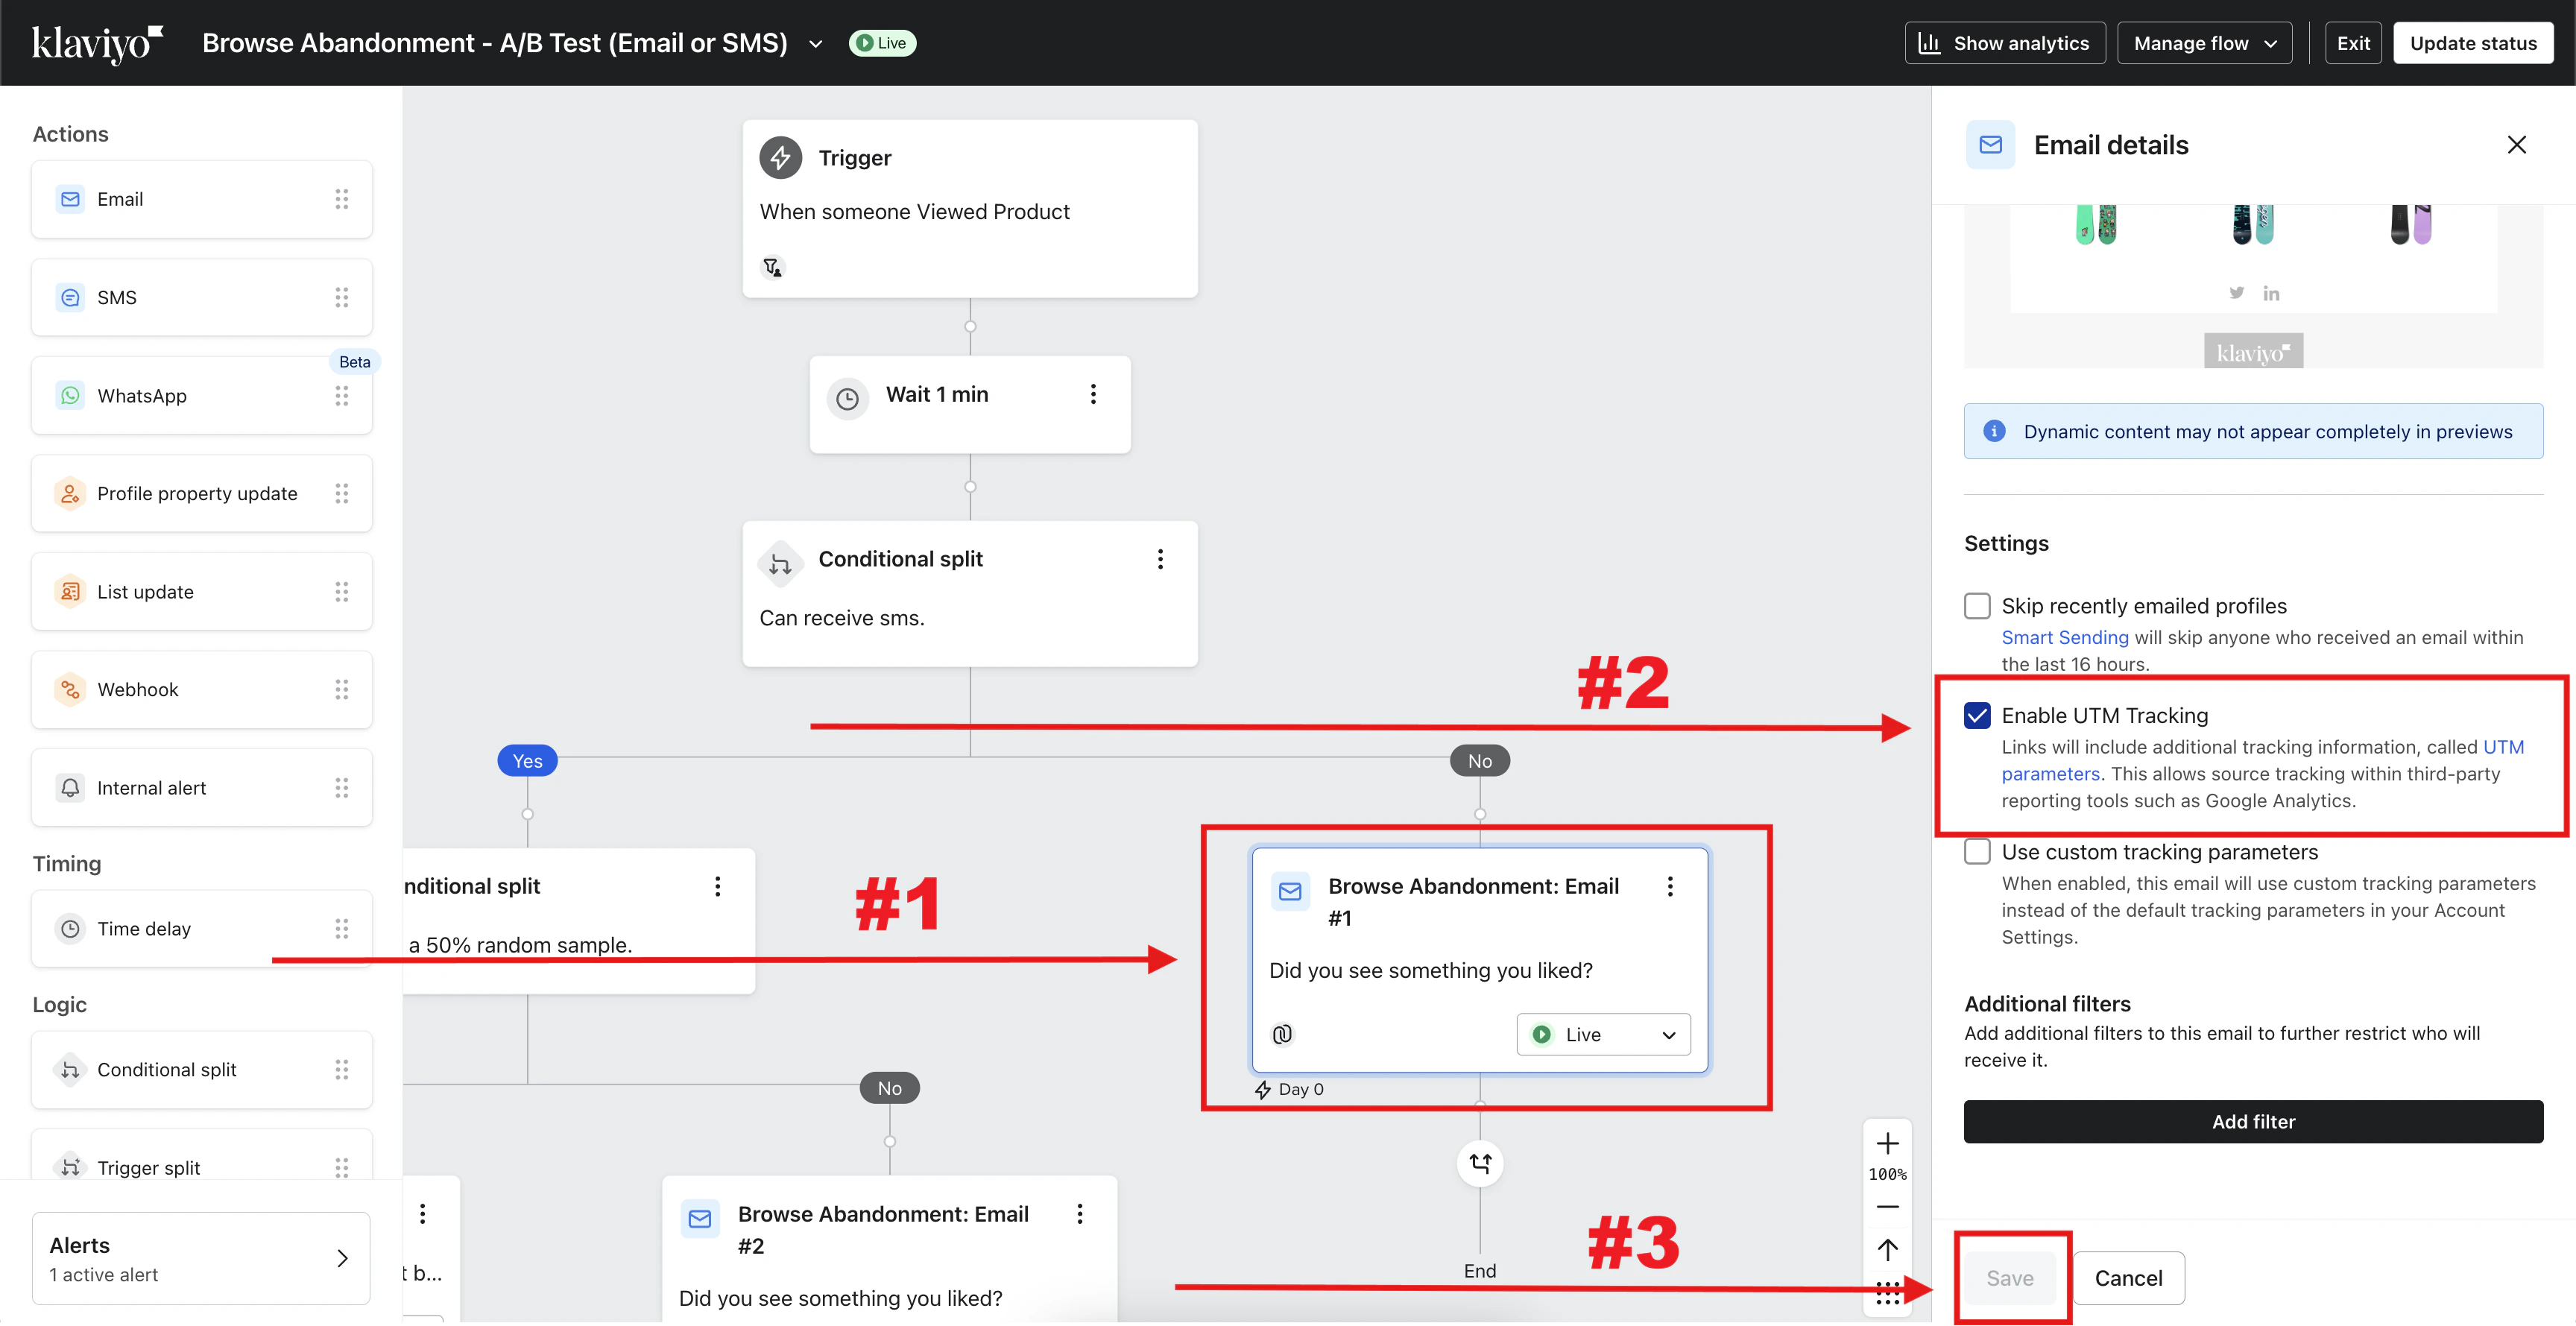
Enable UTM tracking on every Email and SMS node
Before cloning, make sure Enable UTM Tracking is checked on every Email and SMS node inside the standard flow. The setting is copied into the clone, so enabling it now saves rework.
-
In Flows, open the standard flow.
- Click an Email or SMS node.
- In the right-hand details panel, check Enable UTM Tracking.
-
Click Save.
Clone the standard flow
Clone each standard flow and rename the clone with the
- Upstack Data suffix (for example, Abandoned Cart - Upstack Data). When cloning, change the trigger to the corresponding *- Upstackified event:- Browse Abandonment → Viewed Product - Upstackified
- Cart Abandonment → Added to Cart - Upstackified
- Checkout Abandonment → Started Checkout - Upstackified
- Site Abandonment → Active on Site - Upstackified
Open the standard and Upstack copies side-by-side
To make comparing settings easier, keep:
- The standard flow in one browser tab.
- The Upstack copy of the flow in another tab.
Add a 30-minute delay to the Upstack copy
In the Upstack copy of the flow, add +30 minutes to the first wait step compared to the standard flow.Example: 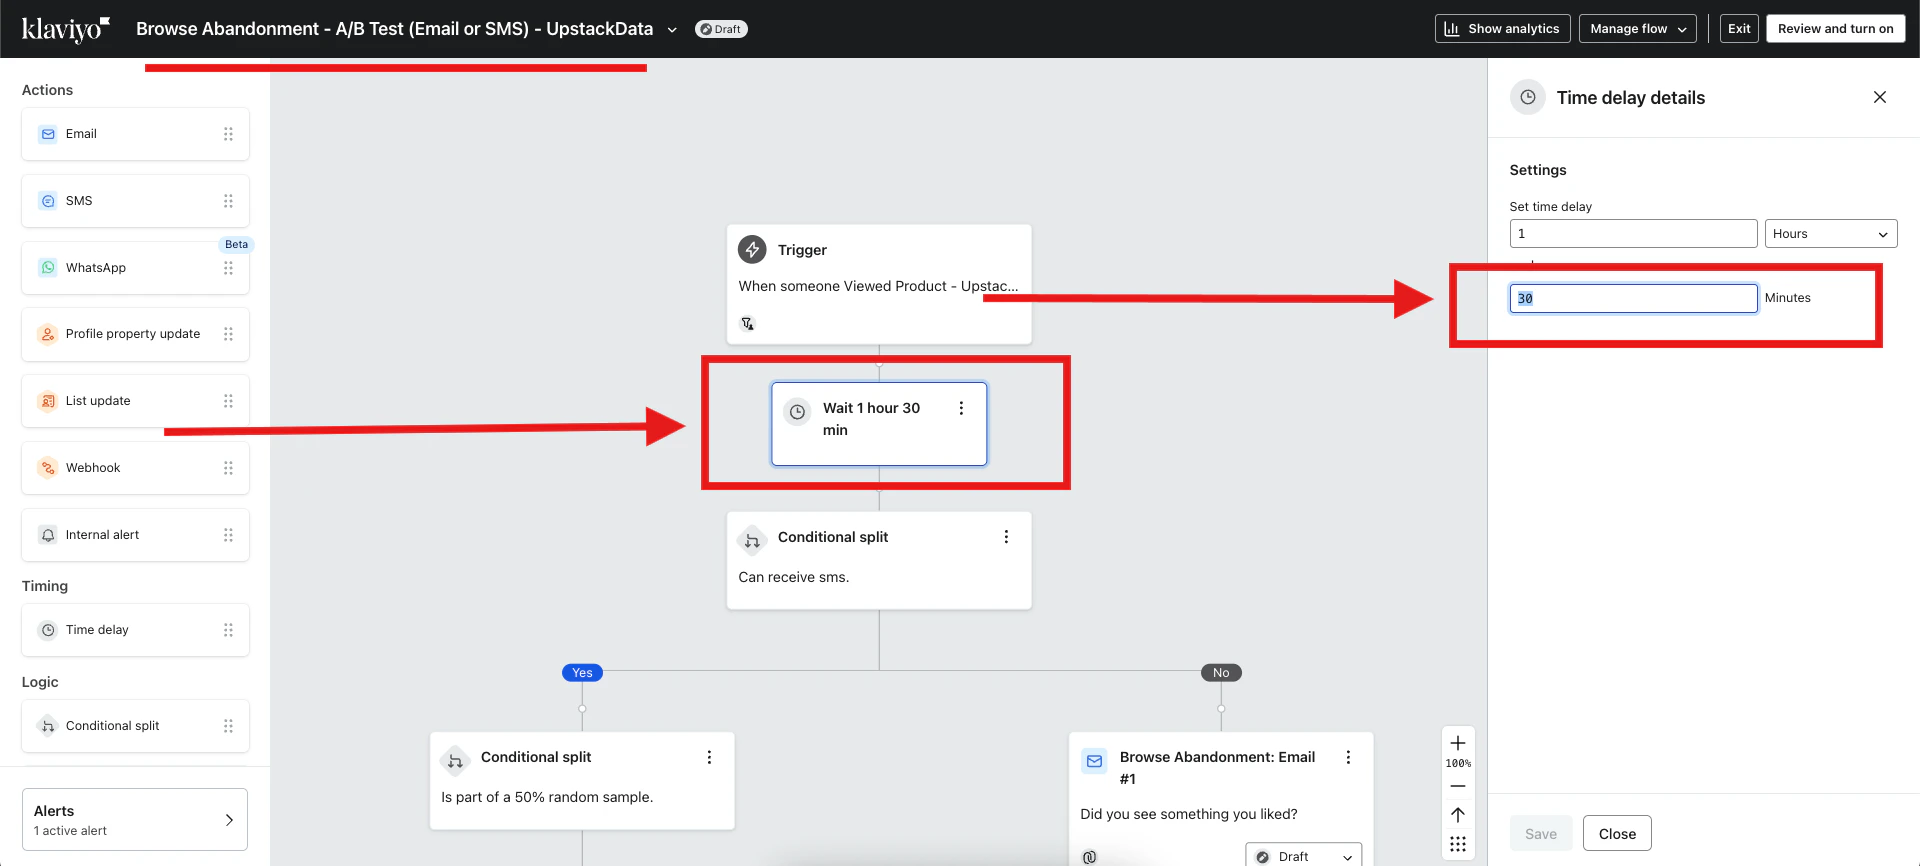
1 hour → 1 hour 30 minutesAdd cross-flow exclusion filters
Purpose: Prevent someone from entering both the standard and Upstack copies within a 7-day window, which would result in duplicate emails.
- On the standard flow: Has received email 0 times in last 7 days where Flow =
[Upstack copy of the flow] - On the Upstack copy of the flow: Has received email 0 times in last 7 days where Flow =
[Standard flow]
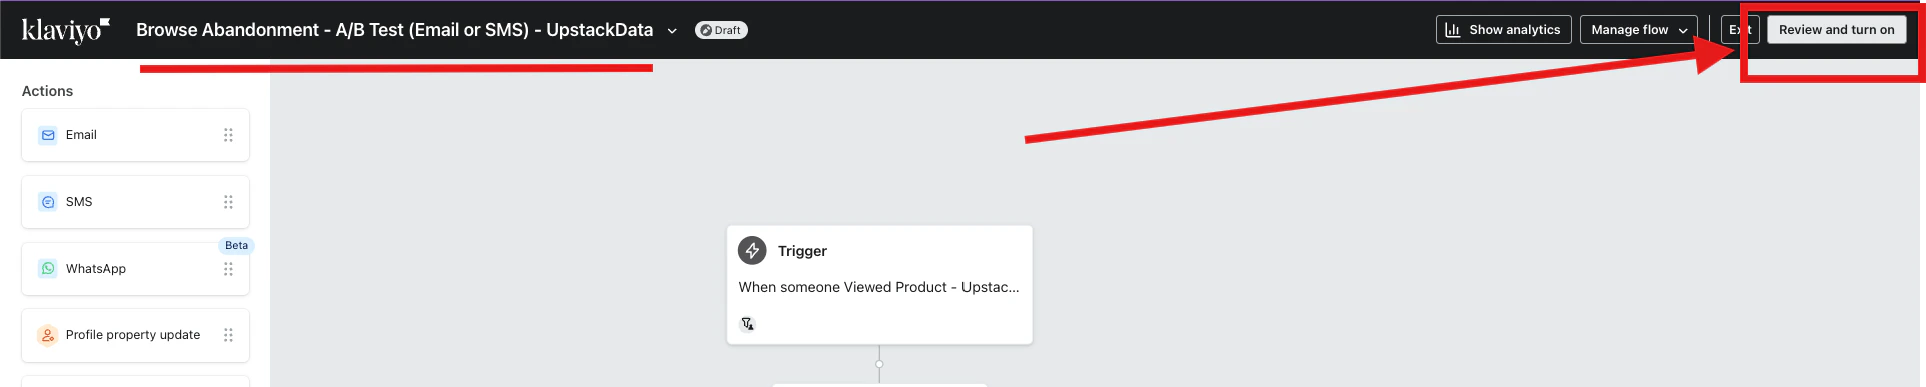
Turn on the Upstack copy of the flow
- Open the Upstack copy of the flow.
-
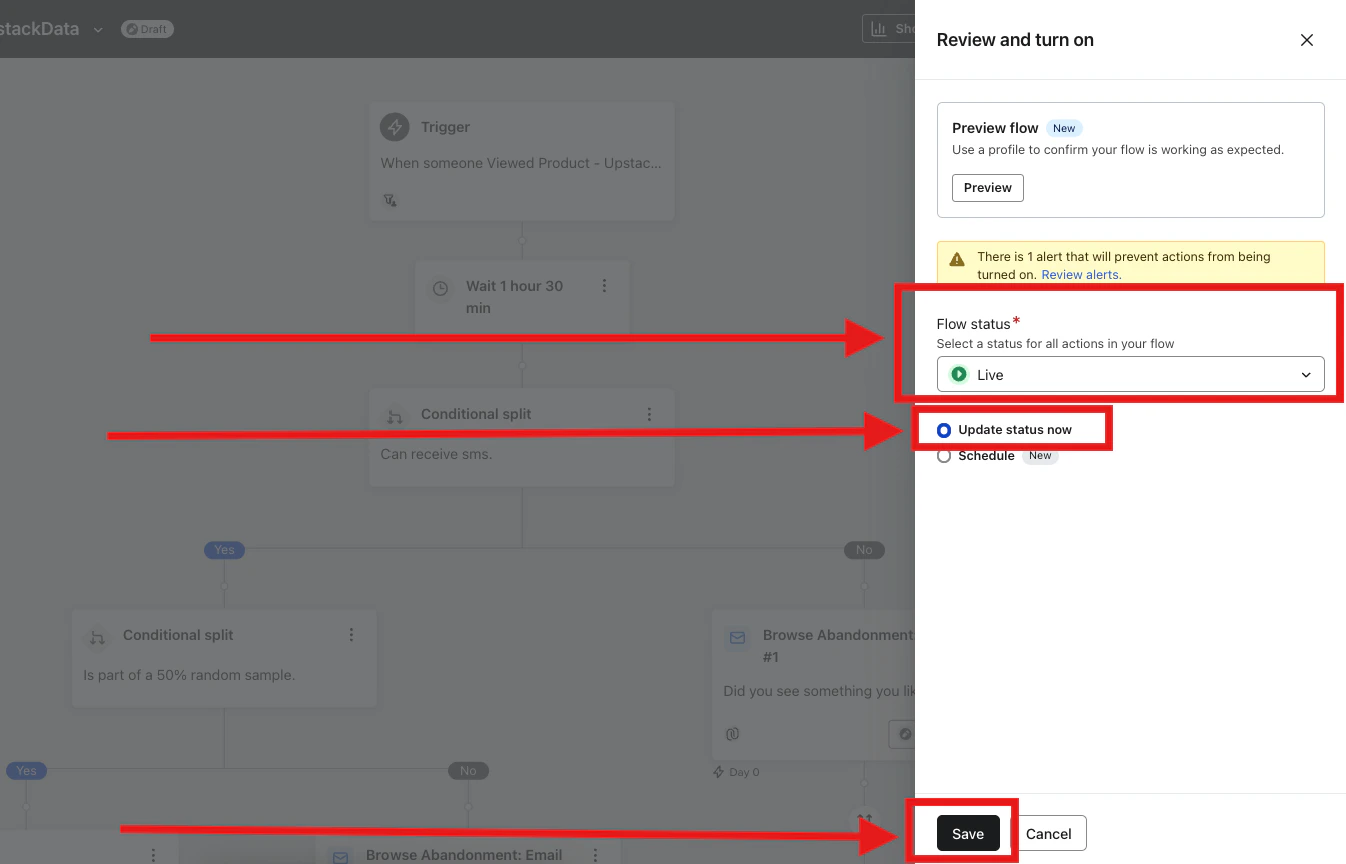
In the top-right of the page, click the Review and turn on button.
- In the right-side panel that appears, set Flow status to Live.
- Select Update status now.
-
Click Save.
Match step statuses to the standard flow
- In the standard flow, note which steps are Live vs Draft / Manual.
- In the Upstack copy of the flow, set each corresponding step to the same status.
- Double-check that every step’s status matches the standard flow before continuing.
Verify the setup
- Confirm the Upstack copy of the flow is Live and that step statuses mirror the standard flow exactly.
- In Klaviyo, open Analytics → Metrics and confirm the corresponding
*- Upstackifiedevent is recording activity (within minutes of live traffic). - In Flows, open the Upstack copy and check the Analytics tab over the first 24–48 hours to confirm profiles are entering the flow.
- Spot-check a recipient profile to confirm they did not also receive the standard flow’s email within the same 7-day window.
Best Practices
- Always confirm timing and messaging changes between the standard flow and the Upstack copy.
- Test triggers to ensure the
*- Upstackifiedevents are firing correctly. - Monitor reporting weekly after launch to assess performance.
Need help or found an issue?If you encounter any issues or have questions while following this guide, you may reach out to us at support@upstackdata.com