Why this Step Matters
The purpose of cross-flow exclusion filters is to prevent someone from entering both the standard flow and the Upstack copy of the flow within a set timeframe. This avoids overlapping or duplicate messages, ensuring a smoother customer experience, reducing message fatigue, and keeping your reporting data clean.
Prerequisites
Before you start, you need:- The Klaviyo destination configured in Upstack Data
- Existing standard abandonment flows in your Klaviyo account (Browse, Cart, Checkout, Site)
- The Upstack copy of each abandonment flow already cloned and renamed with the
- Upstack Datasuffix (learn how) - Admin (manager) access to the store’s Klaviyo account
Key terms used below:
- Standard flow → the original abandonment flow in your Klaviyo account (for example,
Abandoned Cart). - Upstack copy of the flow → the cloned version triggered by Upstack Data’s
*- Upstackifiedevents, named with the- Upstack Datasuffix (for example,Abandoned Cart - Upstack Data).
Part 1: Add the exclusion filter to the standard flow
- Open the standard flow (for example,
Abandoned Cart) in Klaviyo. - Click the Trigger card at the top of the flow.
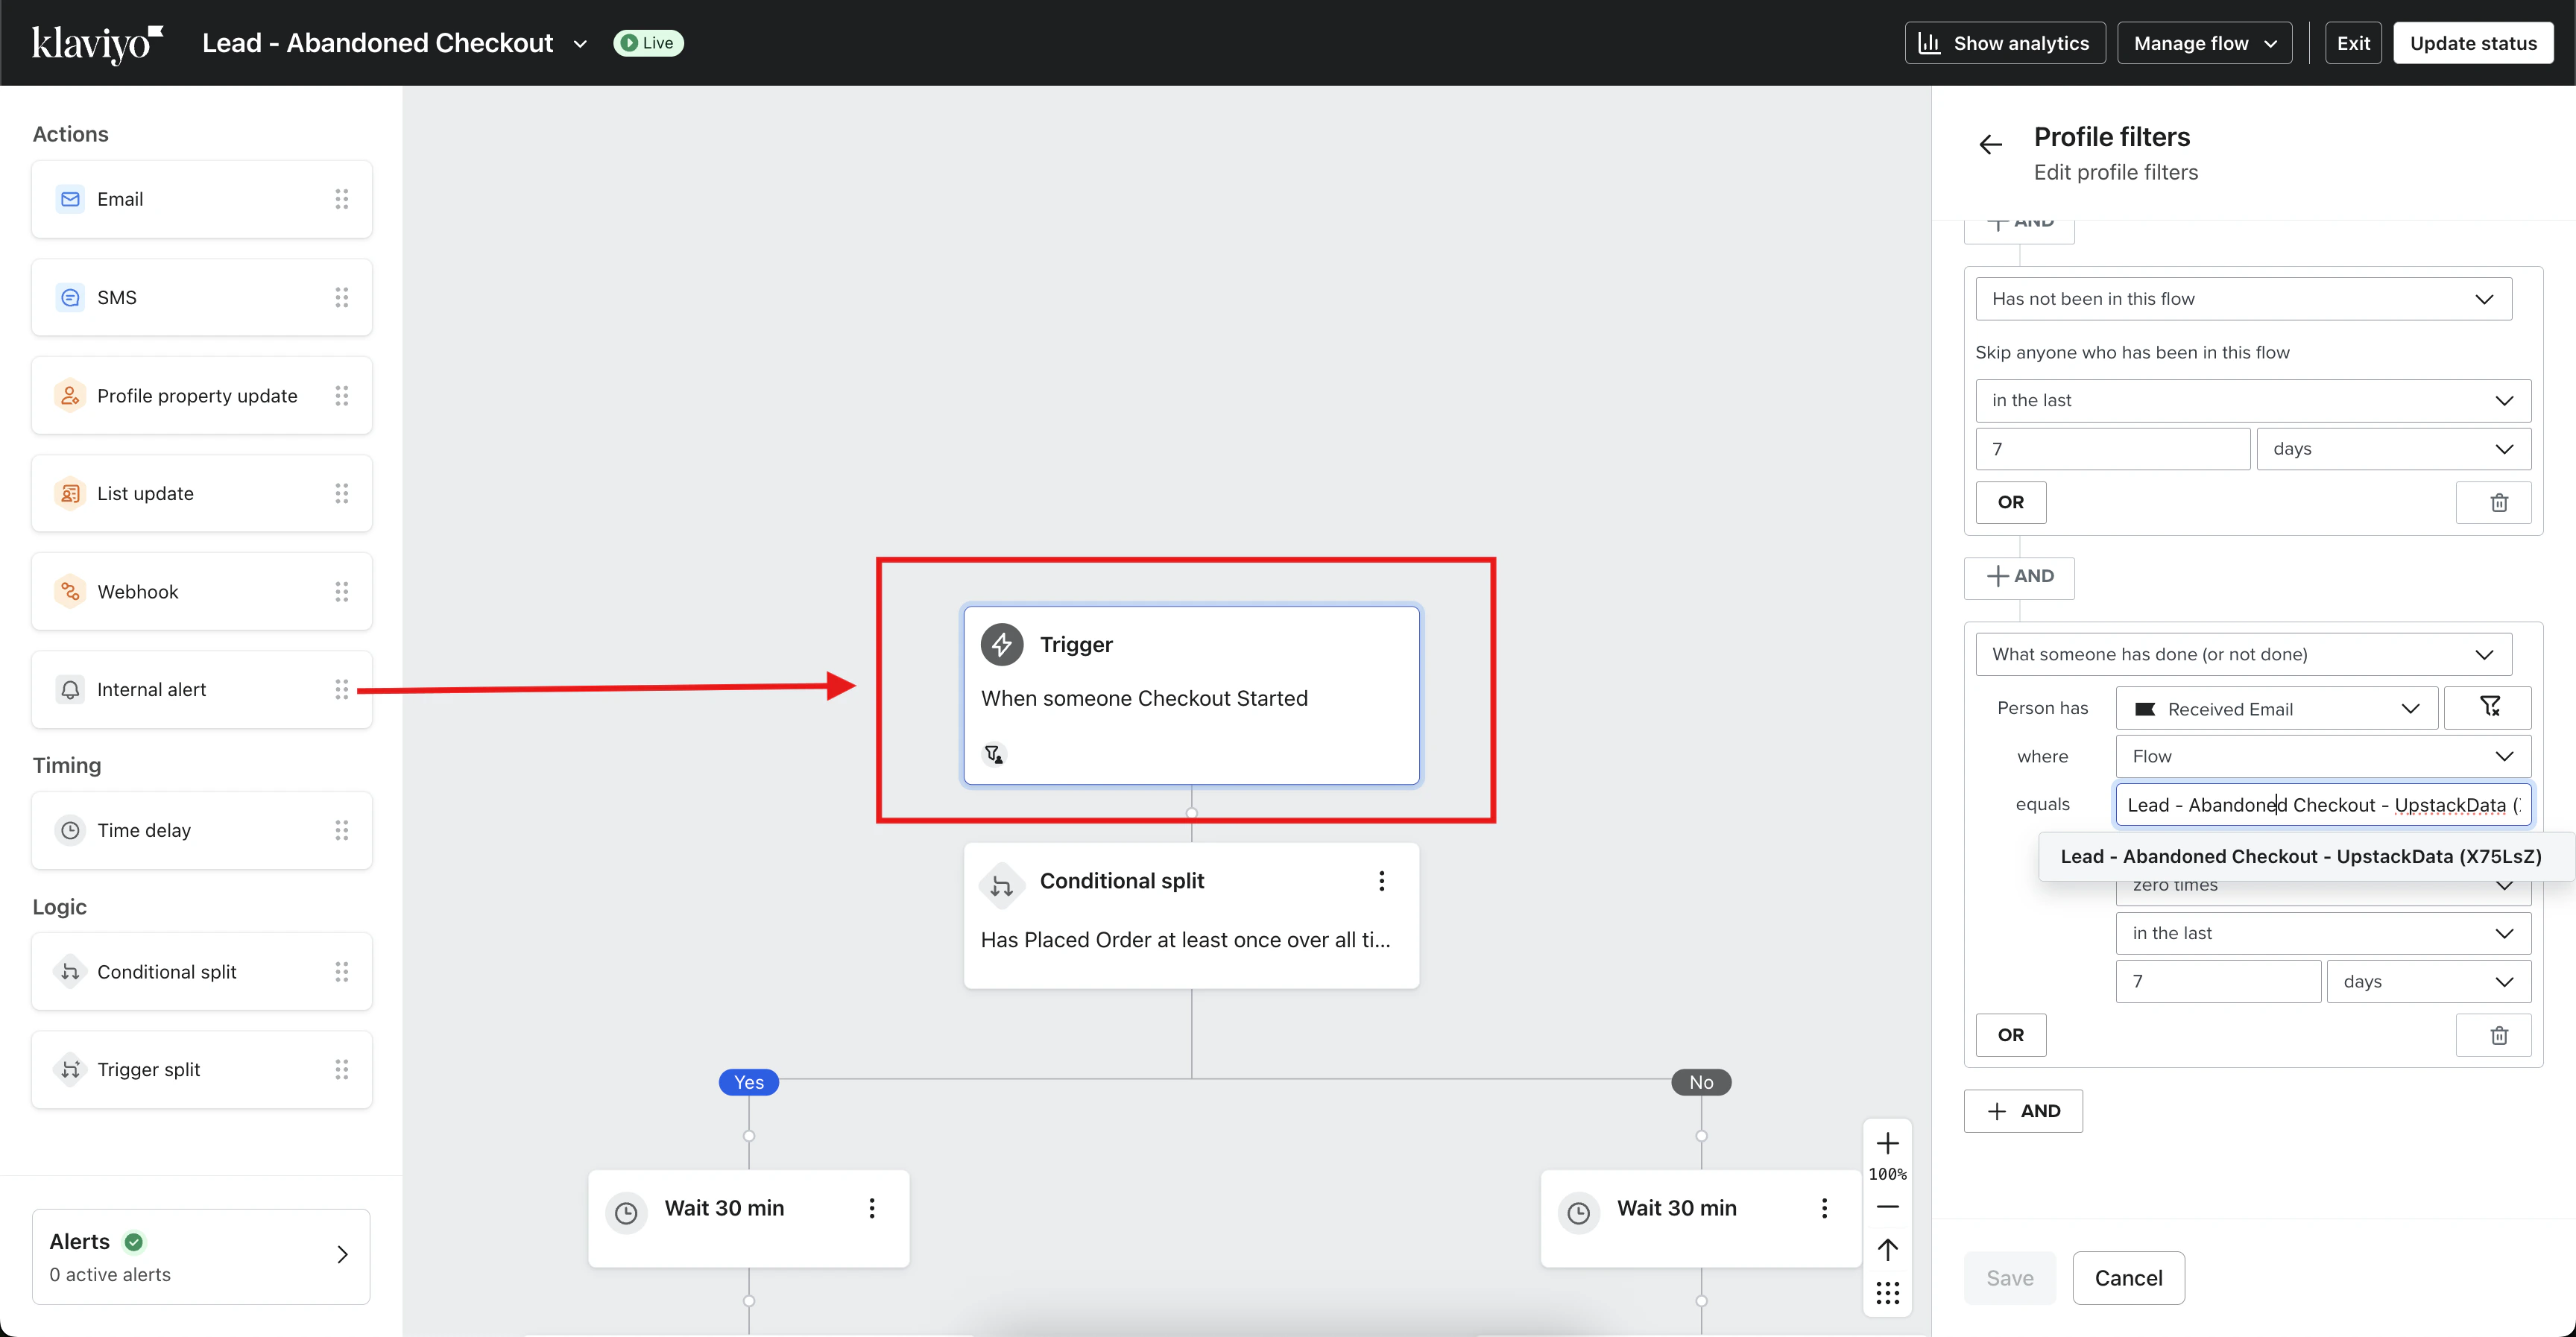
- Go to Profile filters and click Edit.
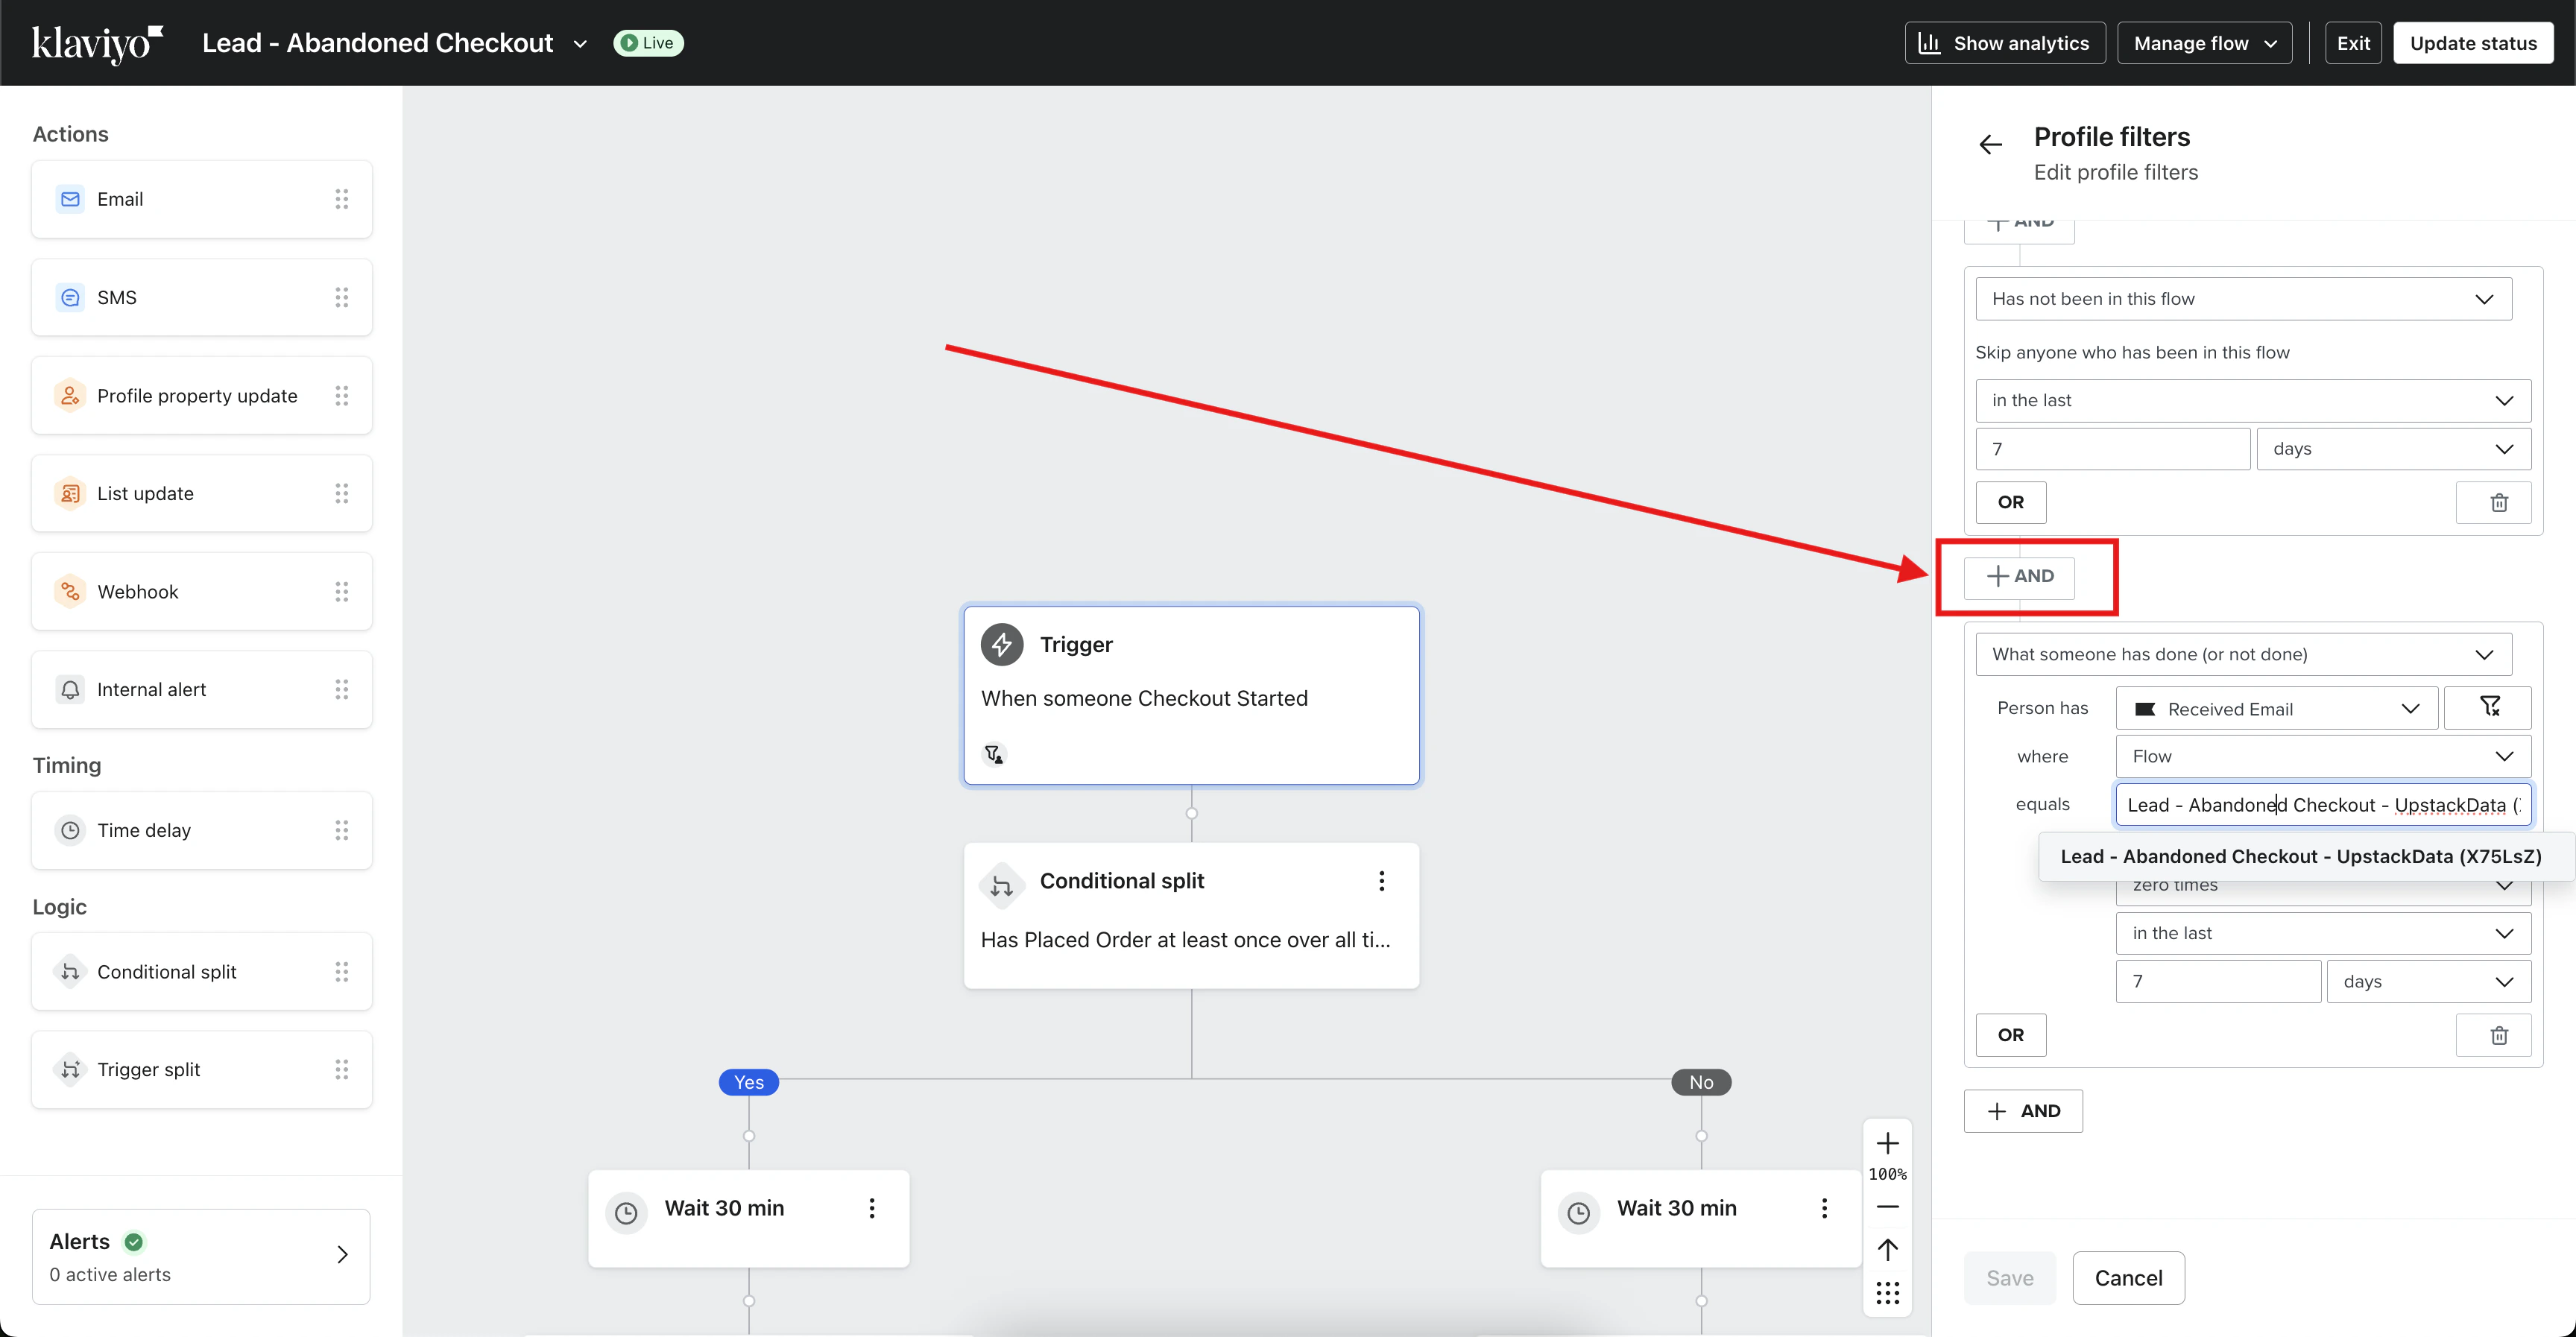
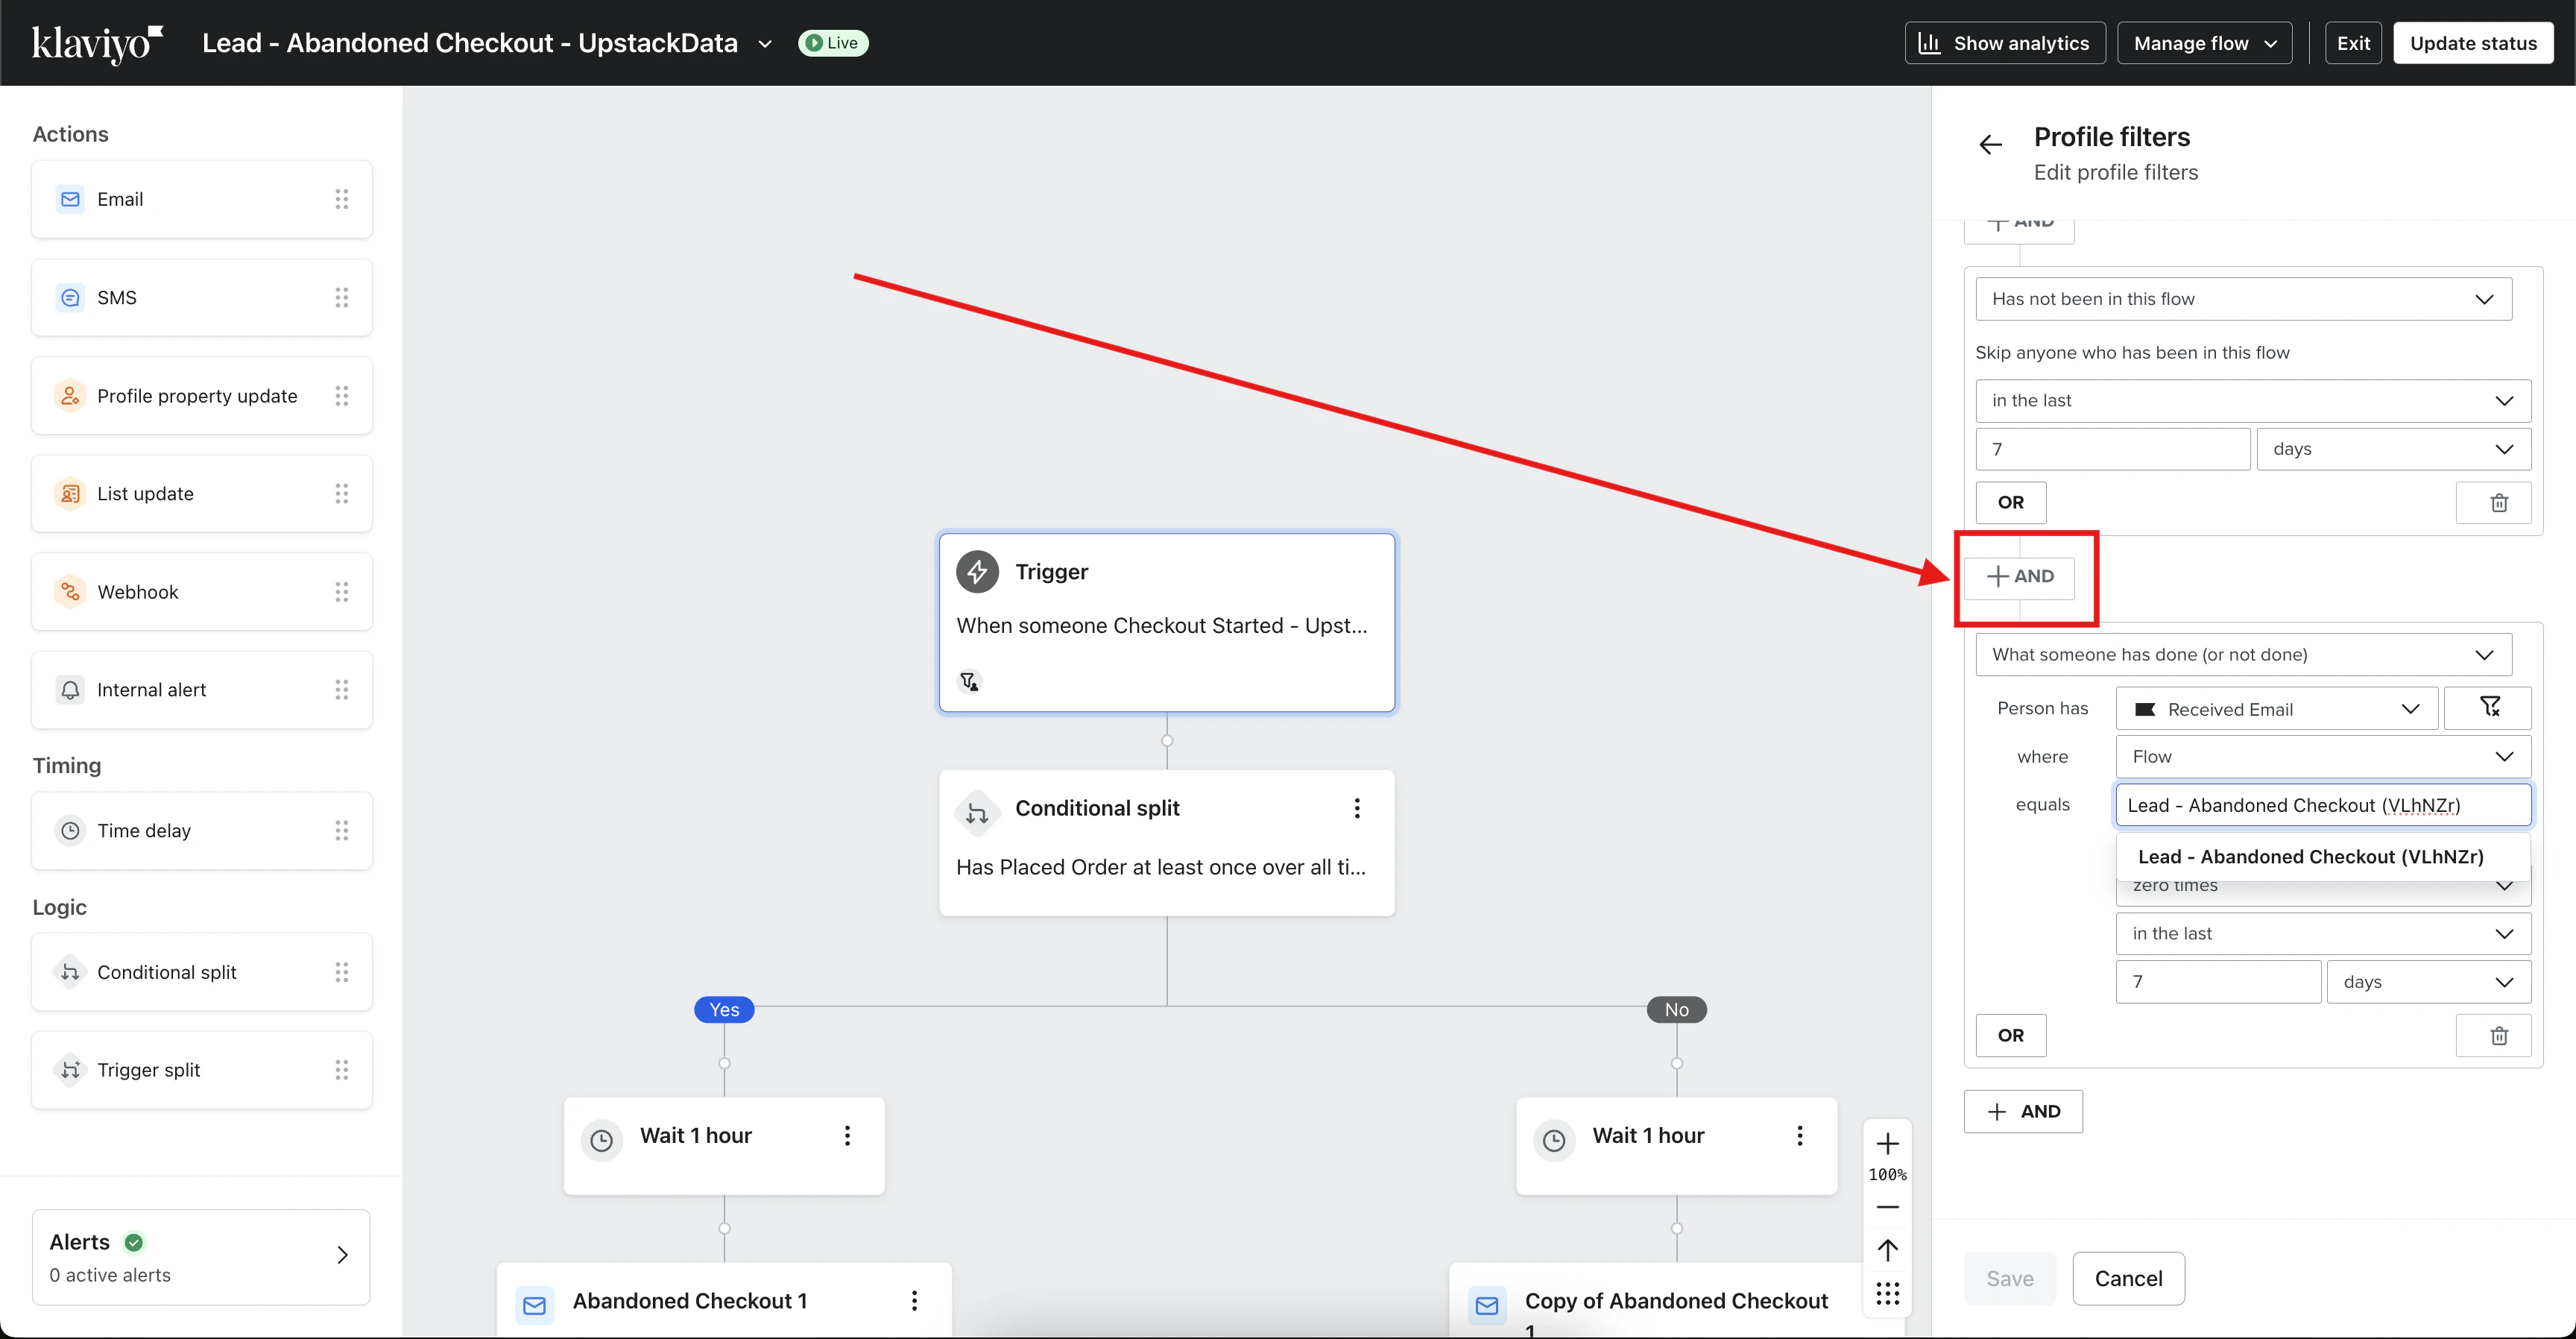
- Scroll to the bottom of the existing profile filters and click + AND.
- Select the condition: What someone has done (or not done).
- Choose Person has → Received Email.
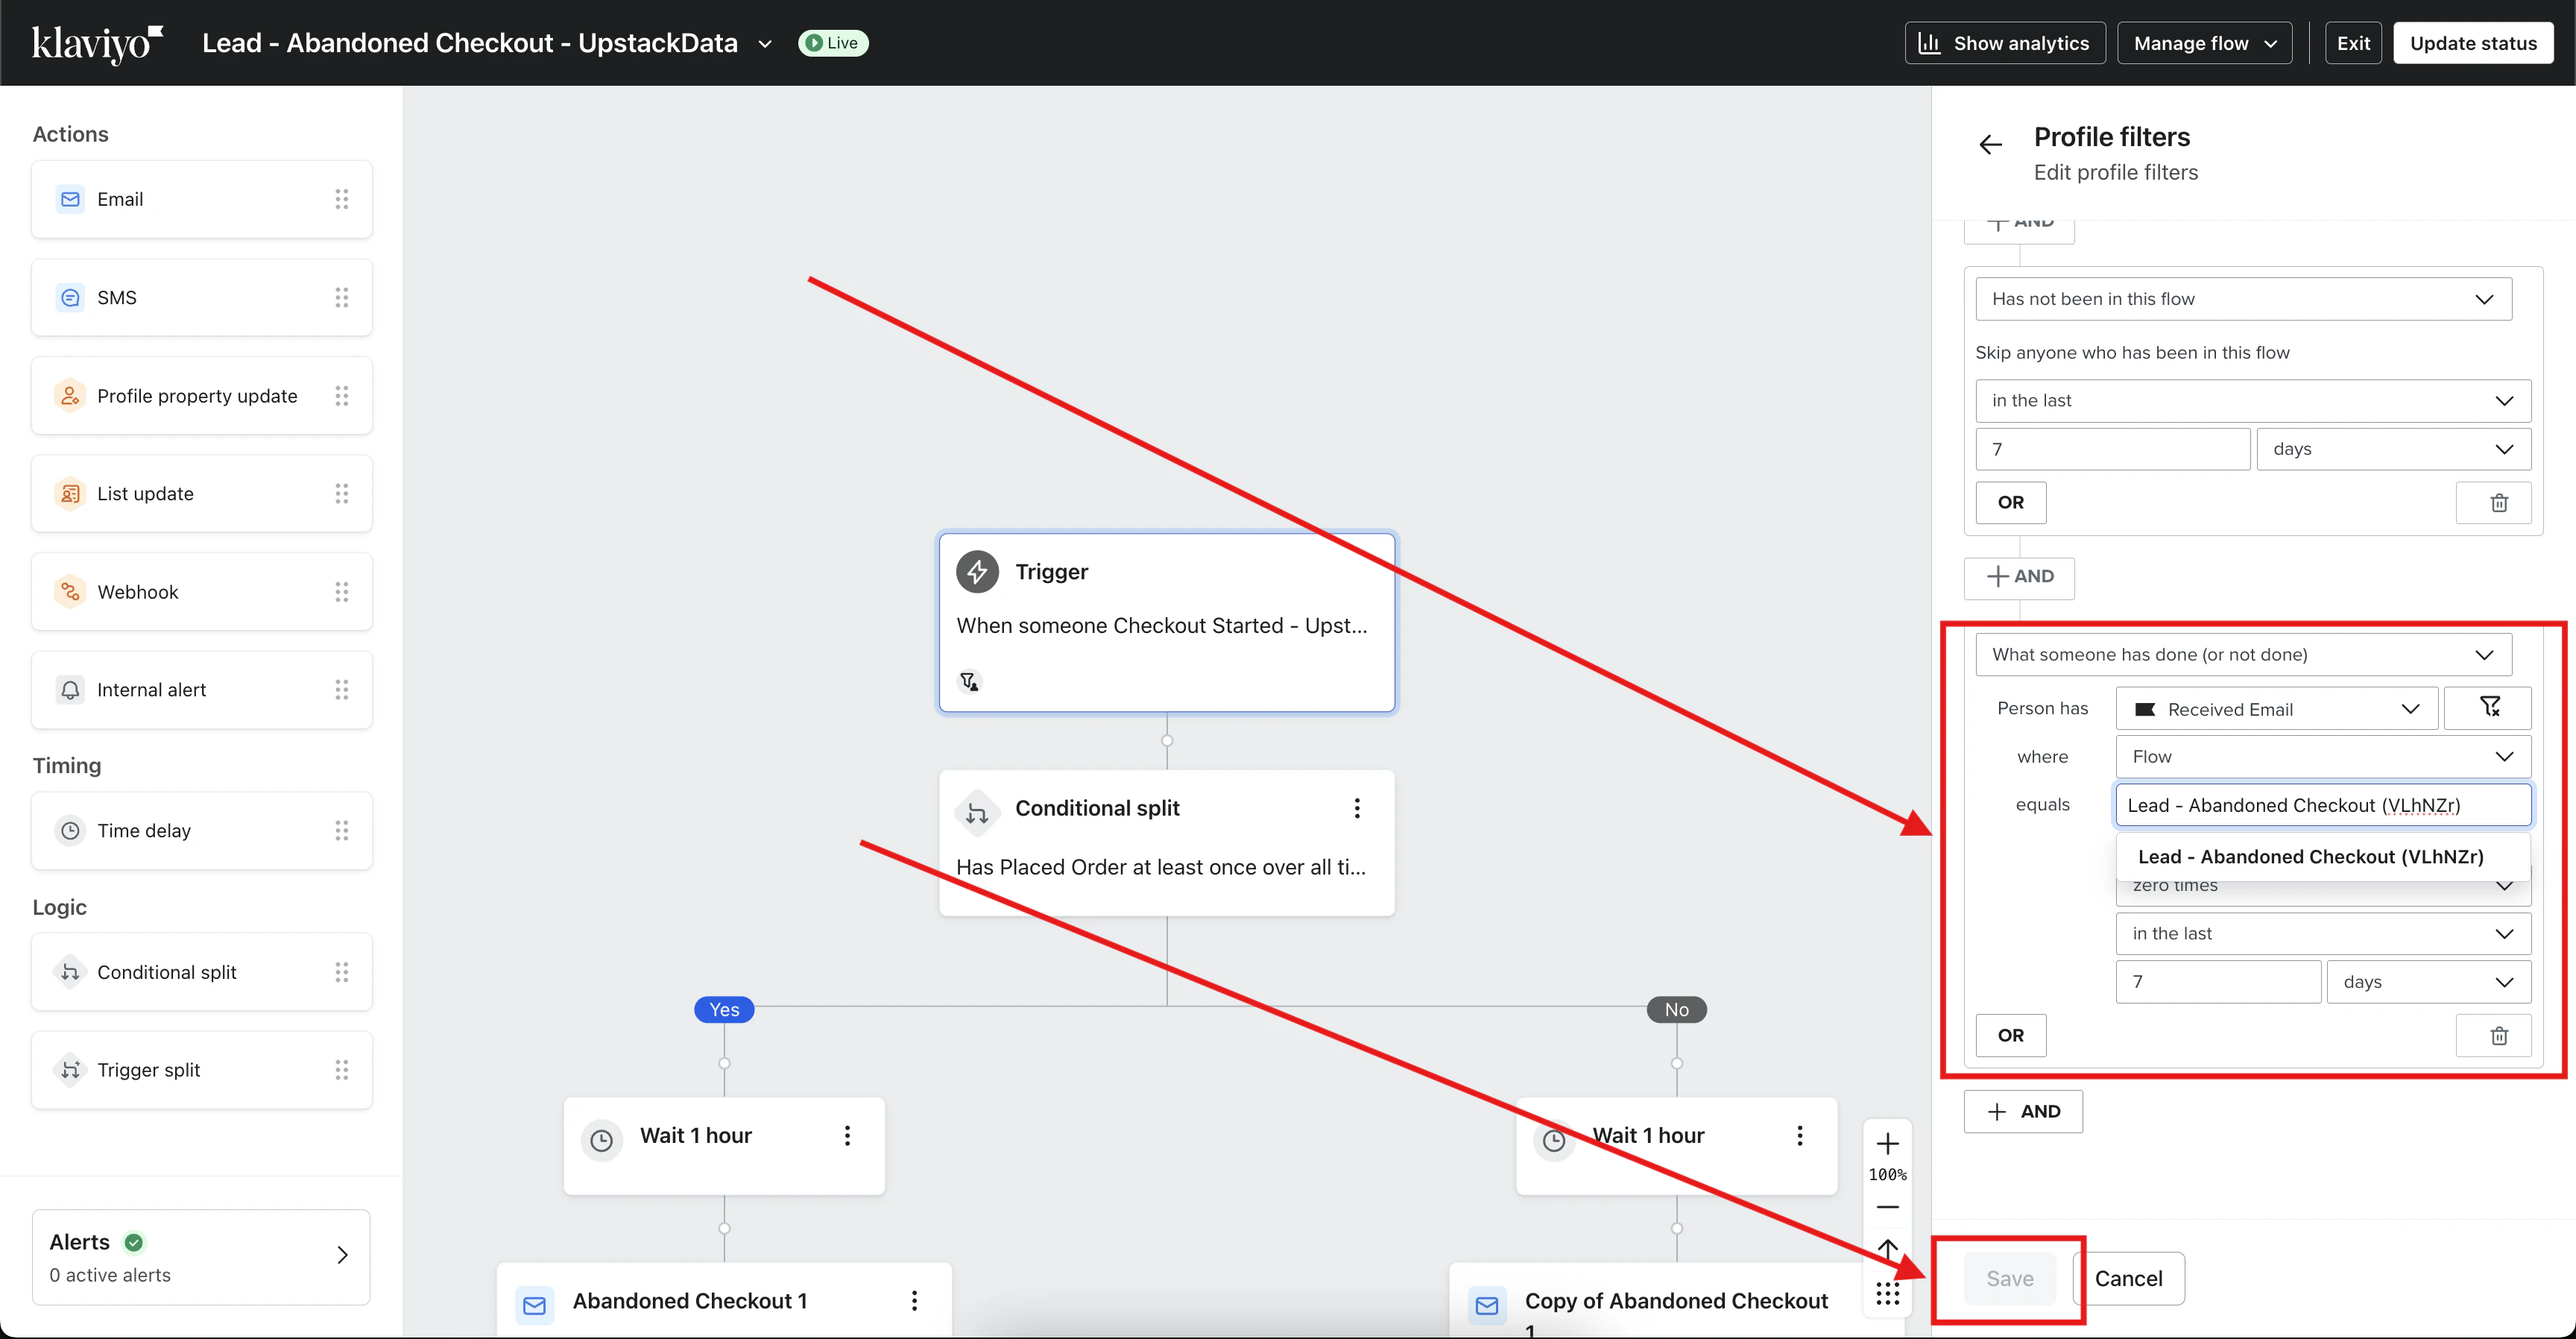
- Set the count and timeframe: zero times → in the last 7 days (or 14 days if preferred).
-
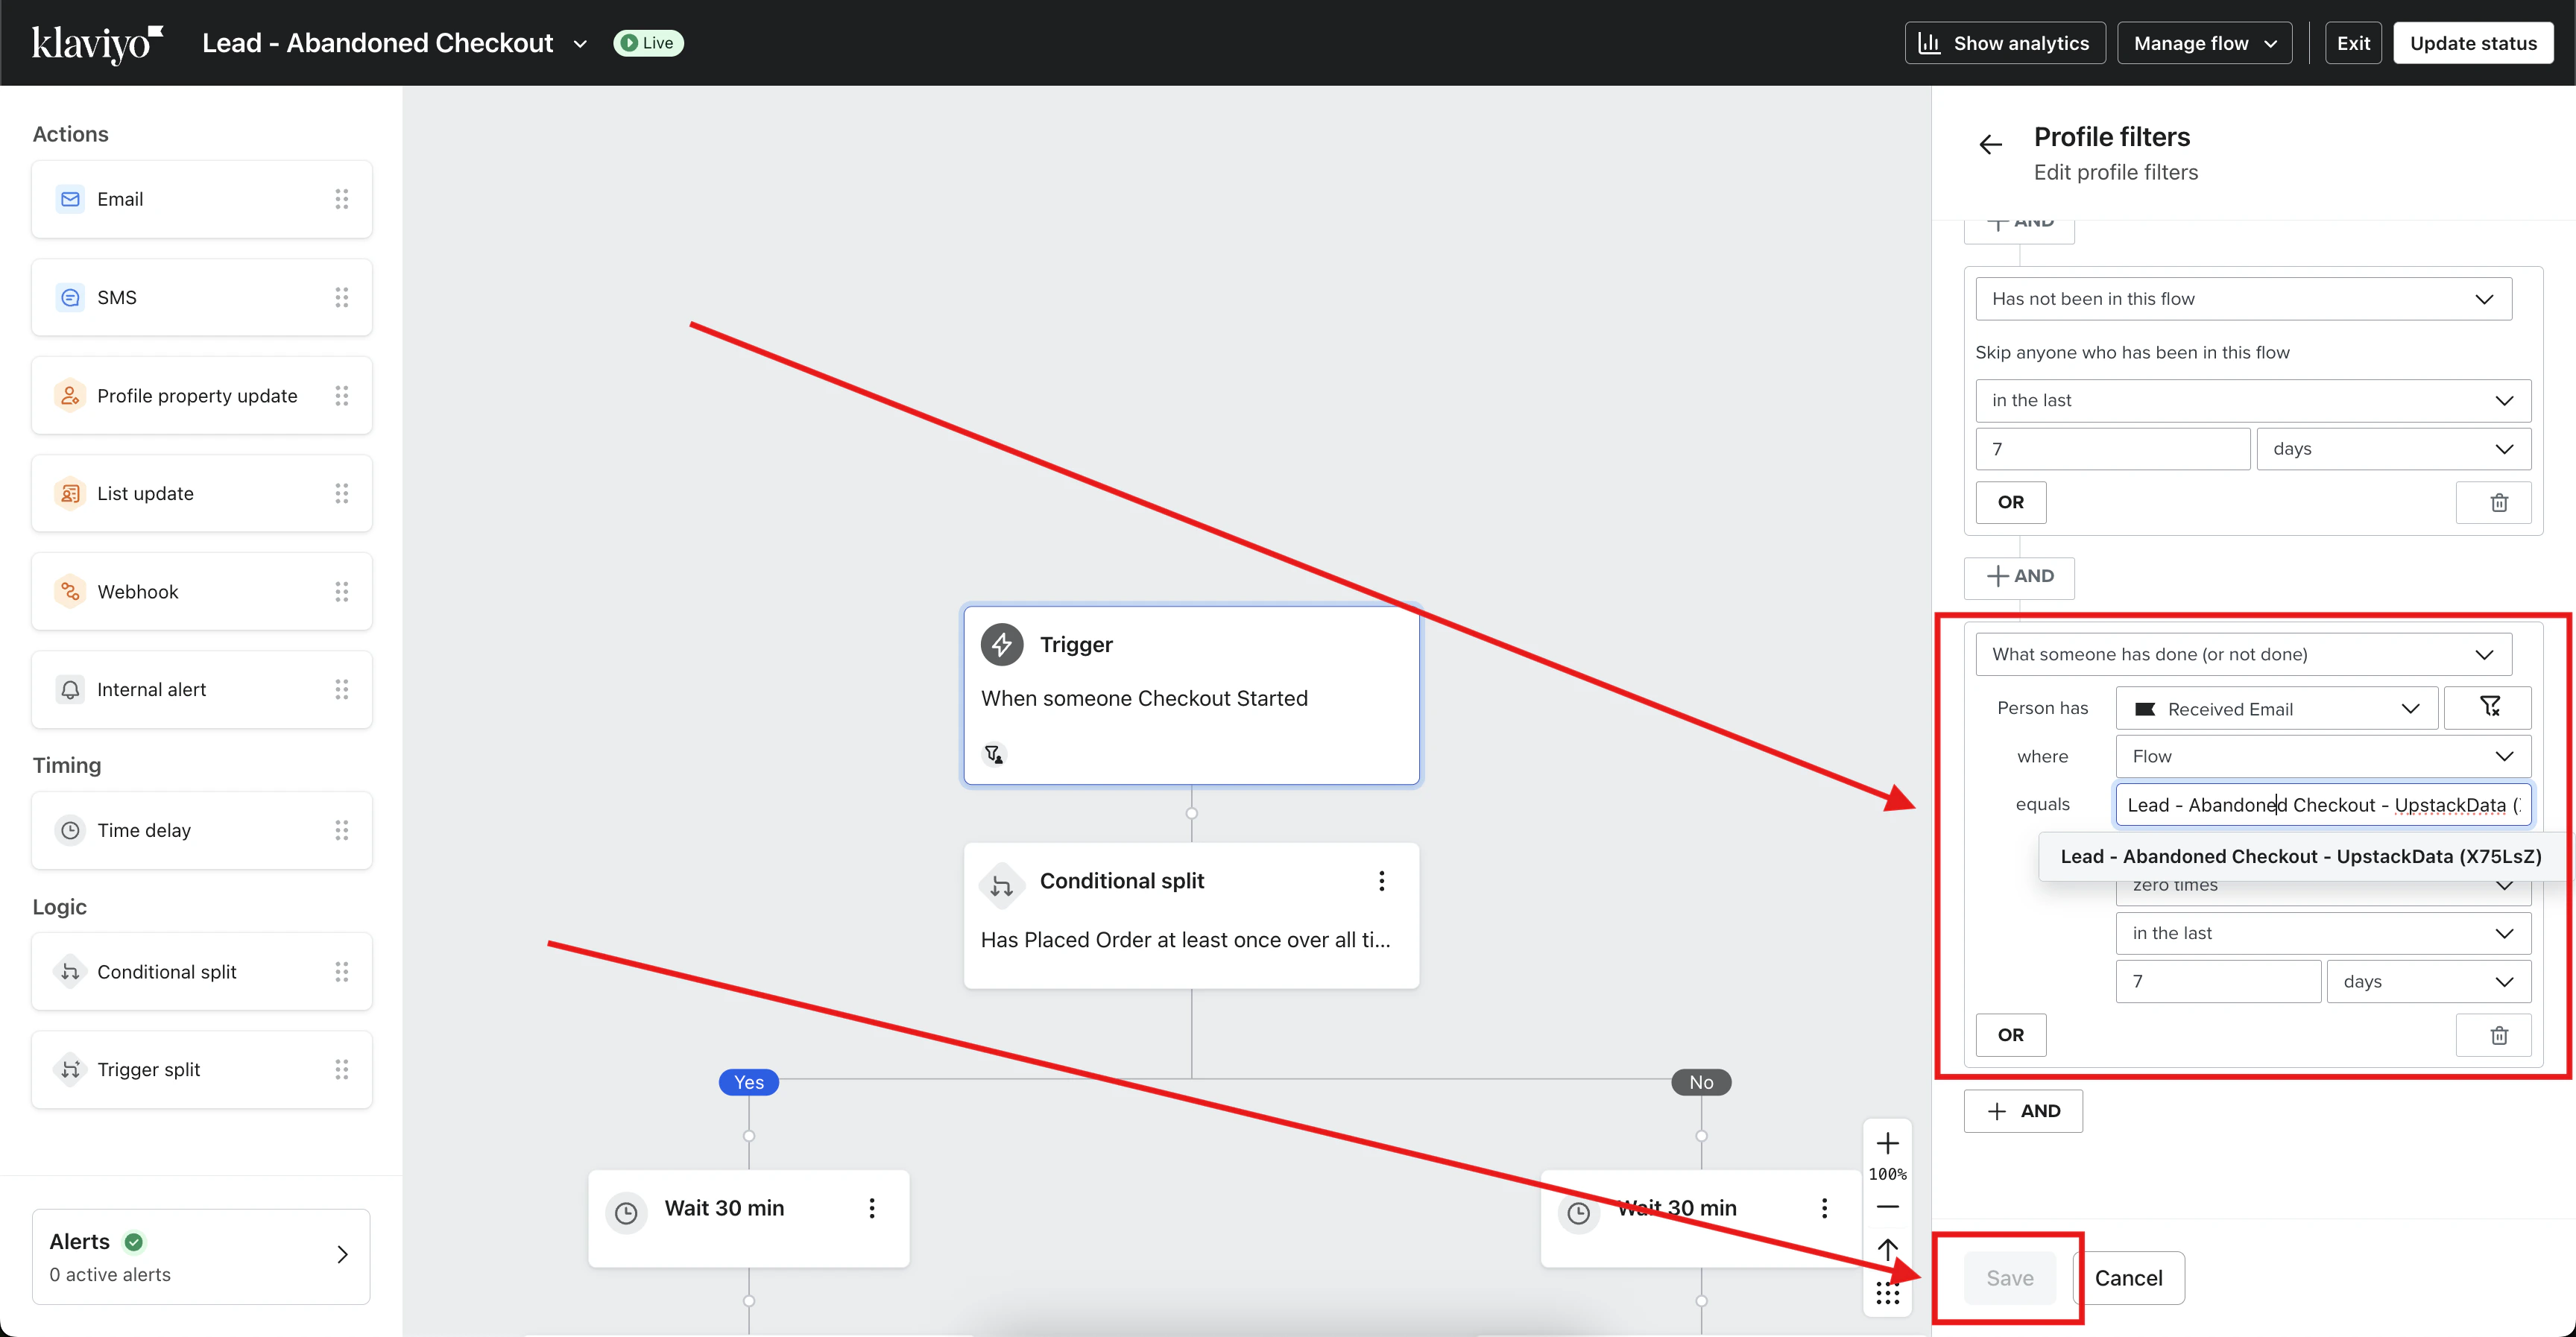
Click Where and add: Flow equals the Upstack copy of this flow.
For example:
Flow equals Abandoned Cart - Upstack Data. Read as: Has received email 0 times in last 7 days where Flow =Abandoned Cart - Upstack Data. - Click Save.
Part 2: Add the reverse exclusion filter to the Upstack copy of the flow
- Open the Upstack copy of the flow (for example,
Abandoned Cart - Upstack Data) in Klaviyo. - Click the Trigger card at the top of the flow.
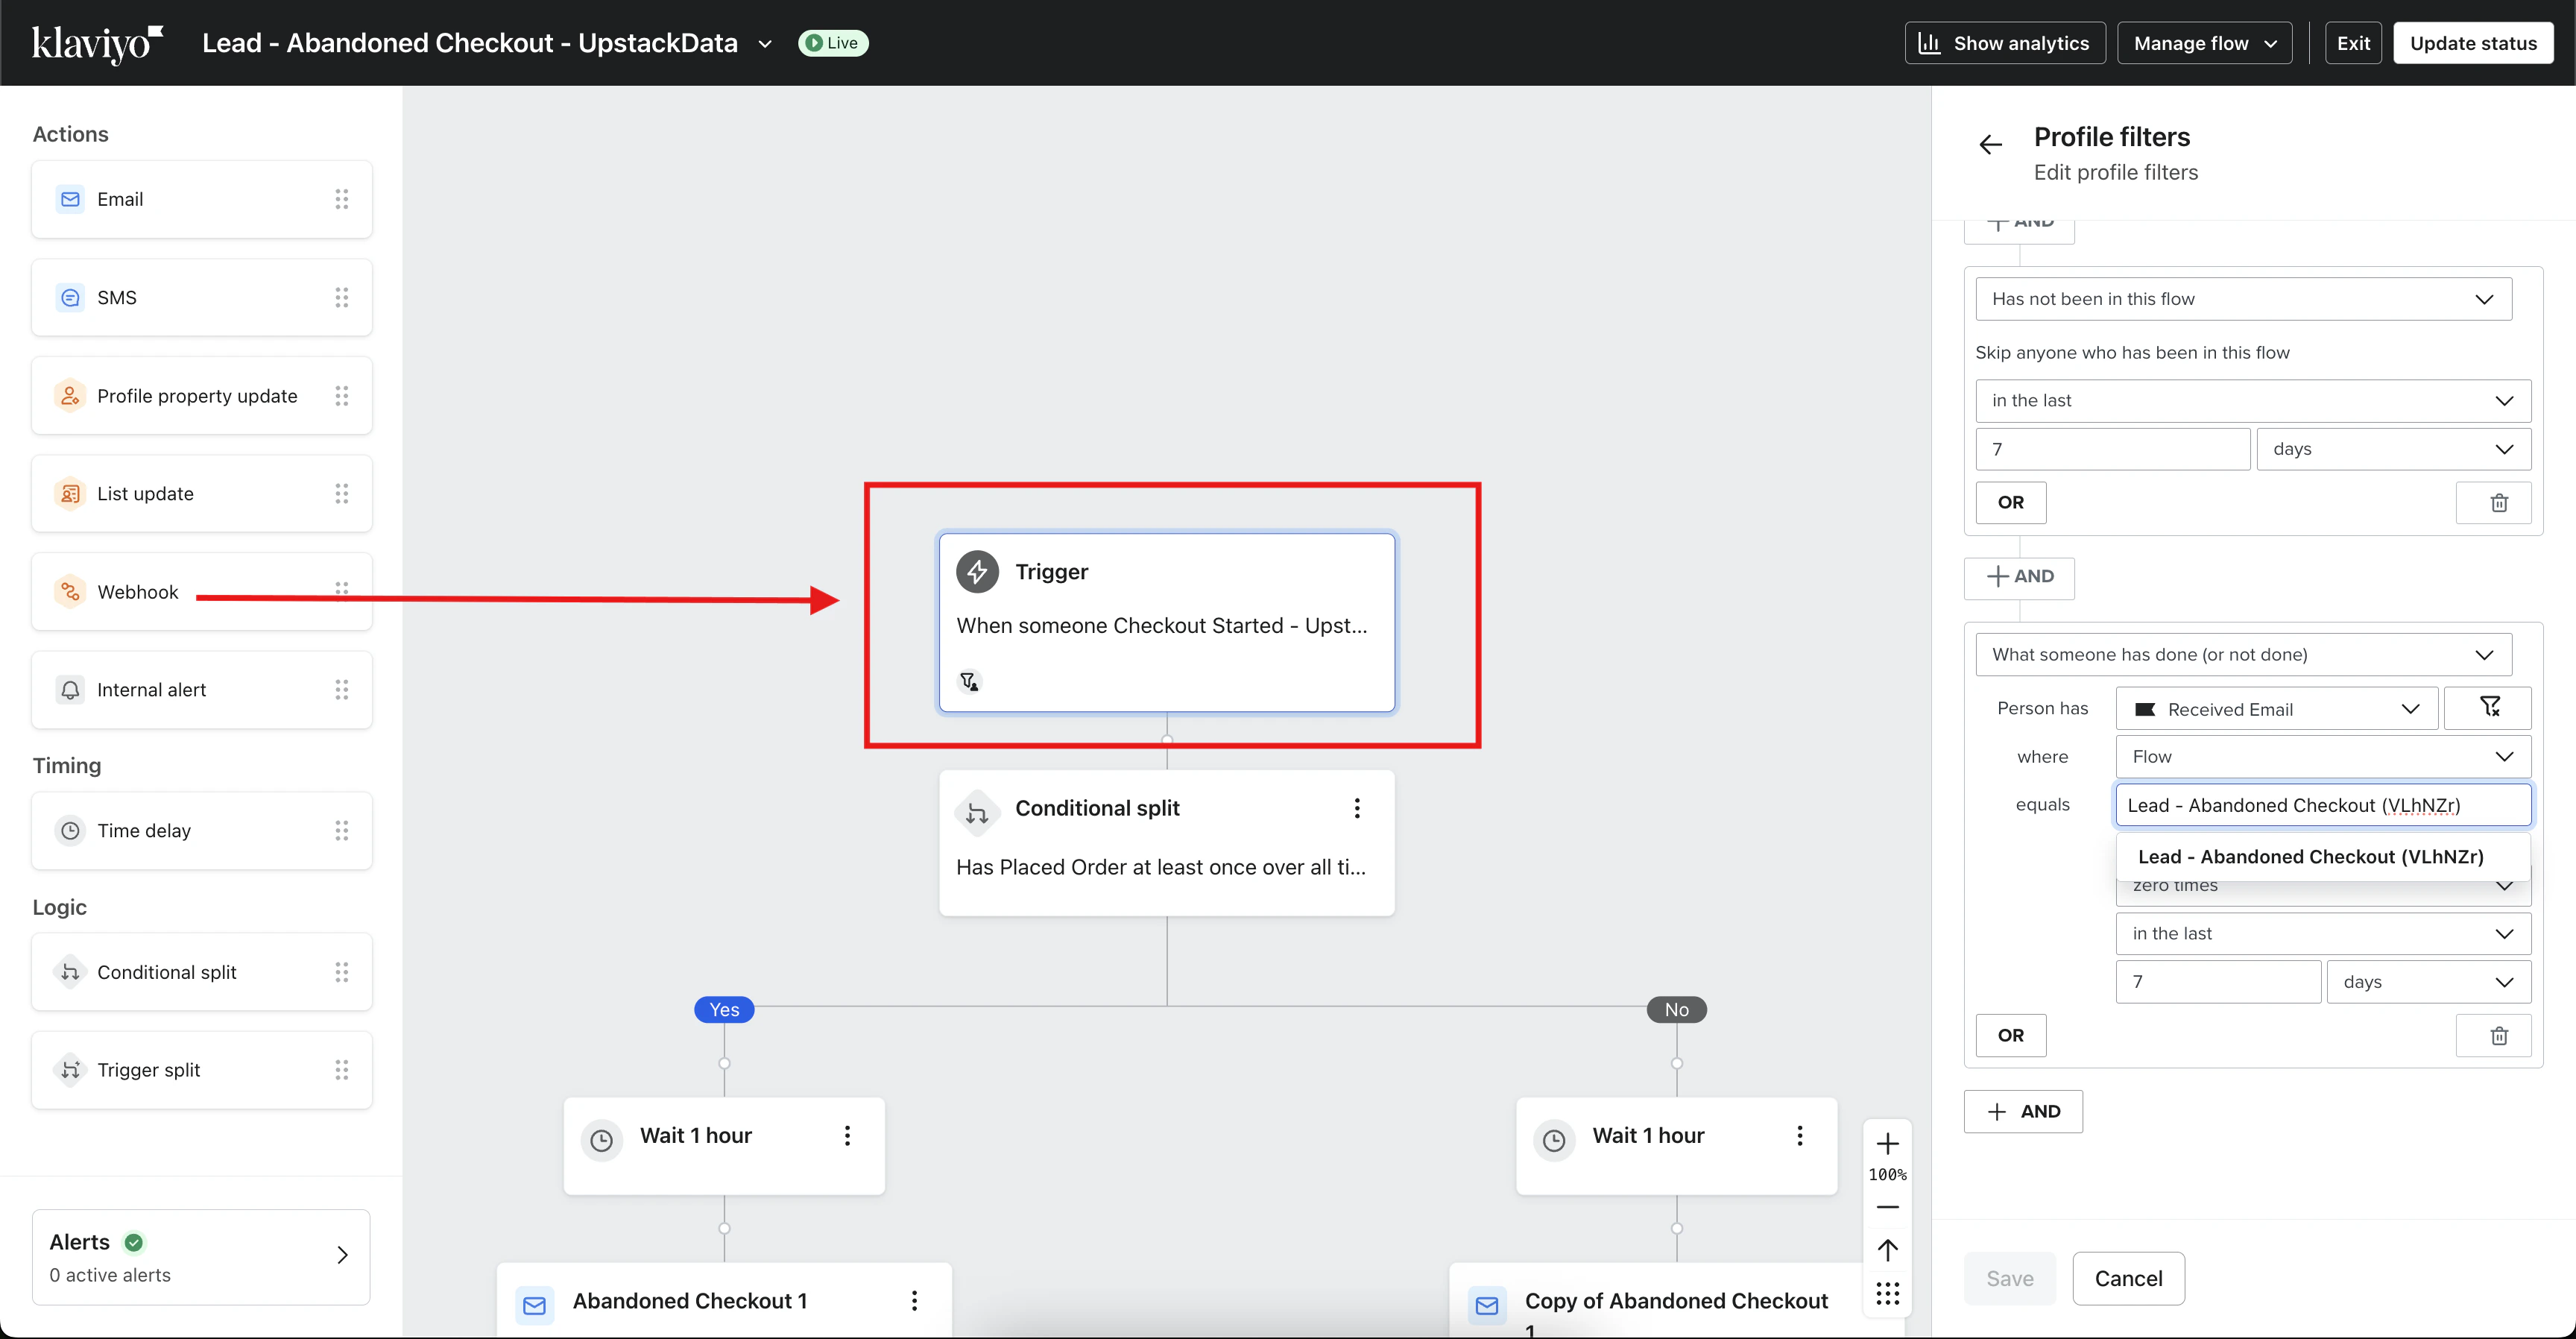
- Go to Profile filters and click Edit.
- Scroll to the bottom of the existing profile filters and click + AND.
- Select the condition: What someone has done (or not done).
- Choose Person has → Received Email.
- Set the count and timeframe: zero times → in the last 7 days (or 14 days if preferred).
-
Click Where and add: Flow equals the standard flow.
For example:
Flow equals Abandoned Cart. Read as: Has received email 0 times in last 7 days where Flow =Abandoned Cart. - Click Save.
Part 3: Verify both filters are in place
- On the standard flow trigger, confirm the profile filter references the Upstack copy name (for example,
Abandoned Cart - Upstack Data). - On the Upstack copy of the flow trigger, confirm the profile filter references the standard flow name (for example,
Abandoned Cart). - Spot-check a recipient profile after going live: confirm they only receive an email from one of the two flows within the 7-day window.
Done 🎉 Repeat both Part 1 and Part 2 for each abandonment flow pair: Cart, Browse, Site, and Checkout.For the full setup walkthrough, see How to set up your Upstack abandonment flows in Klaviyo.
Need help or found an issue?If you encounter any issues or have questions while following this guide, reach out to us at support@upstackdata.com.