Prerequisites
Before you start, you need:- The Klaviyo destination configured in Upstack Data
- Existing standard abandonment flows in your Klaviyo account (Browse, Cart, Checkout, Site)
- Admin (manager) access to the store’s Klaviyo account
- The following Upstack-emitted events present in Klaviyo (under Analytics → Metrics):
- Viewed Product - Upstackified
- Added to Cart - Upstackified
- Started Checkout - Upstackified
- Active on Site - Upstackified
Key terms:
- Standard flow → the existing abandonment flow in the brand/store’s Klaviyo account (for example,
Abandoned Cart). - Upstack copy of the flow → the cloned and modified version triggered by Upstack Data’s
*- Upstackifiedevents. Always identifiable by the- Upstack Dataname suffix (for example,Abandoned Cart - Upstack Data).
Trigger mapping
Use this mapping when changing the trigger on the cloned flow:| Standard flow | Upstack trigger event |
|---|---|
| Browse Abandonment | Viewed Product - Upstackified |
| Cart Abandonment | Added to Cart - Upstackified |
| Checkout Abandonment | Started Checkout - Upstackified |
| Site Abandonment | Active on Site - Upstackified |
Configuration Steps
Sign in to Klaviyo
Sign in to Klaviyo.
Clone the standard flow
- In the left navigation, go to Flows and open the standard flow you want to clone.
-
In the far-right column of the flow’s row, click the vertical three-dot (kebab) menu and select Clone.
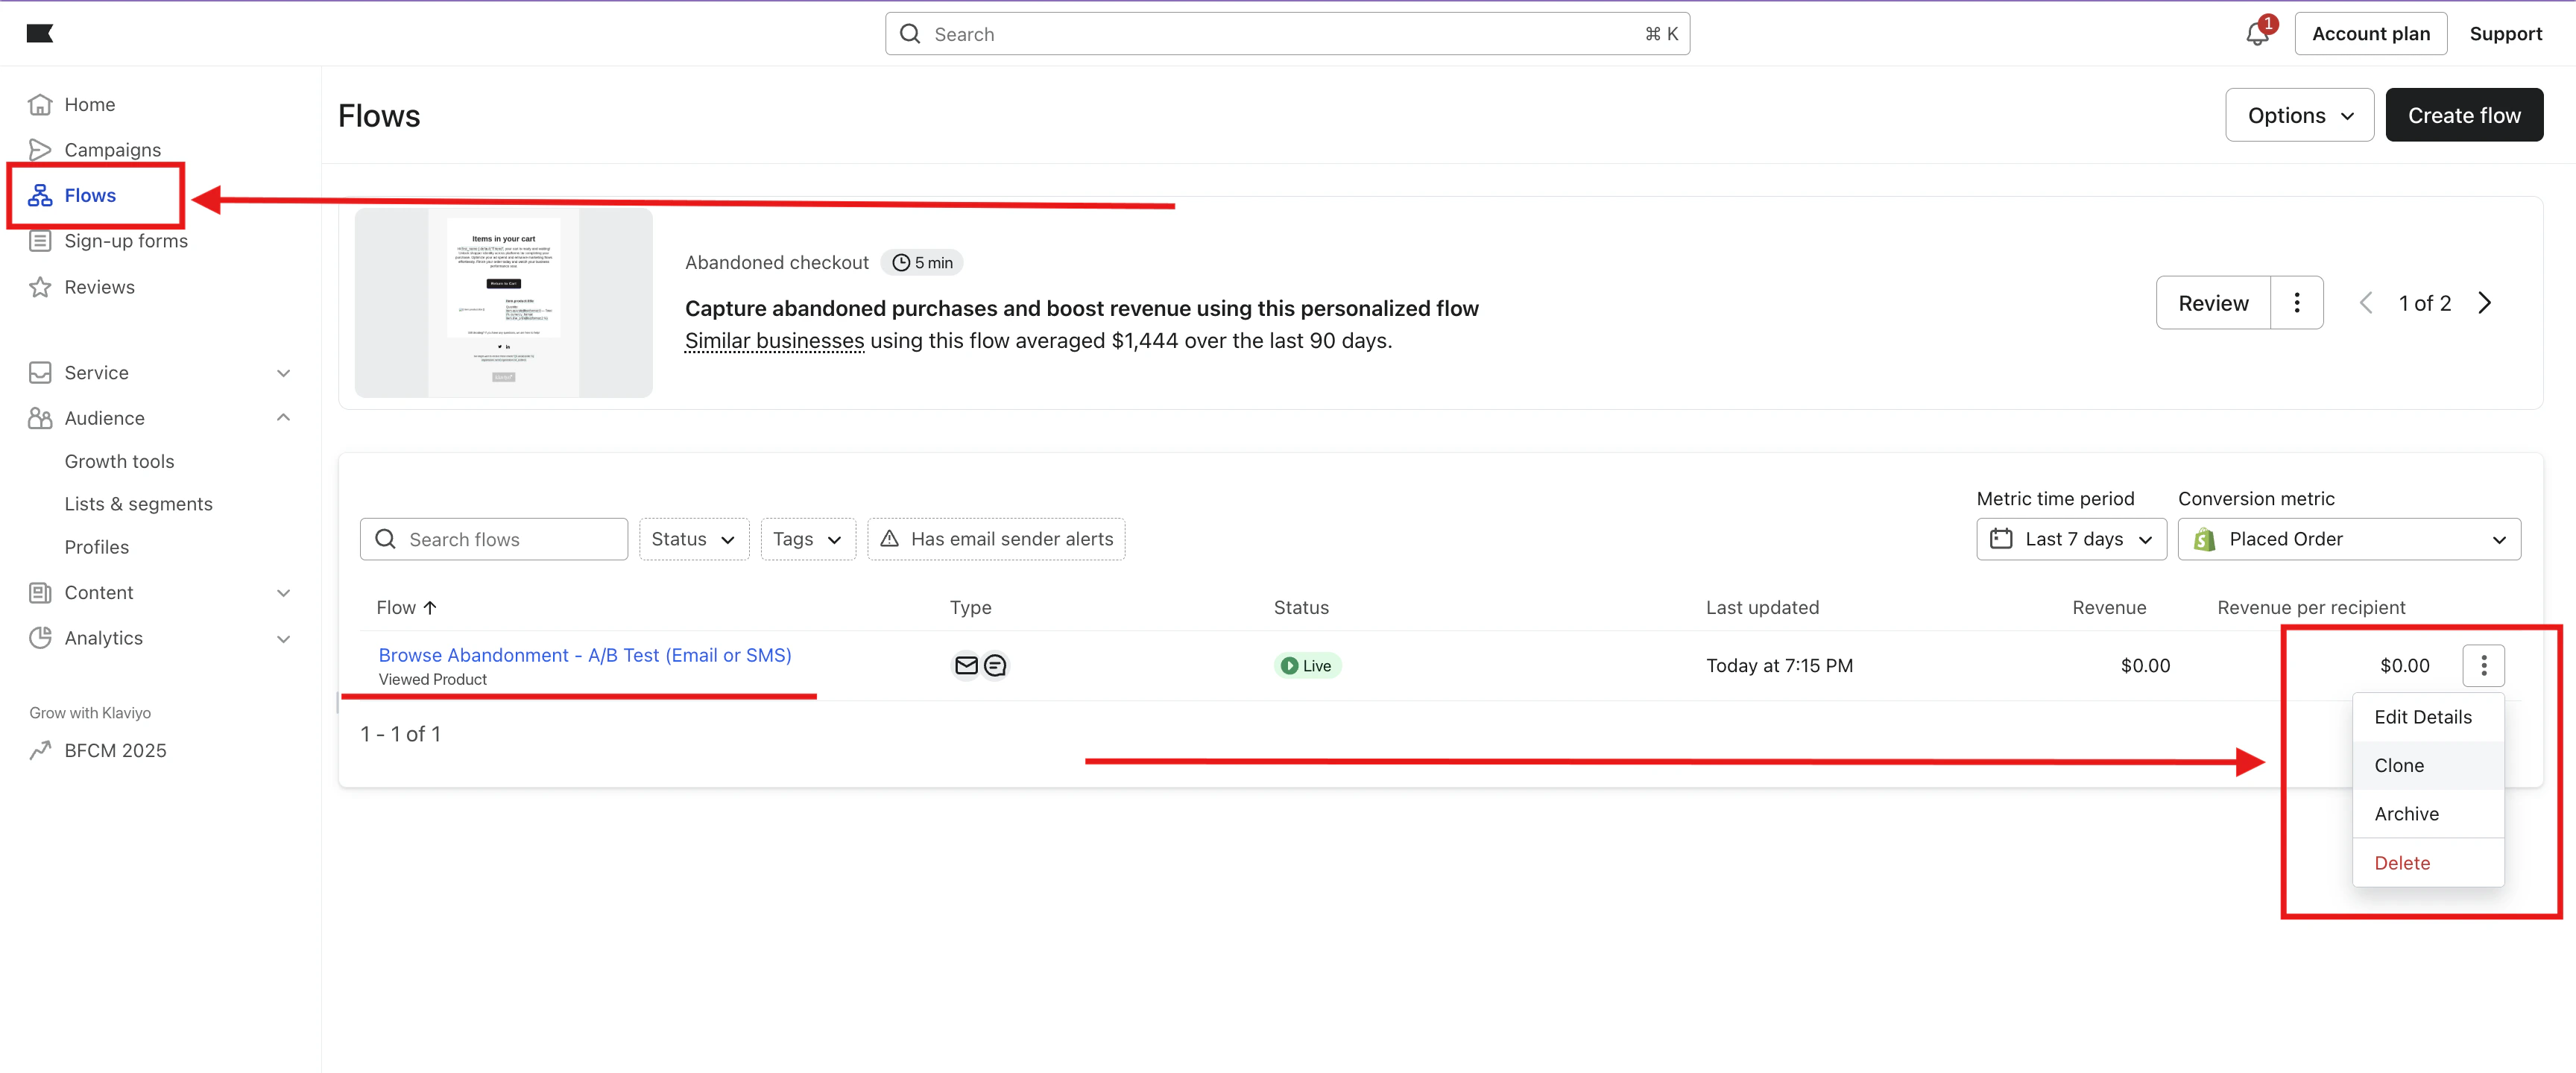
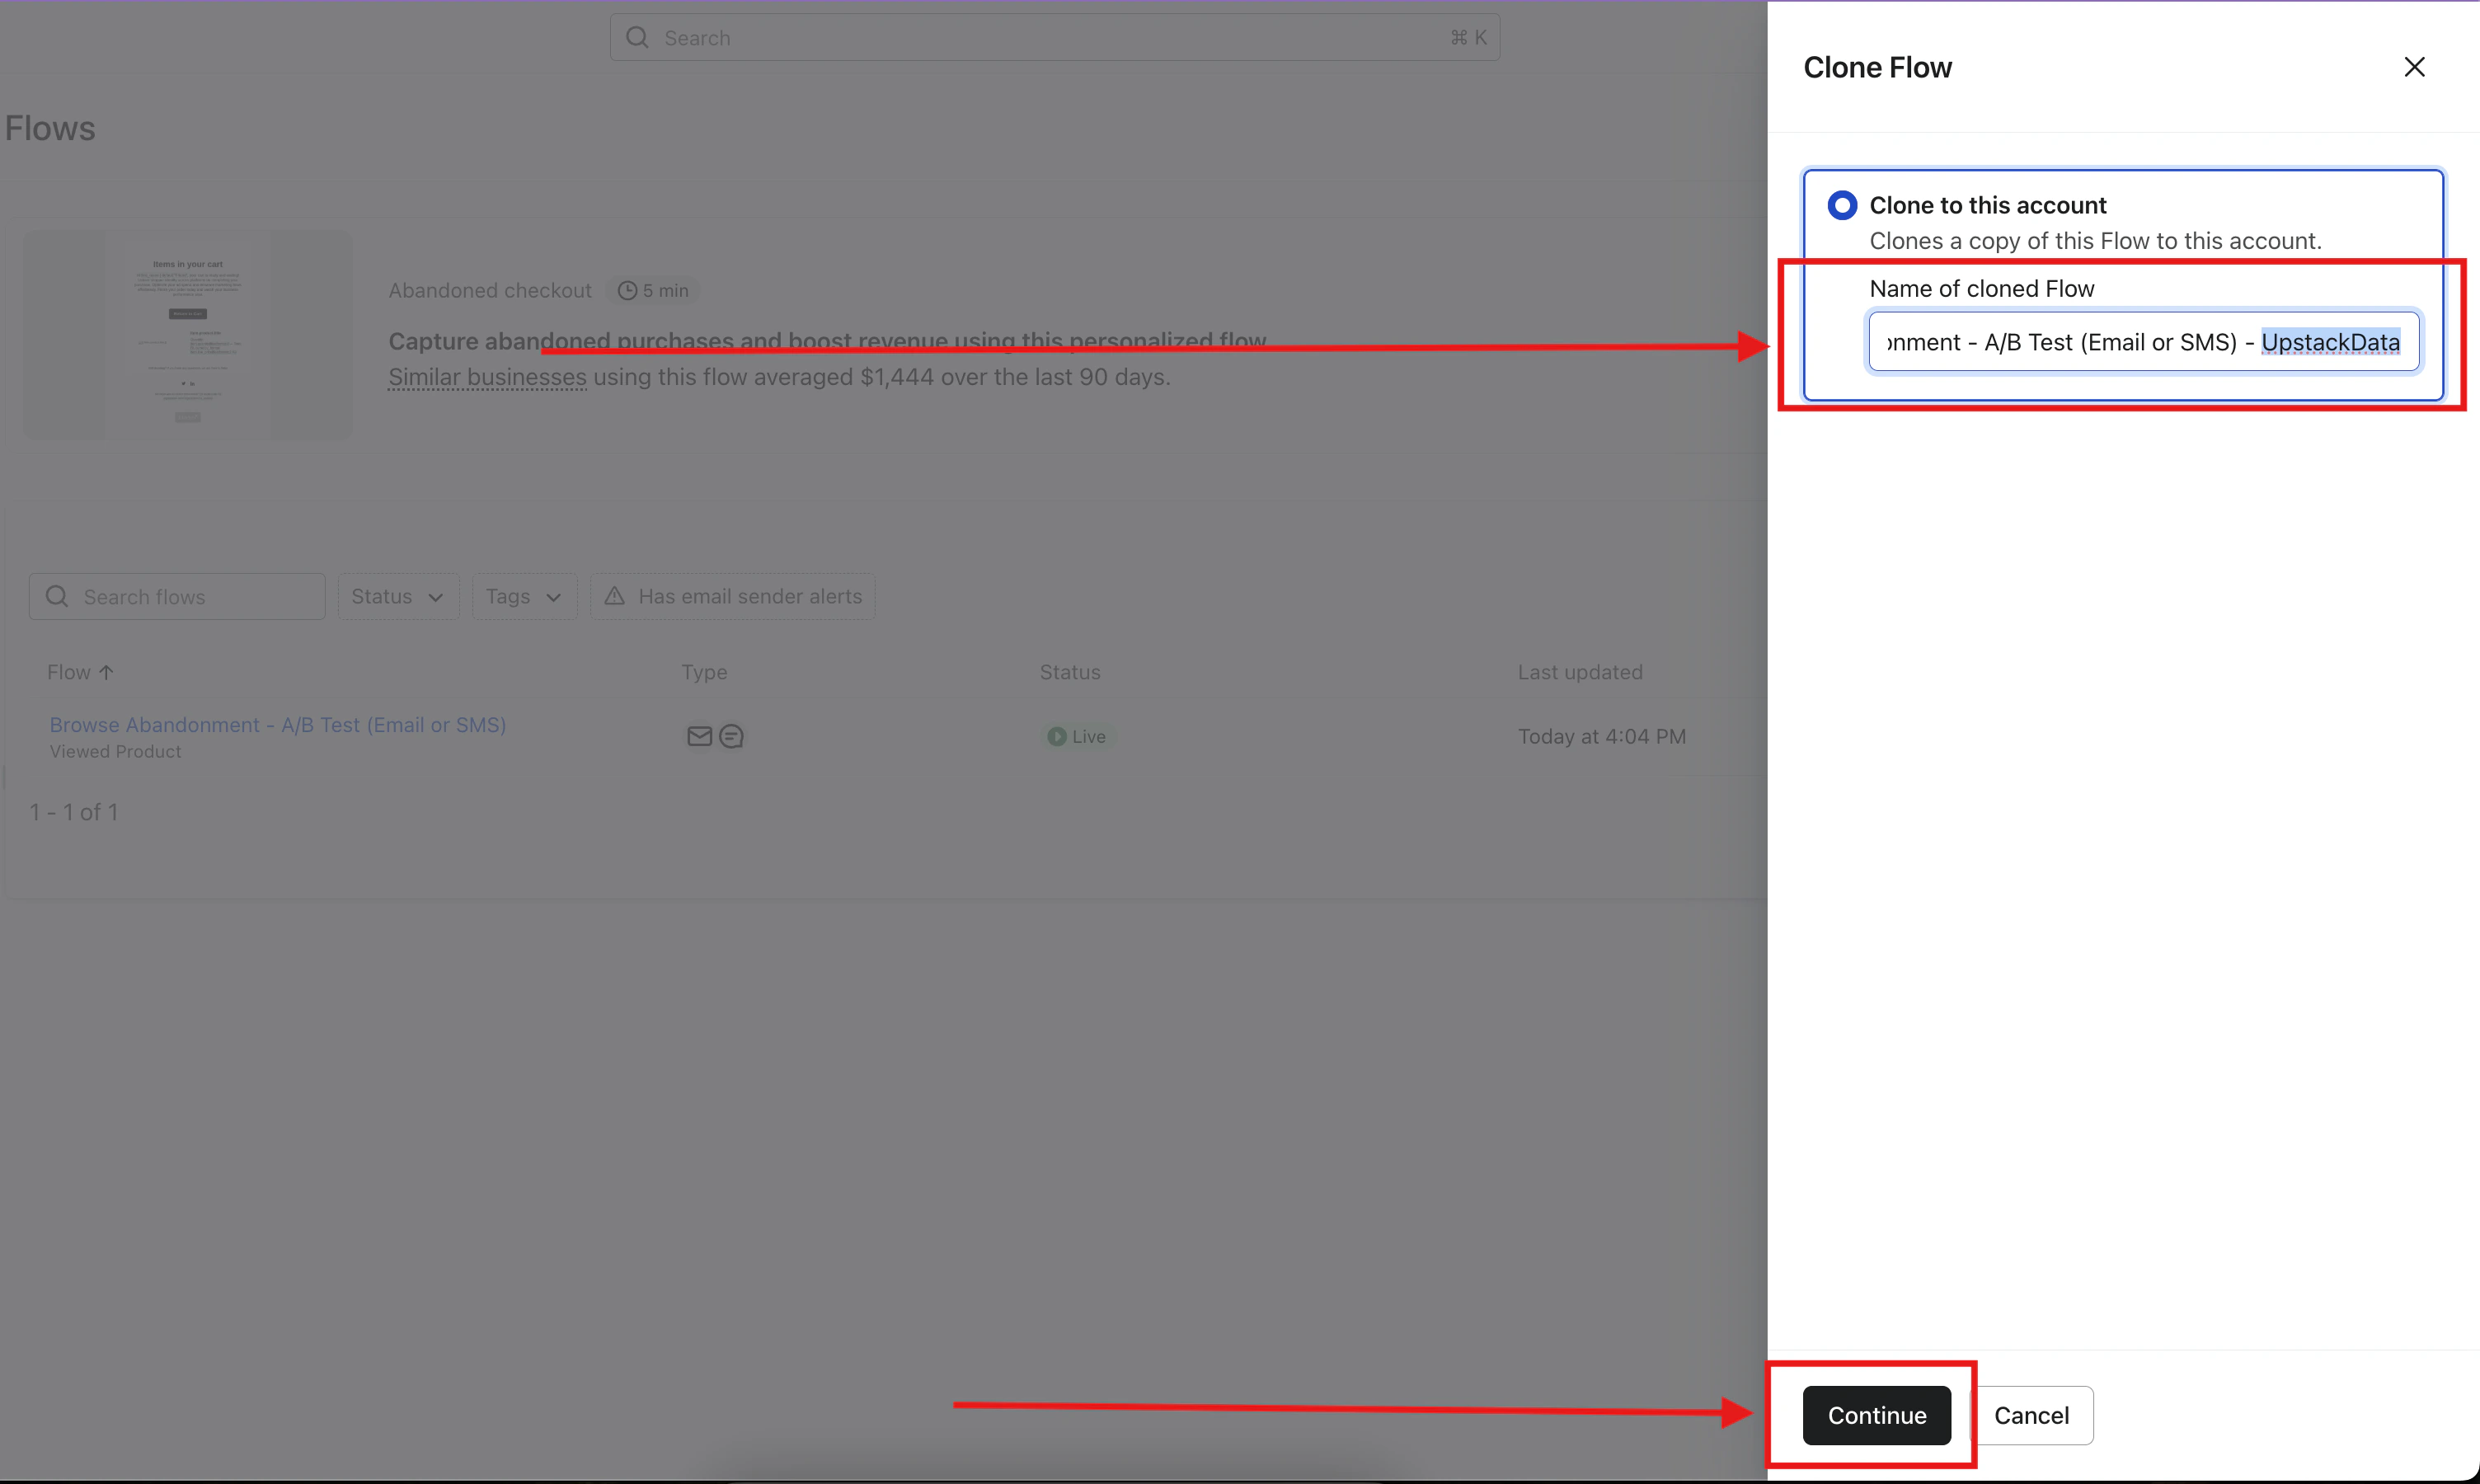
- A right-side panel will slide in, prompting you to specify the new flow name for the clone.
-
Name the clone the same as the original, plus the
- Upstack Datasuffix. For example:ABC | Pre | Added to Cart | Flow | Abandoned CartbecomesABC | Pre | Added to Cart | Flow | Abandoned Cart - Upstack Data. -
Click Continue.
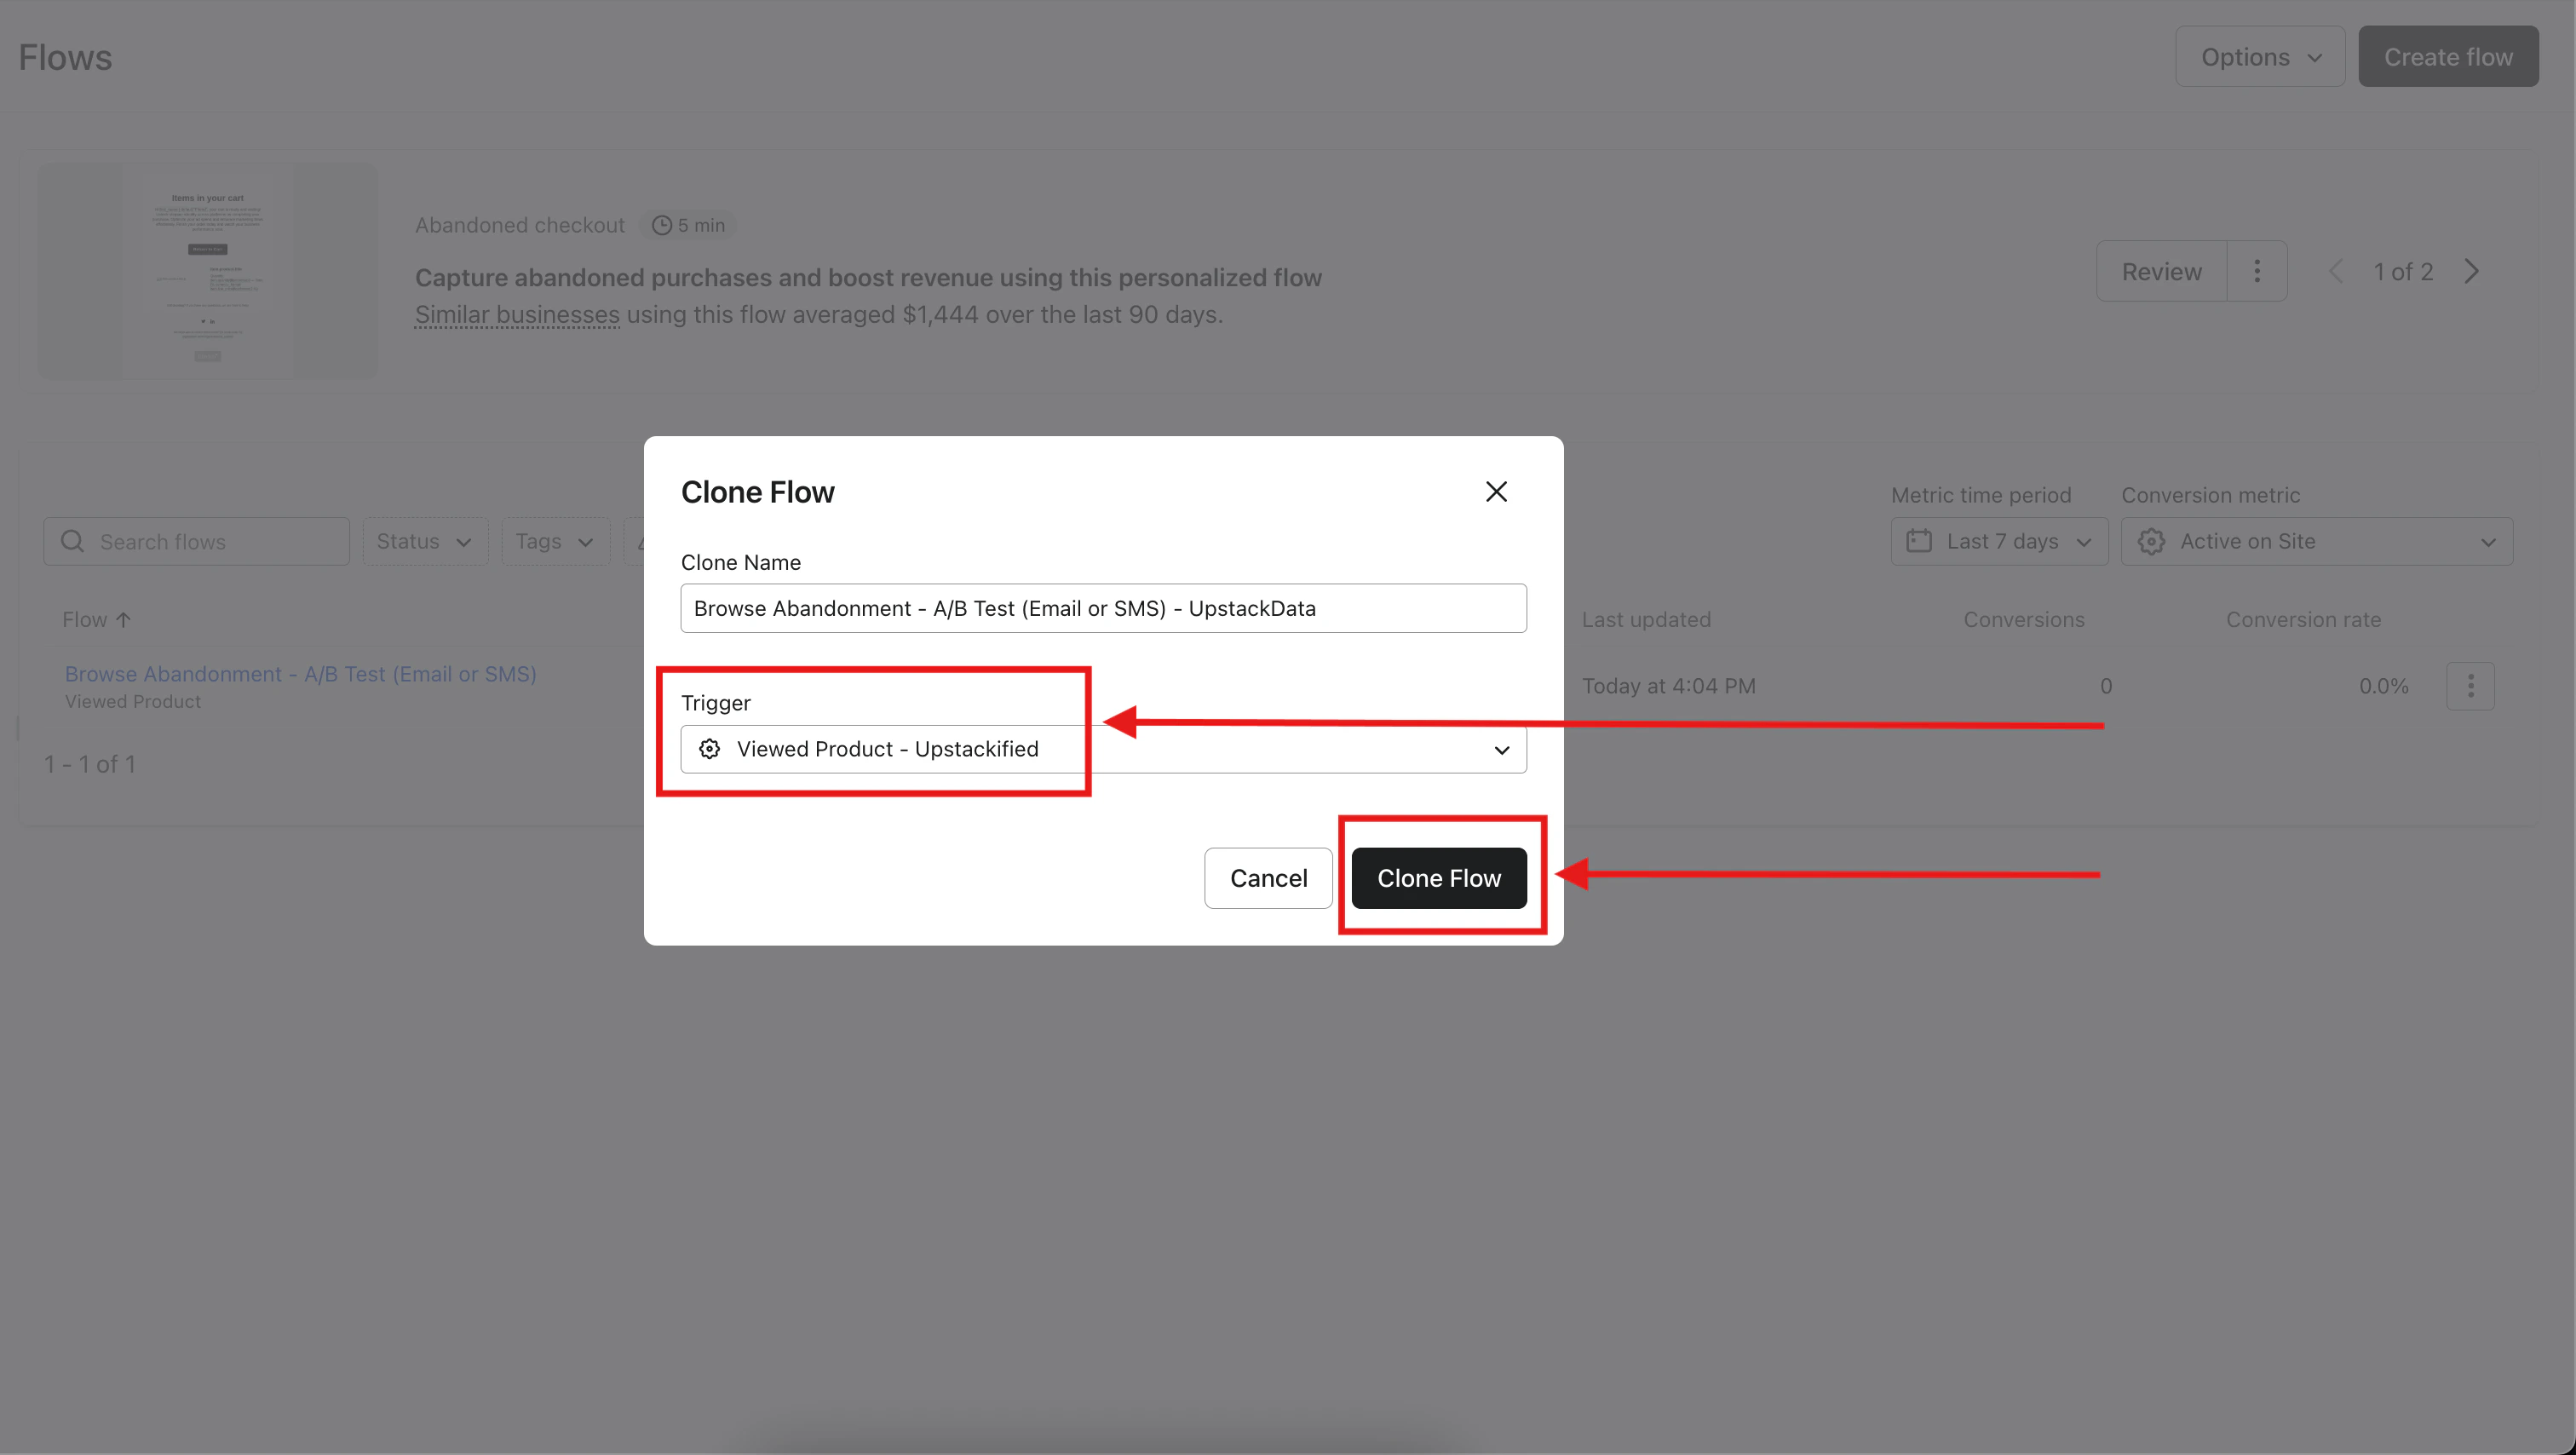
-
Change the Trigger to the matching
*- UpstackifiedKlaviyo metric using the Trigger mapping table above (for example, Viewed Product - Upstackified for Browse Abandonment). -
Save by clicking Clone Flow.
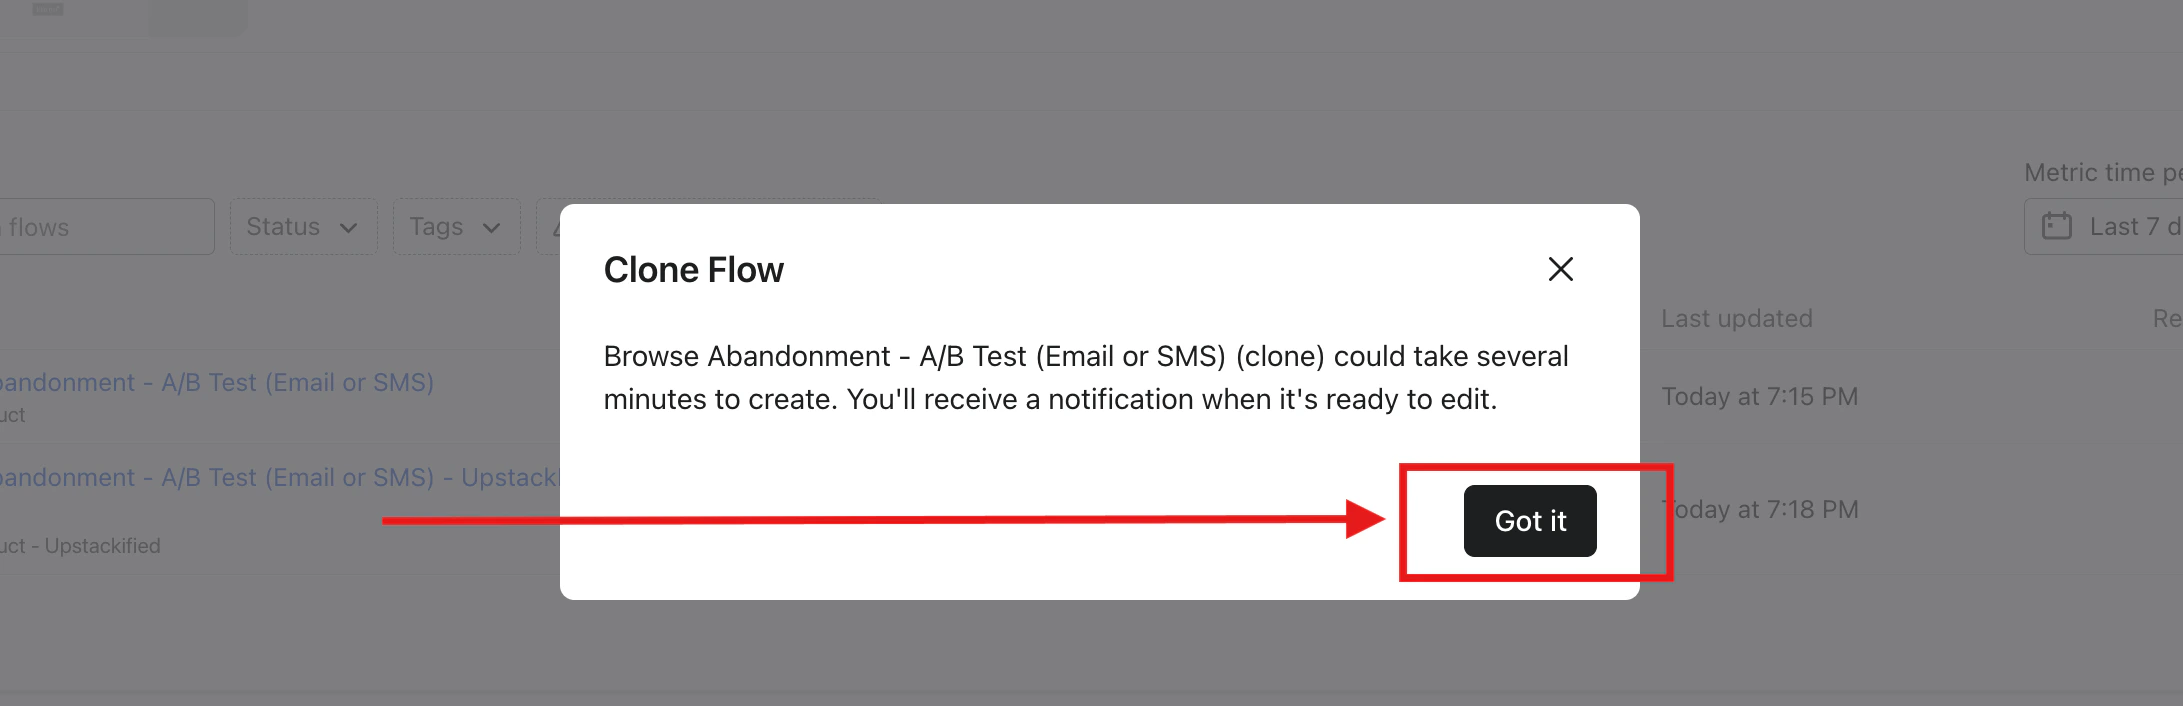
-
A confirmation modal will let you know you’ll receive a notification once the cloned flow is ready to edit. Click Got it to proceed.
Verify the clone
- Once Klaviyo finishes cloning, open the new flow and confirm:
- The flow name ends with
- Upstack Data. - The Trigger is set to the correct
*- Upstackifiedevent from the trigger mapping table above. - The flow is in Draft status (you’ll set it Live later in the setup guide).
- The flow name ends with
Done 🎉 Repeat these steps for each standard abandonment flow: Cart, Browse, Site, and Checkout Abandonment.For the full setup walkthrough, see How to set up your Upstack abandonment flows in Klaviyo.
Need help or found an issue?If you encounter any issues or have questions while following this guide, reach out to us at support@upstackdata.com.