What you’ll createA custom conversion that tracks new-customer purchases, so you can optimize campaigns for customer acquisition rather than repeat purchases.
Prerequisites
Before you start, you need:- The Meta destination configured in Upstack Data — see How to configure the Meta Pixel destination
- The ncPurchase event verified in Meta Events Manager — see How to verify the NC Purchase event
- Admin access to the Meta Business Manager and to every ad account you plan to share the conversion with
Part 1 — Create the NC Purchase custom conversion
Sign in to Meta Events Manager
Sign in to Meta Events Manager at business.facebook.com/events_manager.
Open Custom Conversions
In the left-hand menu, click Custom Conversions, then click Create custom conversion in the top-right.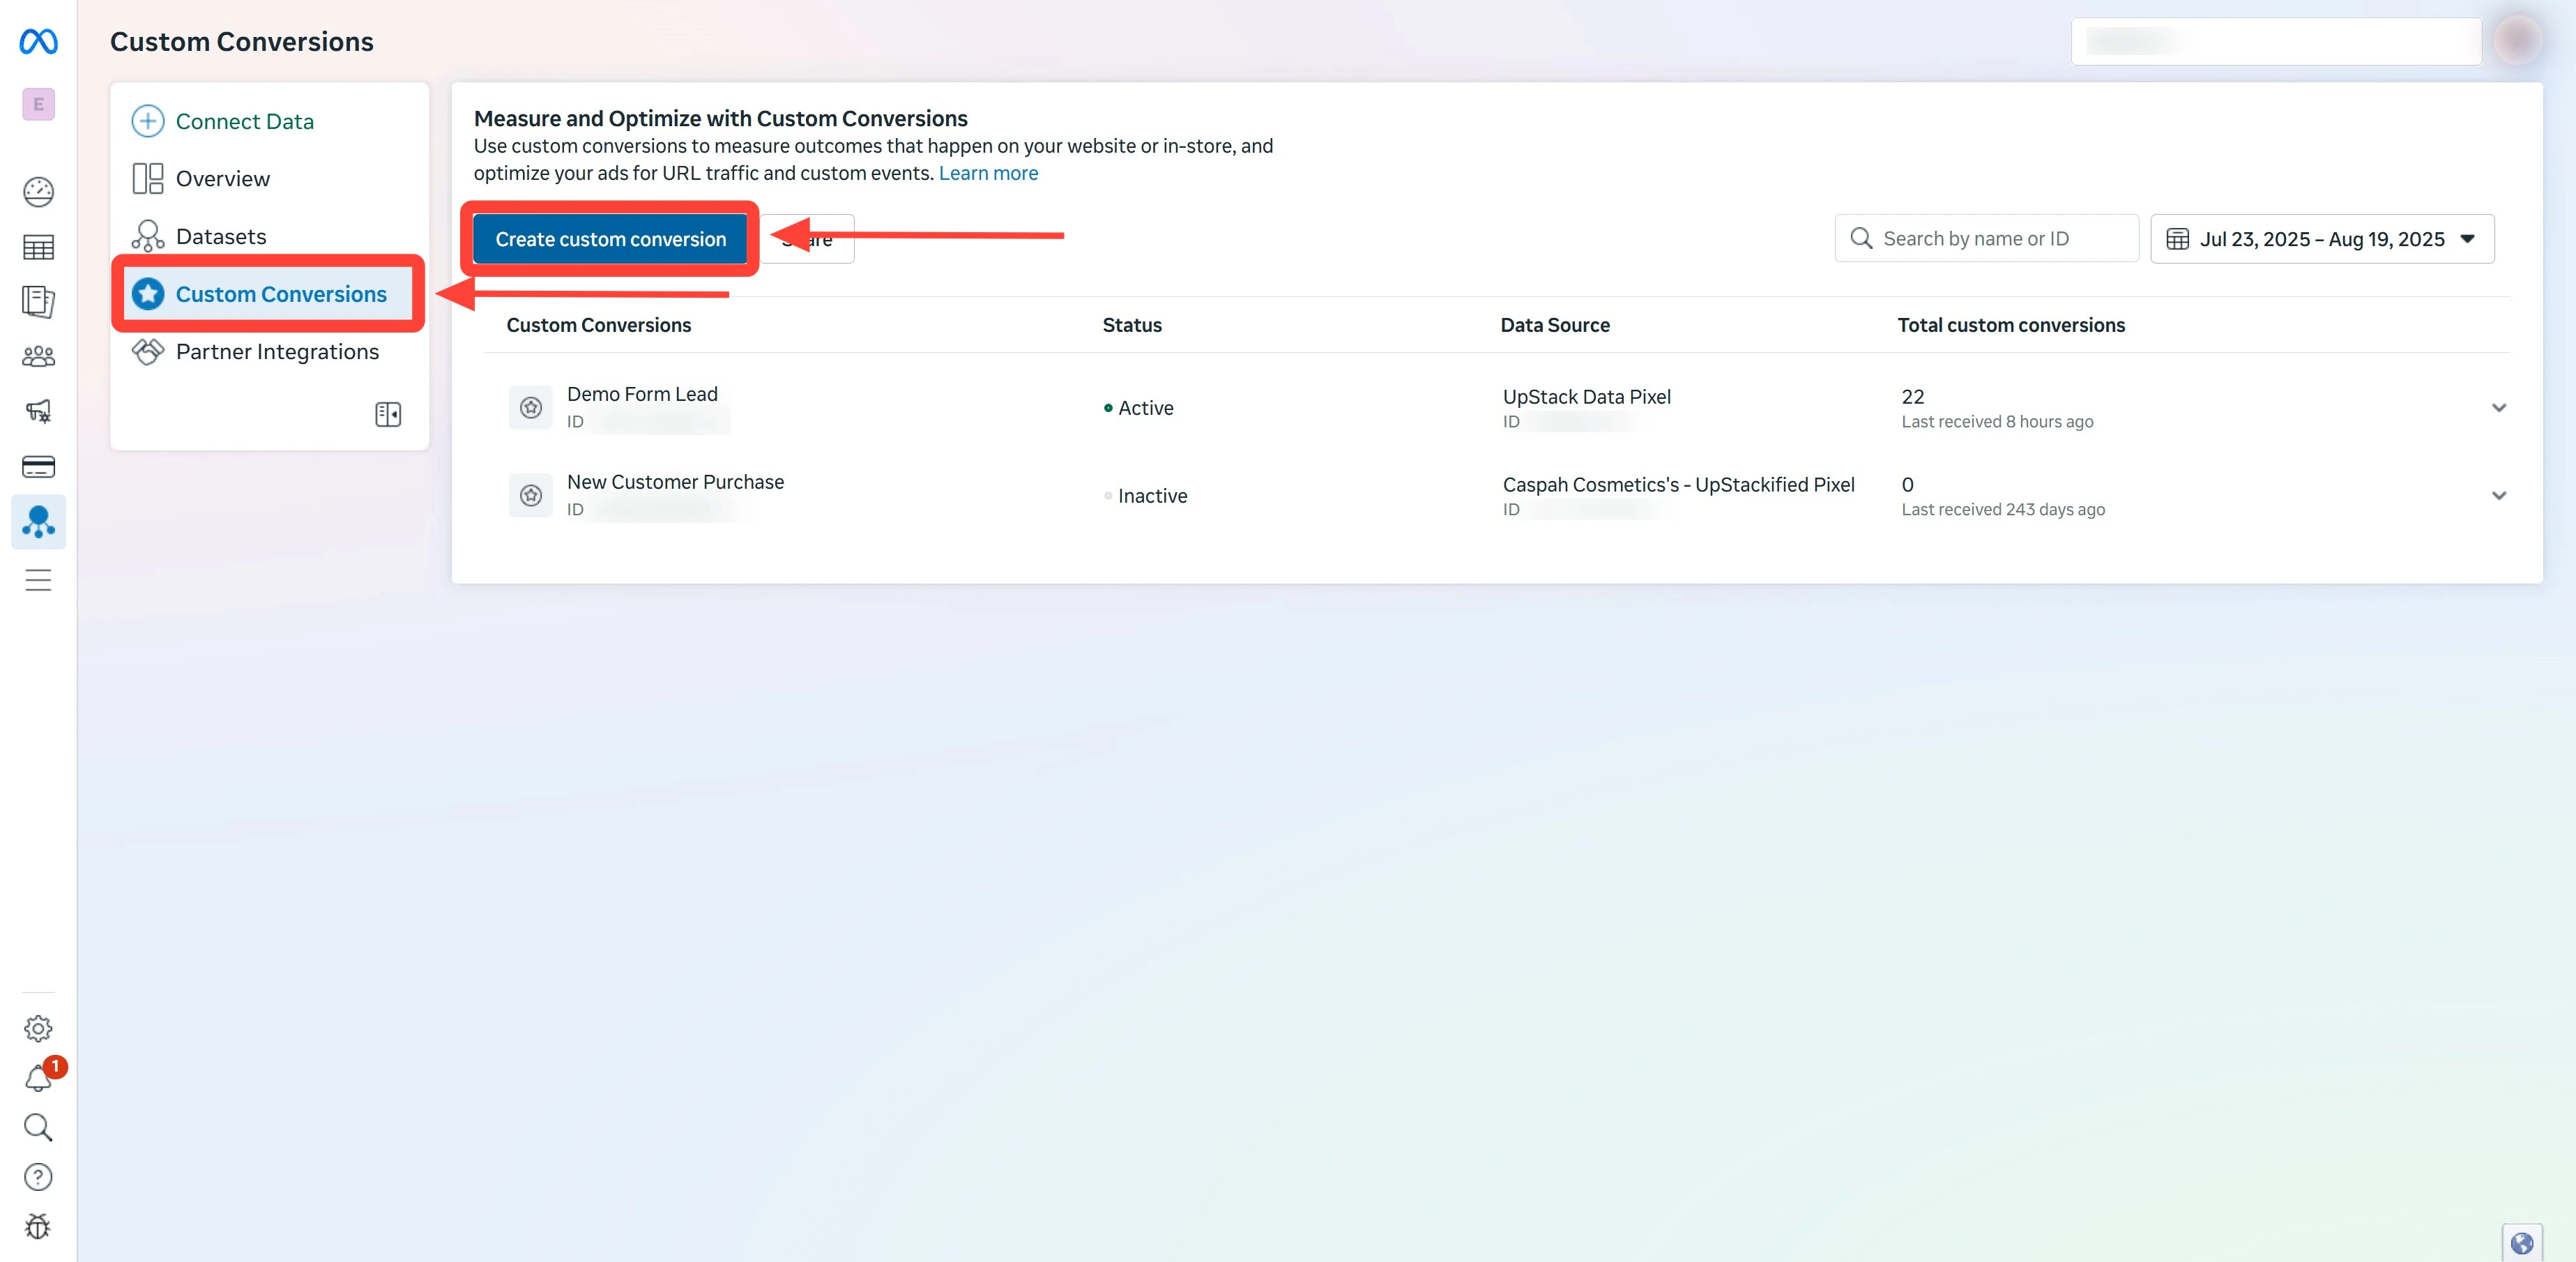
Name and select the event
In the Create a custom conversion dialog:
- Name:
NC Purchase - Event: select ncPurchase
If you don’t see ncPurchase in the Event dropdown, return to Meta Events Manager and verify the event first. See How to verify the NC Purchase event.
Set the optimization event
In the Choose a standard event for optimization field, select Purchase. This tells Meta to optimize delivery using its Purchase model when this custom conversion is used.
Configure URL rules
Under Rules: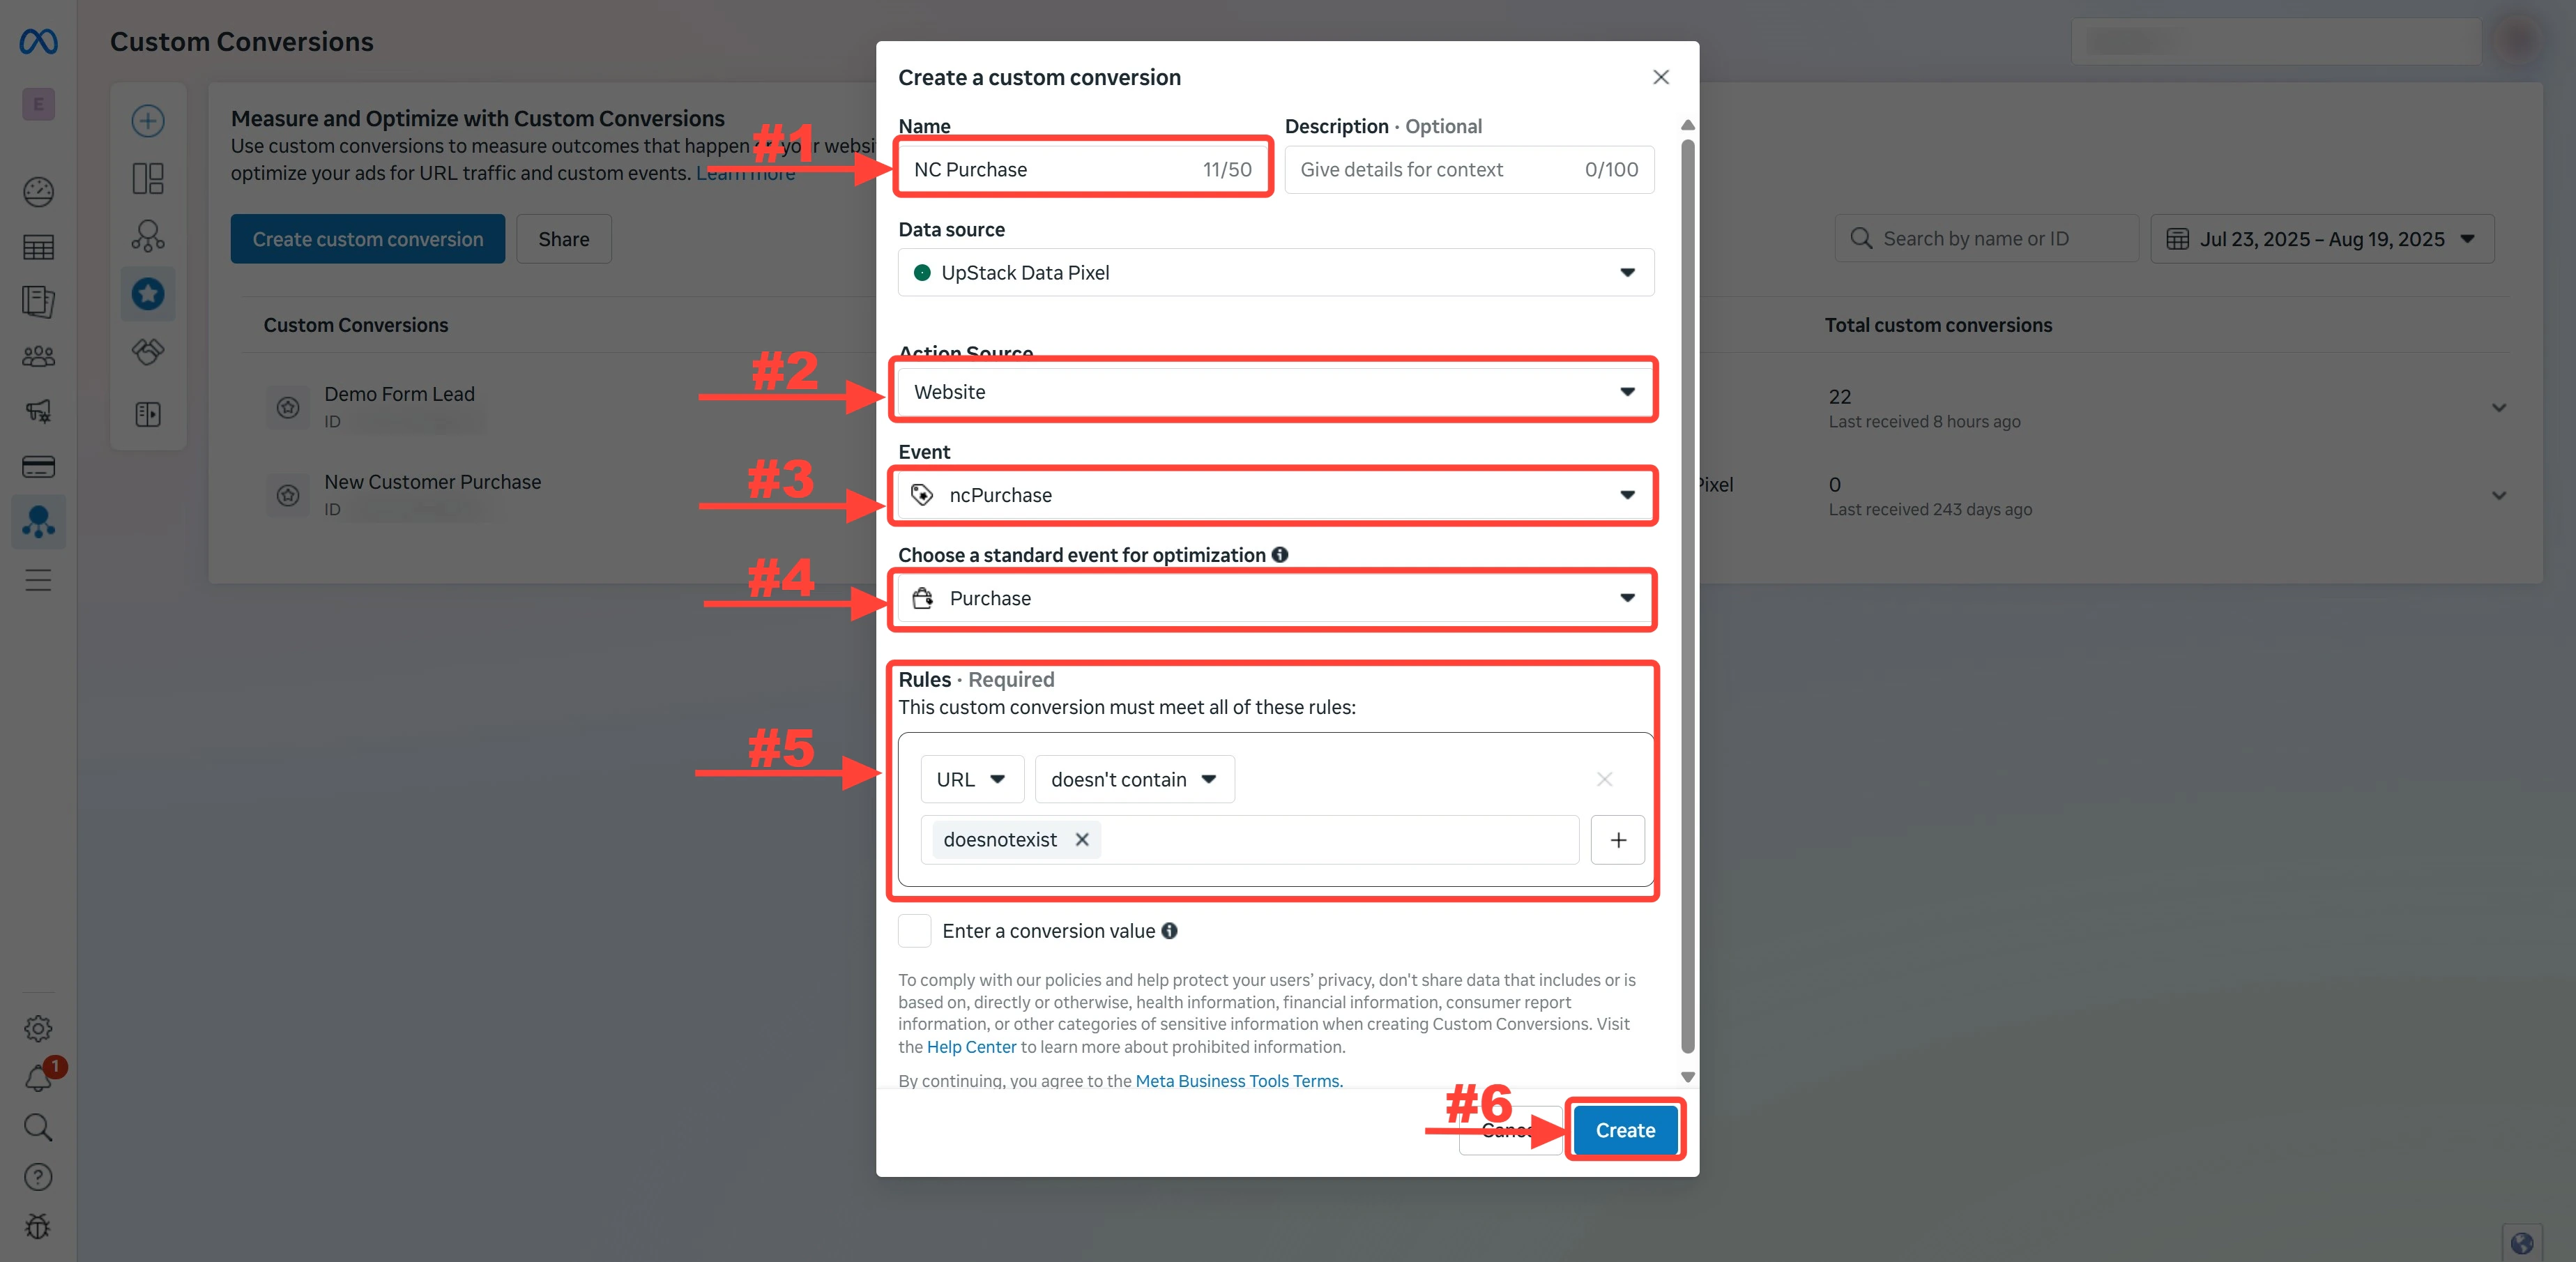
- Choose URL as the parameter
- Select doesn’t contain as the condition
- Type
doesnotexistin the value field - Press Enter until the value becomes a light-grey tag
- Click Create
Why this rule? Since no URL on your store contains
doesnotexist, this rule effectively matches every page — so the custom conversion fires for the ncPurchase event across your entire site.Part 2 — Share with ad accounts
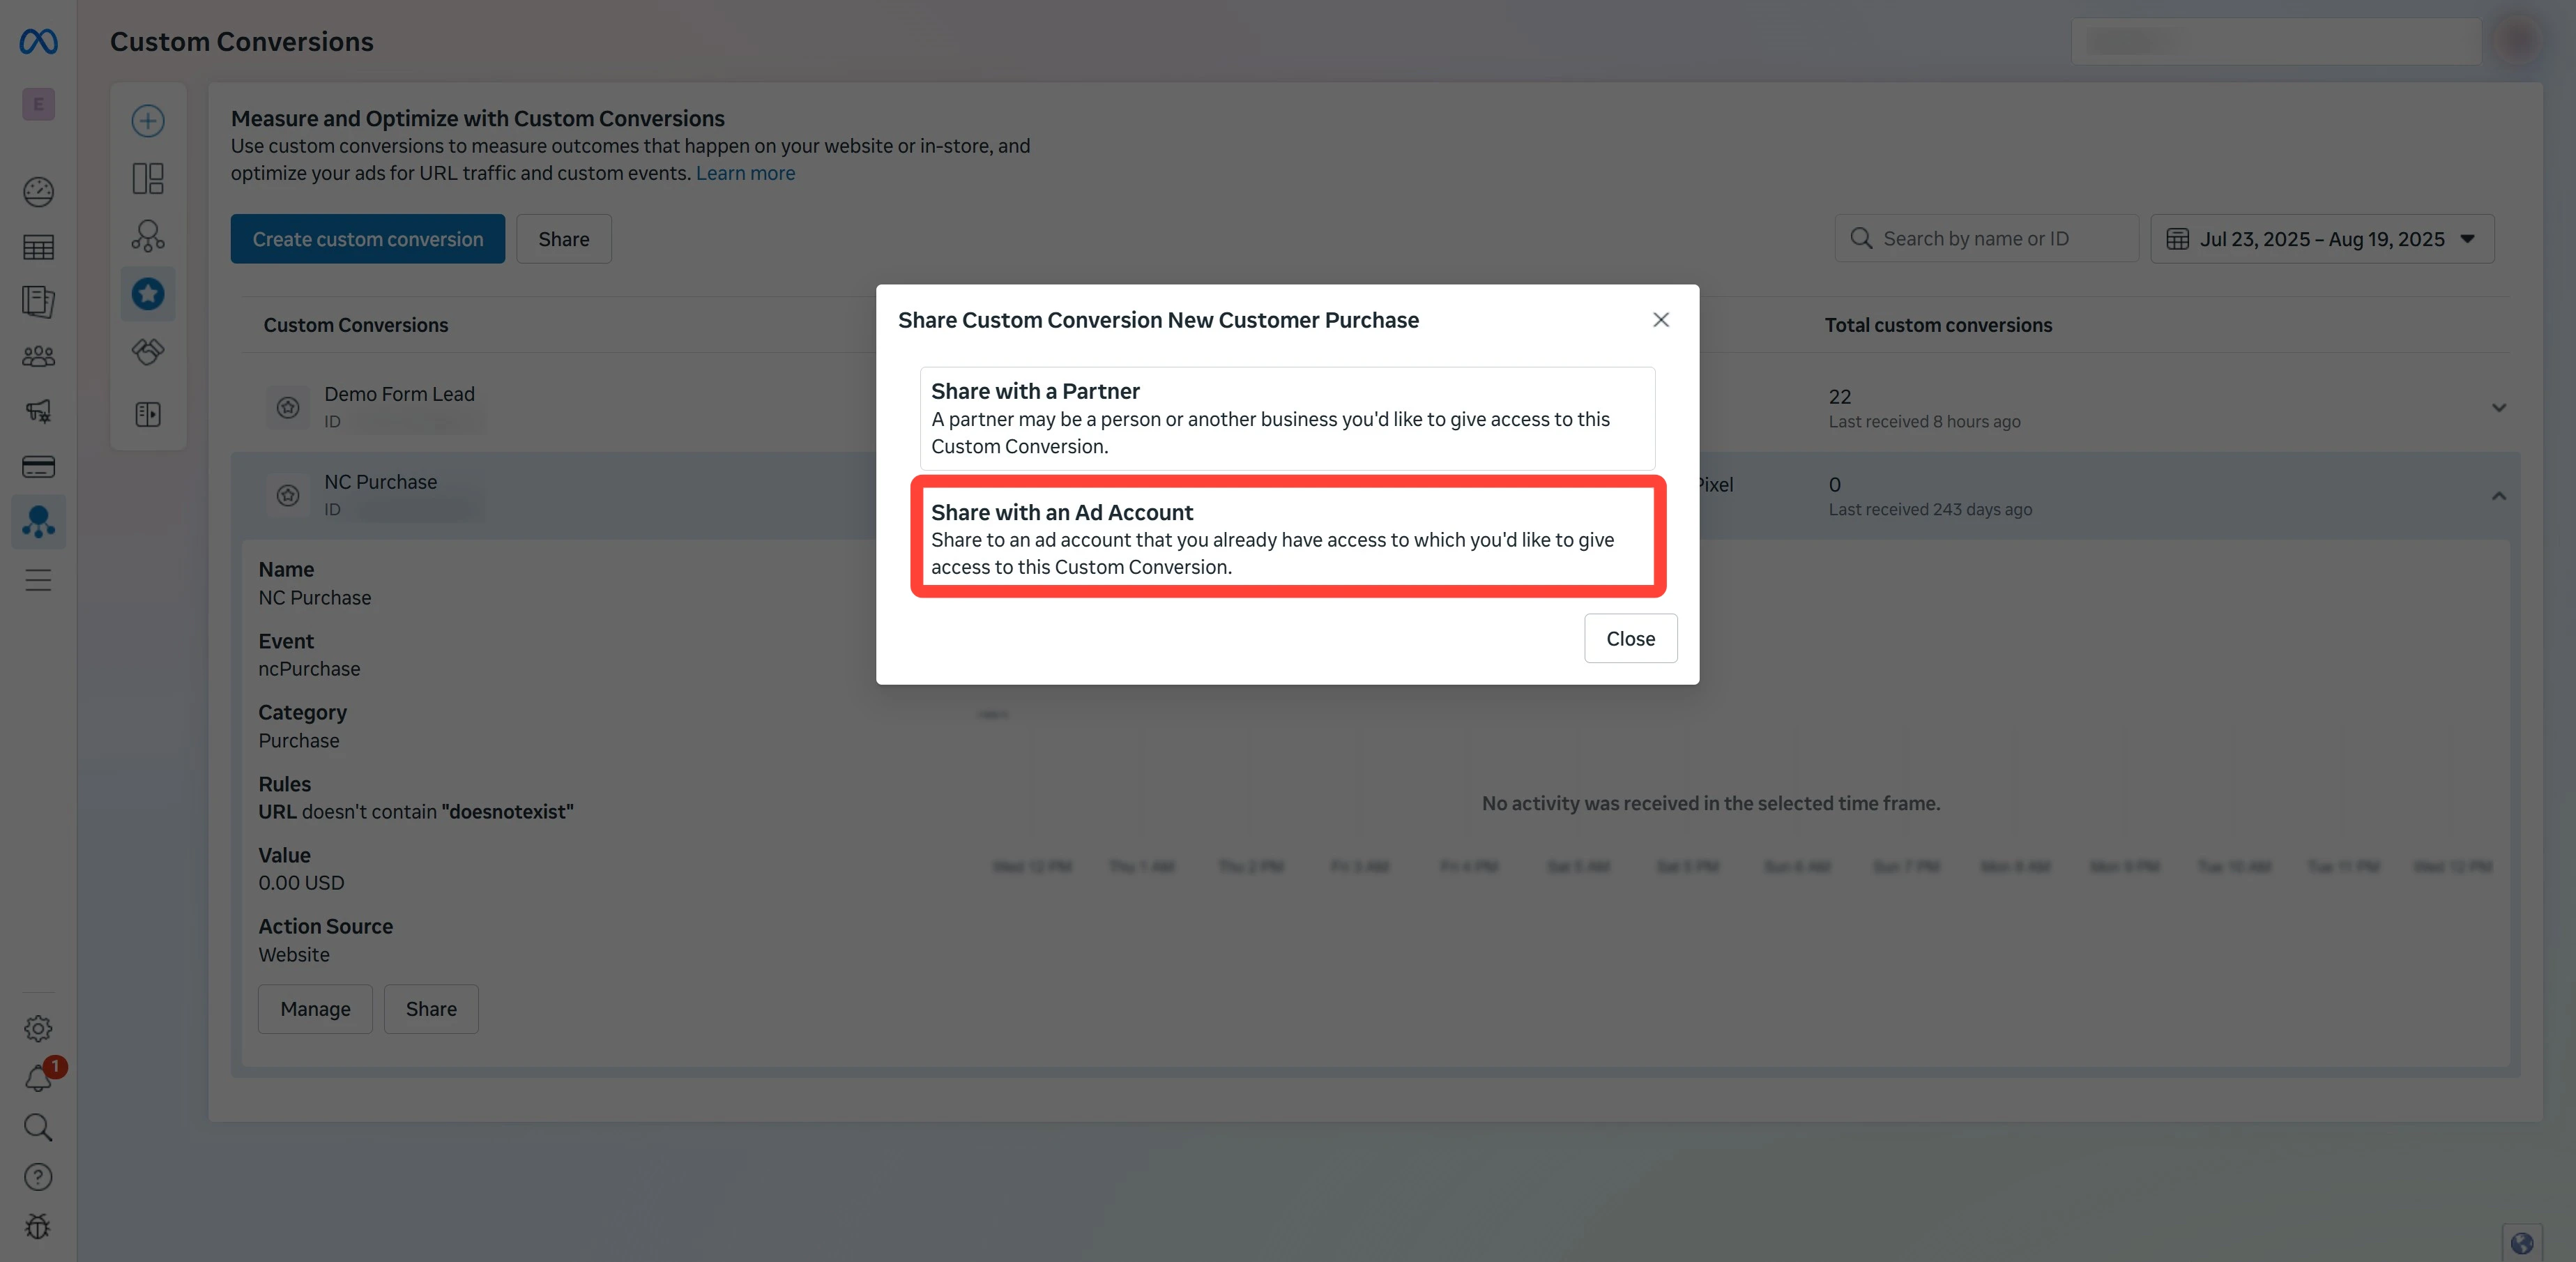
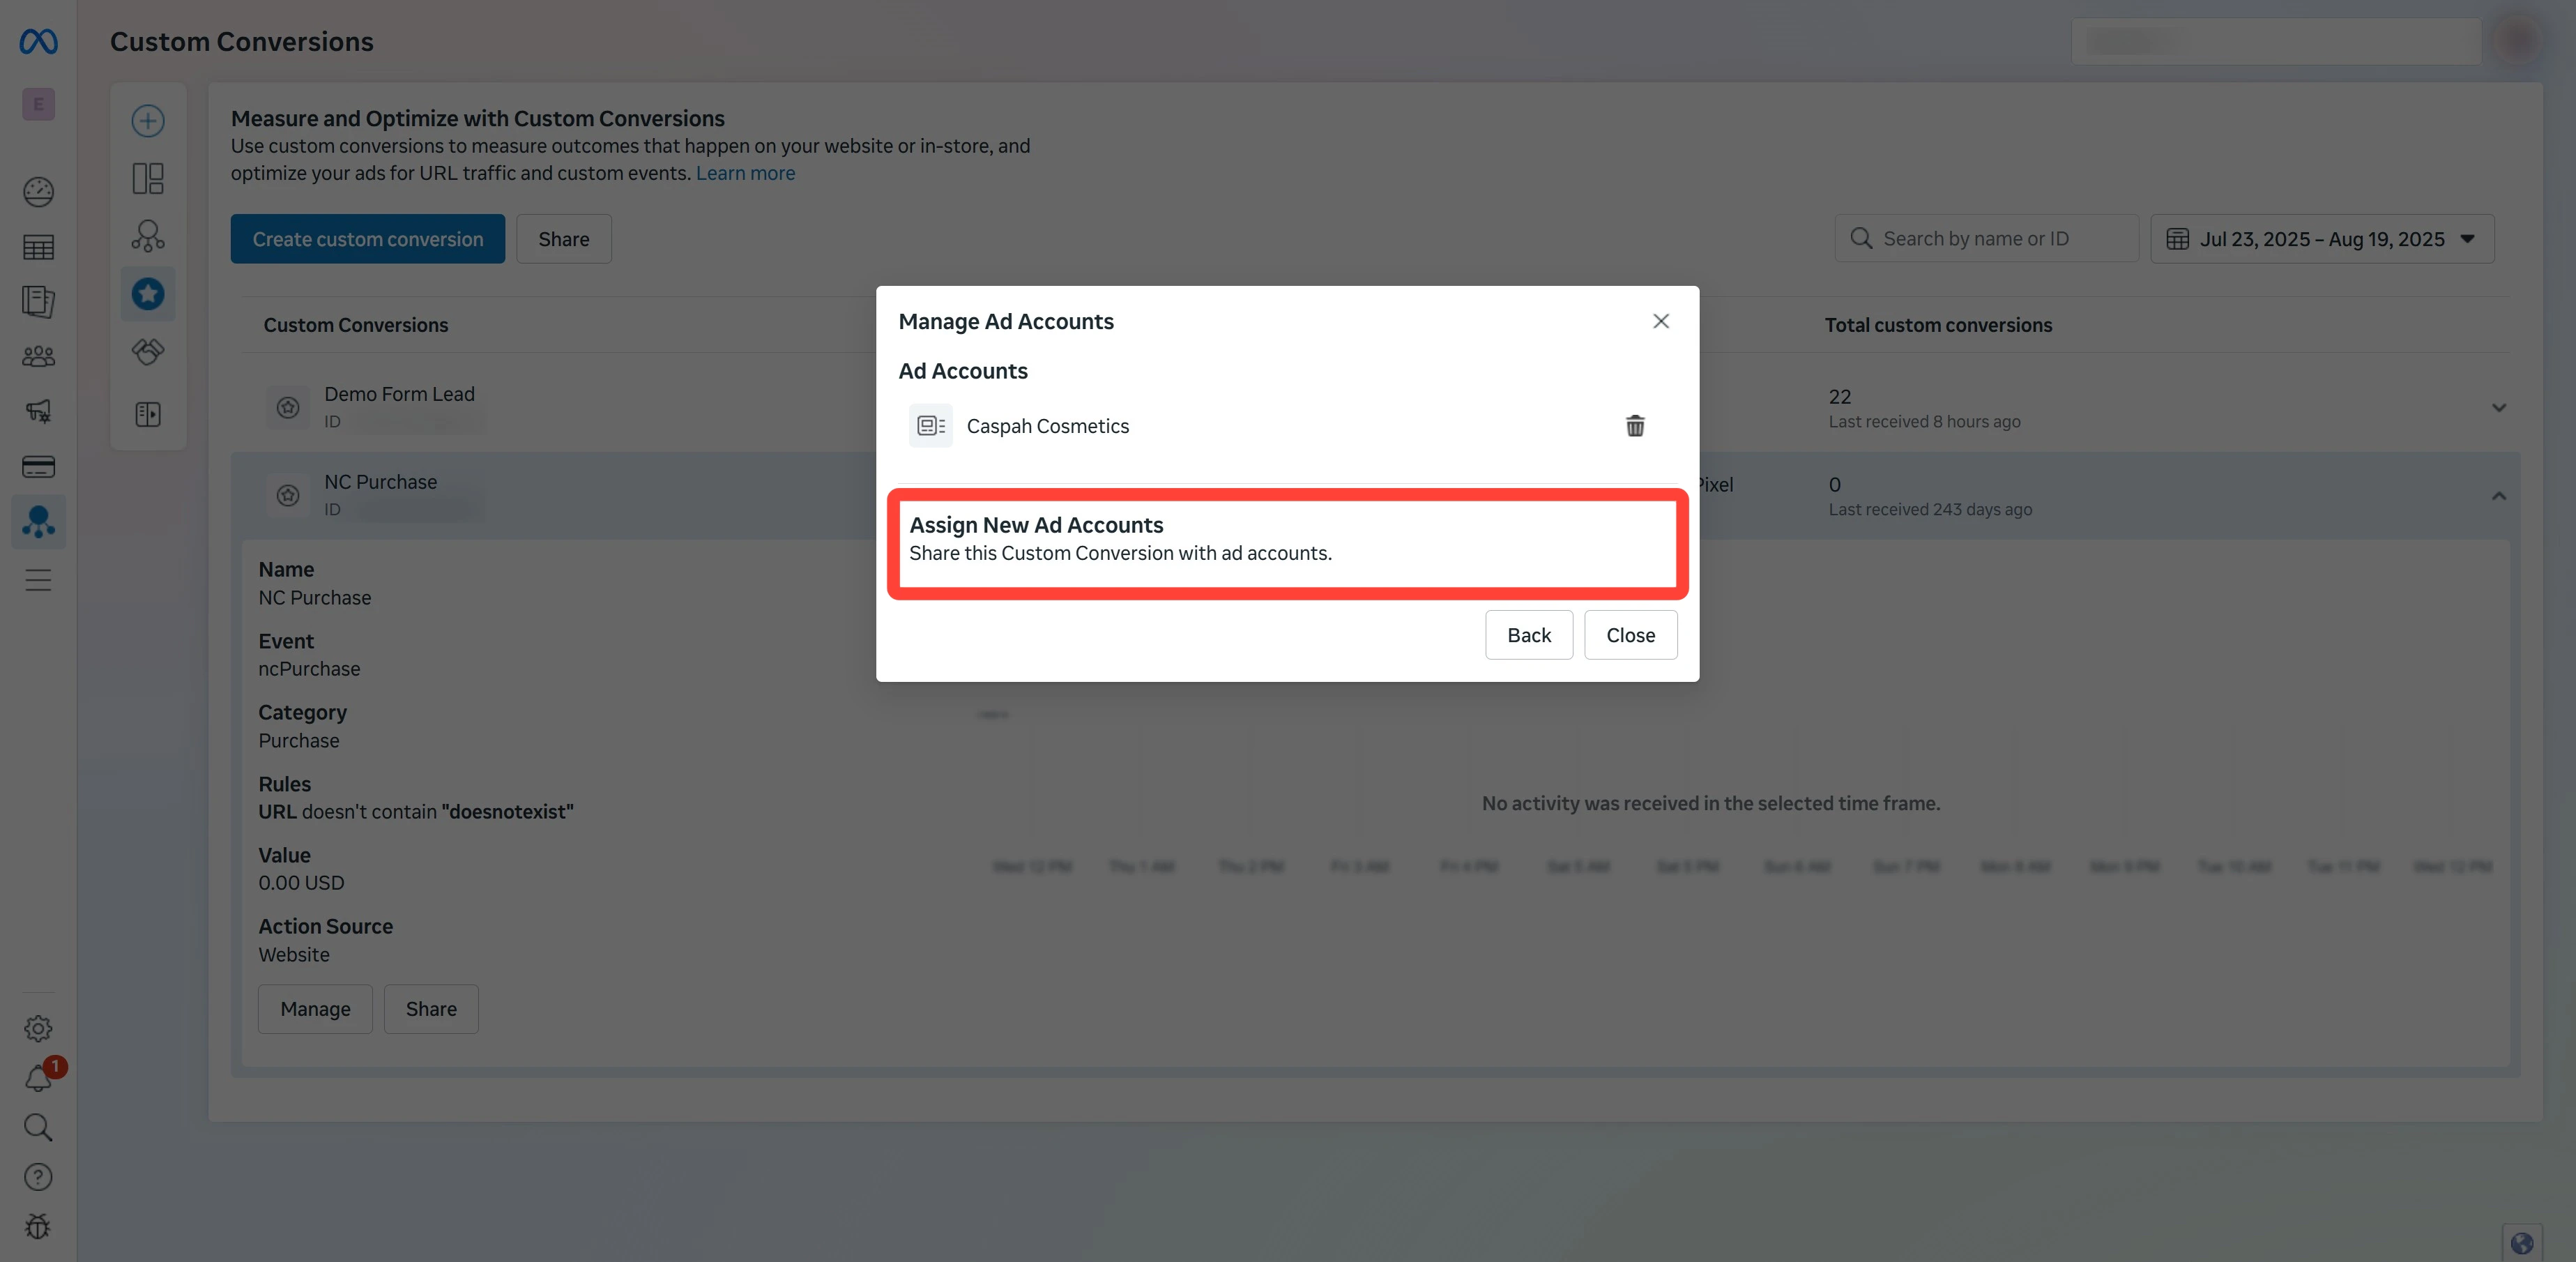
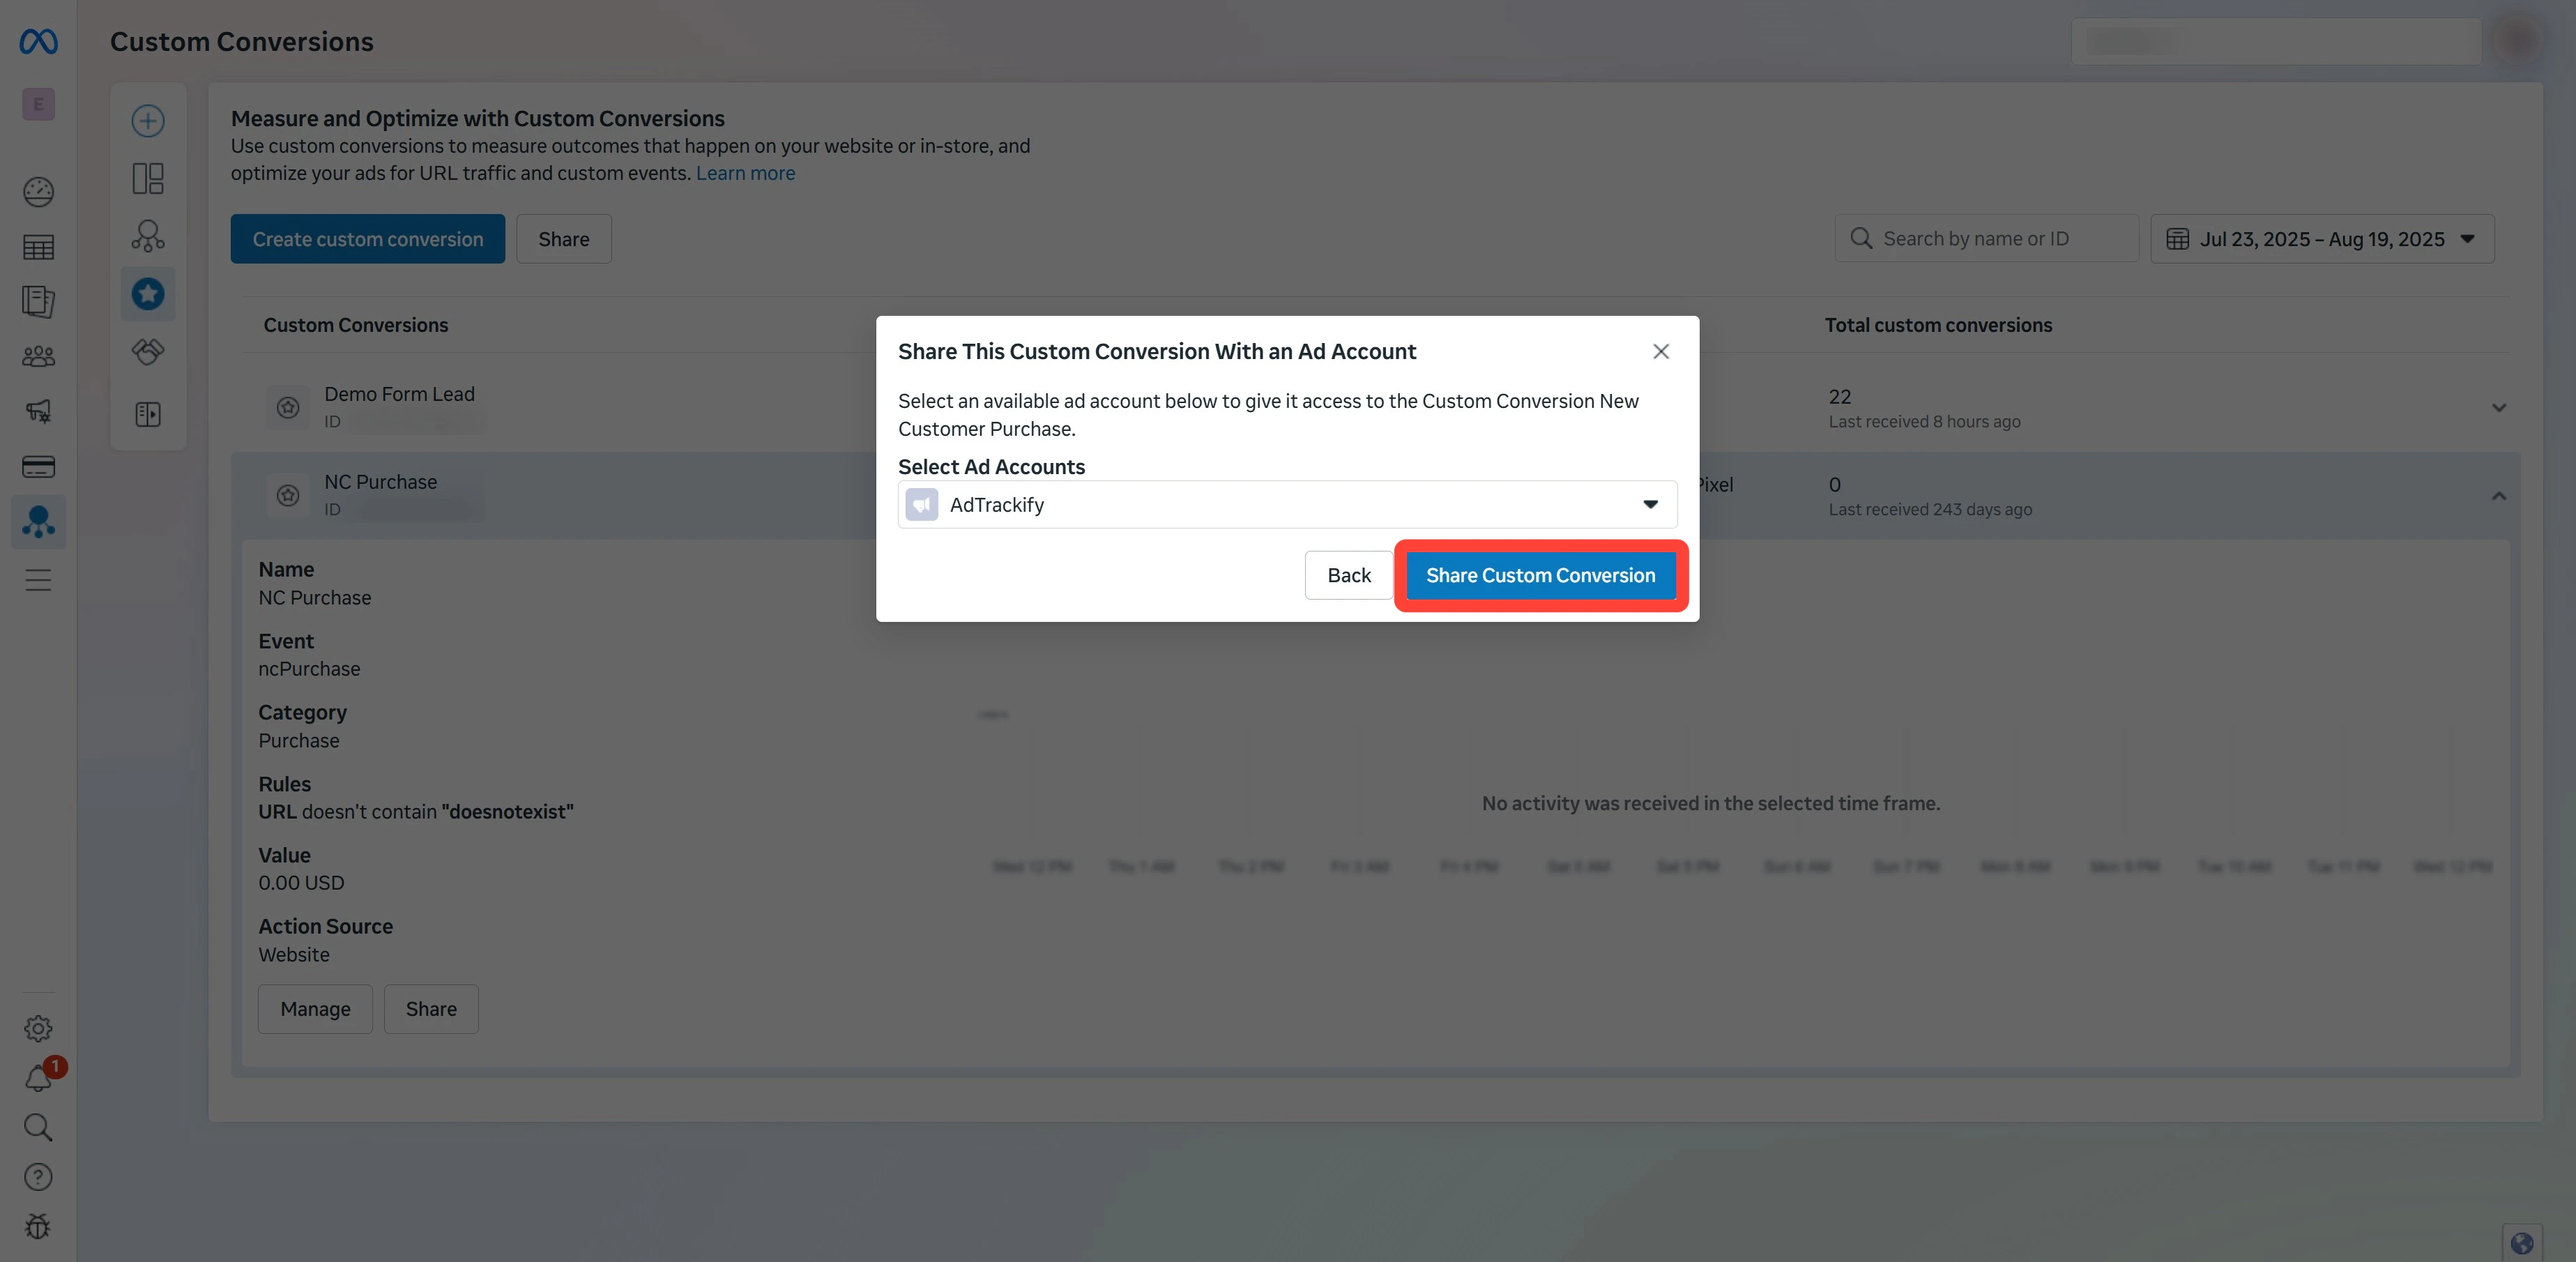
Open the share menu
On the Custom Conversions page, find the NC Purchase conversion you just created. Click the dropdown (kebab menu) on the right of the row, then click Share.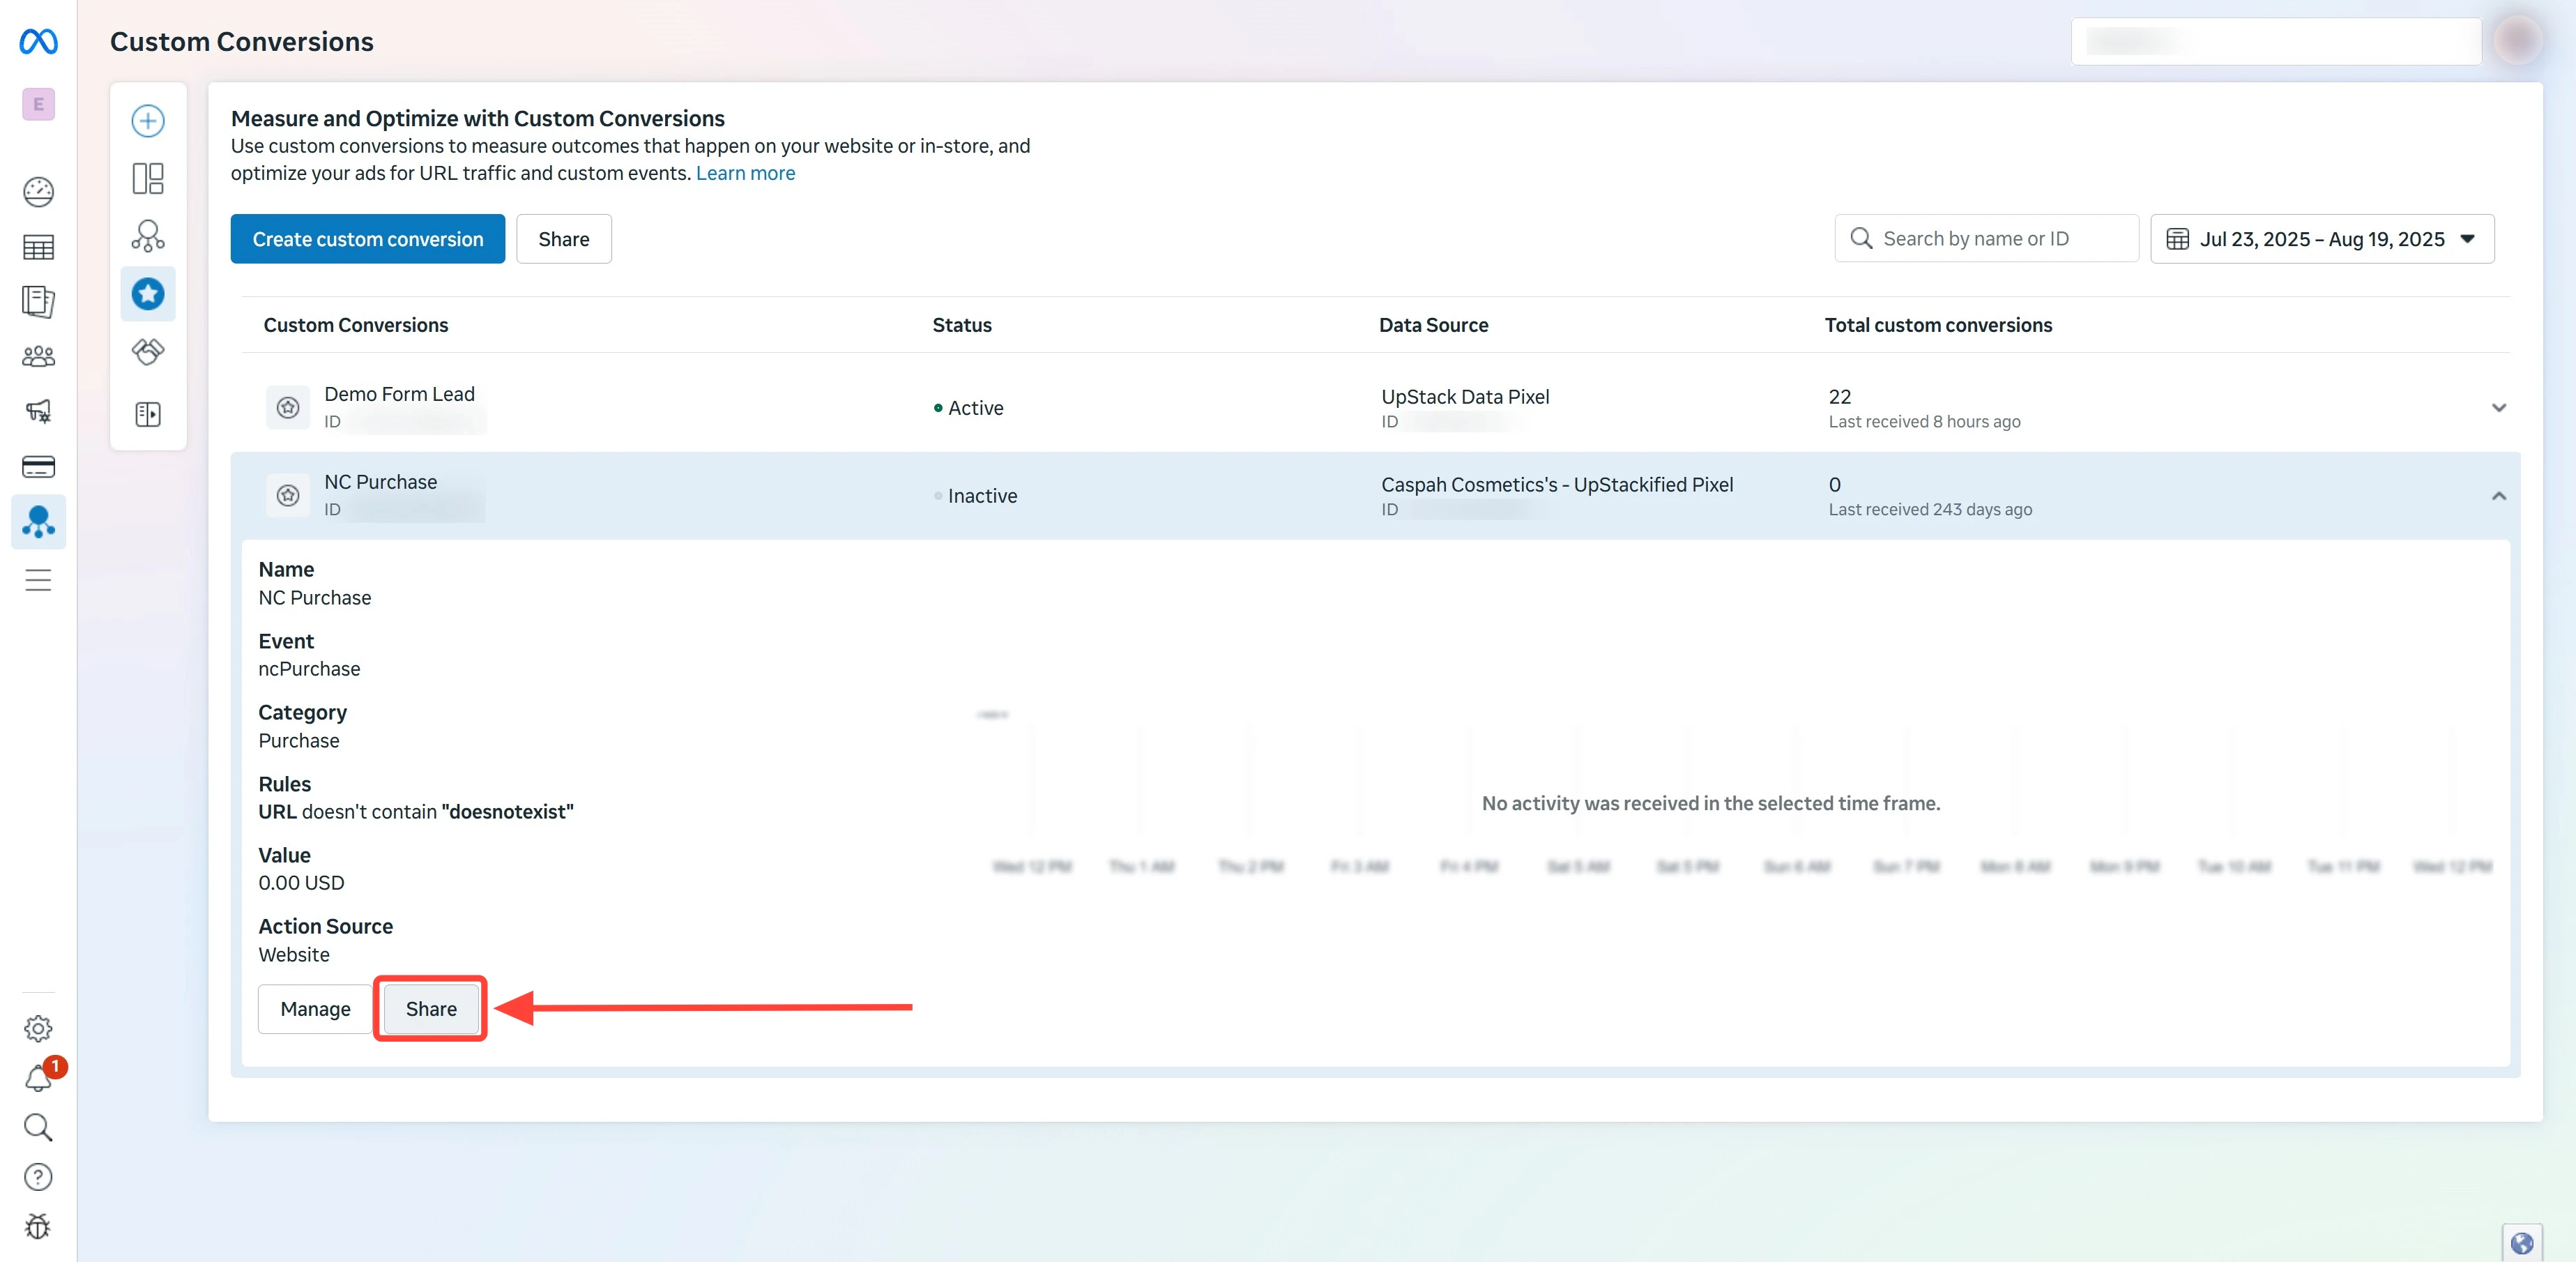

Verify the conversion is shared and active
Back on the Custom Conversions page, the NC Purchase row should show:
- Status: Active (no warning icon)
- Shared with: the ad accounts you selected